
Documentation Index

Fetch the complete documentation index at: https://docs.streamnative.io/llms.txt

Use this file to discover all available pages before exploring further.

This guide describes how to prepare a Databricks Unity Catalog for use with StreamNative Ursa as a Delta Lake catalog on Google Cloud Platform (GCP).

Prerequisites

  • A GCP project with permissions to create GCS buckets and IAM roles
  • A Databricks account with permissions to create workspaces

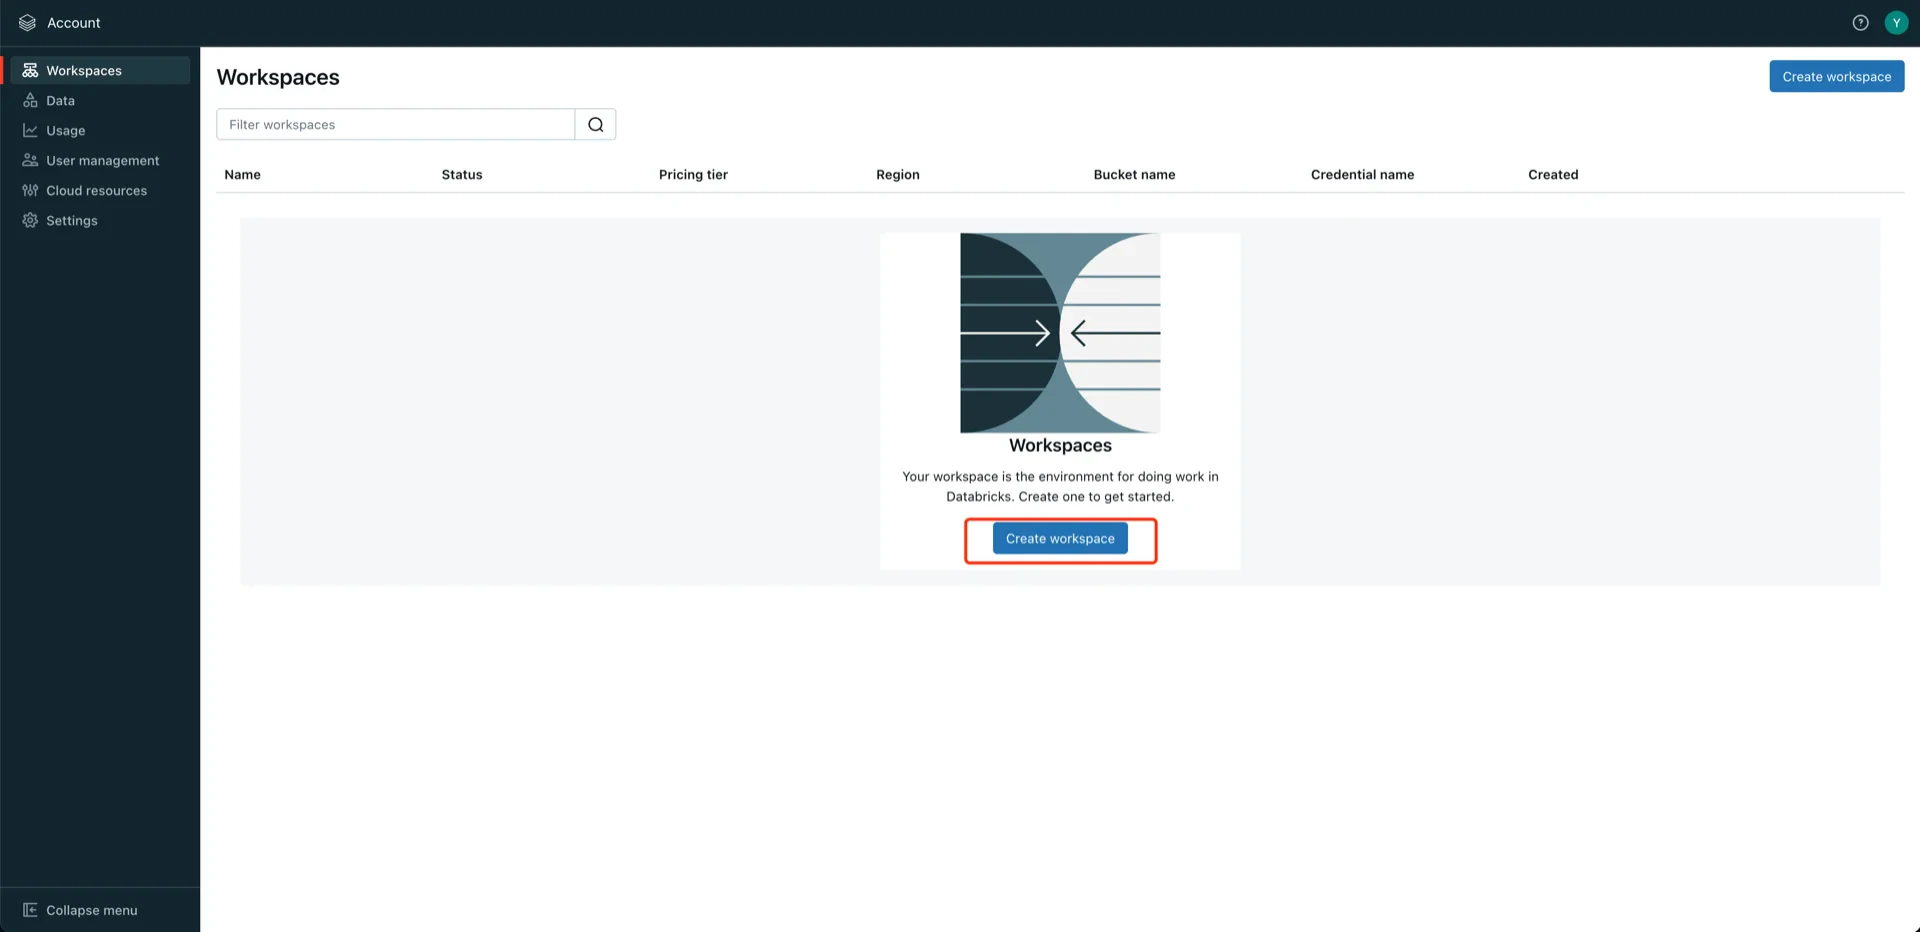
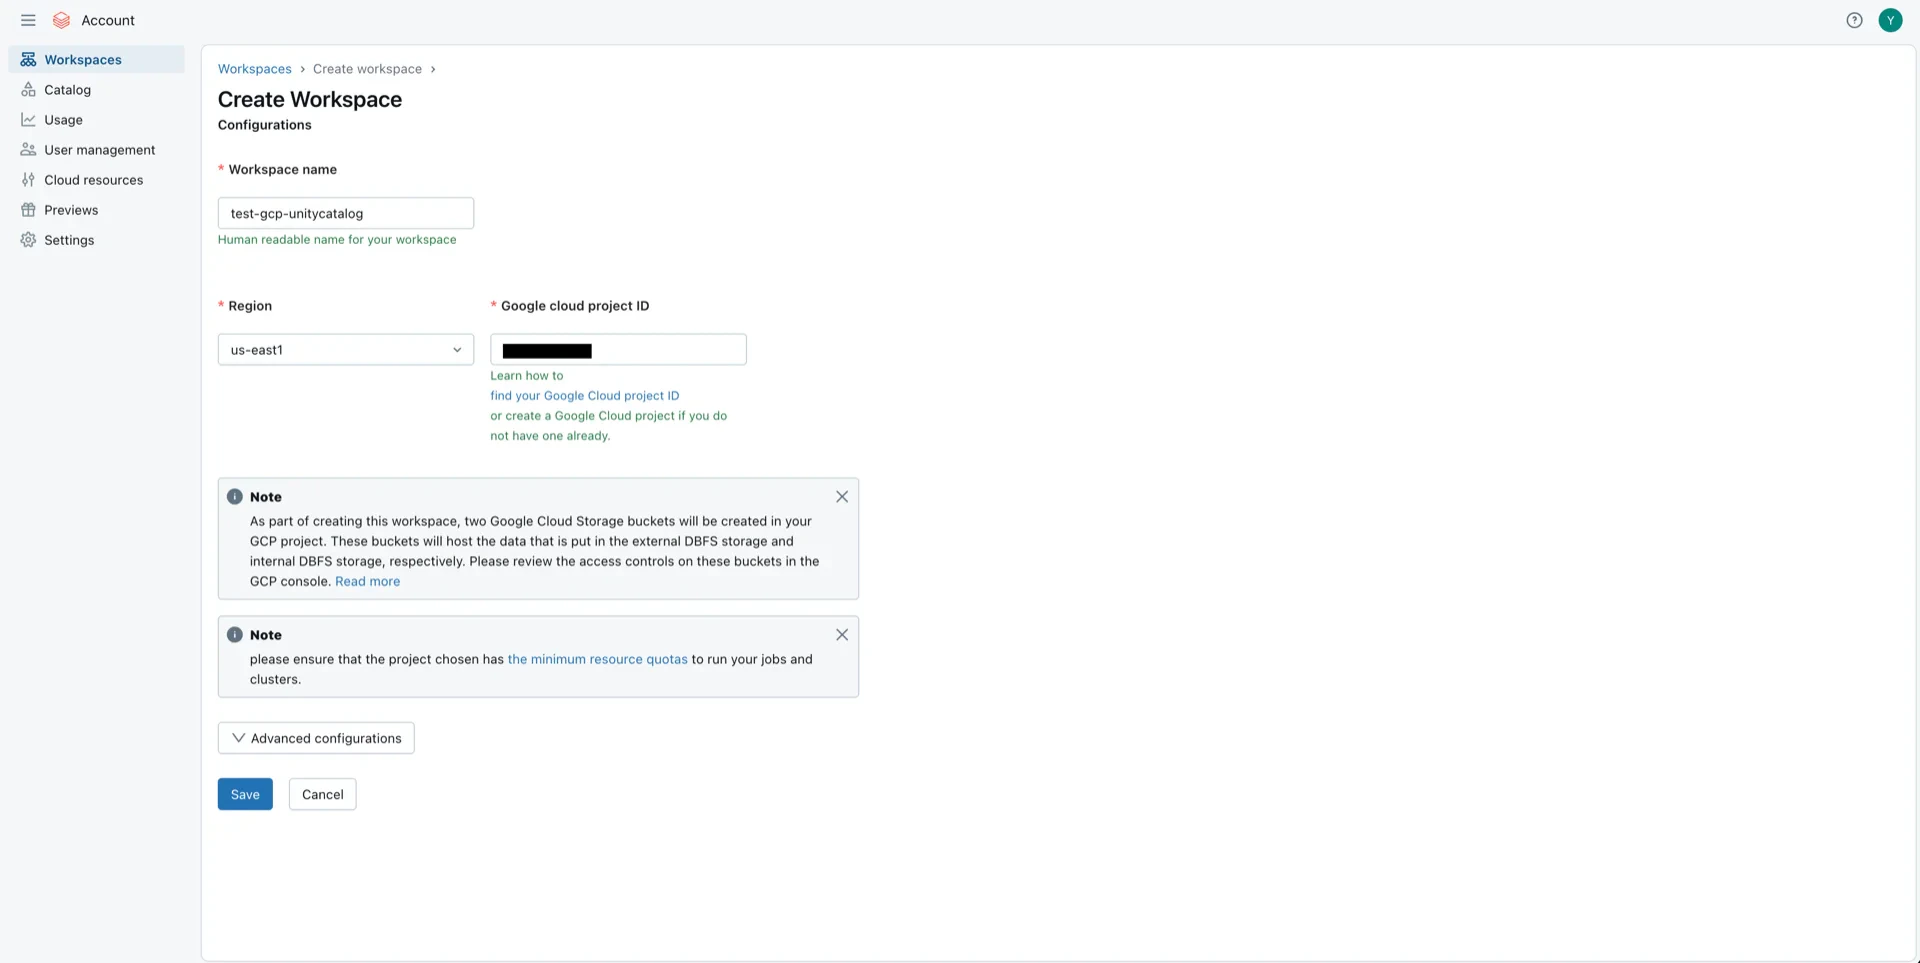
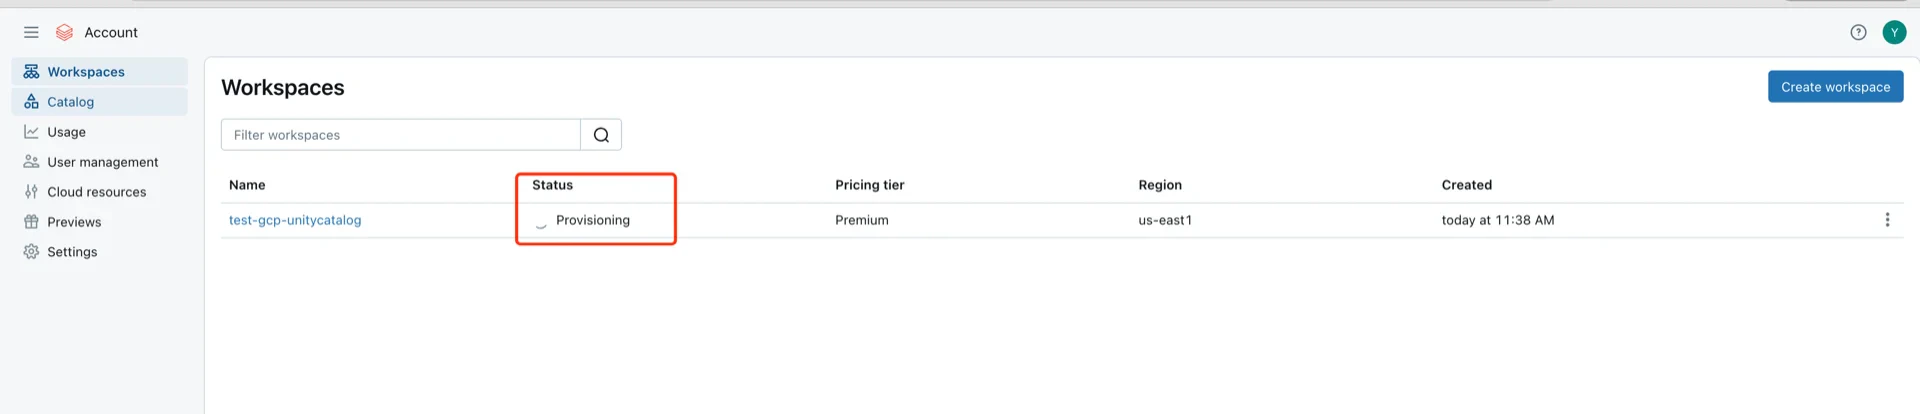
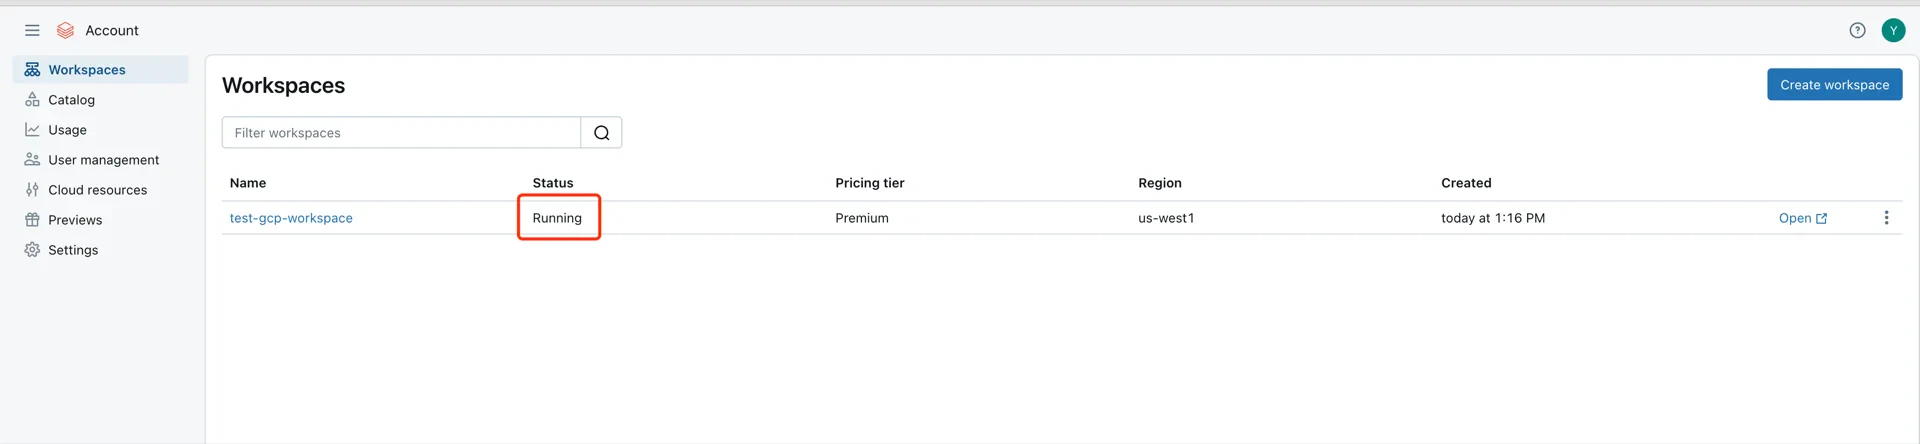
1. Create a Databricks Workspace

Skip this step if you already have the Databricks Workspace in GCP
In the GCP Databricks account console, click Create workspace. Create workspace Enter the workspace name, choose the region, and provide your GCP project ID. Workspace configuration Click Save. The workspace status shows Provisioning while initialization is in progress. Workspace provisioning When the status changes to Running, the workspace is ready. Workspace running Open the workspace to enter the Unity Catalog console. Unity Catalog console

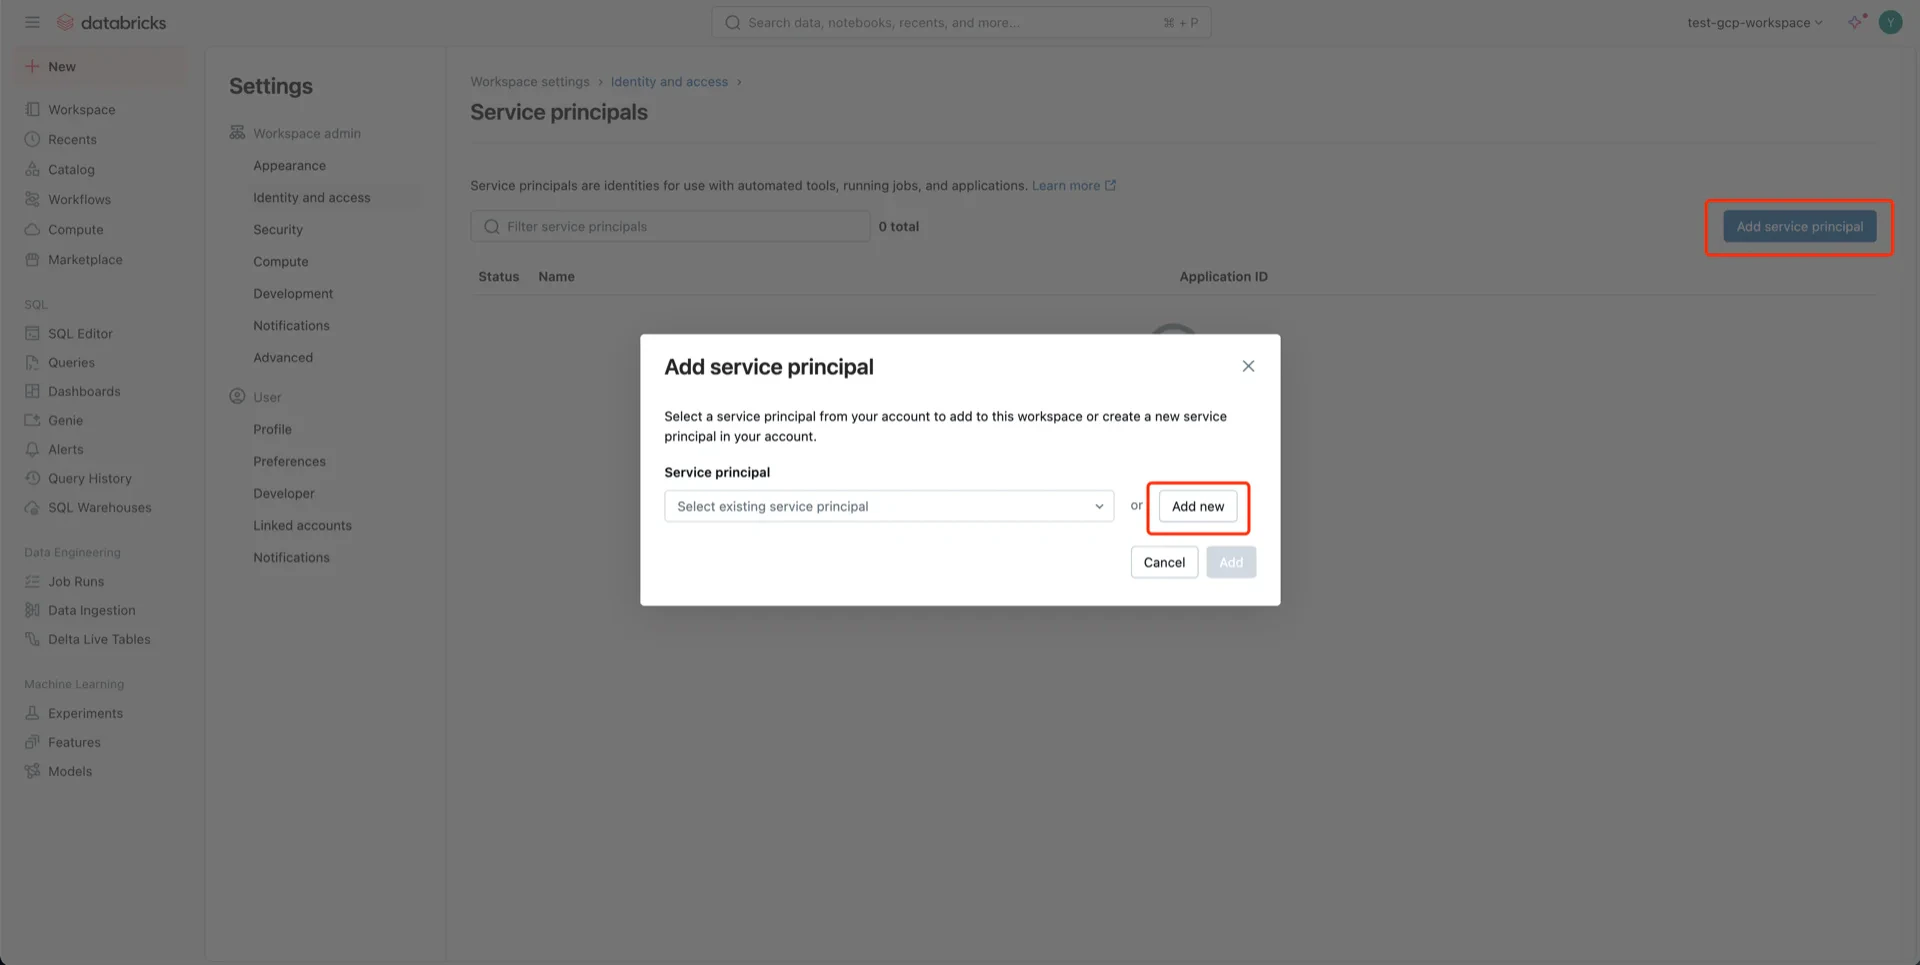
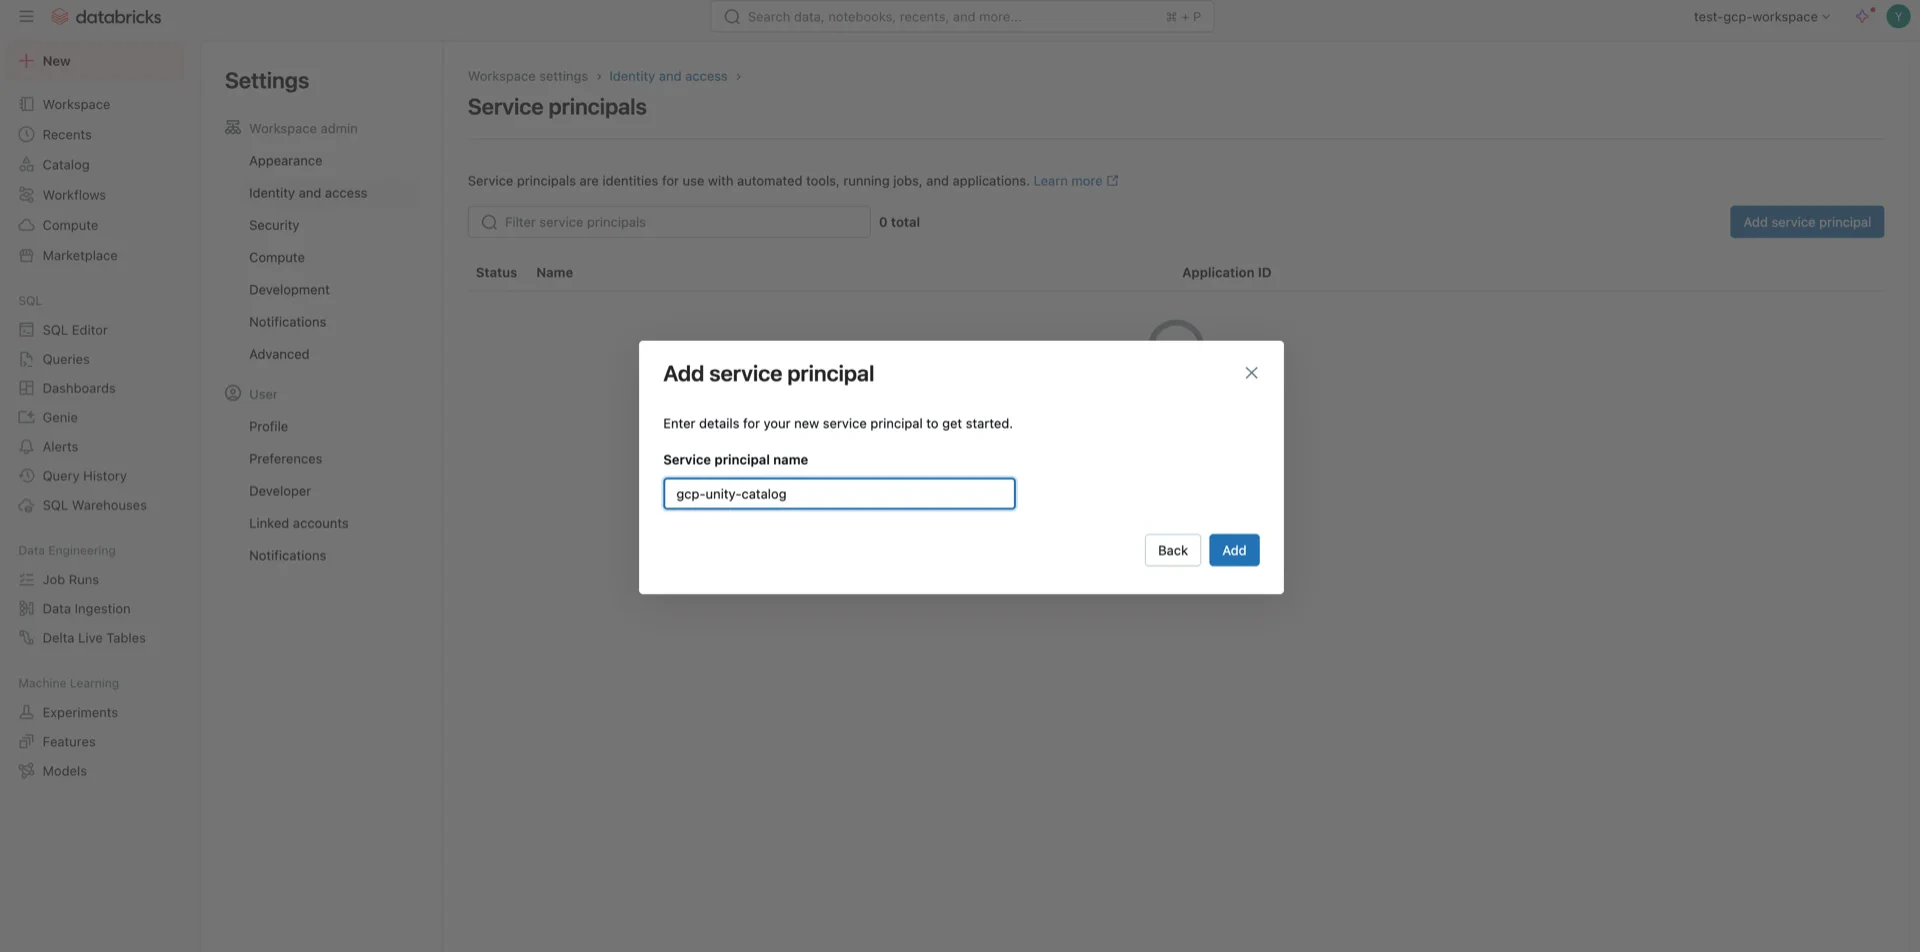
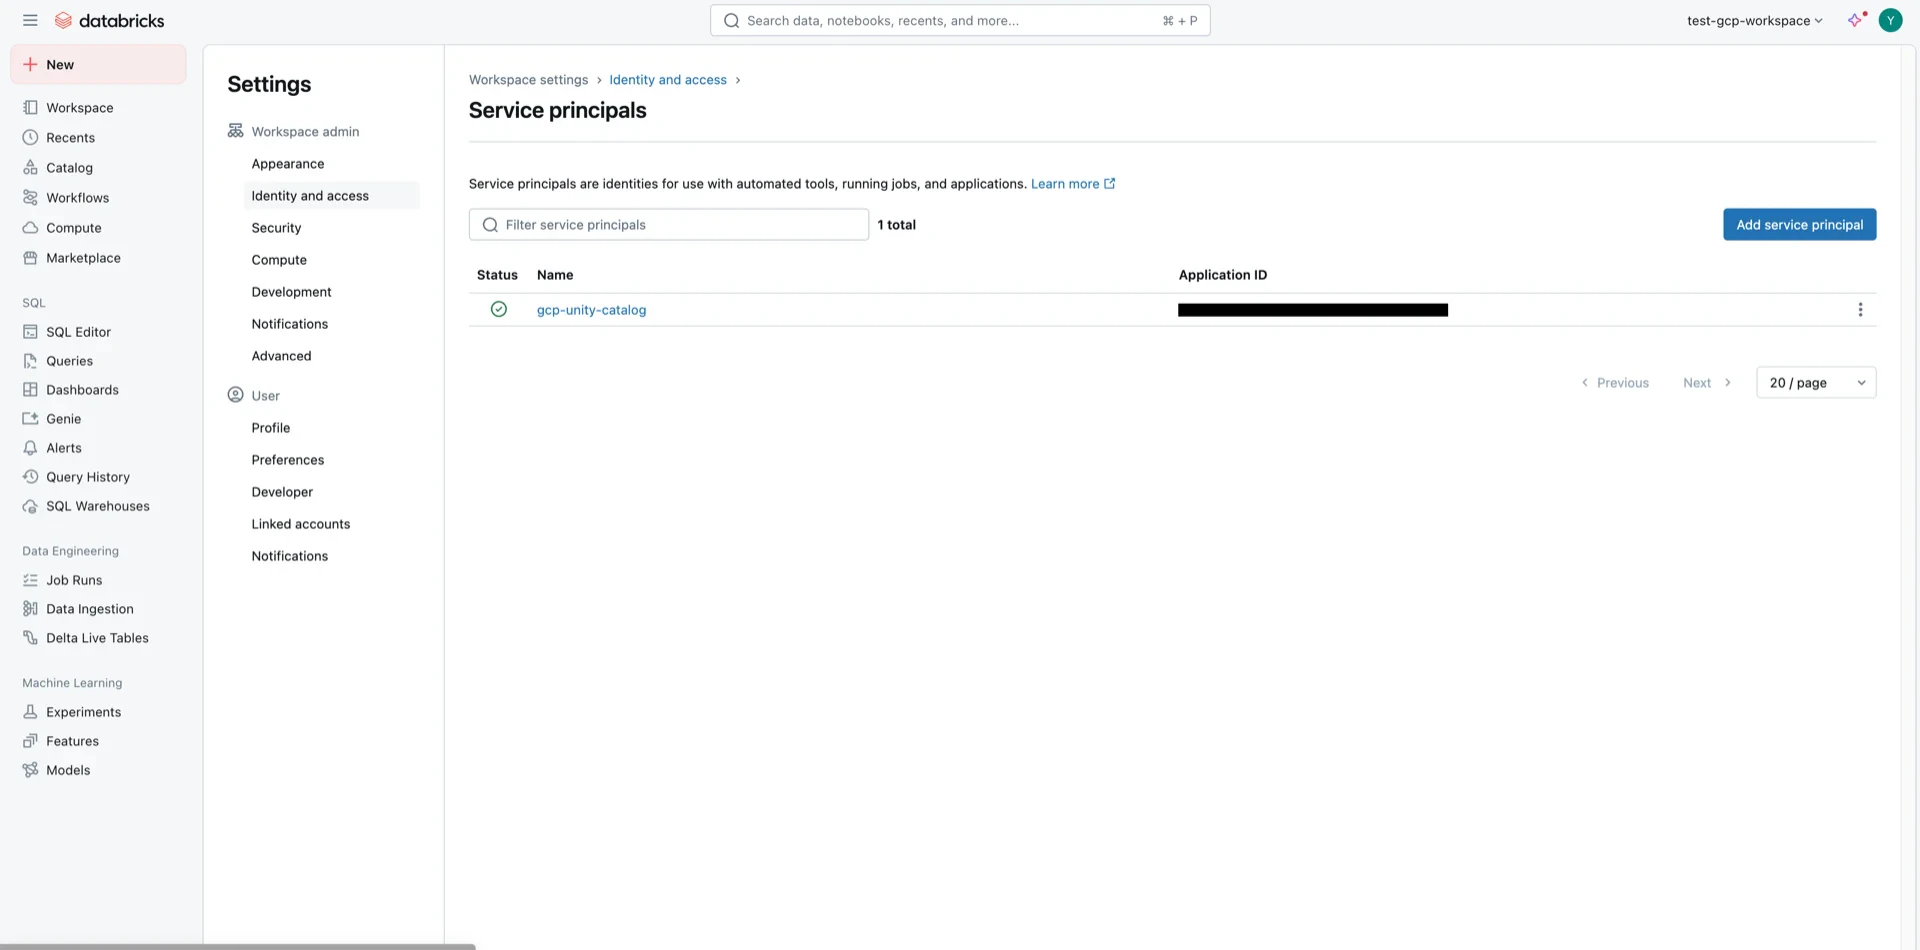
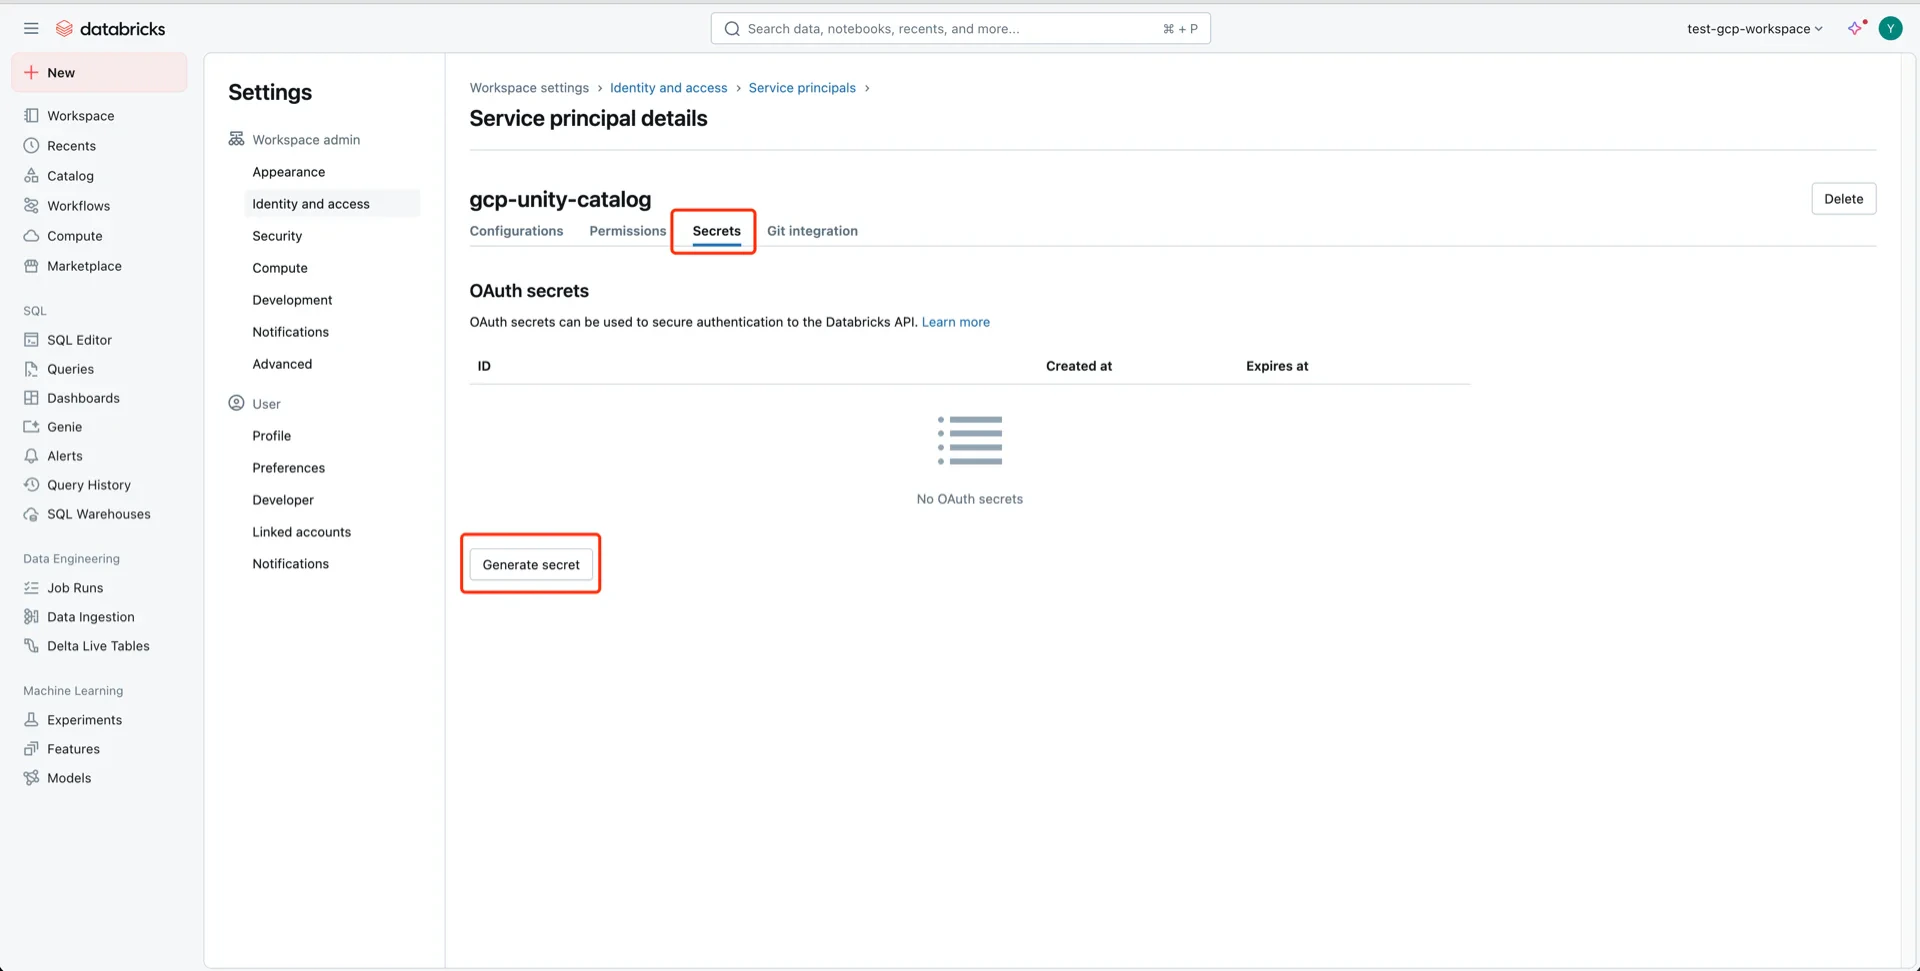
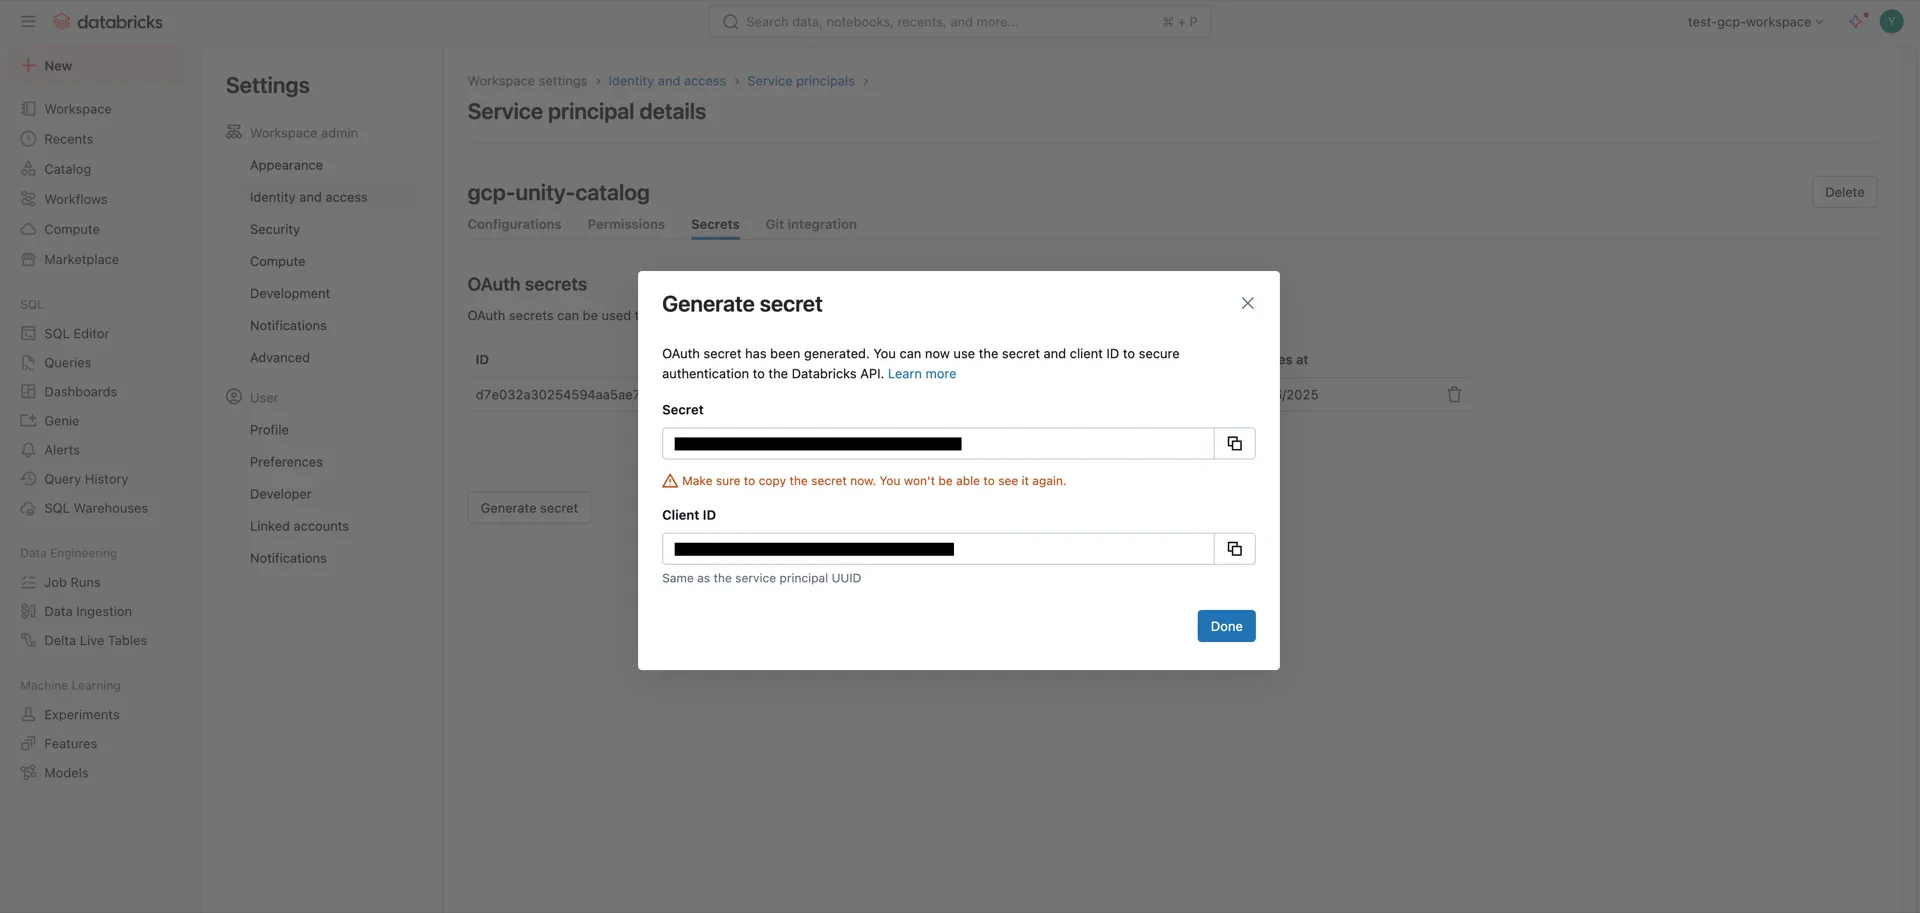
2. (Recommend) Generate an OAuth2 Service Principal

For OAuth2 authentication, navigate to Identity and access -> Service principals -> Manage. Service principals Click Add service principal -> Add new and provide a name. Add service principal Create service principal Service principal created Open the service principal, click Secrets -> Generate secret, choose an expiration period, and Generate. Generate secret Record both the Client ID and Client Secret — the secret cannot be retrieved later. Client ID and Secret

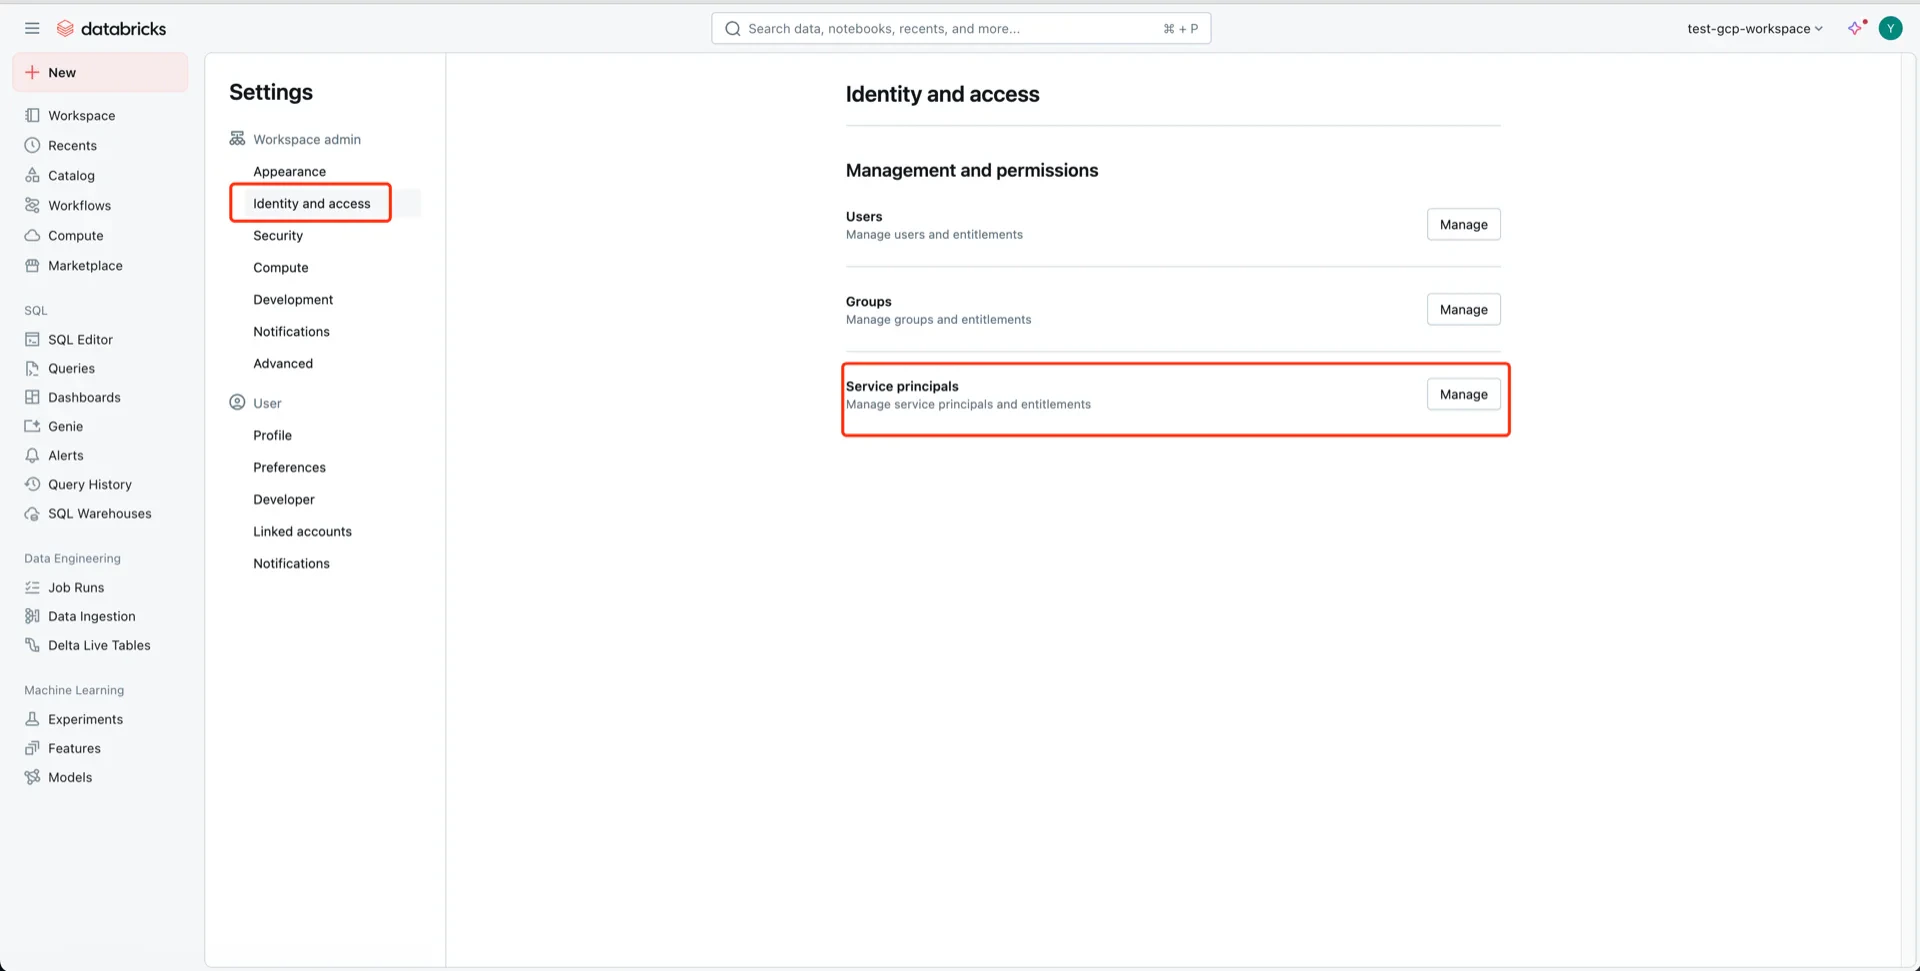
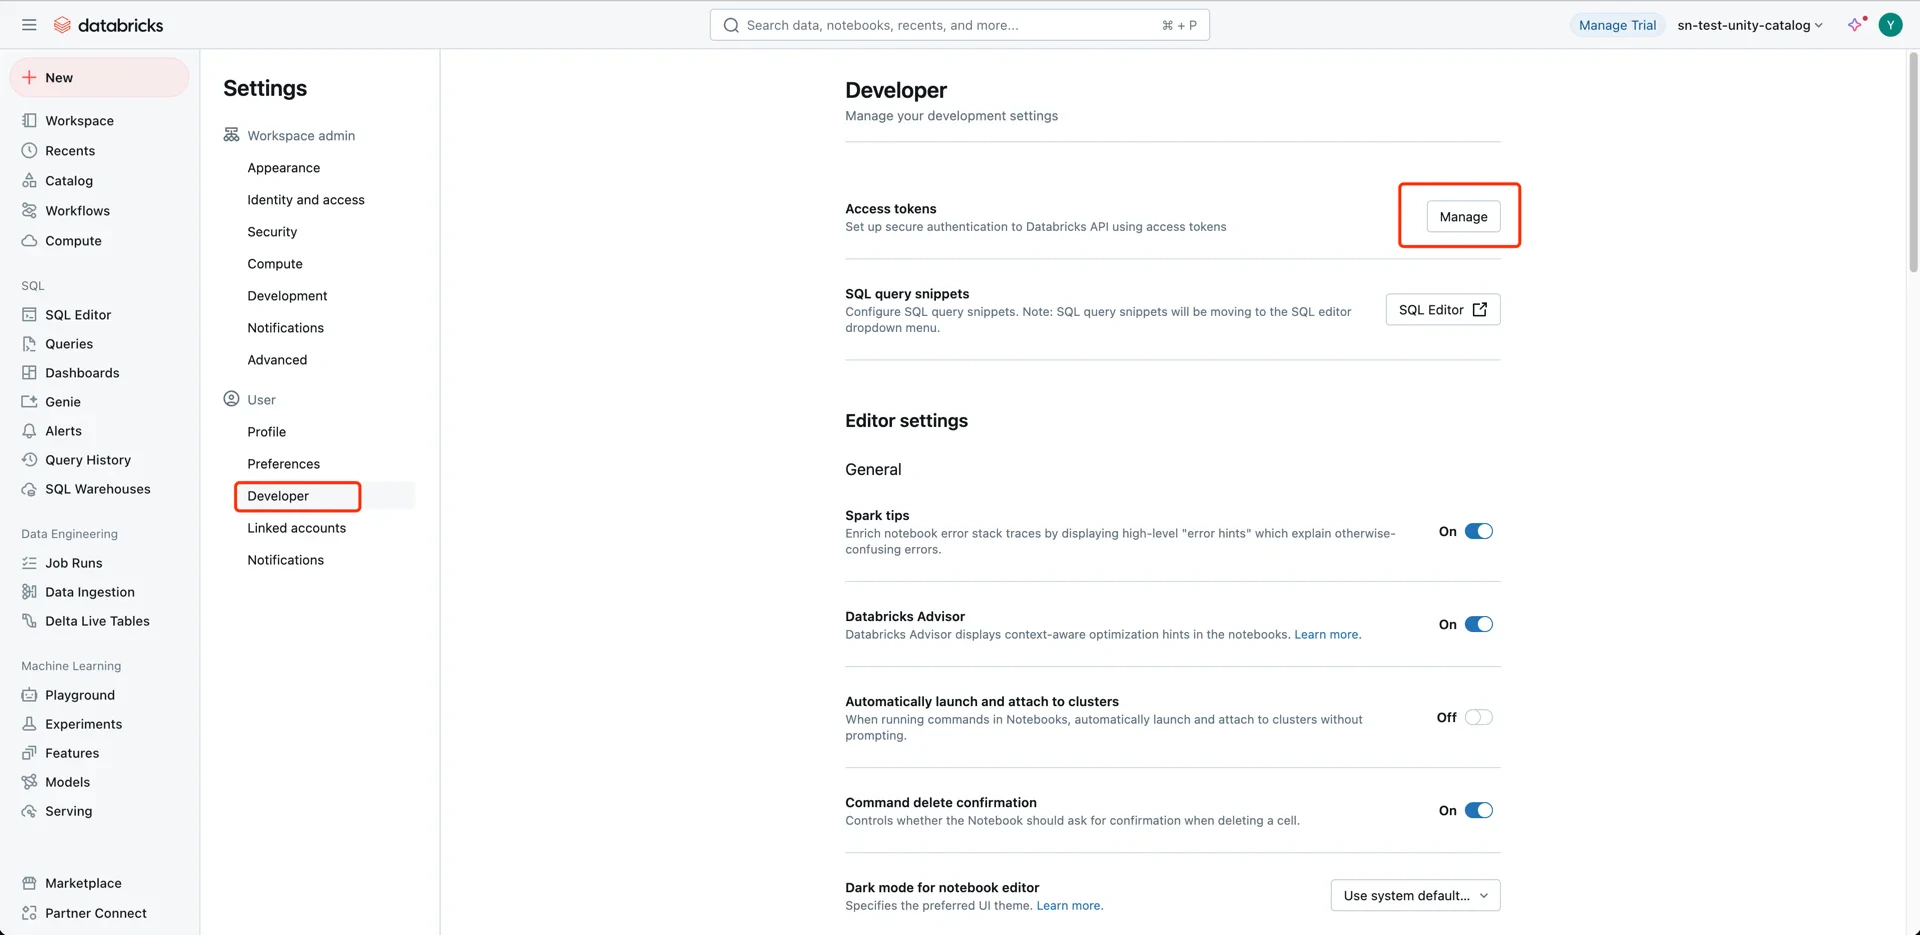
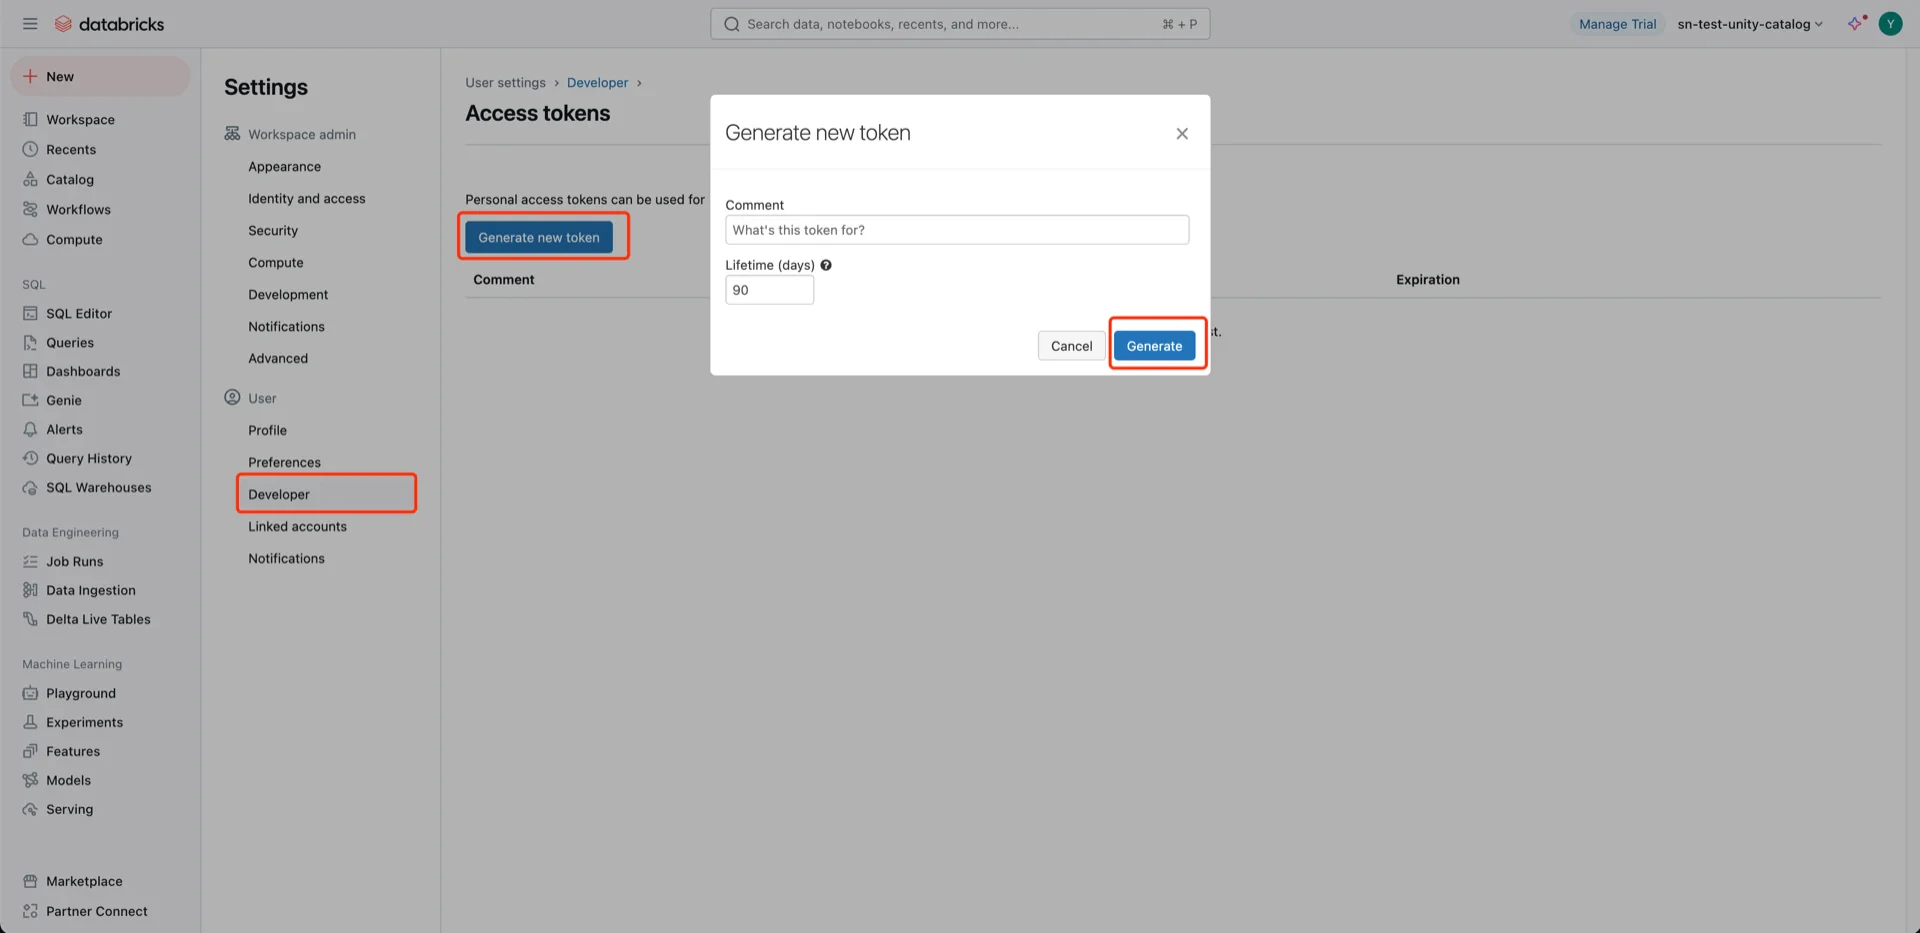
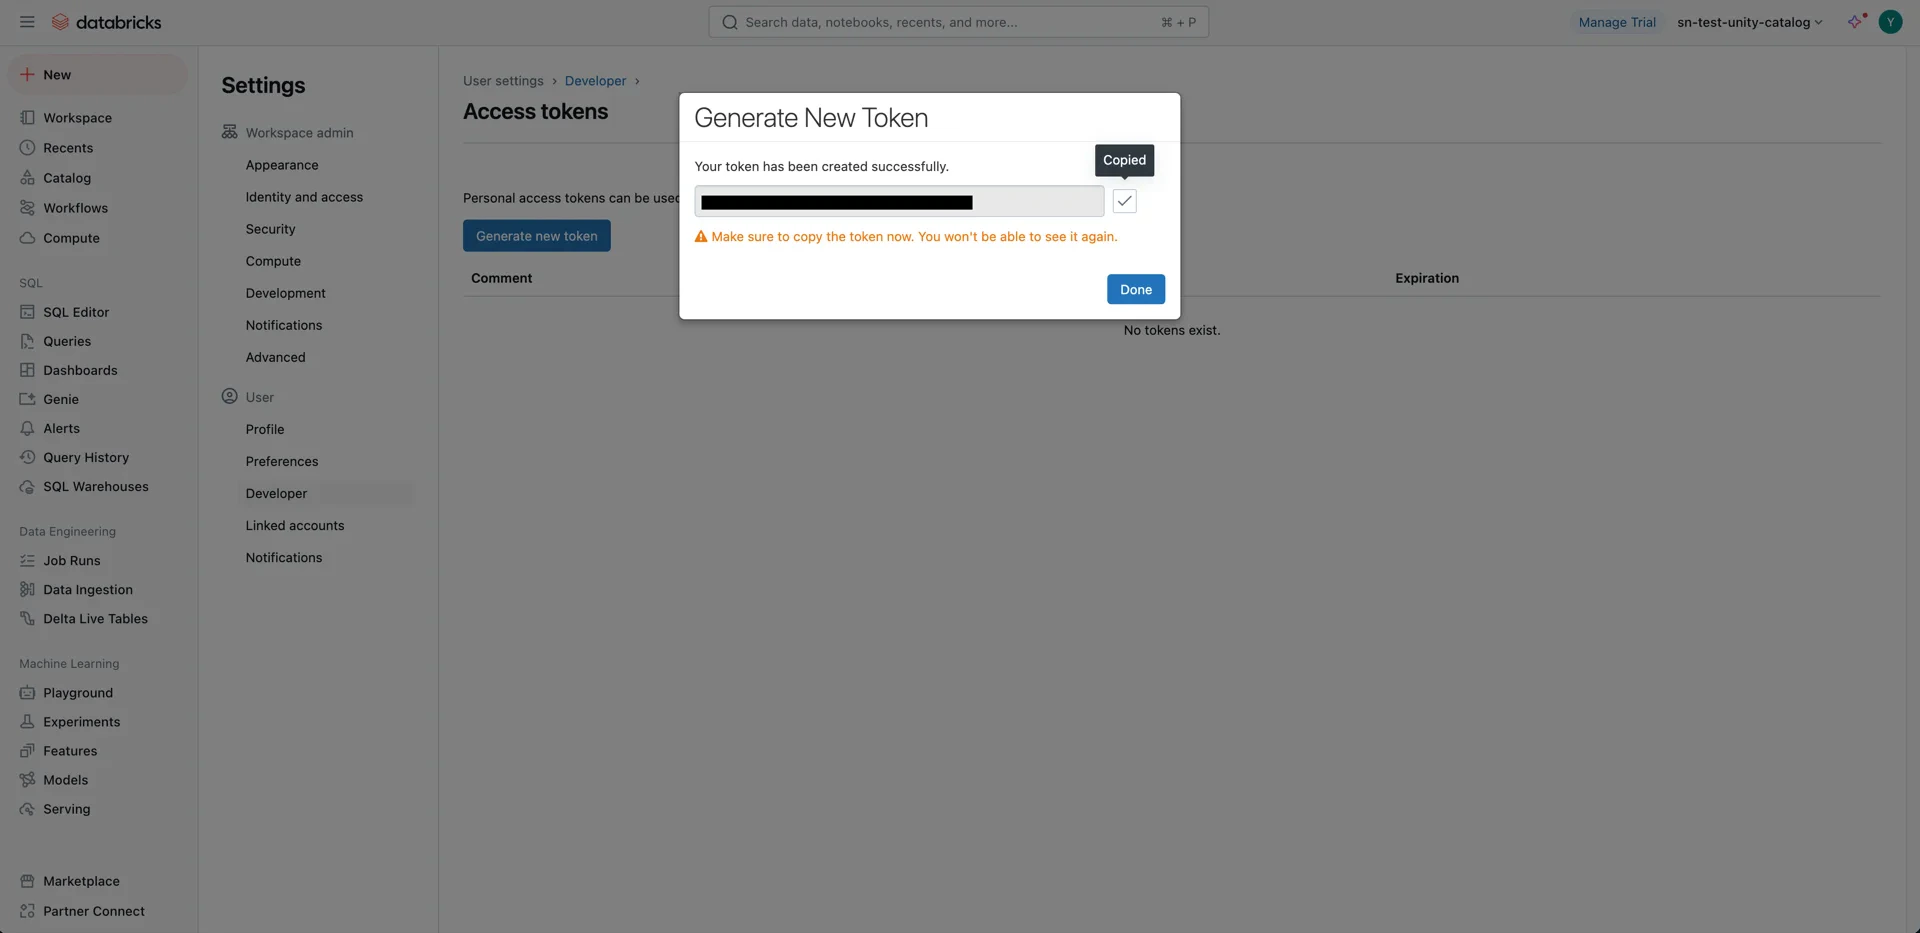
3. (Alternative) Generate a User Token

A Databricks user token can be used by StreamNative Ursa to authenticate against Unity Catalog. Open User Settings. User settings Navigate to Developer -> Access tokens -> Manage and generate a new token. Record the token value — it cannot be retrieved later. Developer menu Access tokens Generate token

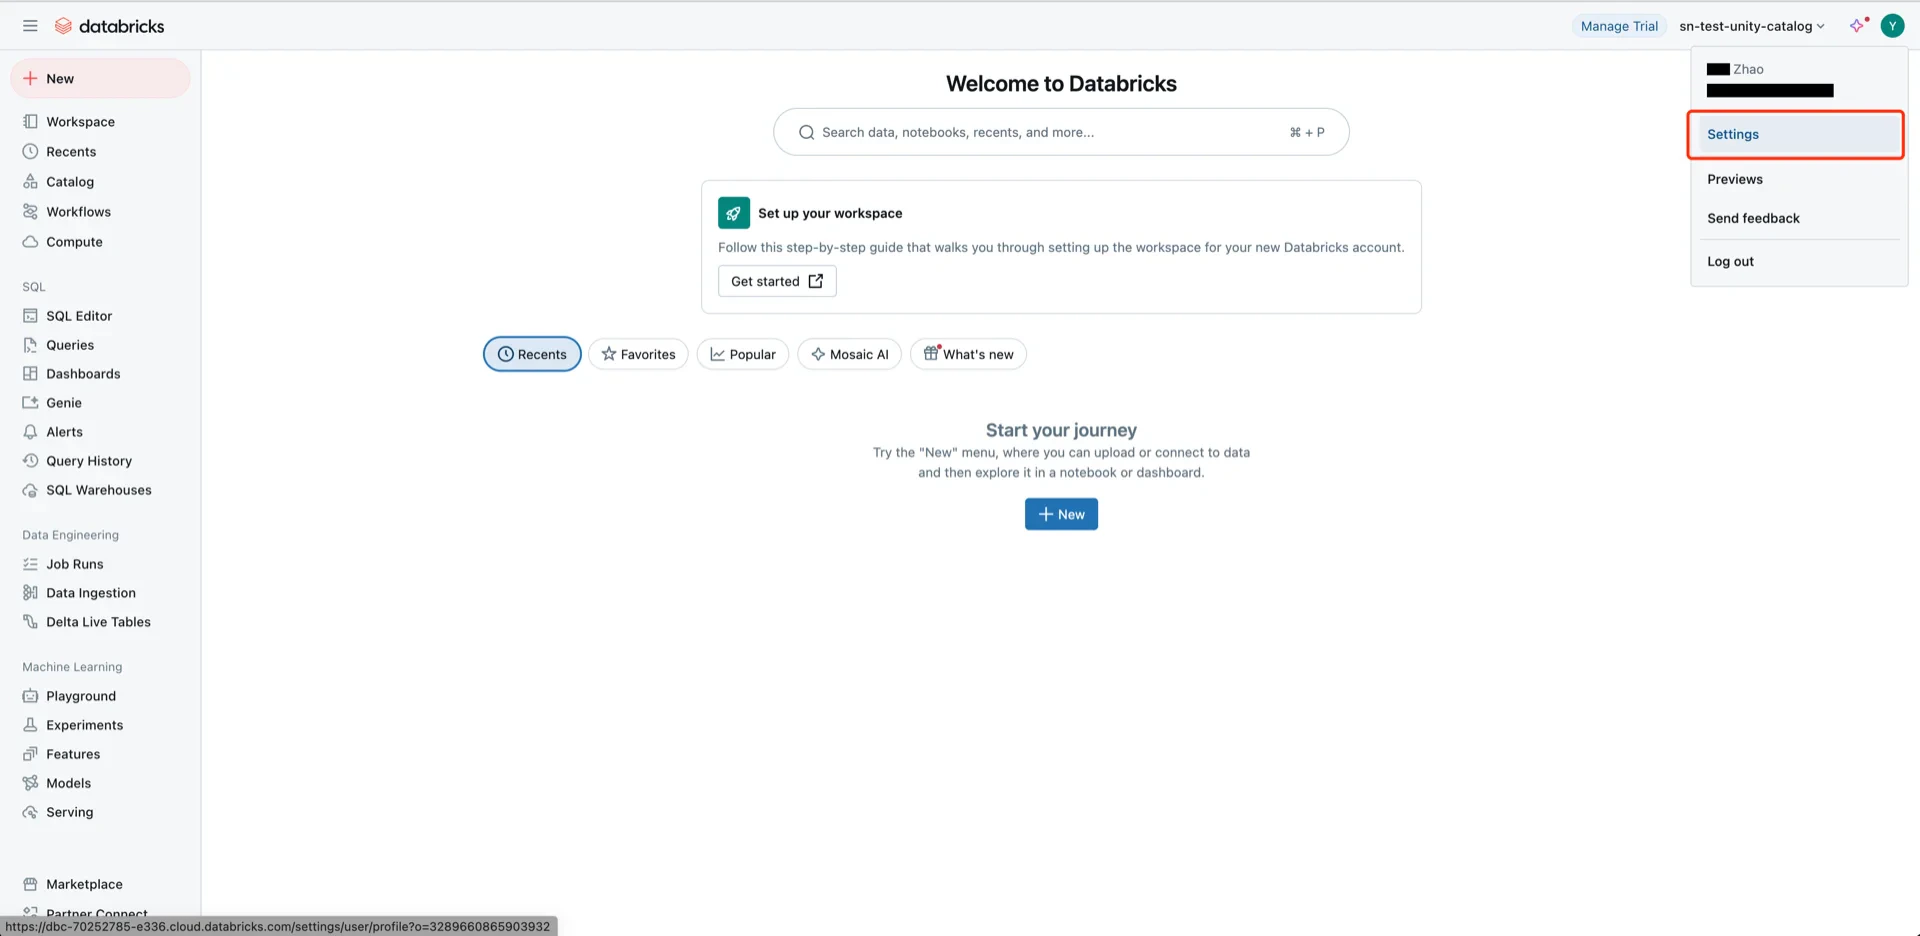
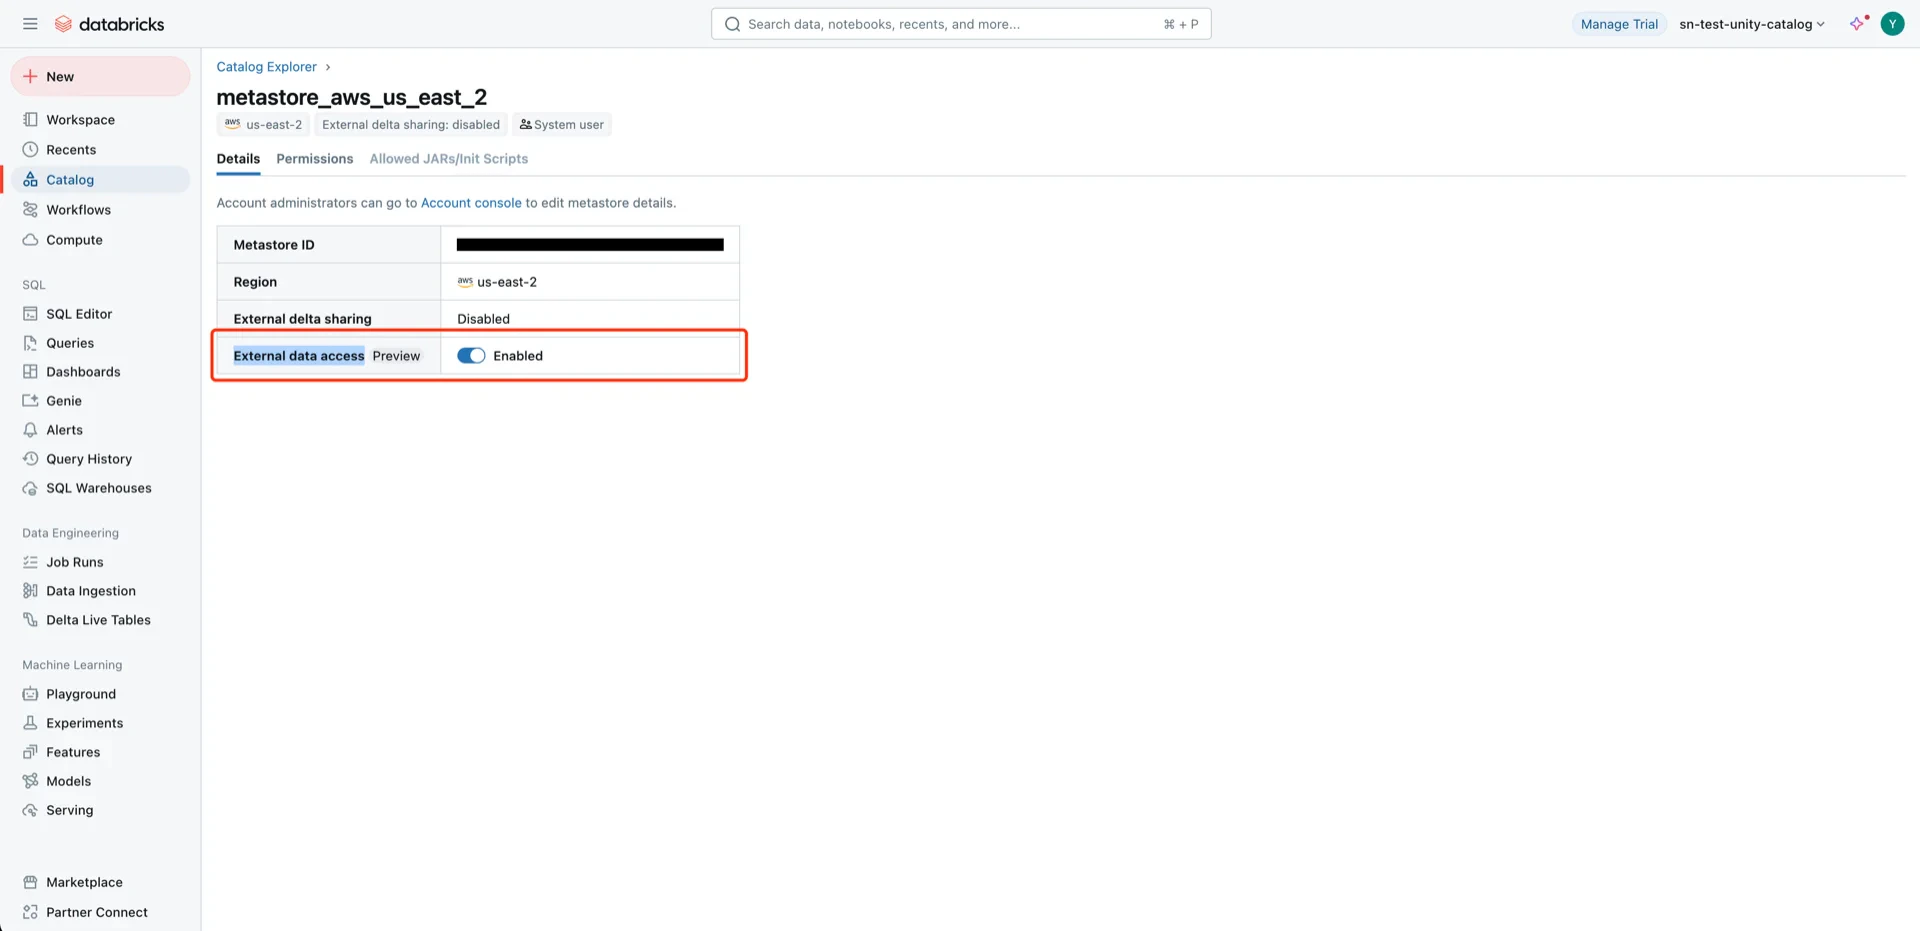
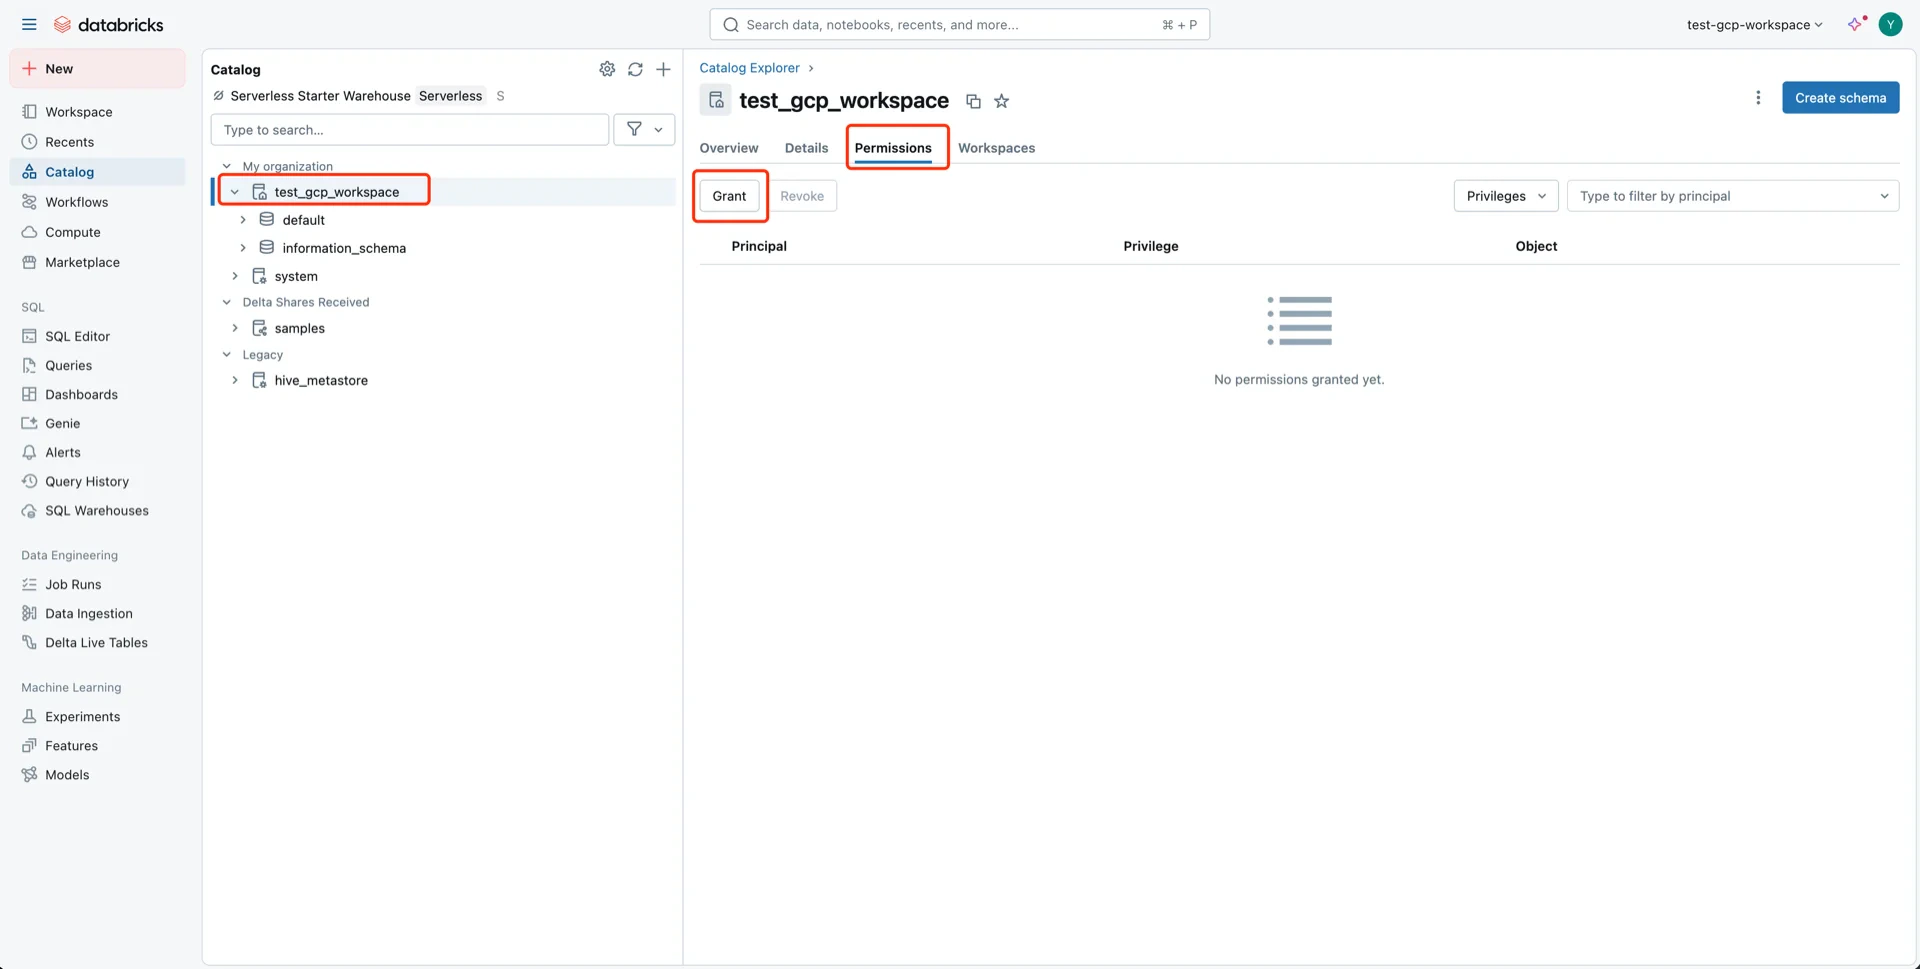
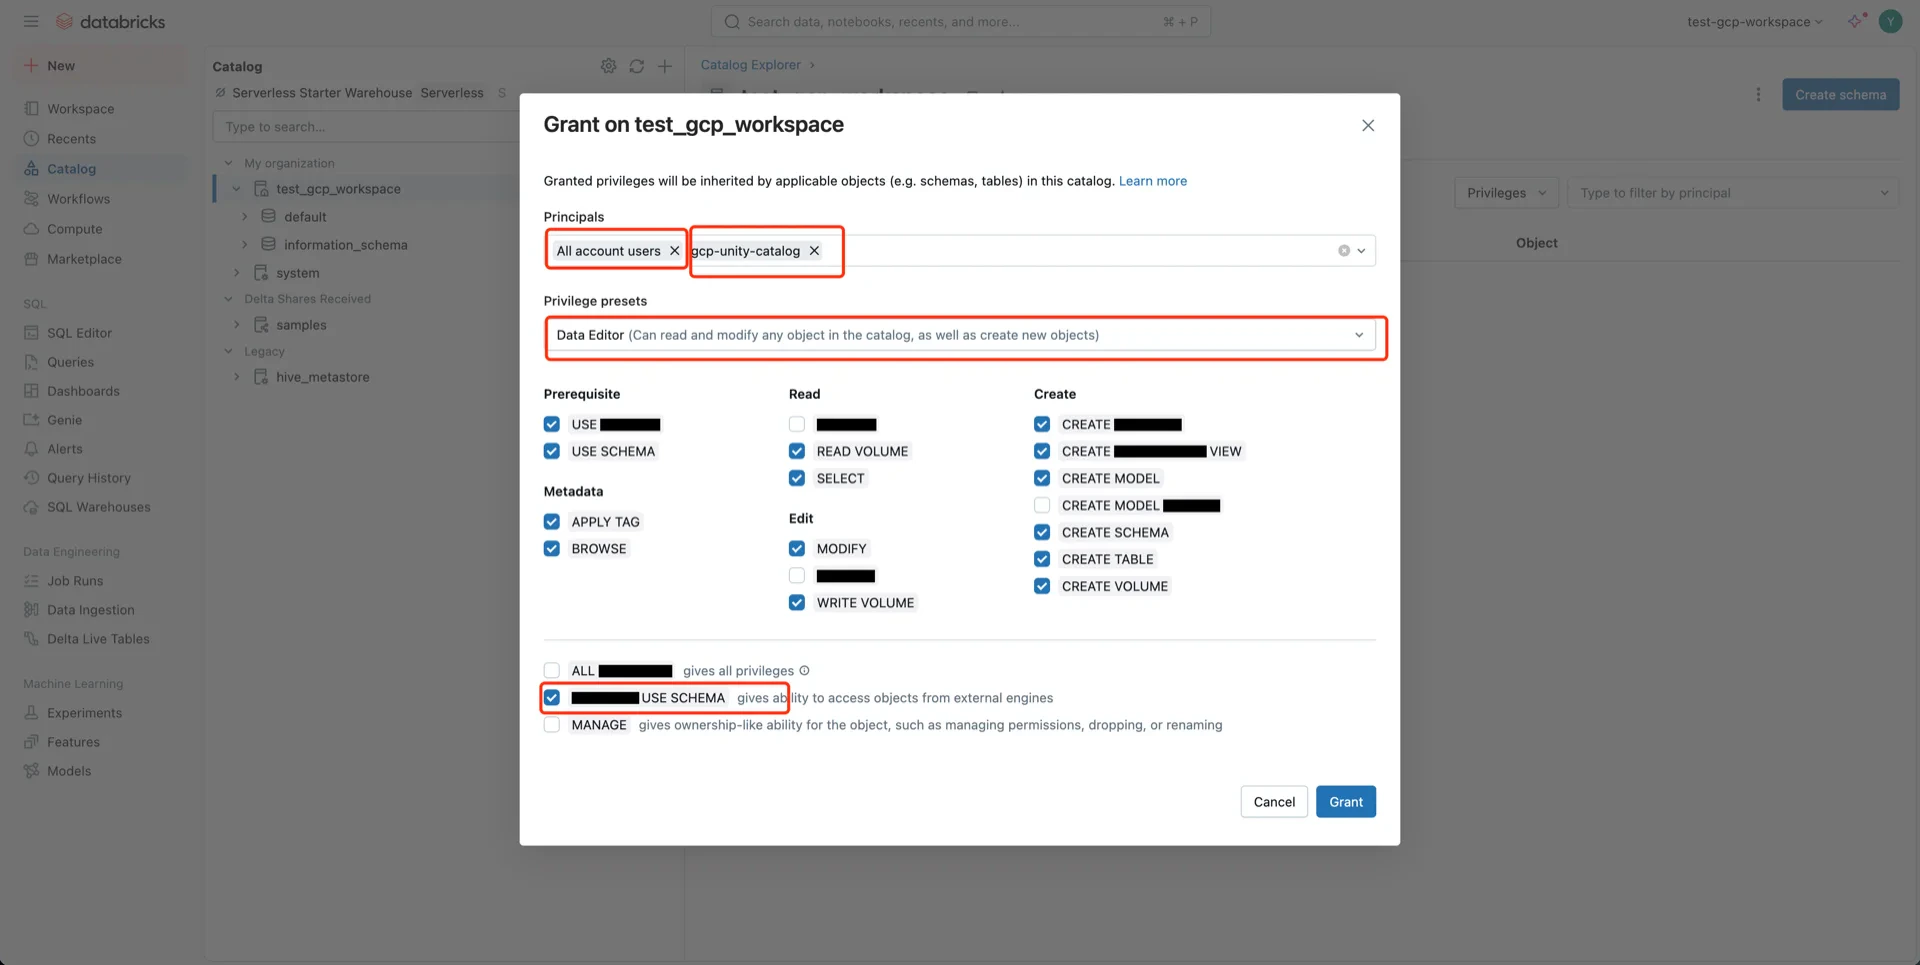
4. Configure Unity Catalog Access

Navigate to Catalog -> Settings -> Metastore. Catalog settings Enable External data access on the metastore. External data access Grant catalog privileges with the following settings:
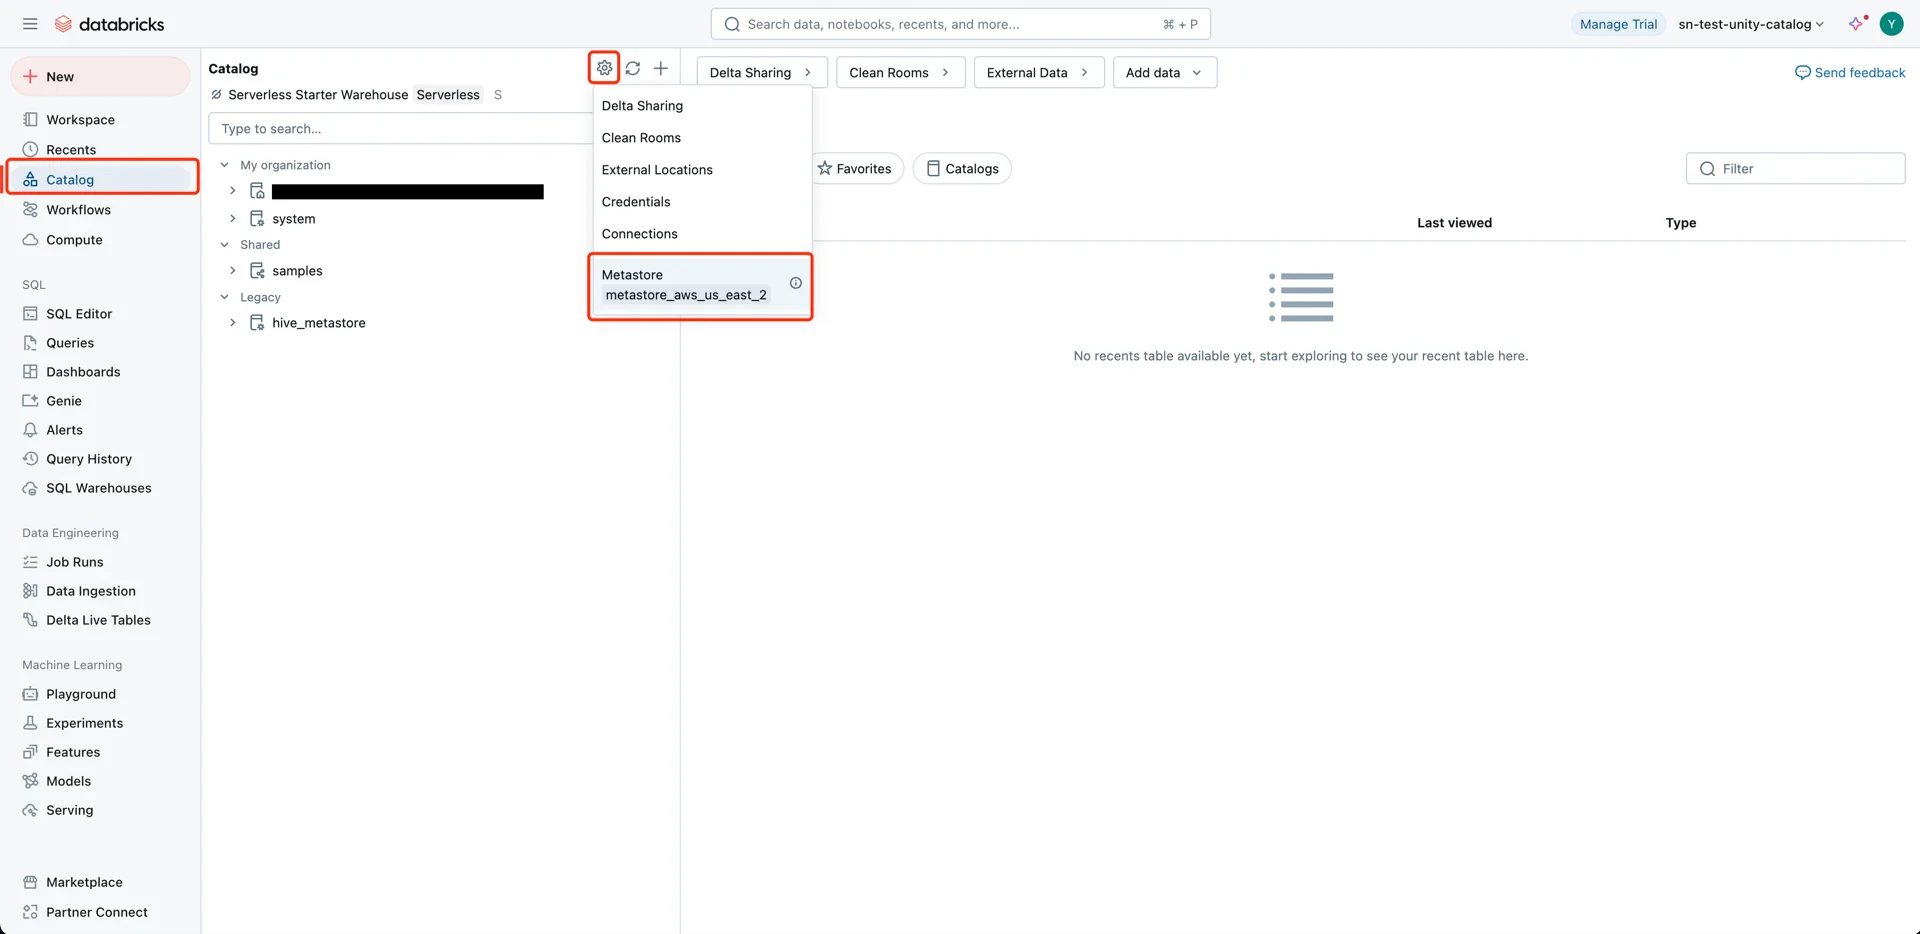
  • Principal: All accounts (or the specific user/service principal)
  • Privilege presets: Data Editor (selects related privileges automatically)
  • EXTERNAL USE SCHEMA: Enabled
Grant privileges Privilege configuration

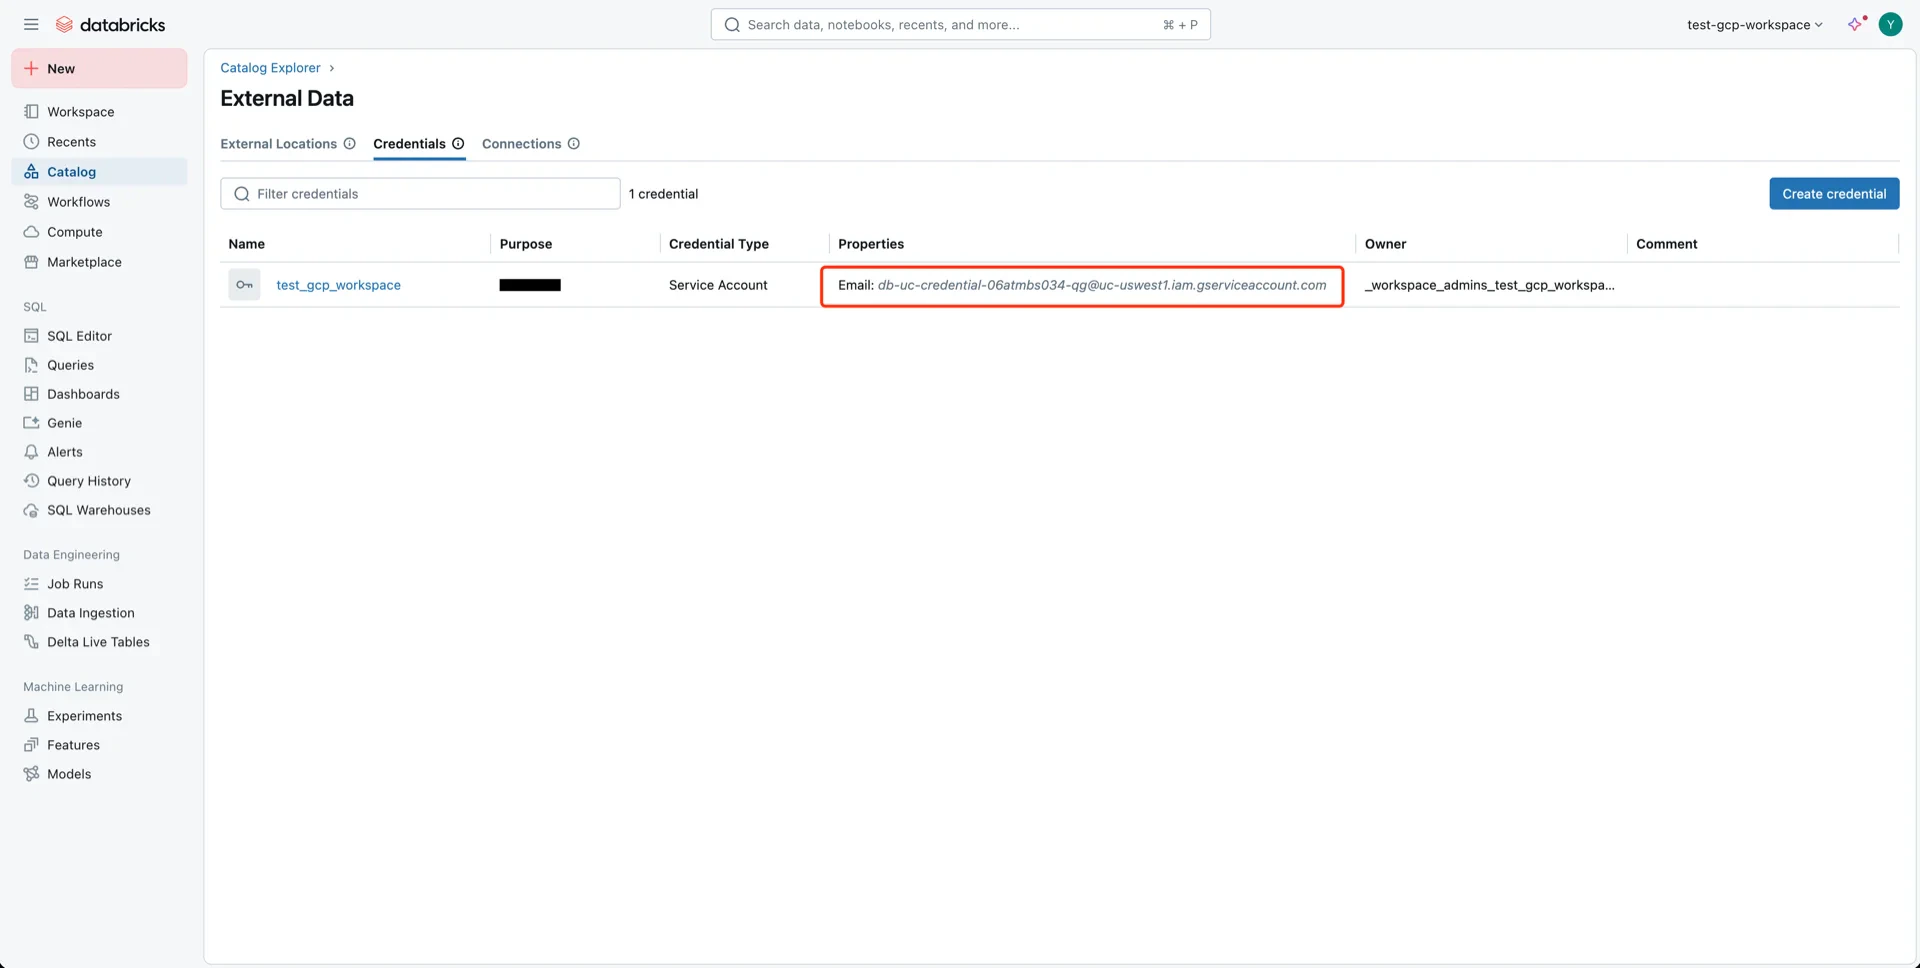
5. Grant Bucket Permissions to the Databricks Service Account

When the Databricks workspace is initialized, a service account is created for Unity Catalog. Navigate to Catalog -> Settings -> Credentials to find the service account. Credentials menu Example service account name:
db-uc-credential-<id>@uc-uswest1.iam.gserviceaccount.com
Databricks service account

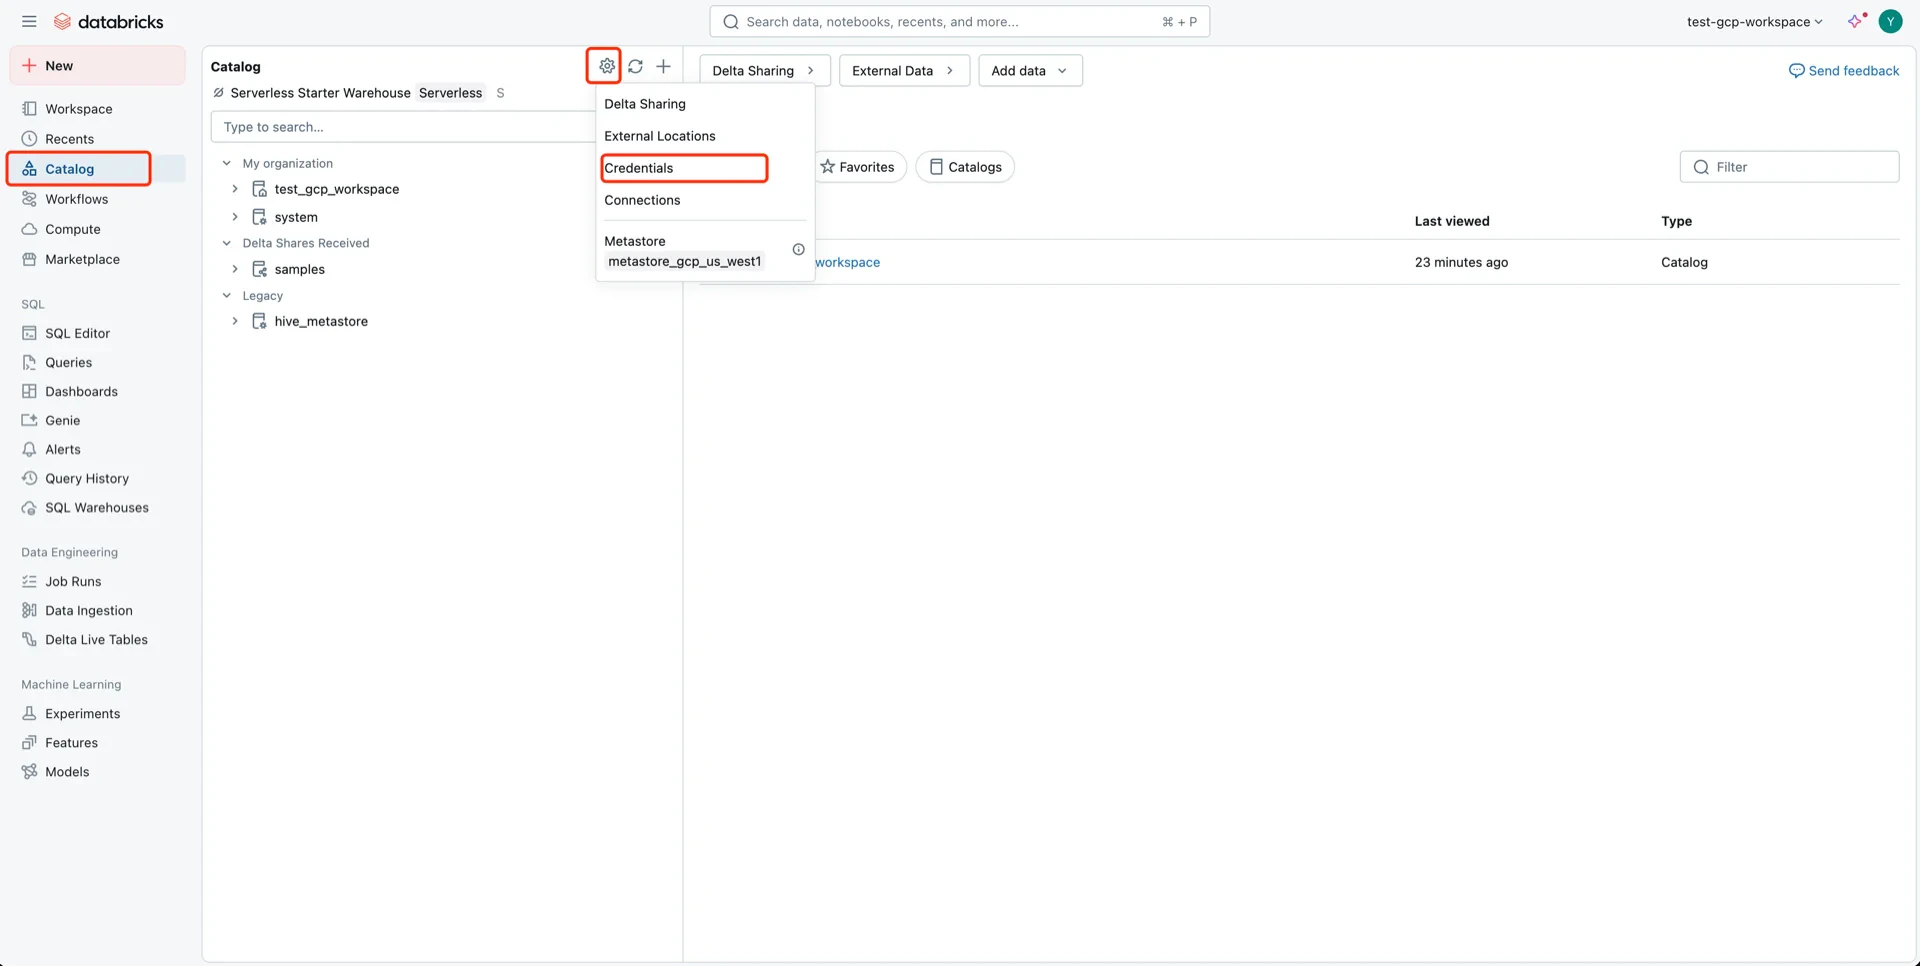
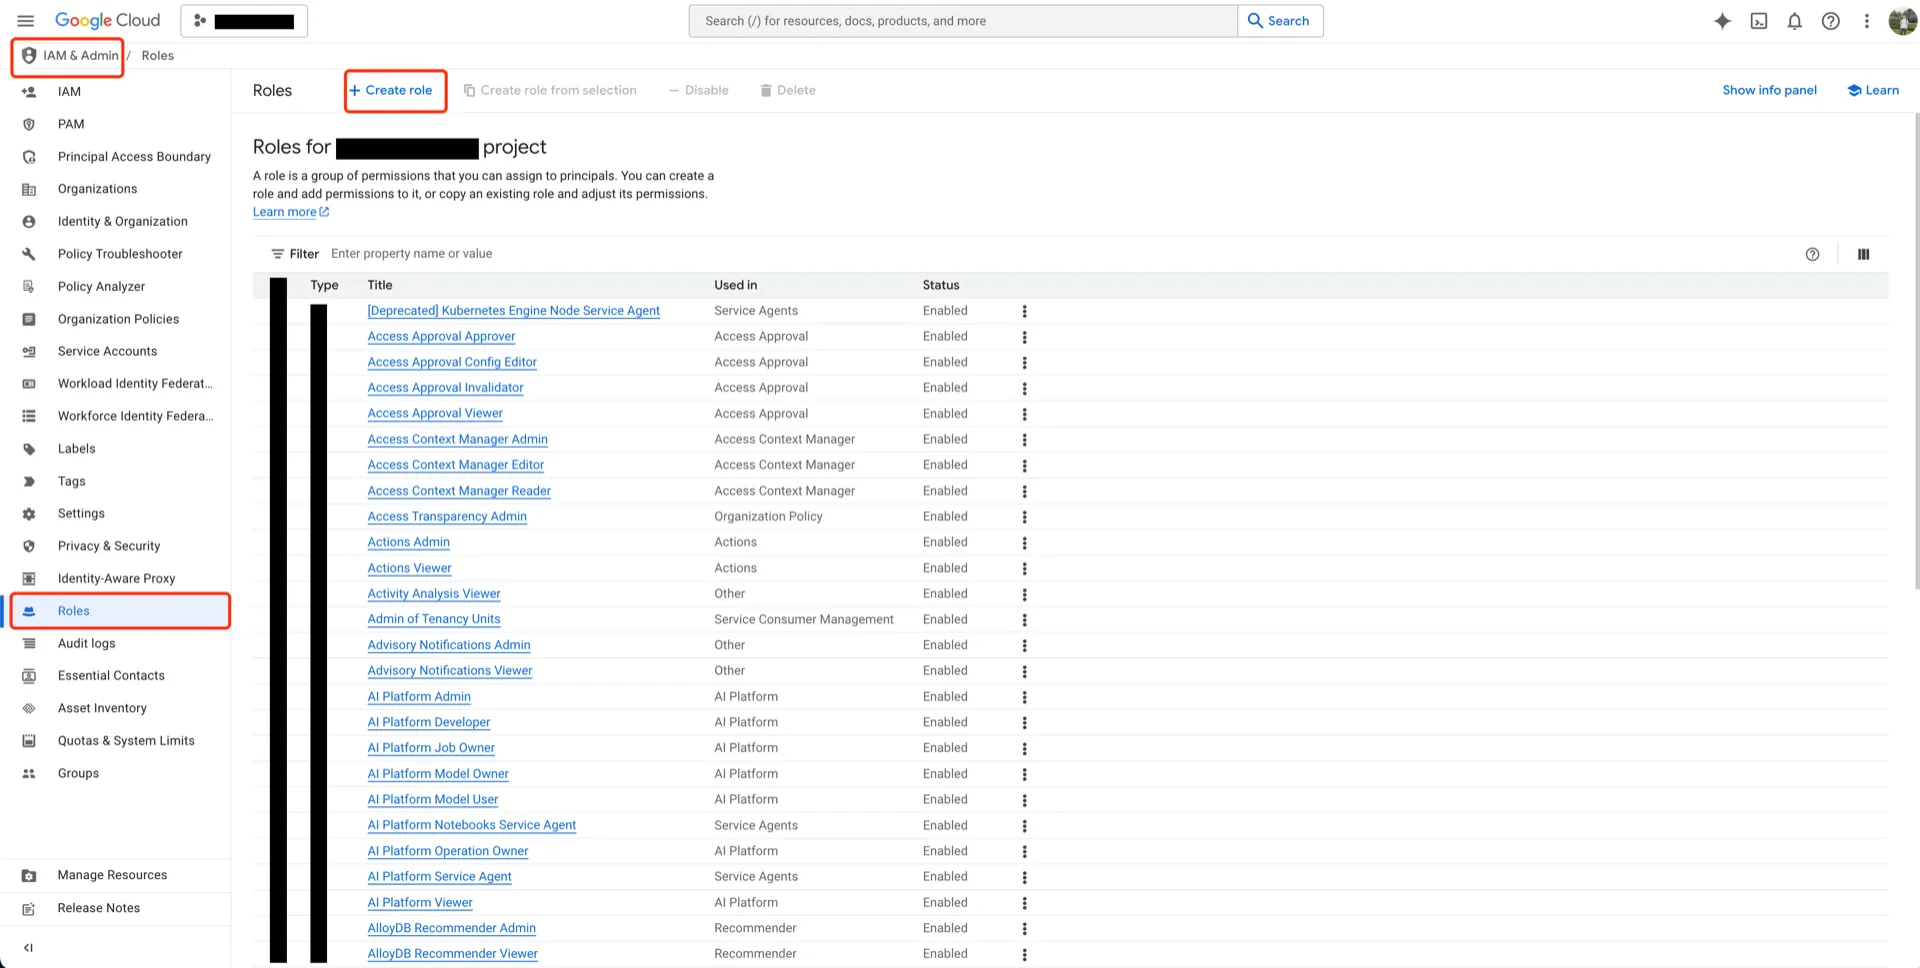
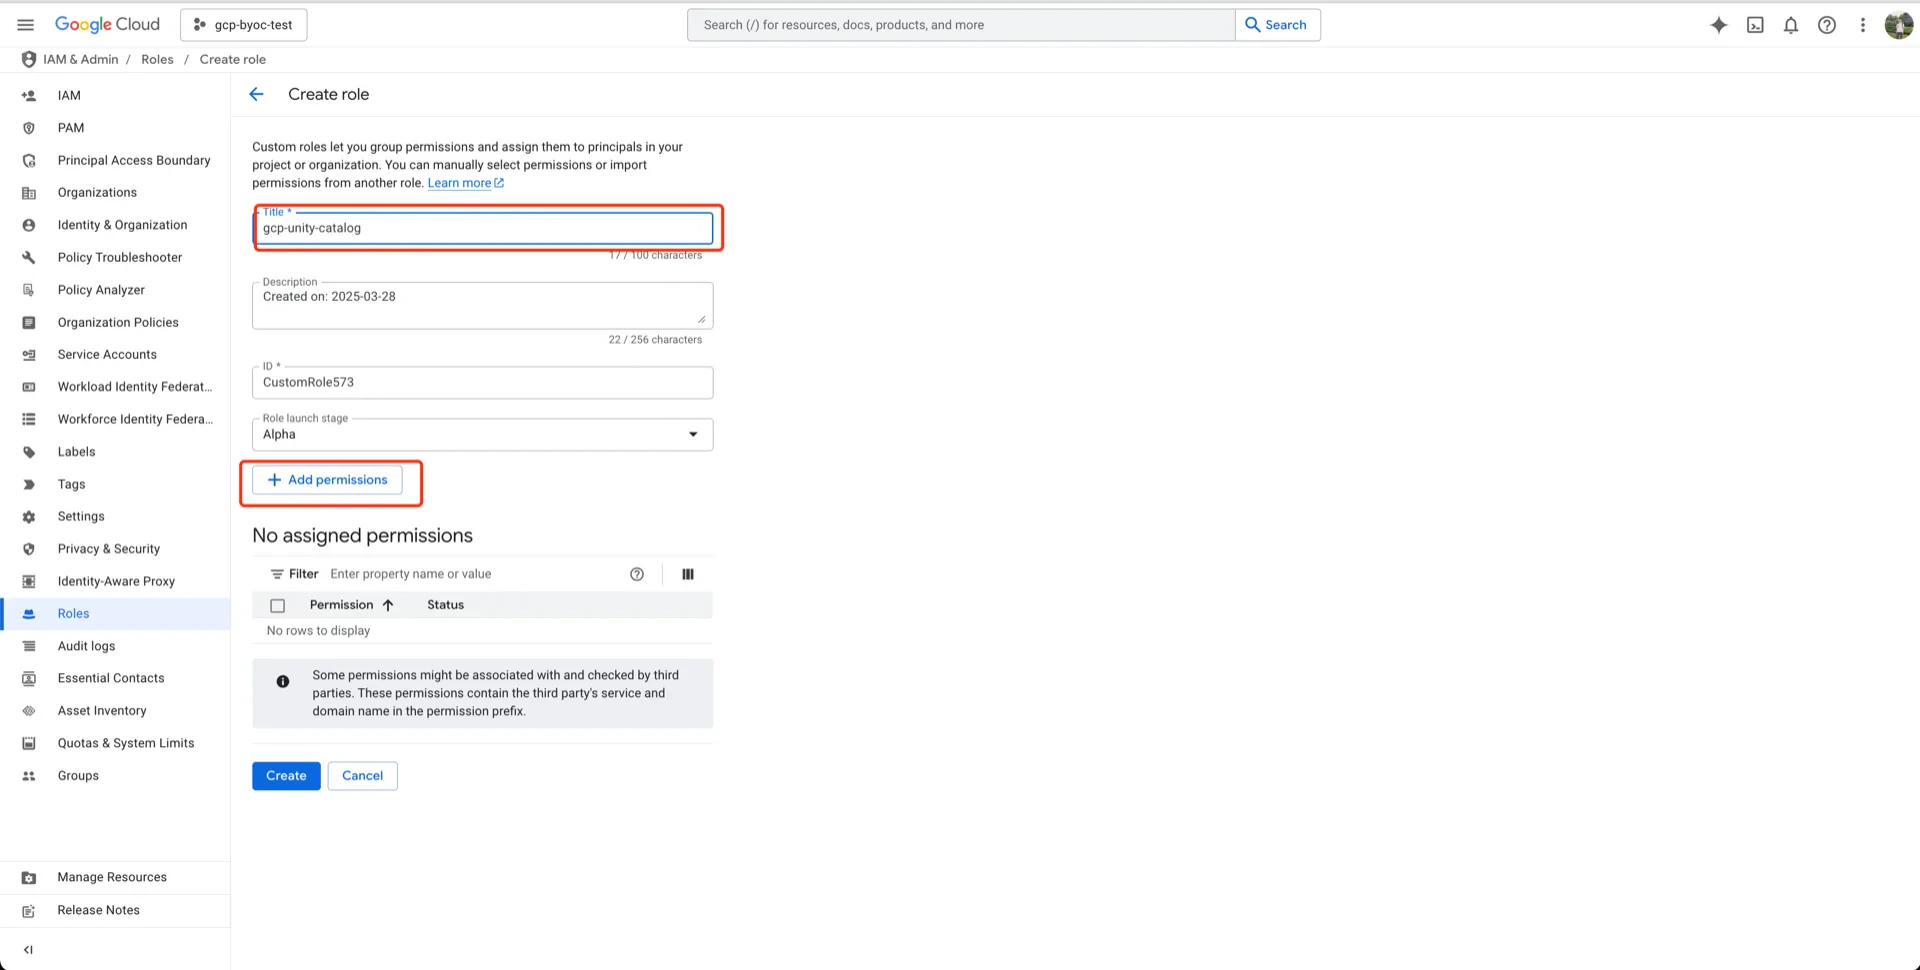
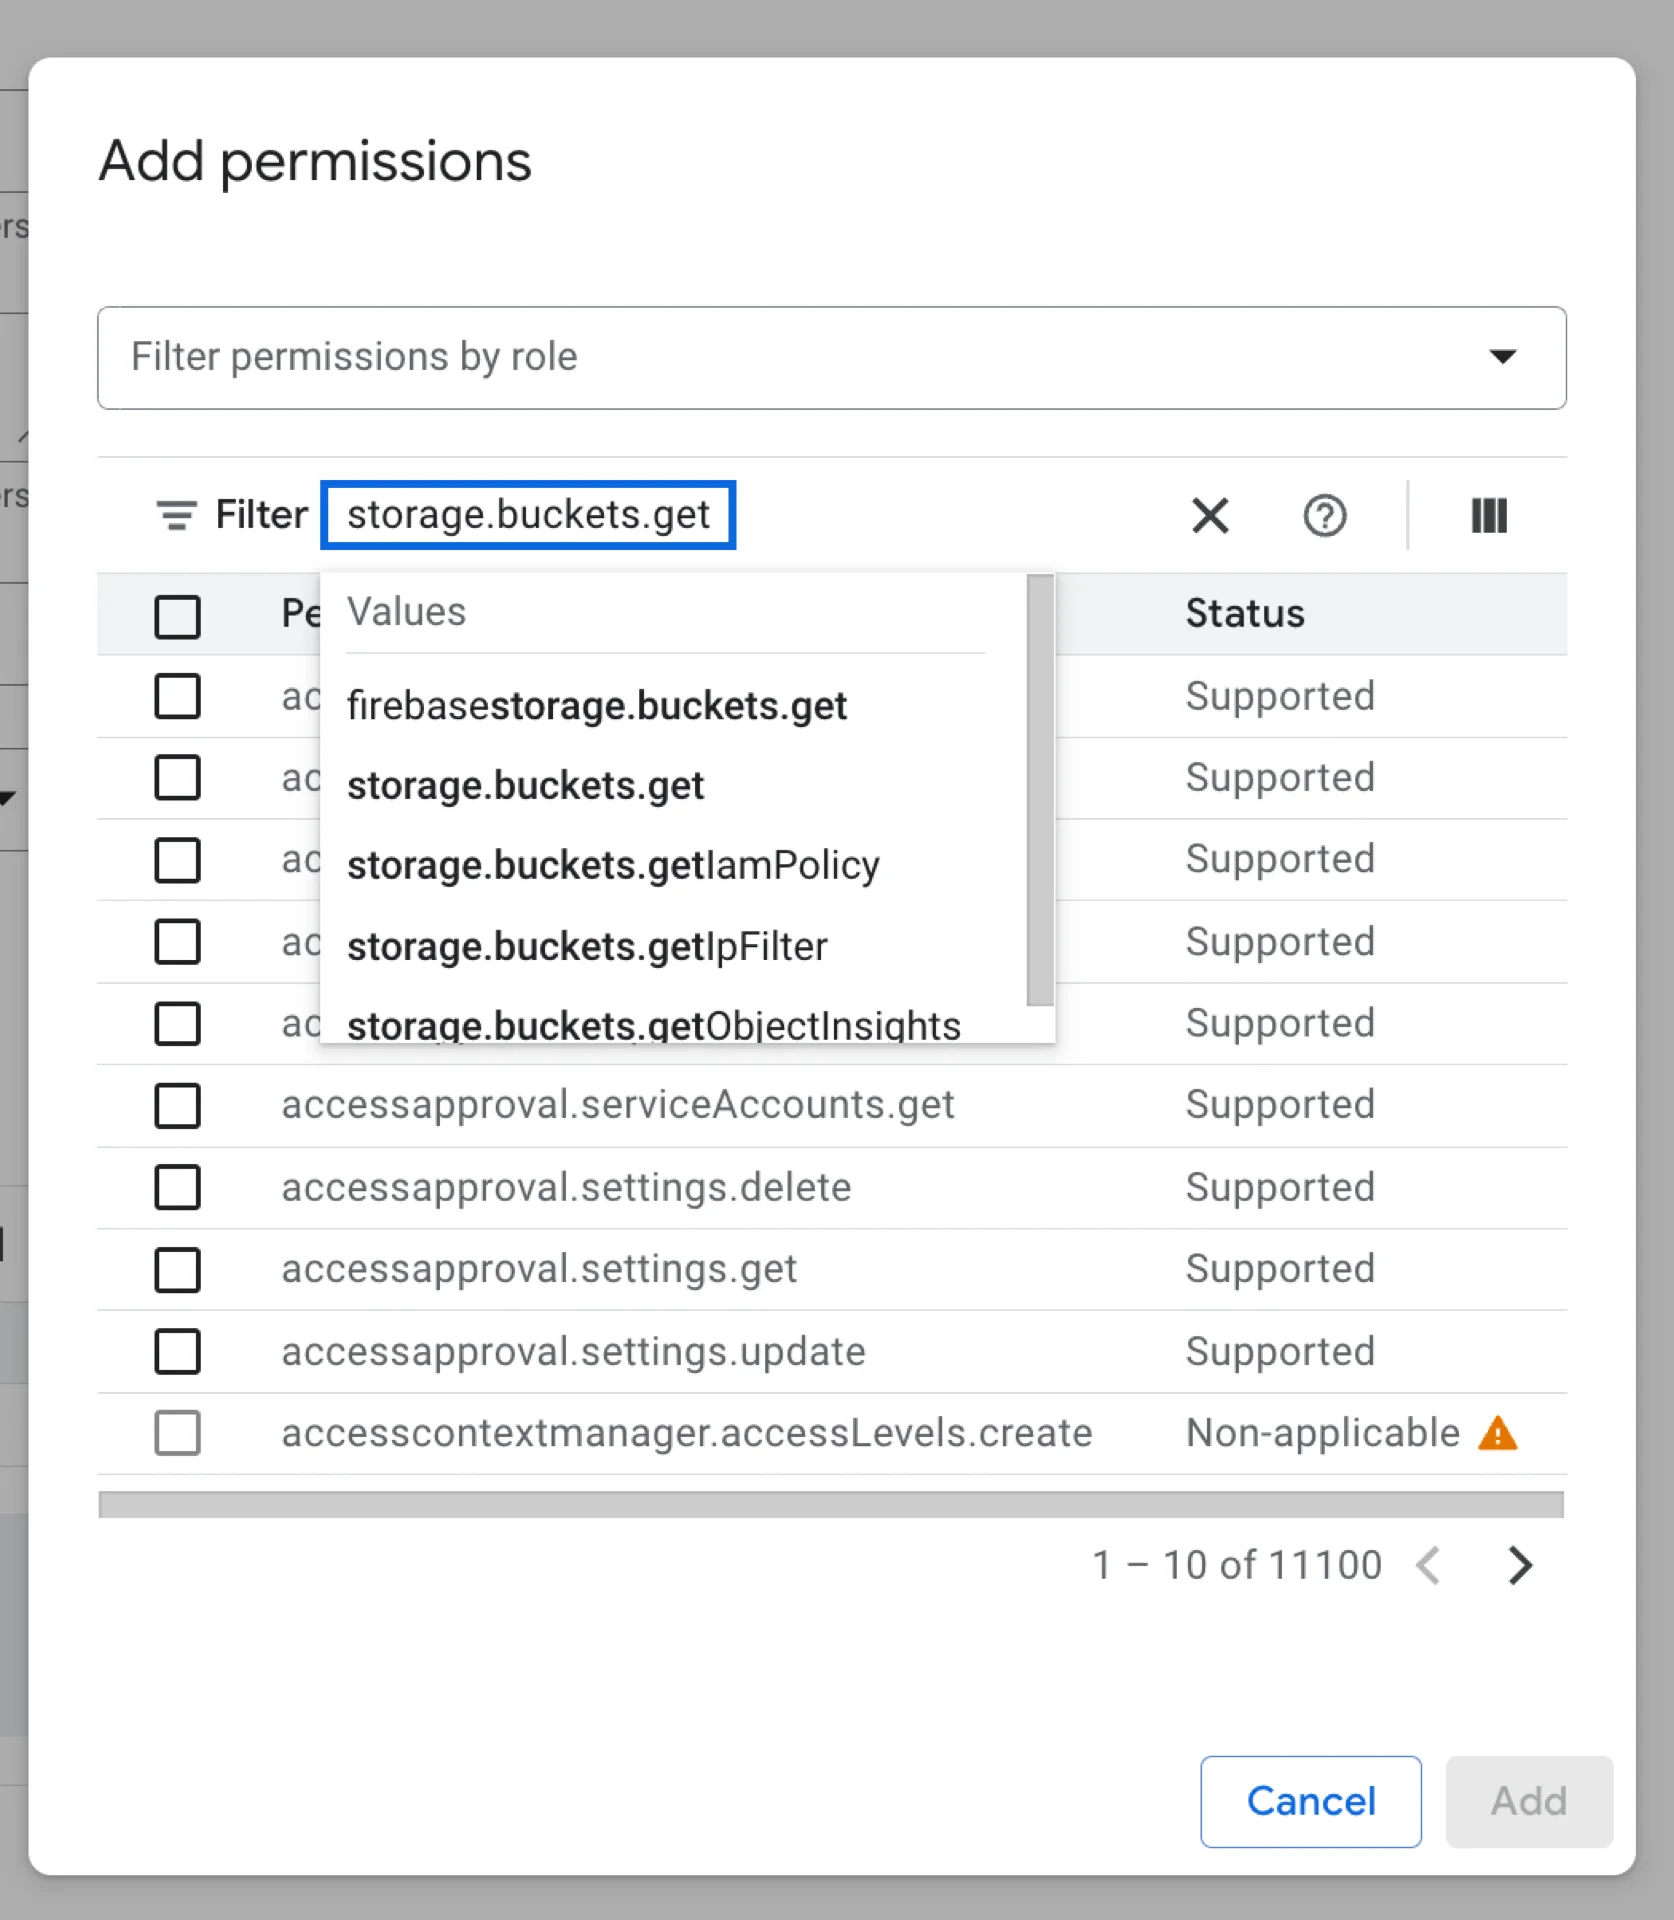
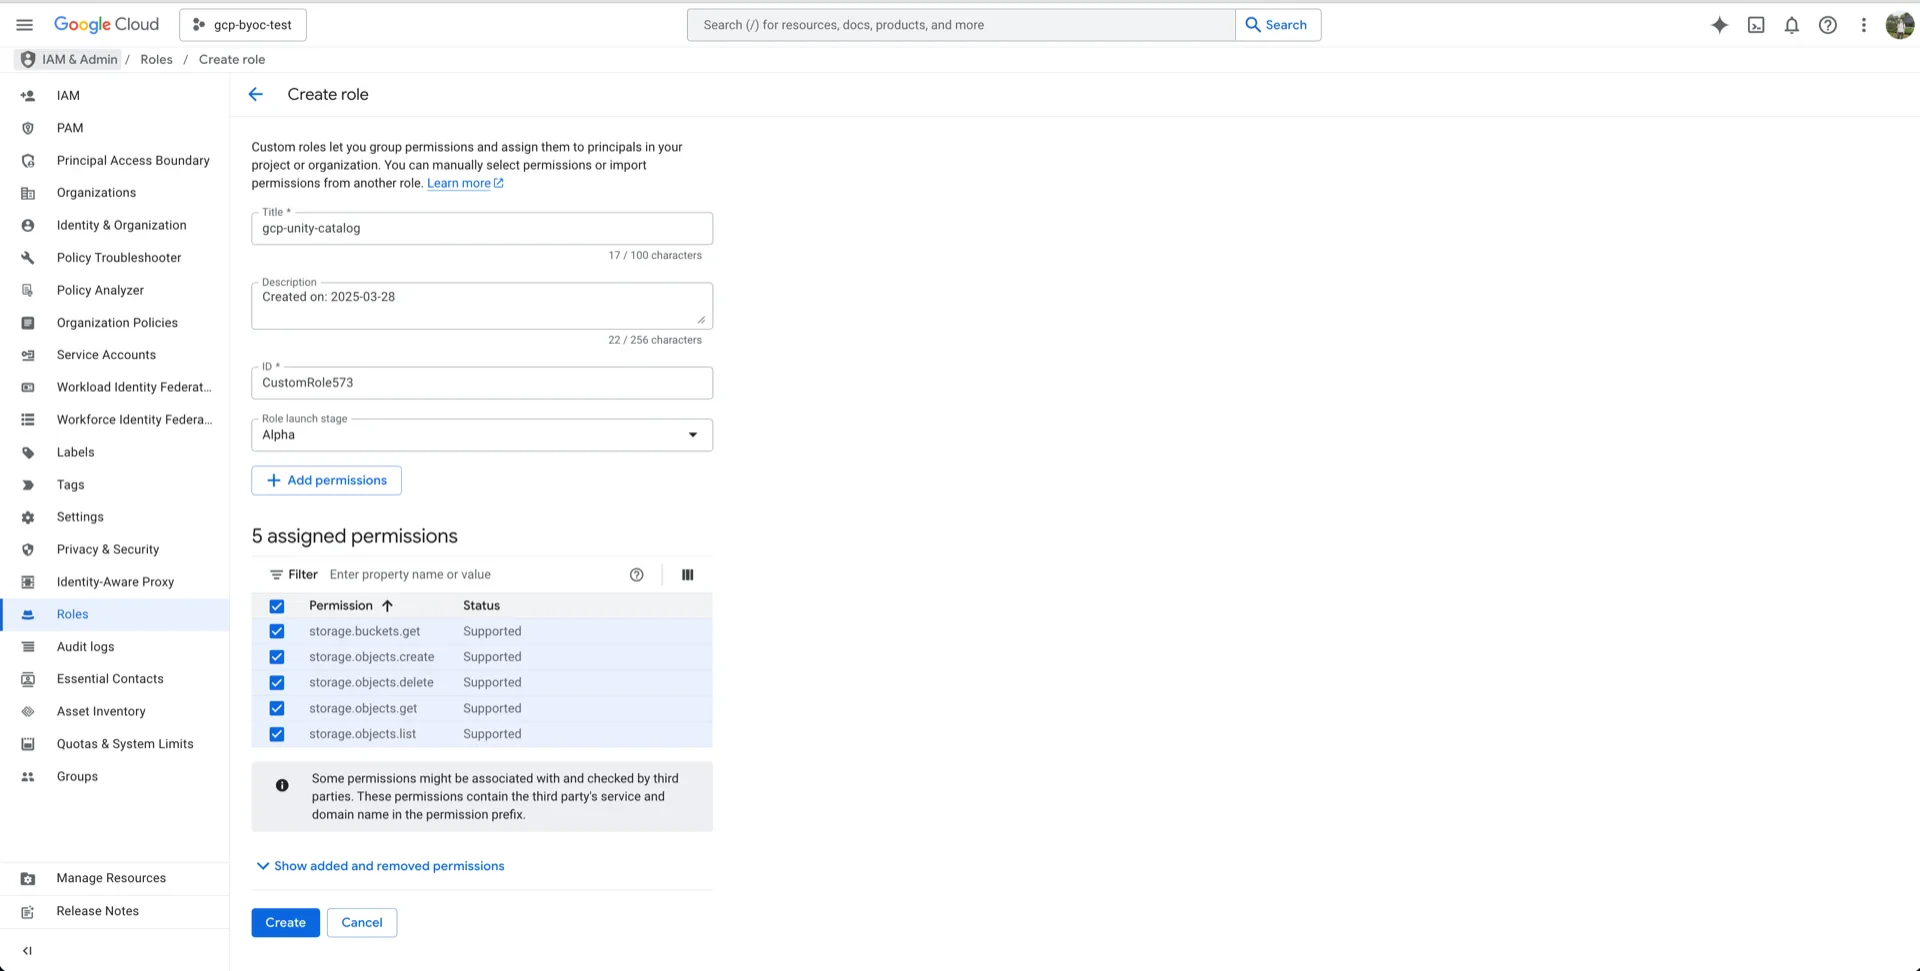
5.1 Create a Custom IAM Role

In the GCP console, navigate to IAM & Admin -> Roles -> Create role and add the following permissions:
  • storage.buckets.get
  • storage.objects.create
  • storage.objects.delete
  • storage.objects.get
  • storage.objects.list
Create role Role setup Permissions Permissions selected

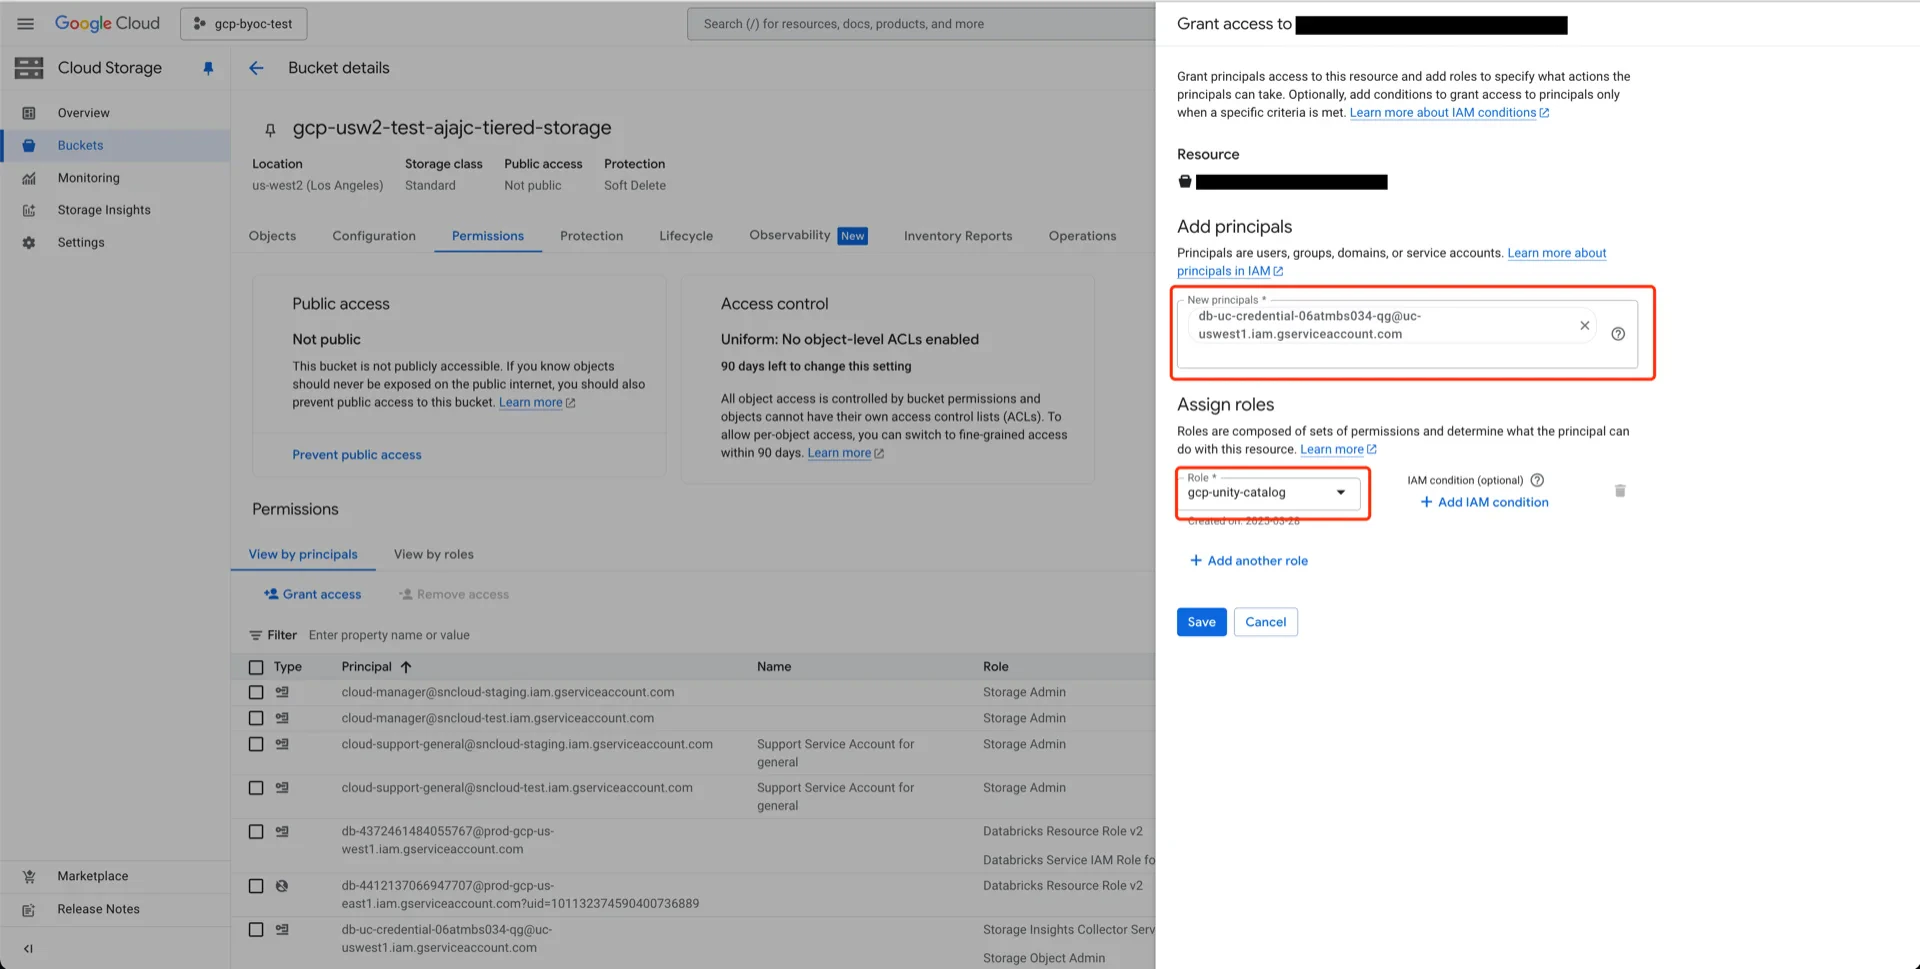
5.2 Assign the Role to the Databricks Service Account

Open your bucket, click PERMISSIONS -> View BY PRINCIPALS -> GRANT ACCESS. Grant bucket access Add the Databricks service account, select the role created in step 6.1, and click SAVE. Save access

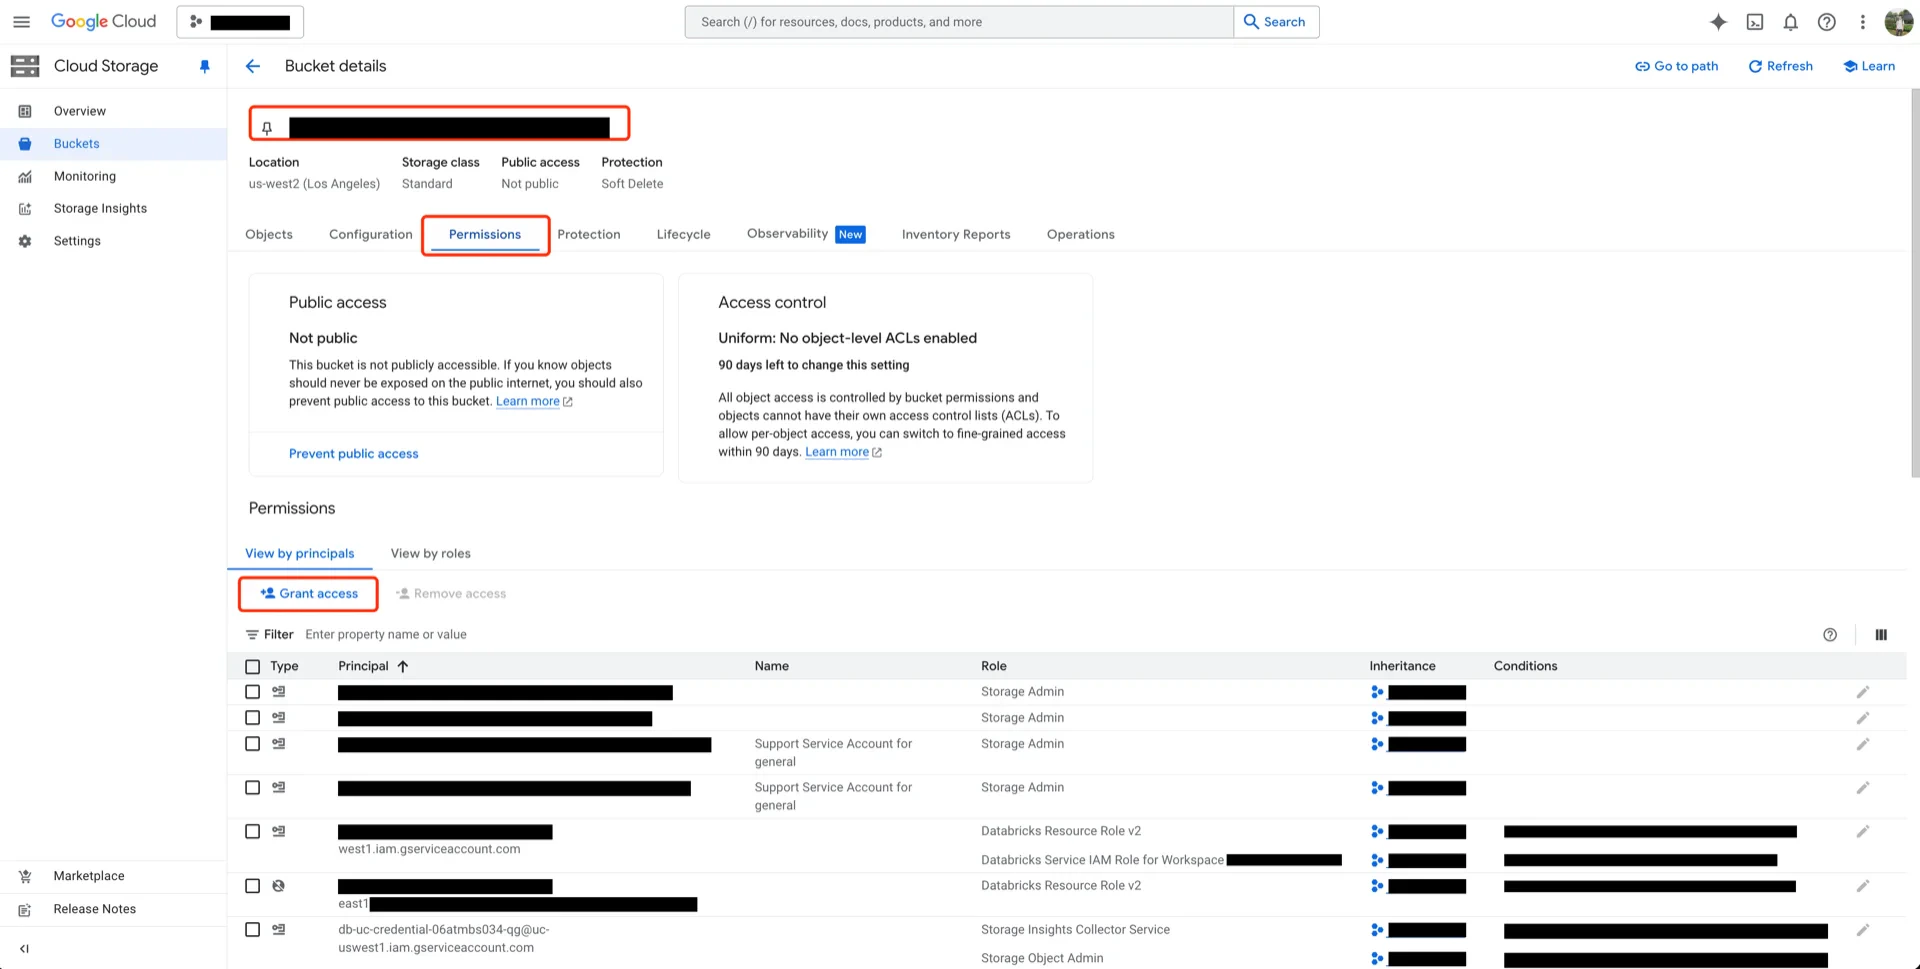
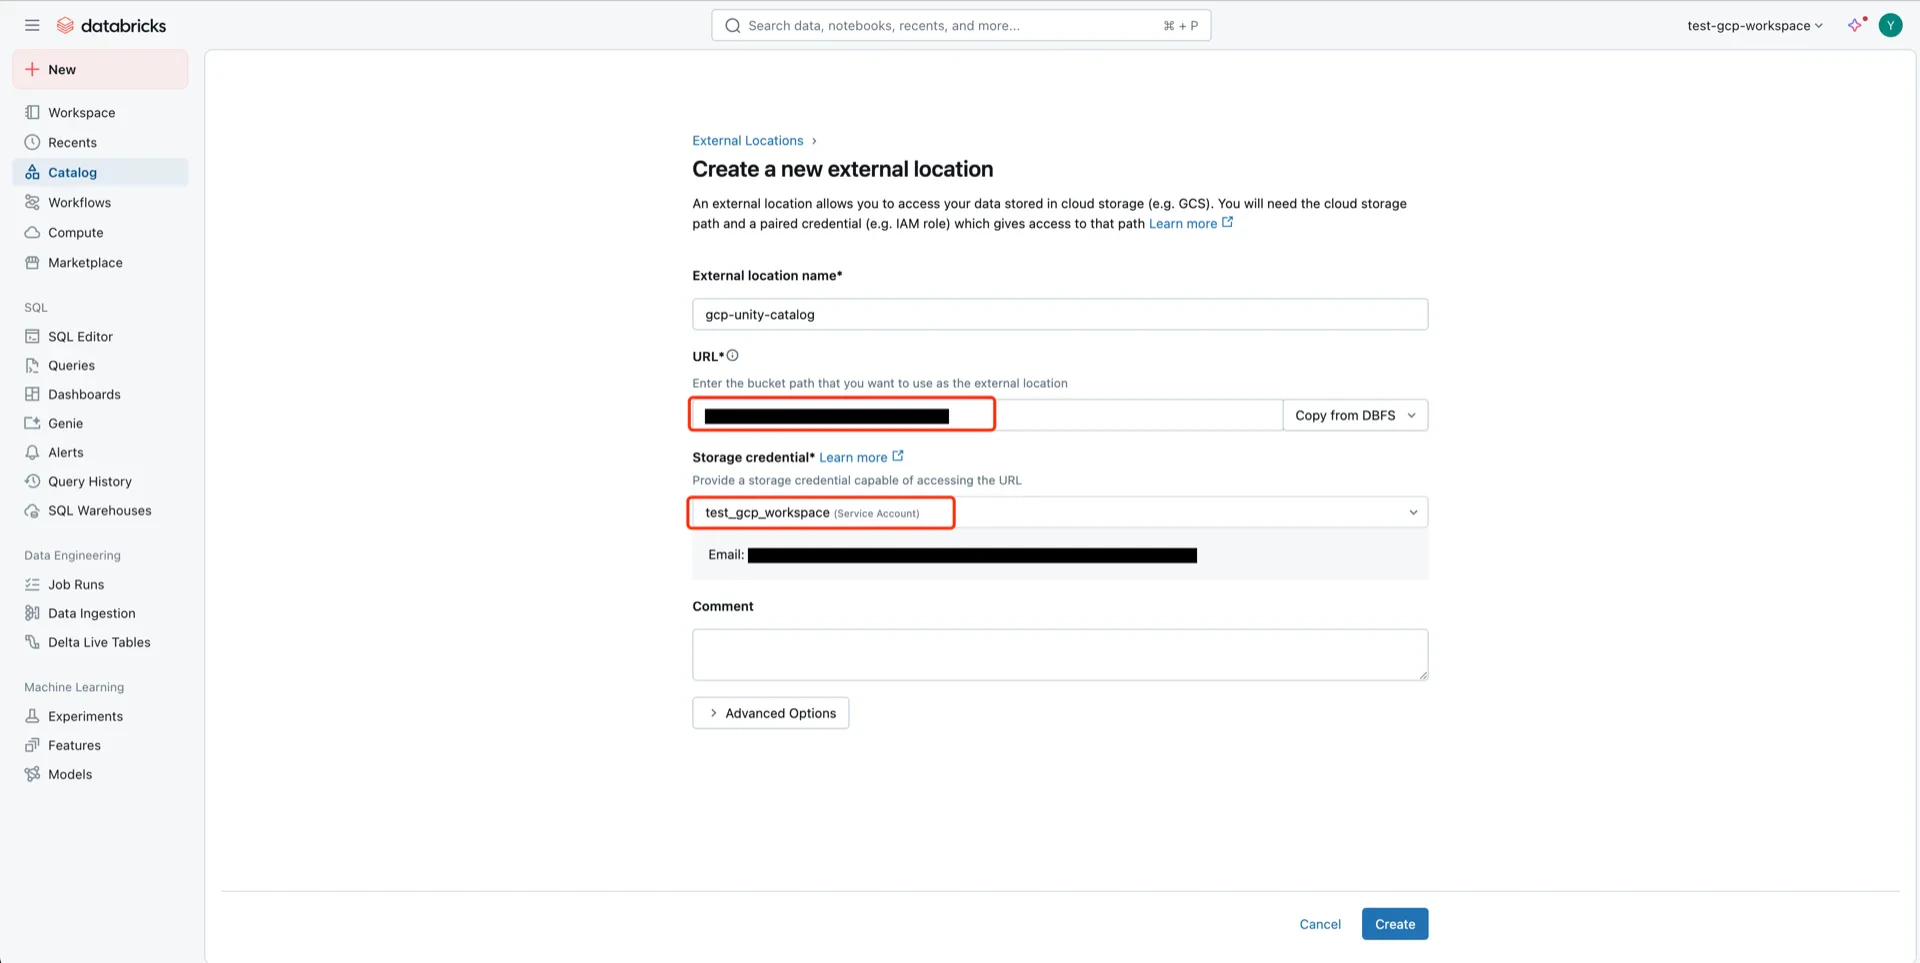
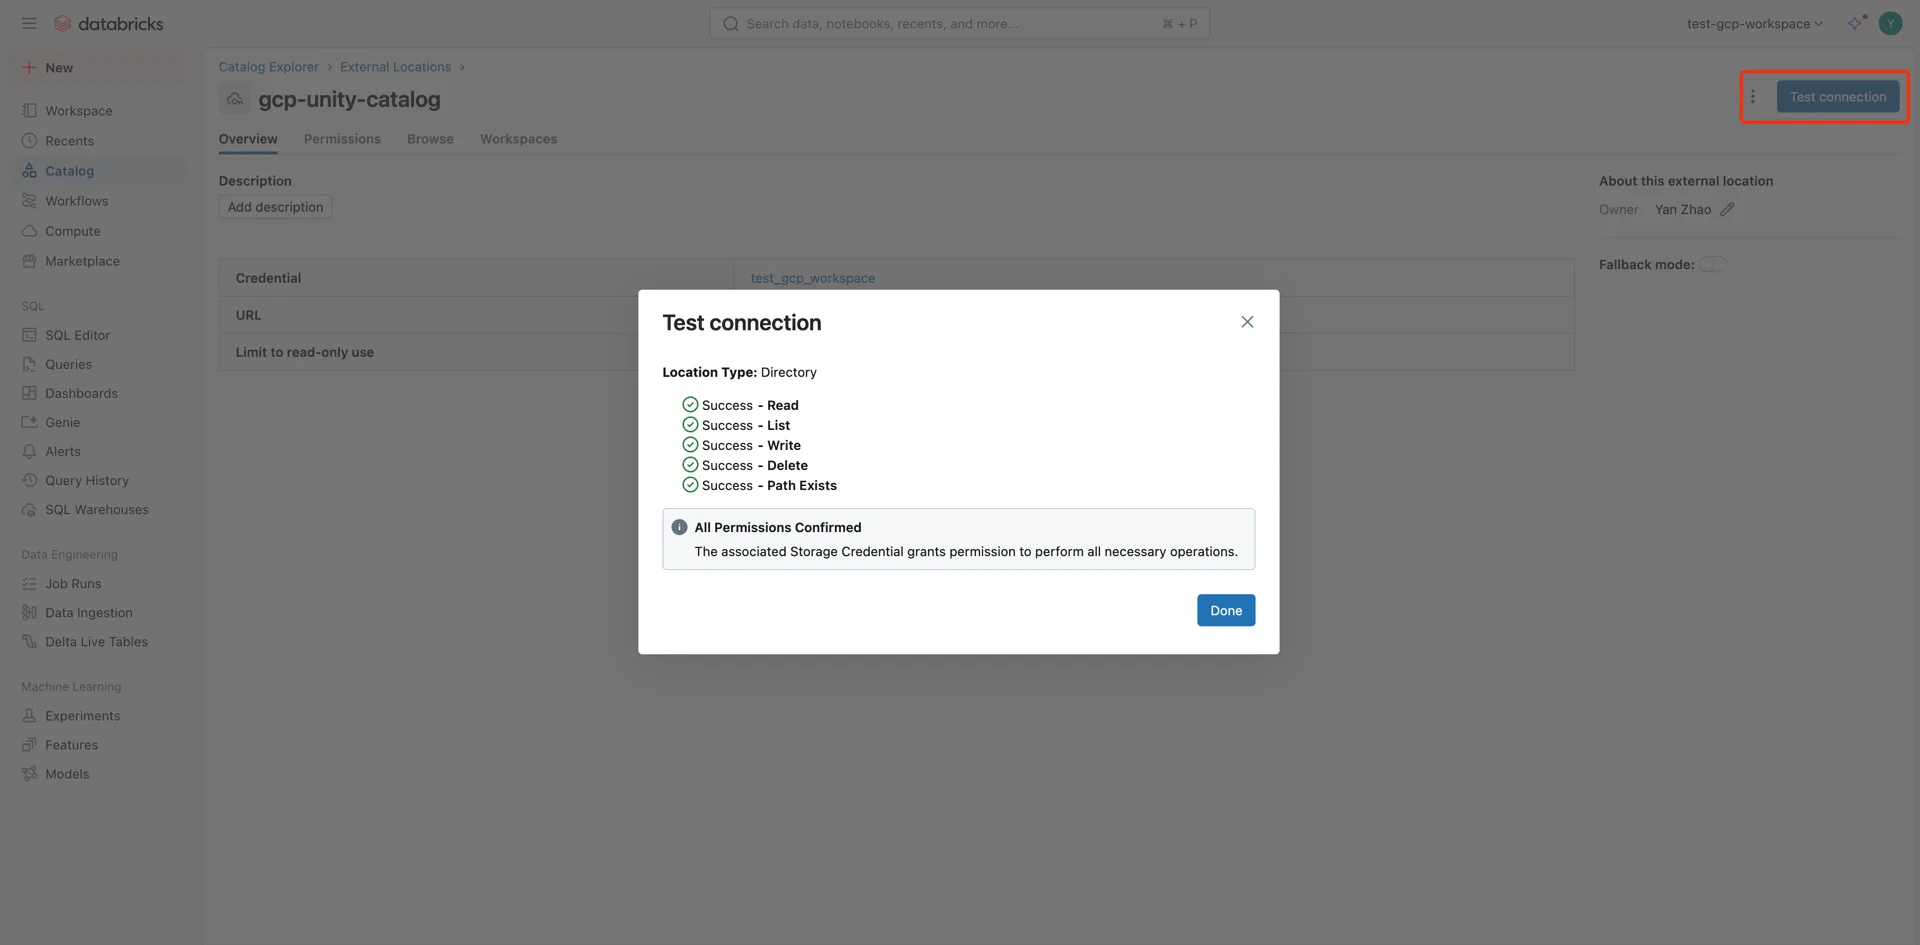
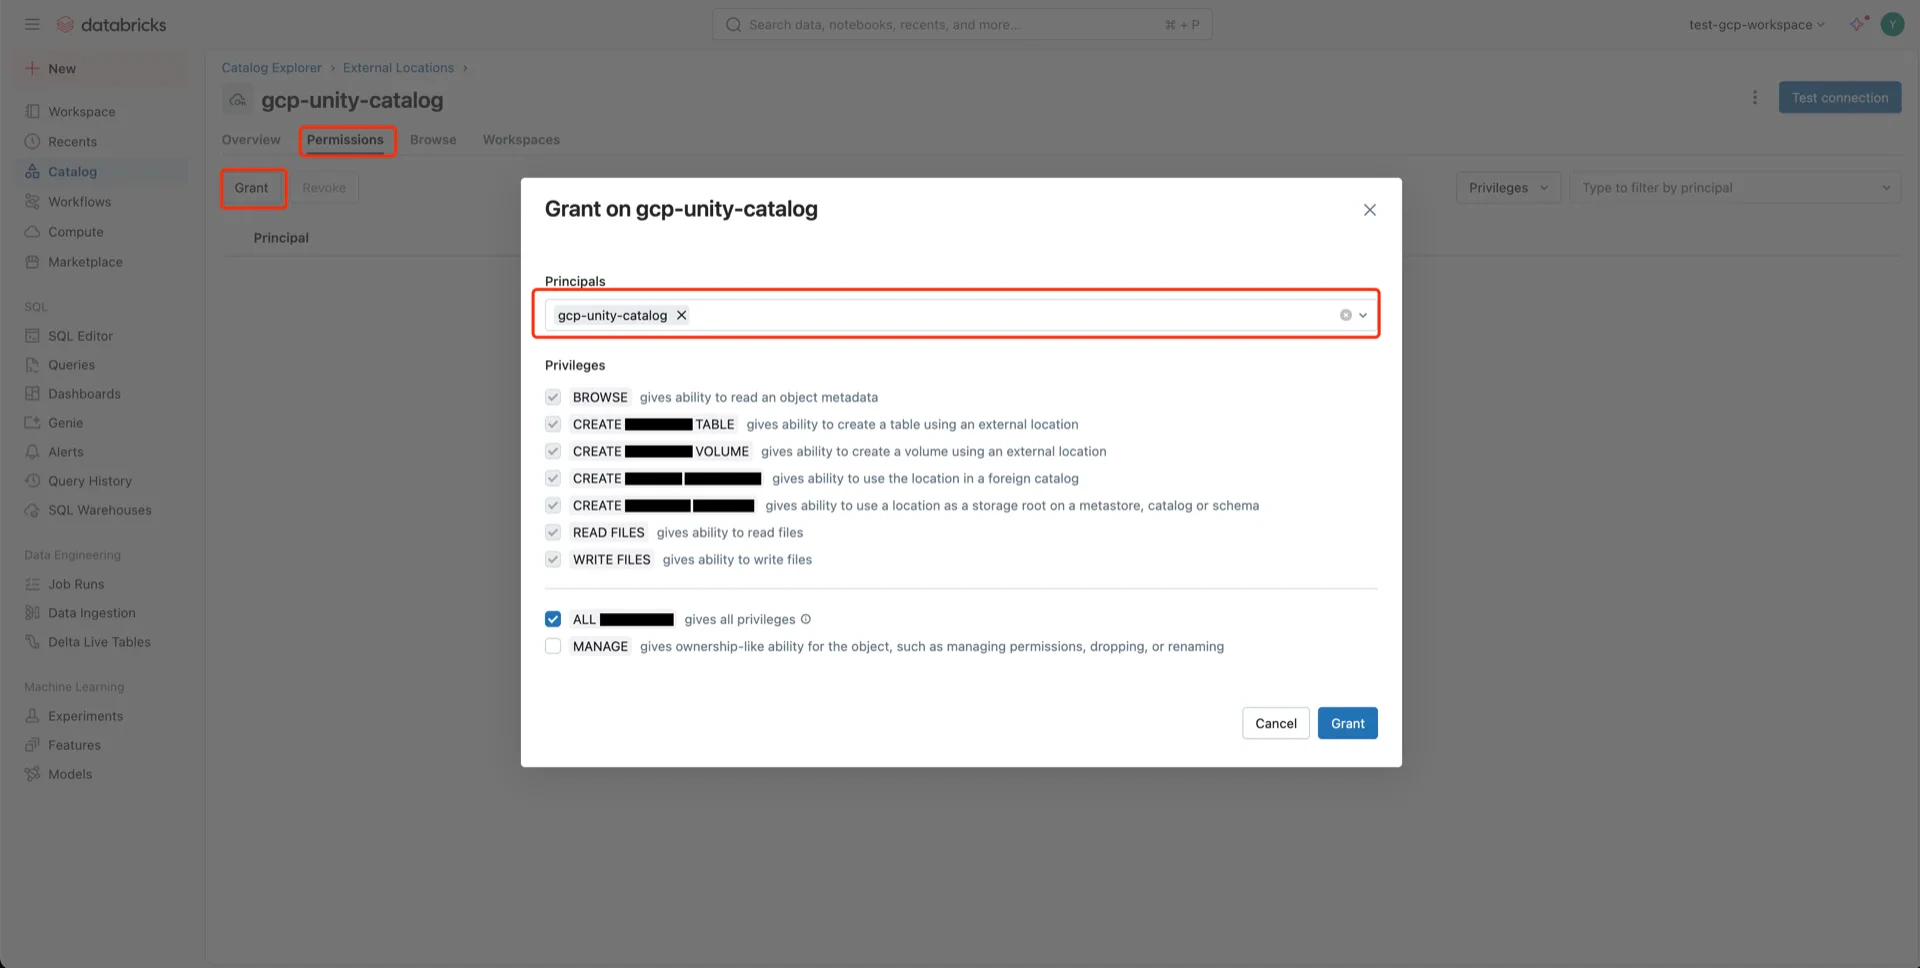
6. Create an External Location in Unity Catalog

Navigate to Catalog -> Settings -> External Locations and create a new external location. External locations Create external location Configure with:
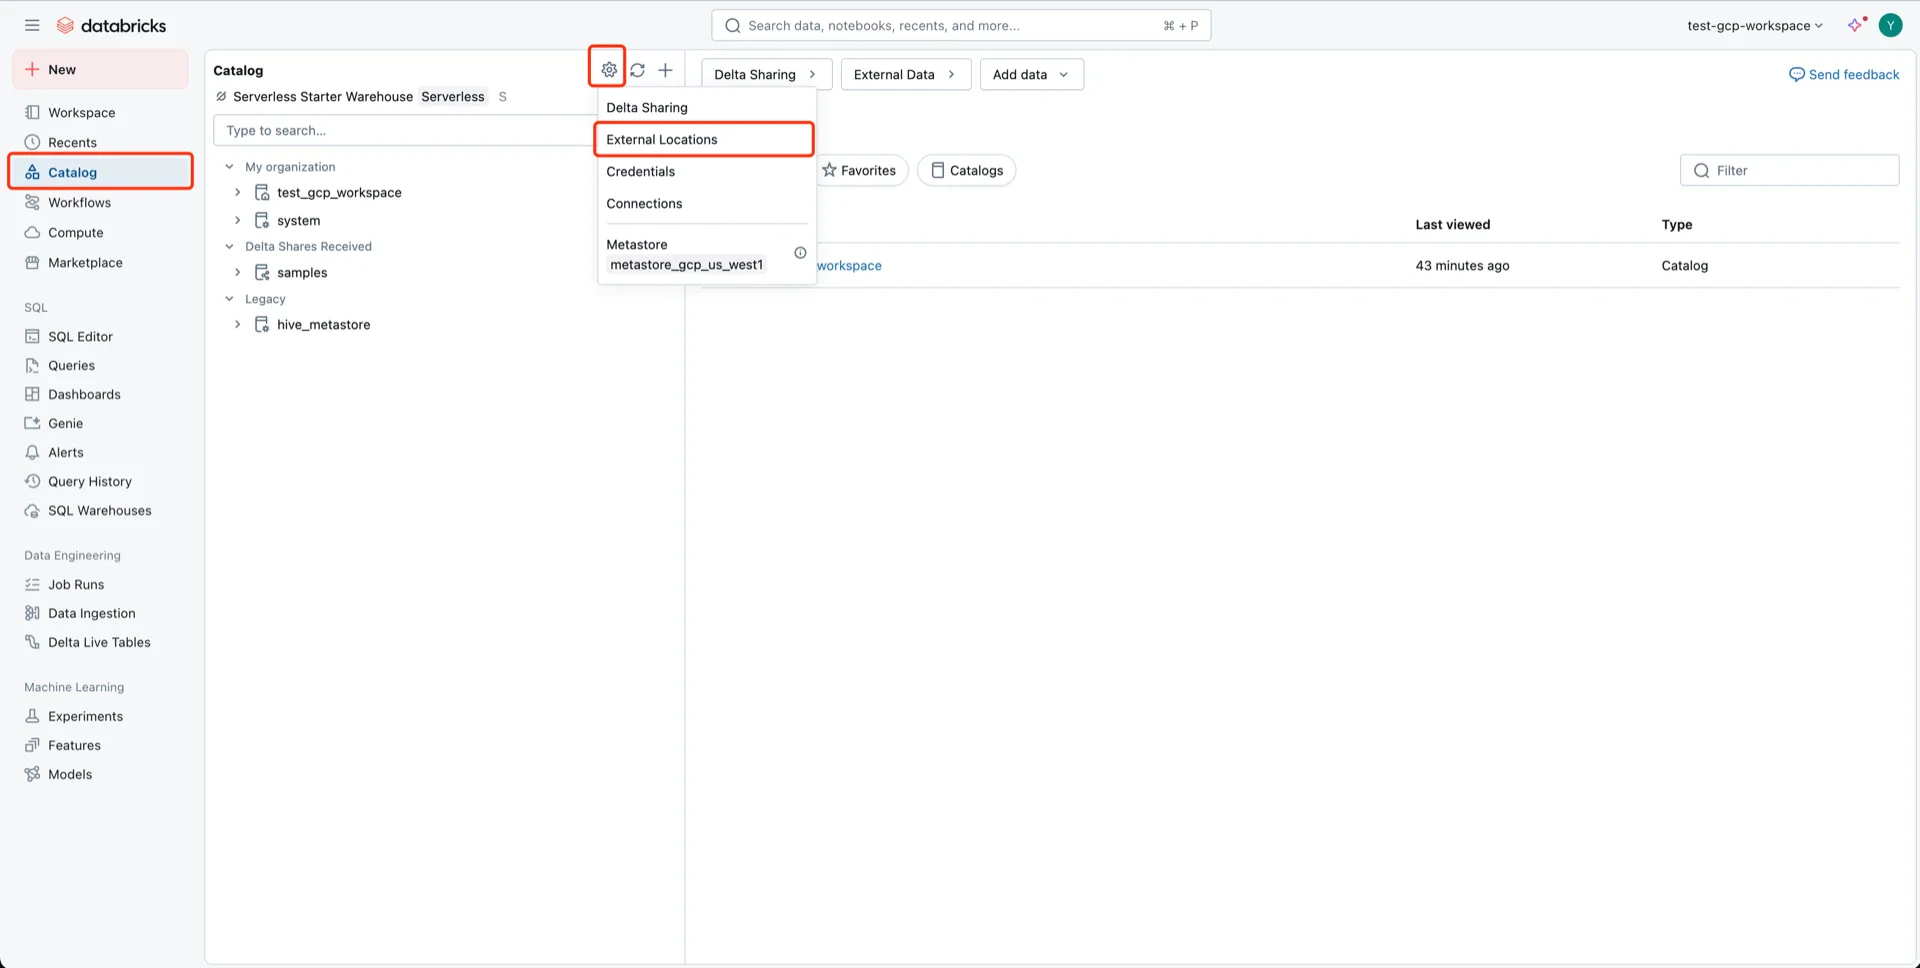
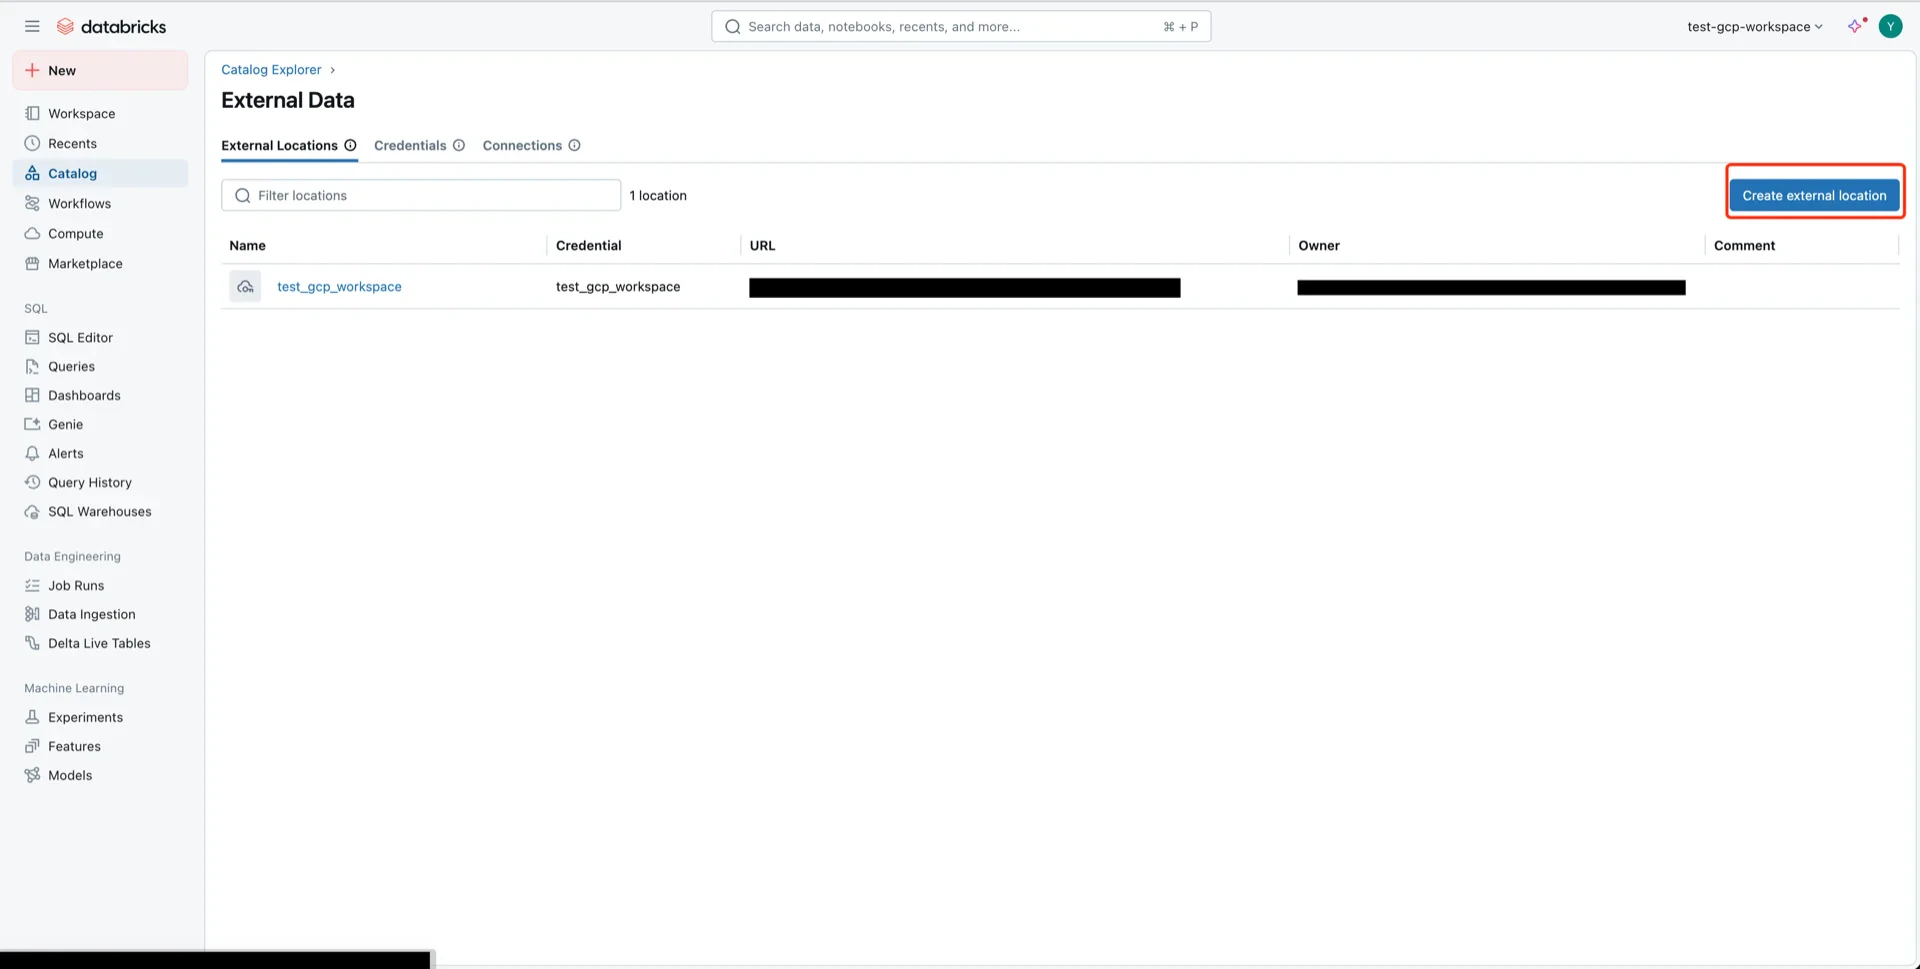
  • External location name: any name
  • URL: the GCS bucket path
  • Storage credential: the Unity Catalog credential
External location form Click Test connection to verify access. External location created Grant ALL PRIVILEGES on the external location to the service principal. Grant OAuth2 permissions

Catalog Information Summary

When the steps above are complete, collect the following values for the StreamNative Ursa compaction service:
ValueDescription
unityCatalogUriDatabricks workspace URL (e.g., https://<workspace>.gcp.databricks.com)
unityCatalogNameThe Unity Catalog name
unityCatalogTokenPersonal access token from step 2, or
unityCatalogClientId / unityCatalogClientSecretOAuth2 credentials from step 3
For the next steps, see Configure Lakehouse Catalogs.