
Documentation Index

Fetch the complete documentation index at: https://docs.streamnative.io/llms.txt

Use this file to discover all available pages before exploring further.

This guide describes how to prepare a Databricks Unity Catalog for use with StreamNative Ursa as a Delta Lake catalog on Microsoft Azure.

Prerequisites

  • An Azure subscription with permissions to create storage accounts and Access Connectors
  • A Databricks workspace on Azure

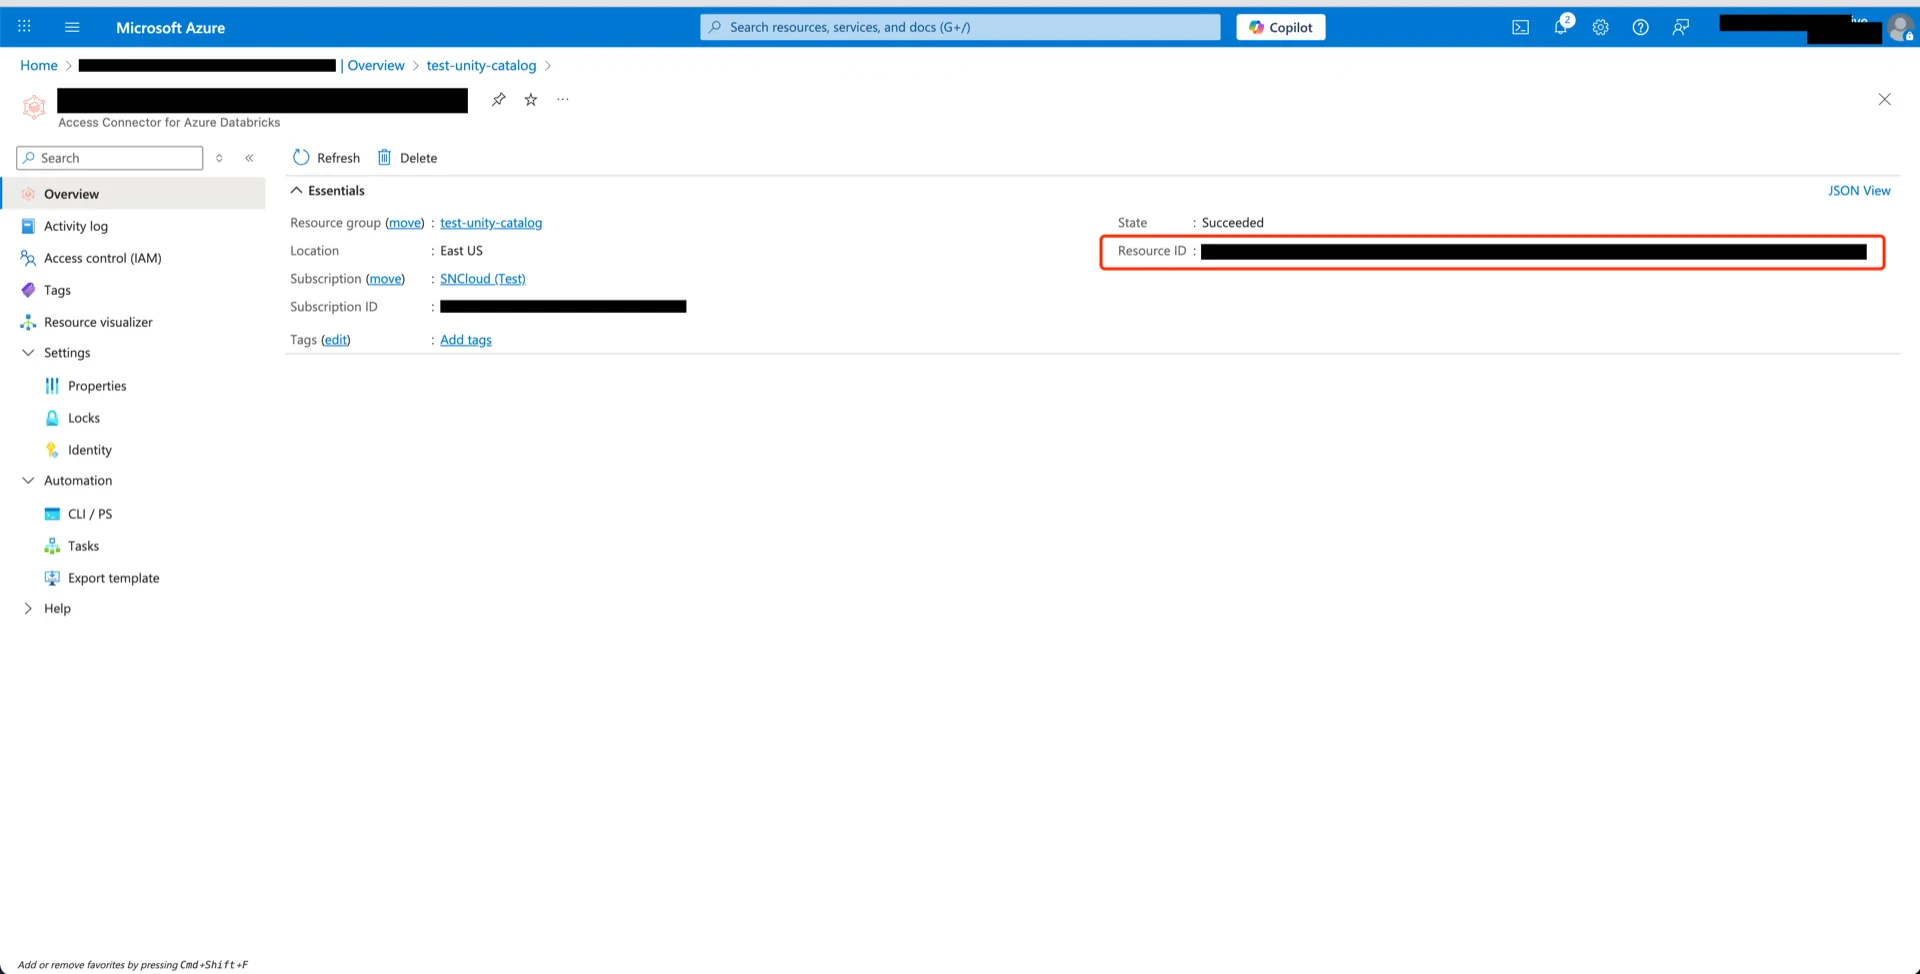
1. Create an Access Connector for Azure Databricks

In the Azure Marketplace, search for Access Connector for Azure Databricks and click Create. Search Access Connector Choose the resource group, provide a connector name (for example, 
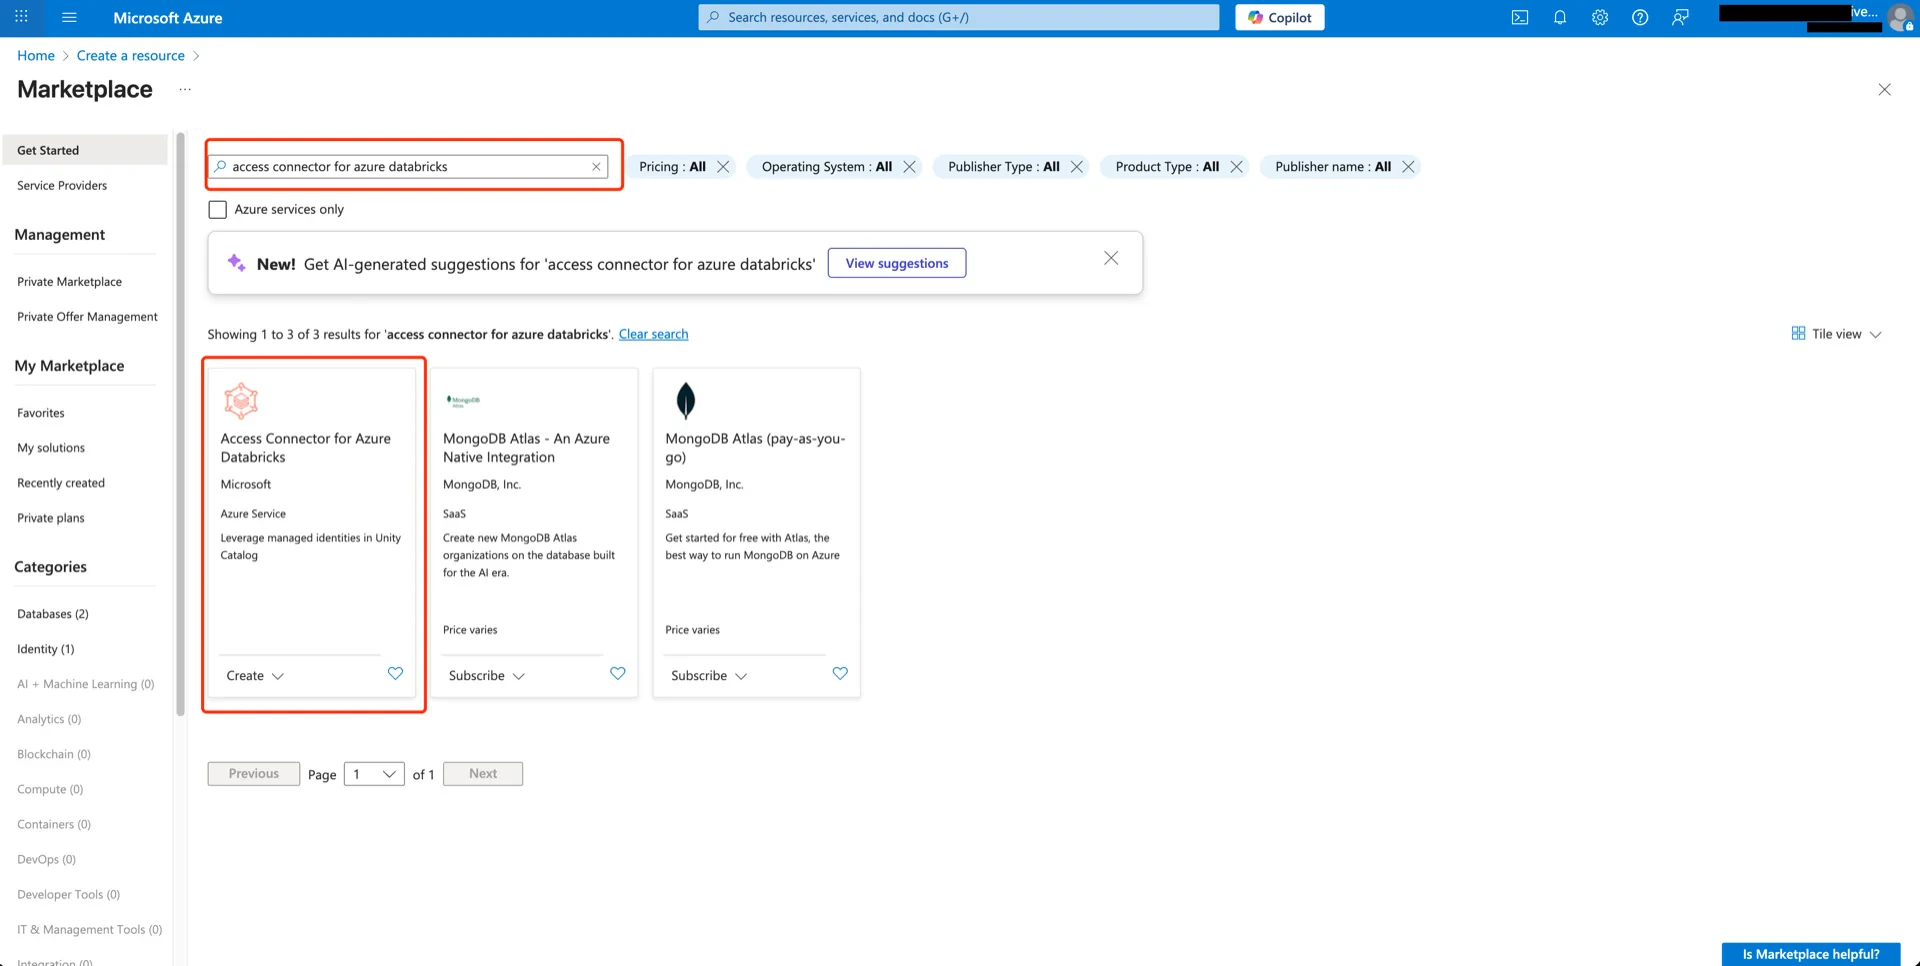
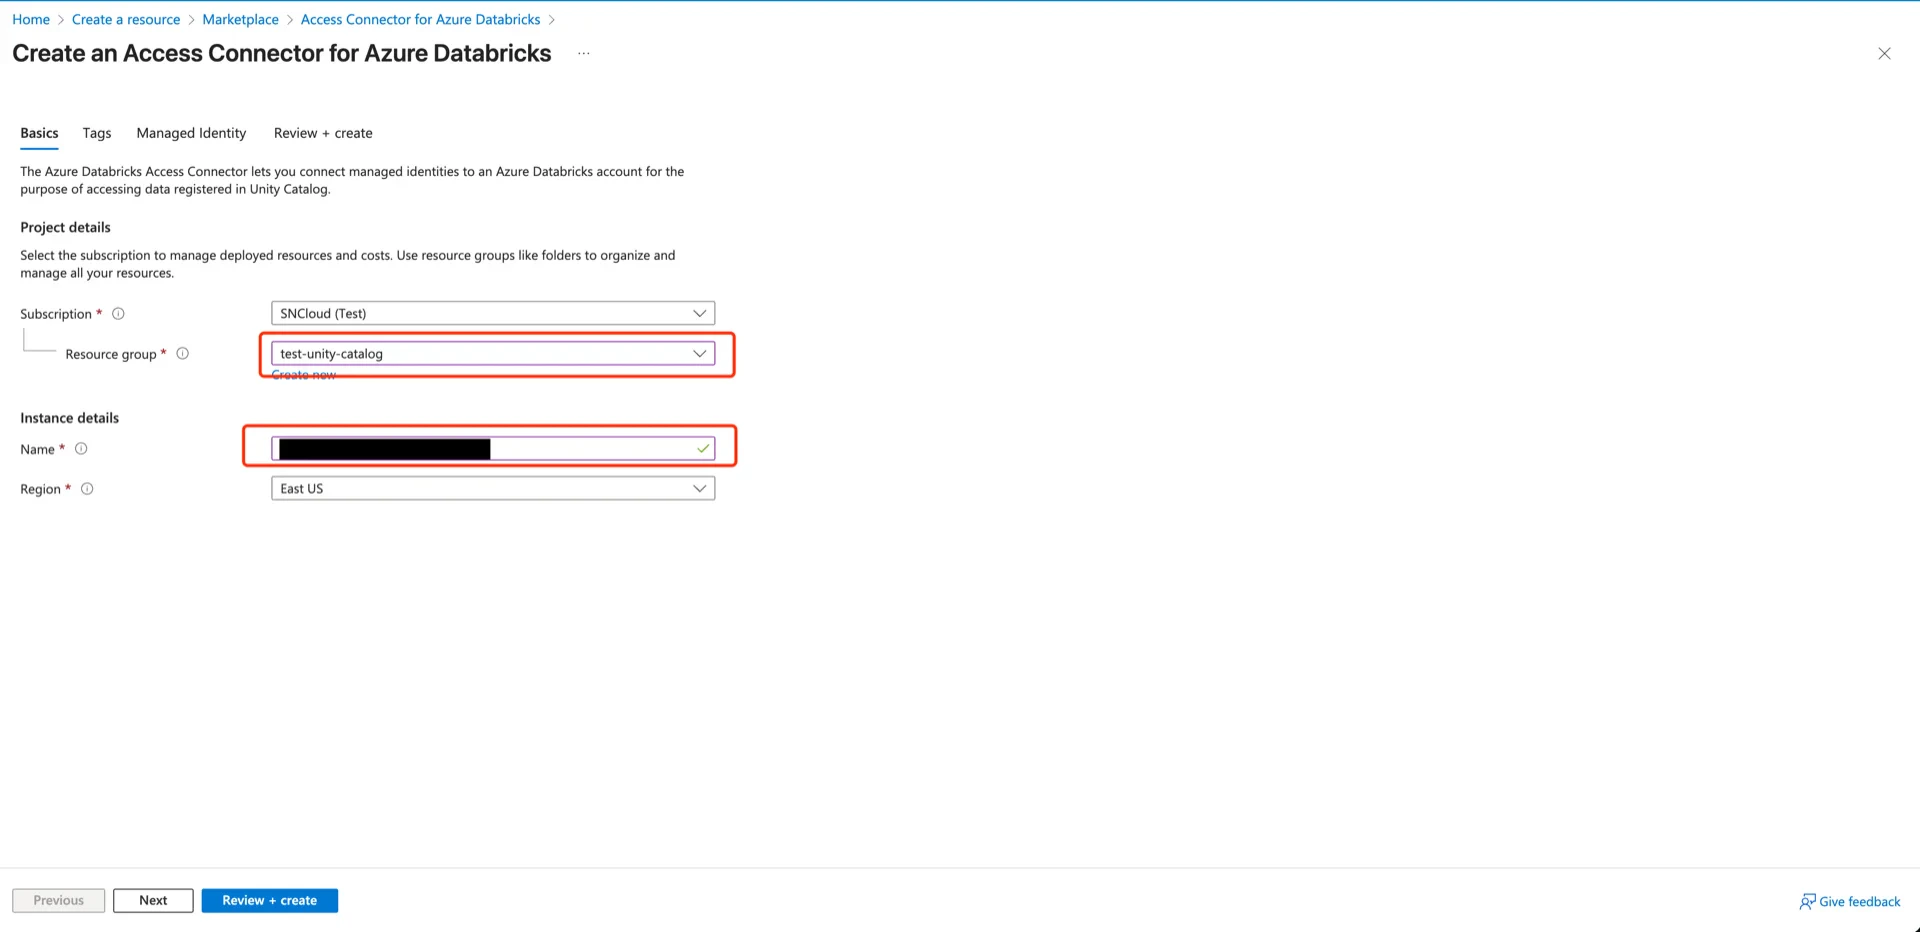
unity-catalog-access-connector), and click Next. Connector configuration In the Managed Identity panel, enable System assigned identity, then click Next -> Create. Enable managed identity Connector created Record the connector Resource ID: Connector Resource ID

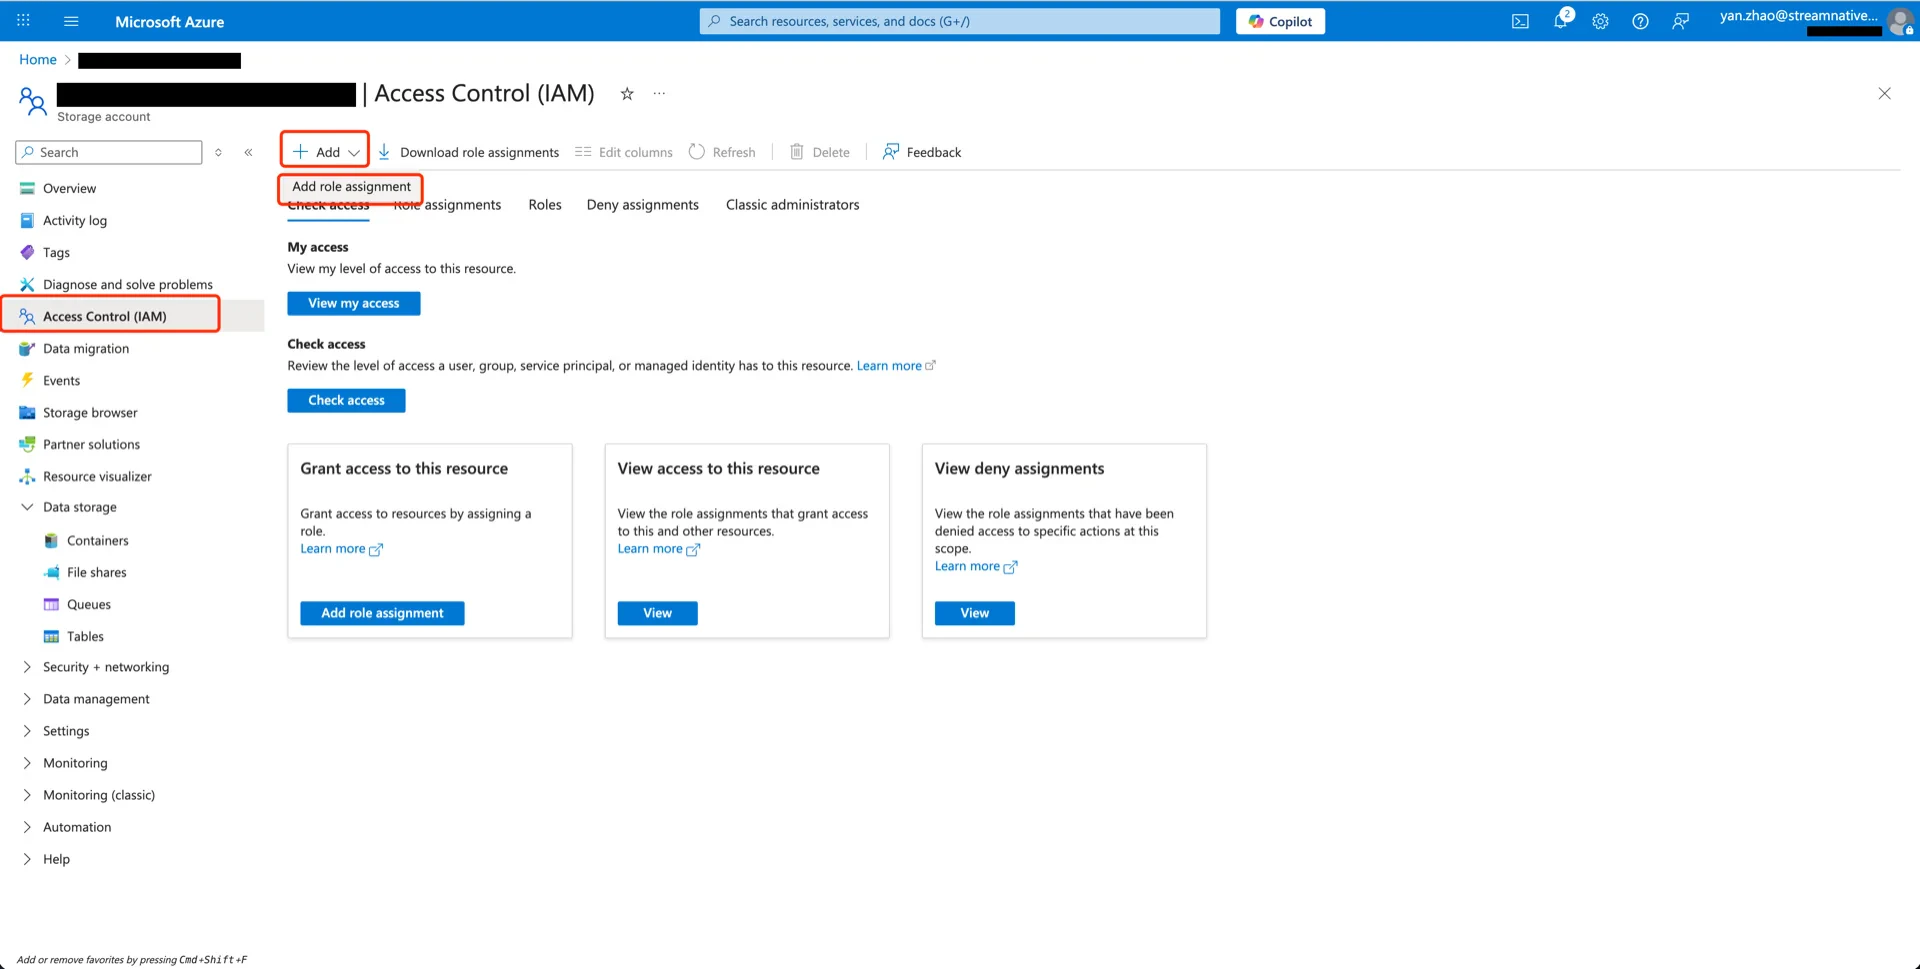
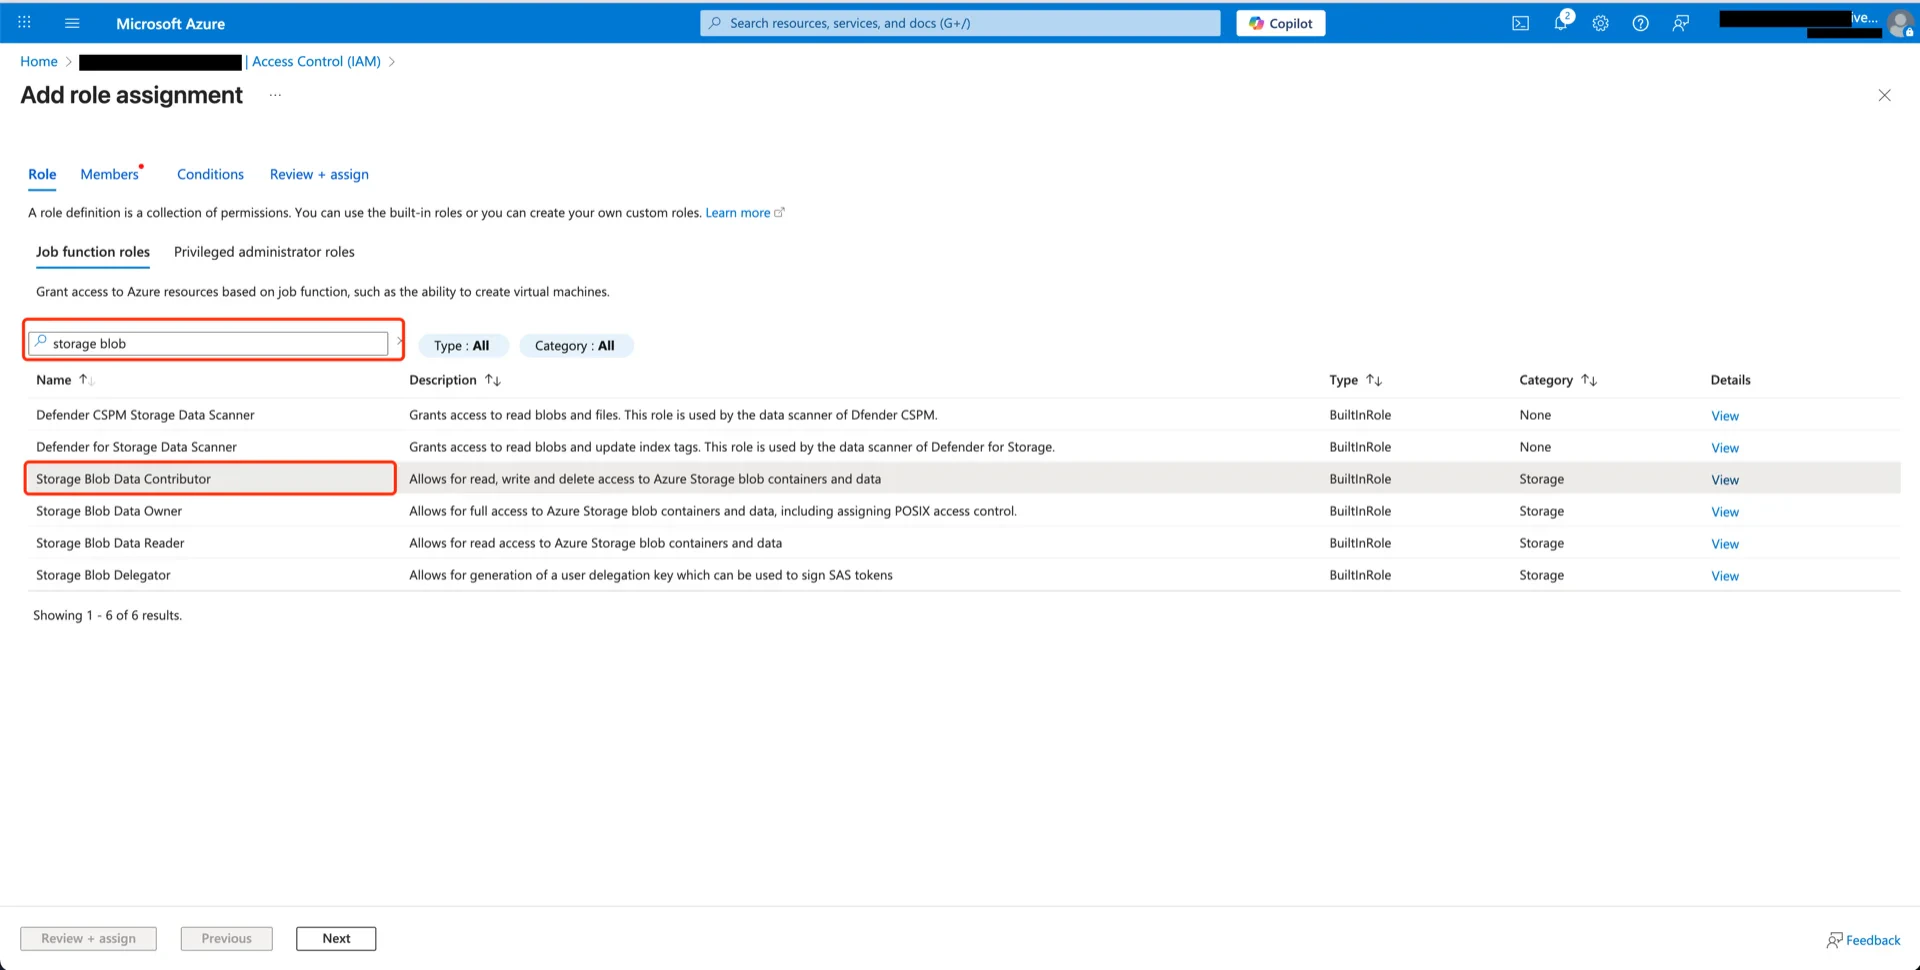
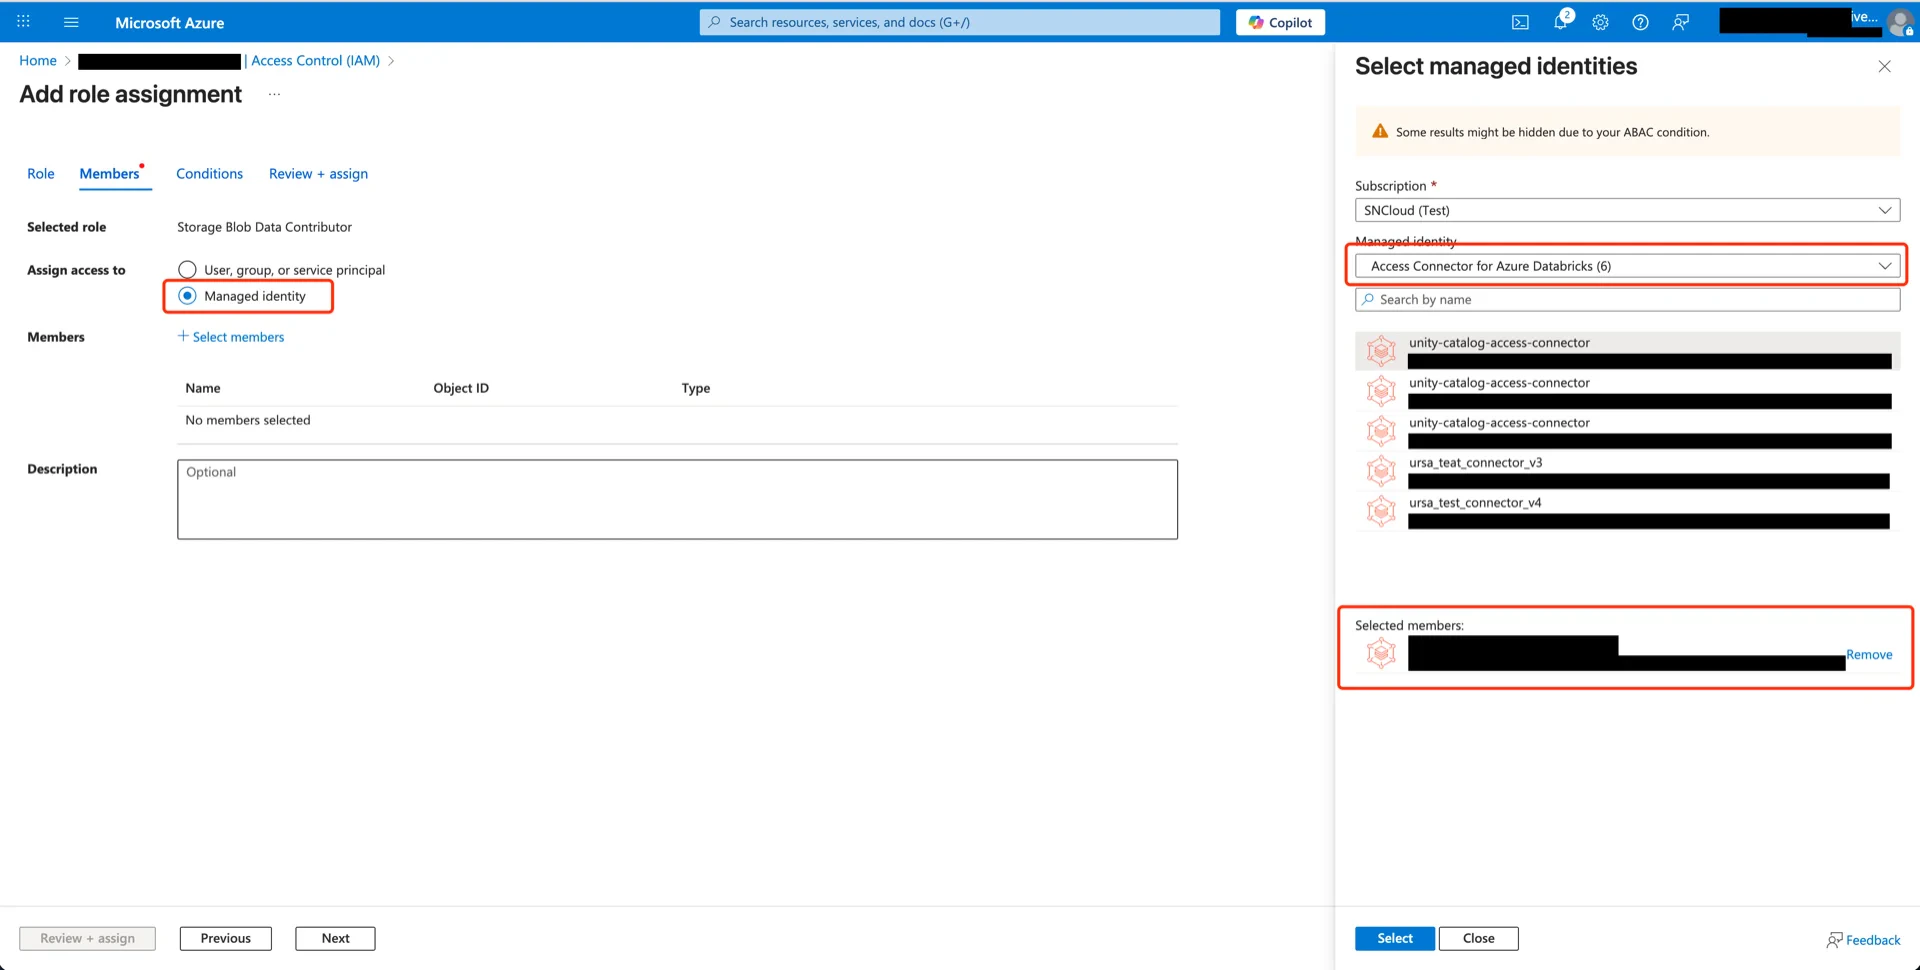
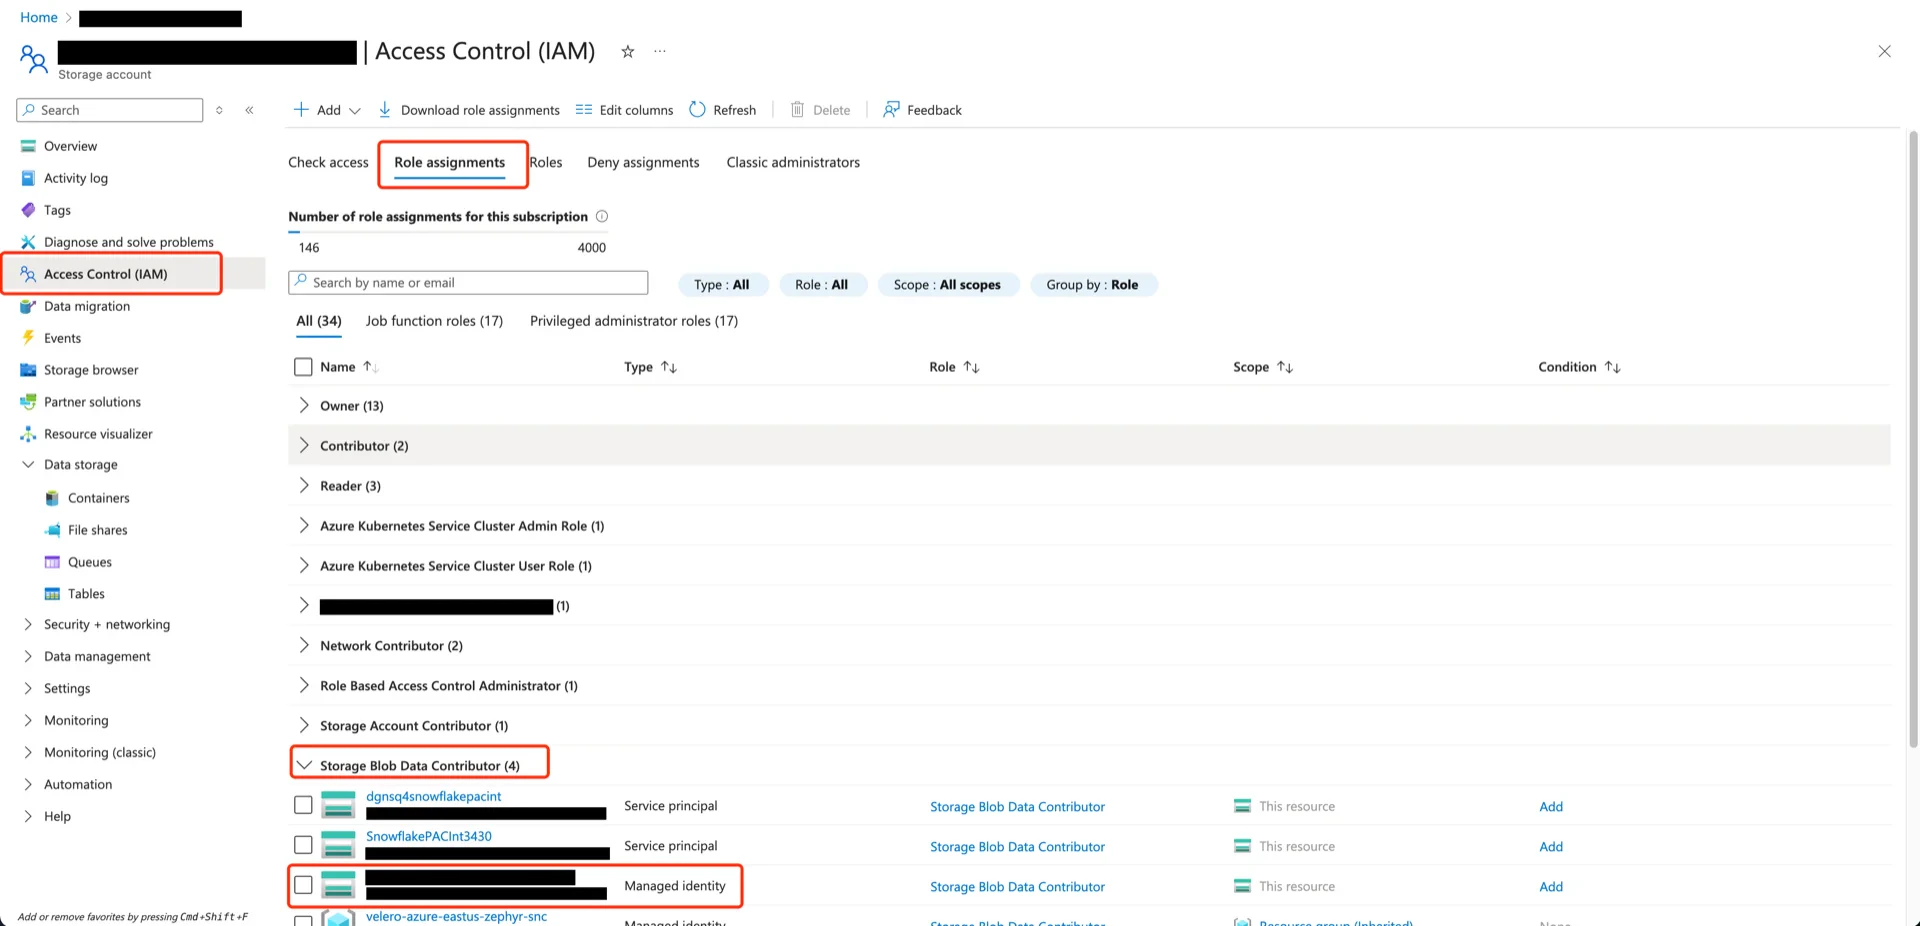
2. Grant Storage Blob Data Contributor to the Connector

Open the storage account that will hold the Delta tables, navigate to Access Control (IAM) -> Add -> Add role assignment. Access control Search for and select Storage Blob Data Contributor, then click Next. Select Blob Data Contributor Choose Managed identity and select the Access Connector created in step 1. Select members Click Next -> Review + assign. Role assigned

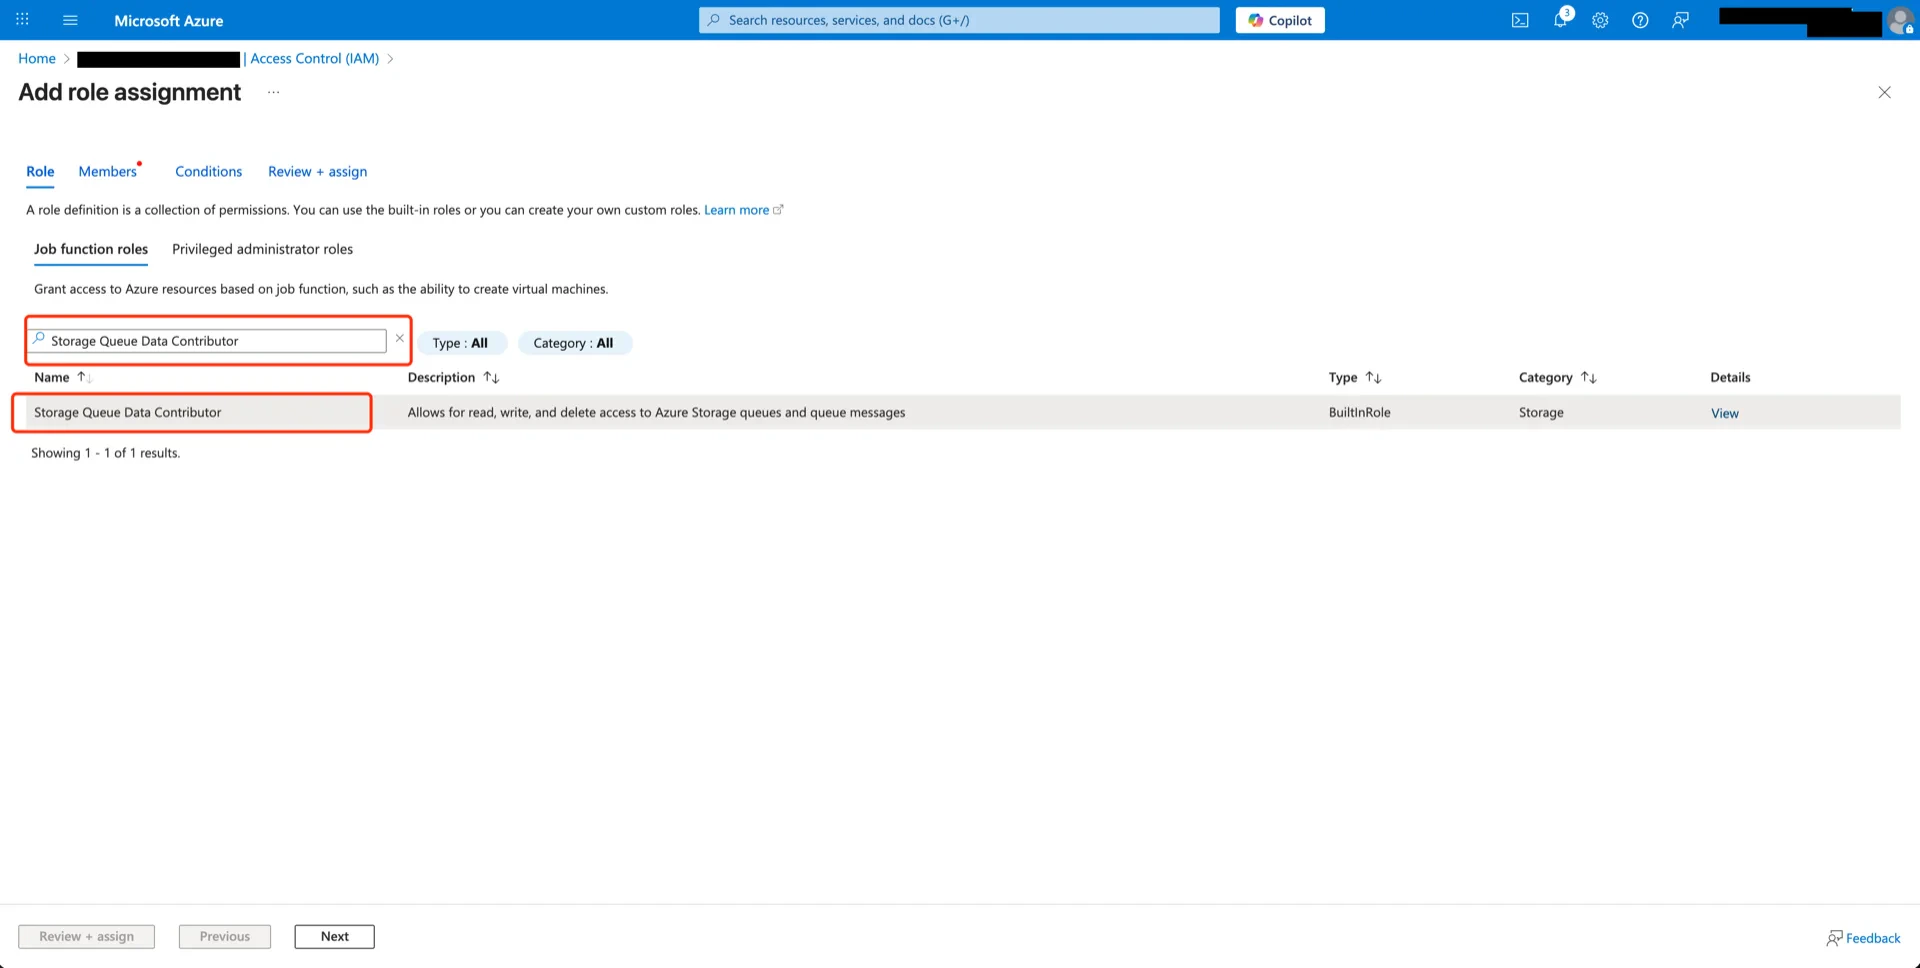
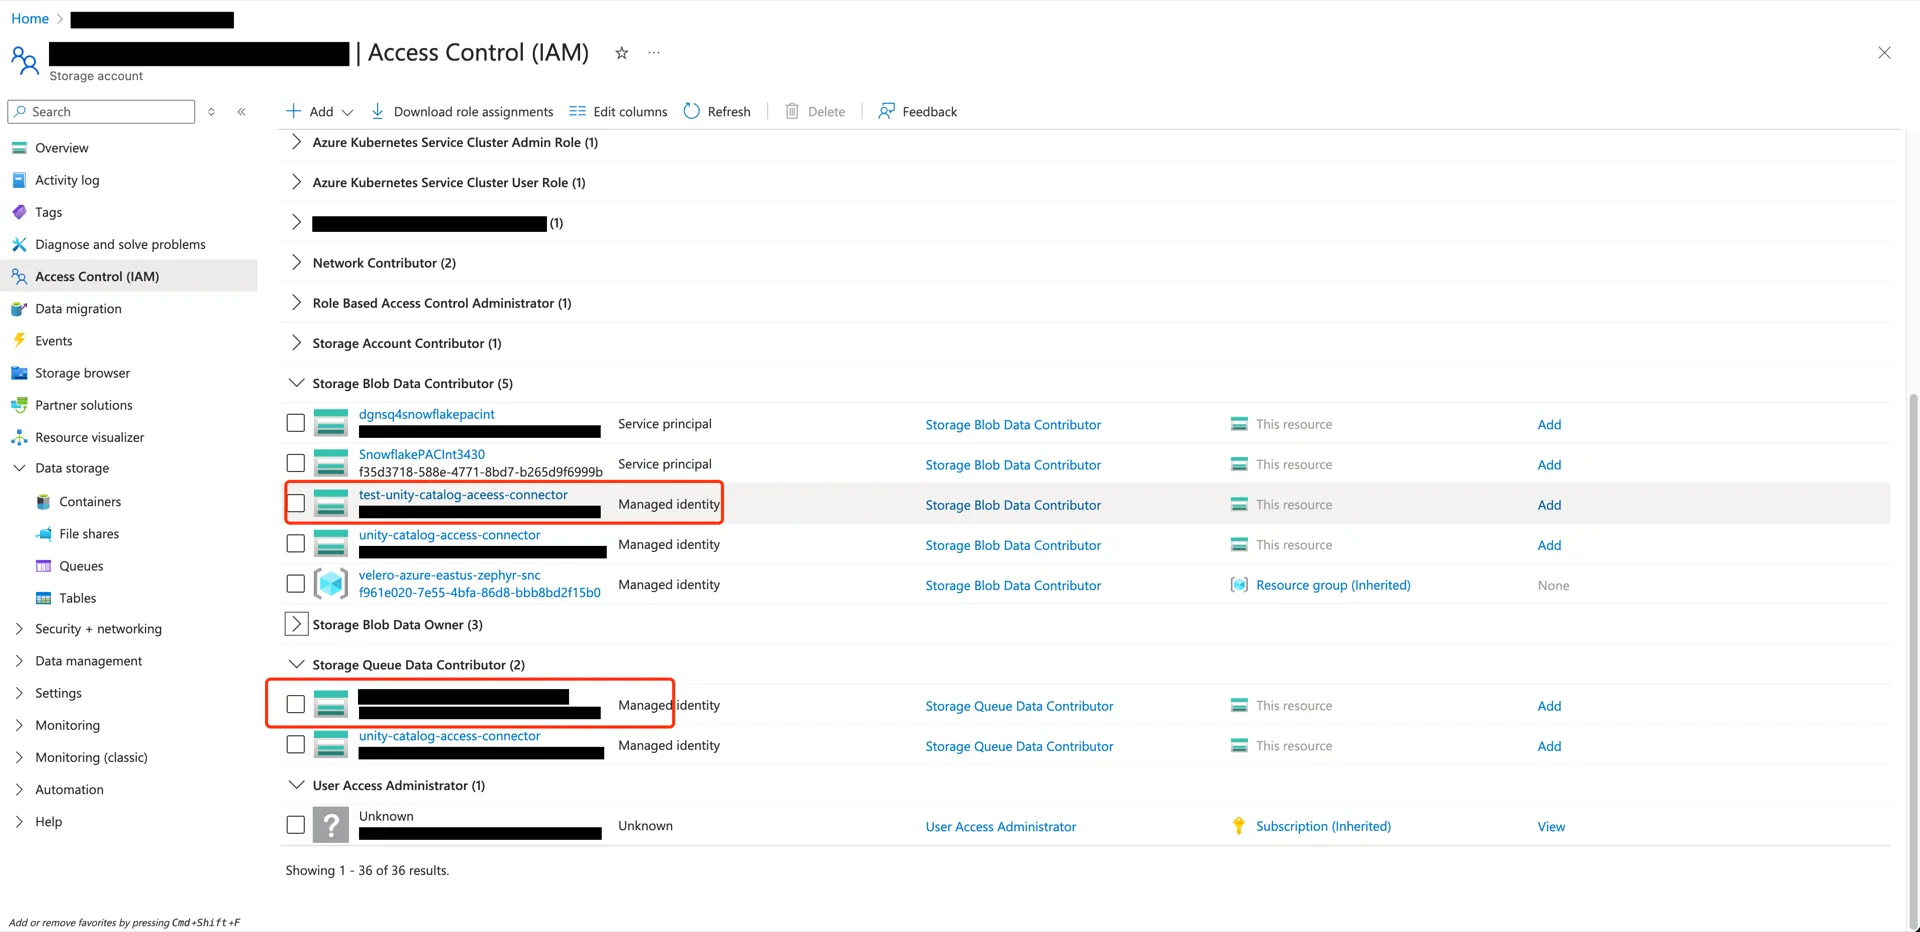
3. Grant Storage Queue Data Contributor to the Connector

Repeat the process from step 2 with the Storage Queue Data Contributor role. Queue Data Contributor Both roles are now assigned to the Access Connector. Both roles assigned

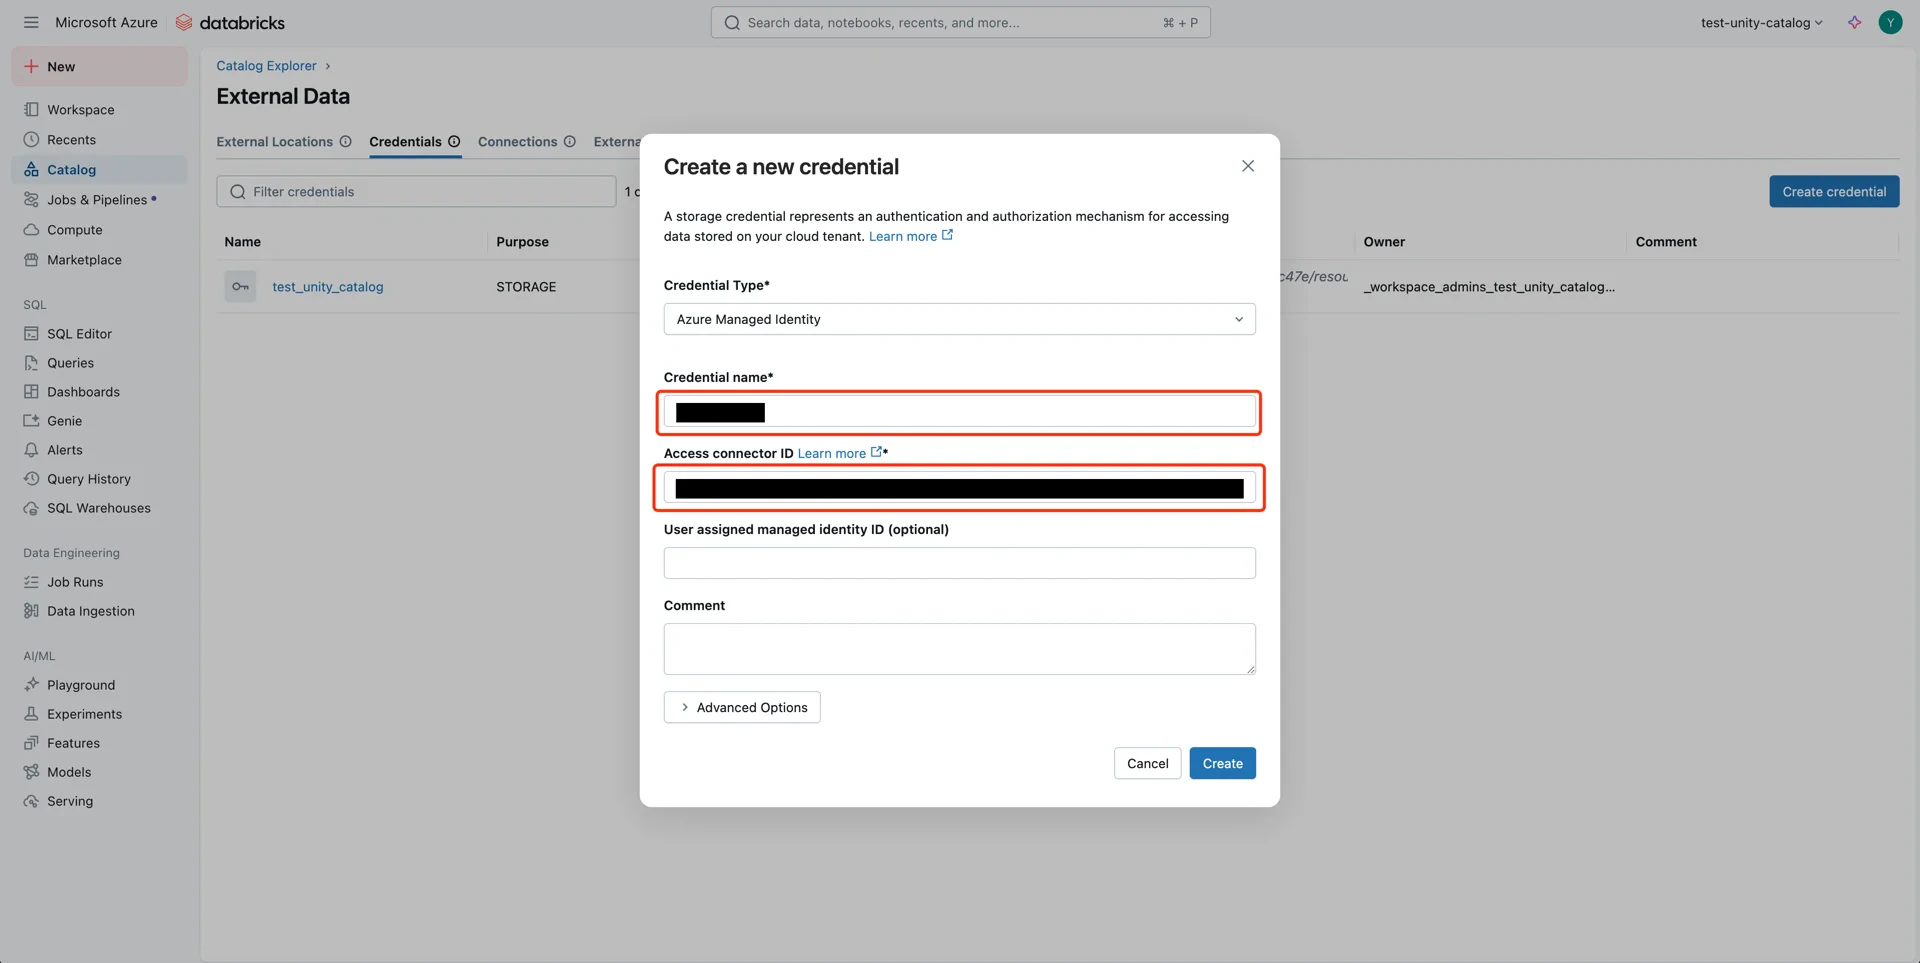
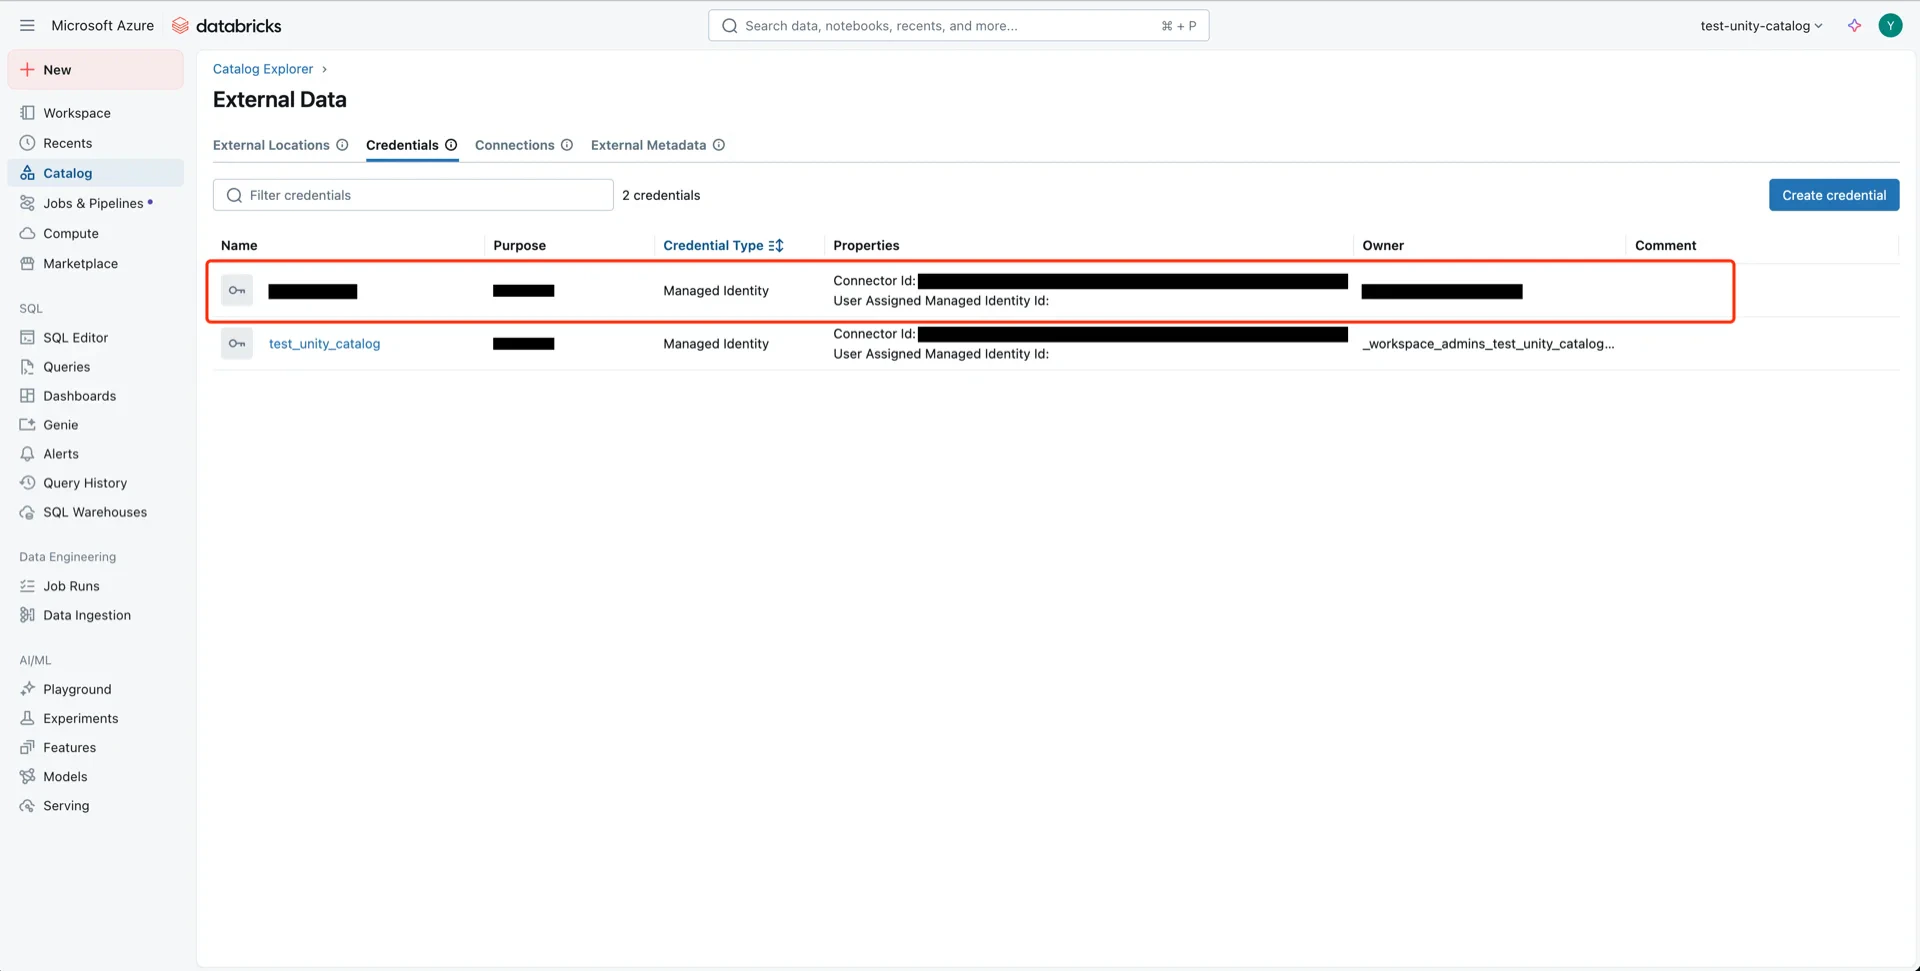
4. Create a Storage Credential in Unity Catalog

In the Databricks Catalog console, navigate to Catalog -> Settings -> Credentials. Credentials menu Click Create Credential, provide a name, and paste the Access Connector Resource ID from step 1. Create credential Credential created

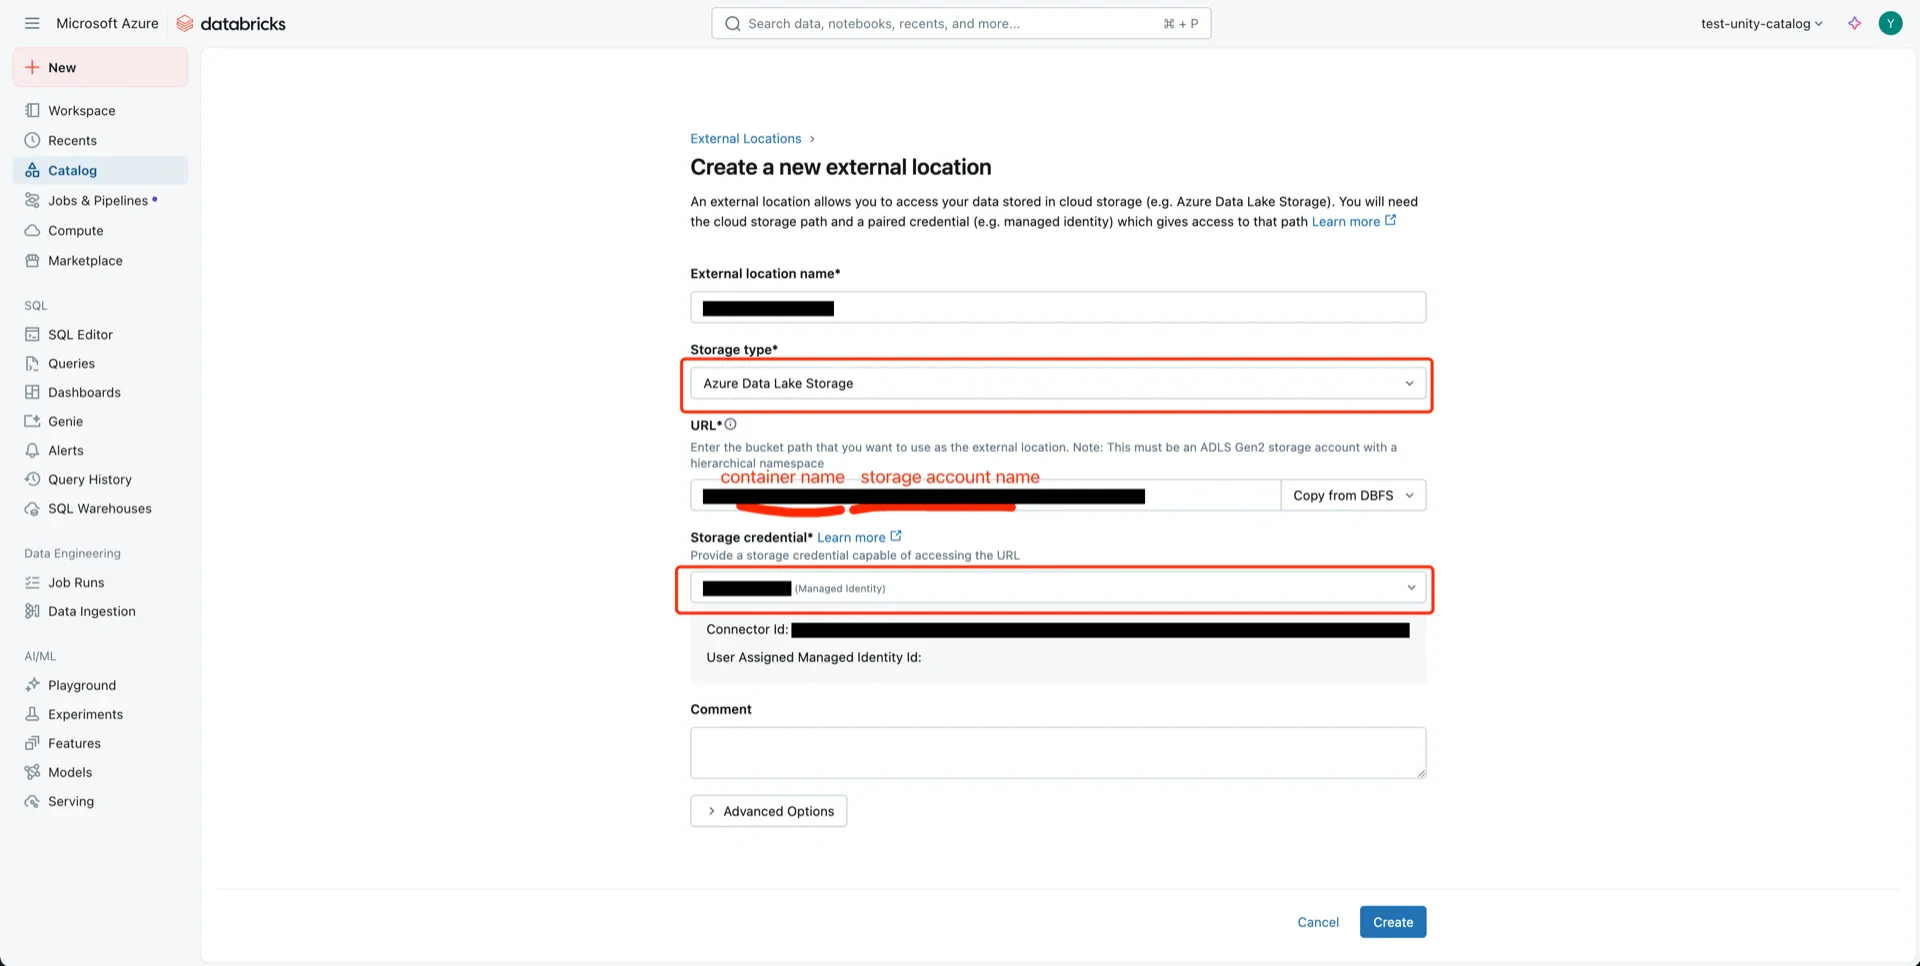
5. Create an External Location

In the Databricks Catalog console, create a new external location. External locations Configure with:
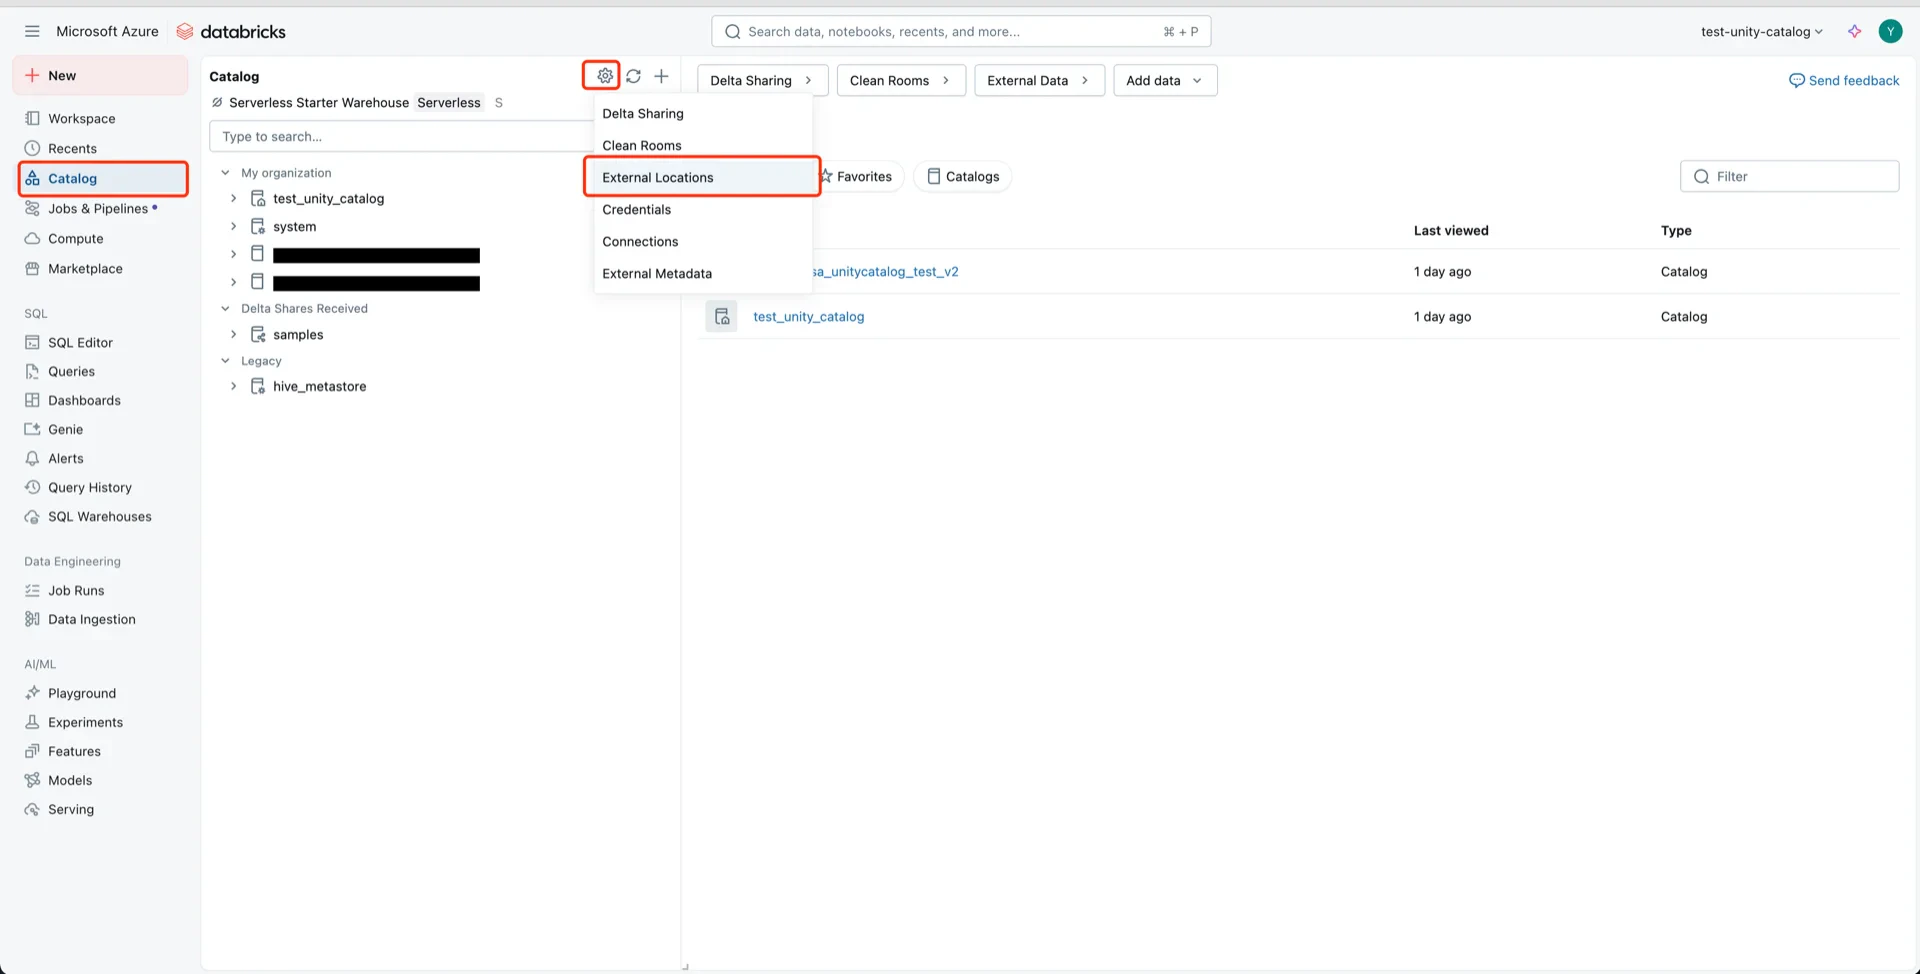
  • Storage type: Azure Data Lake Storage
  • URL: abfss://<container>@<storage-account>.dfs.core.windows.net
  • Storage credential: the credential created in step 4
External location form External location created Click Test Connection to verify the credential. Test connection
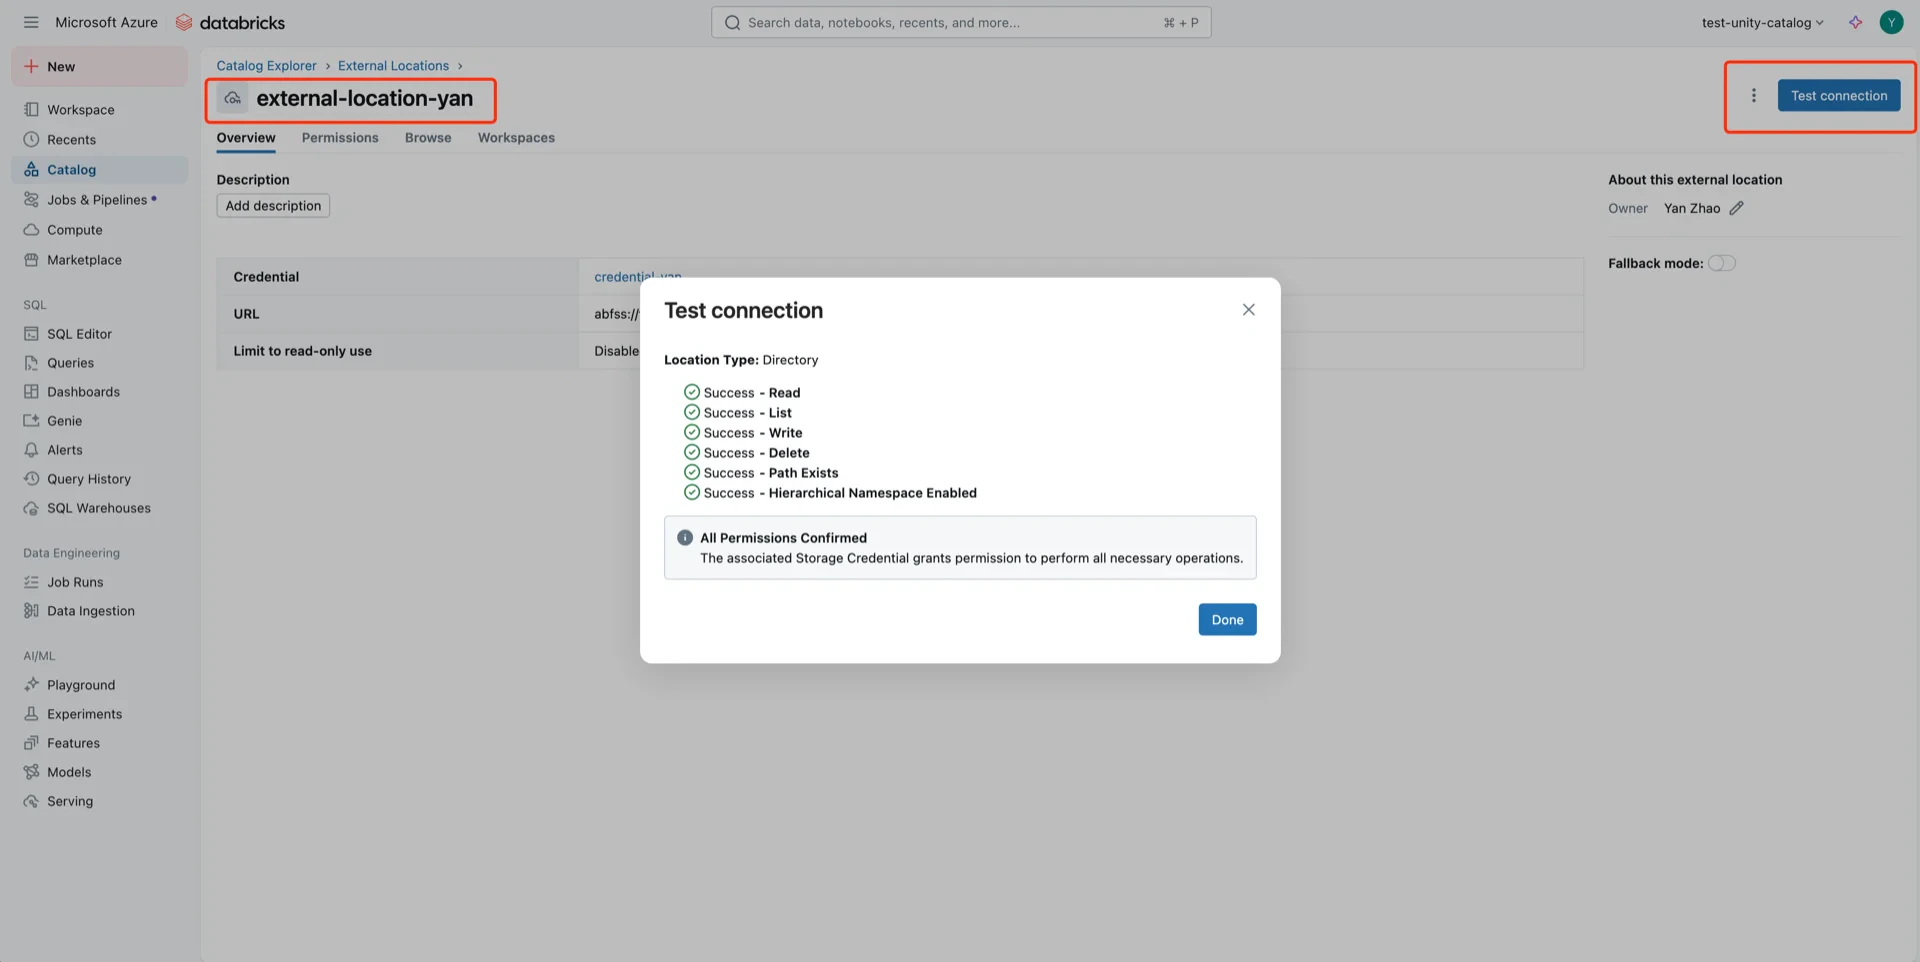
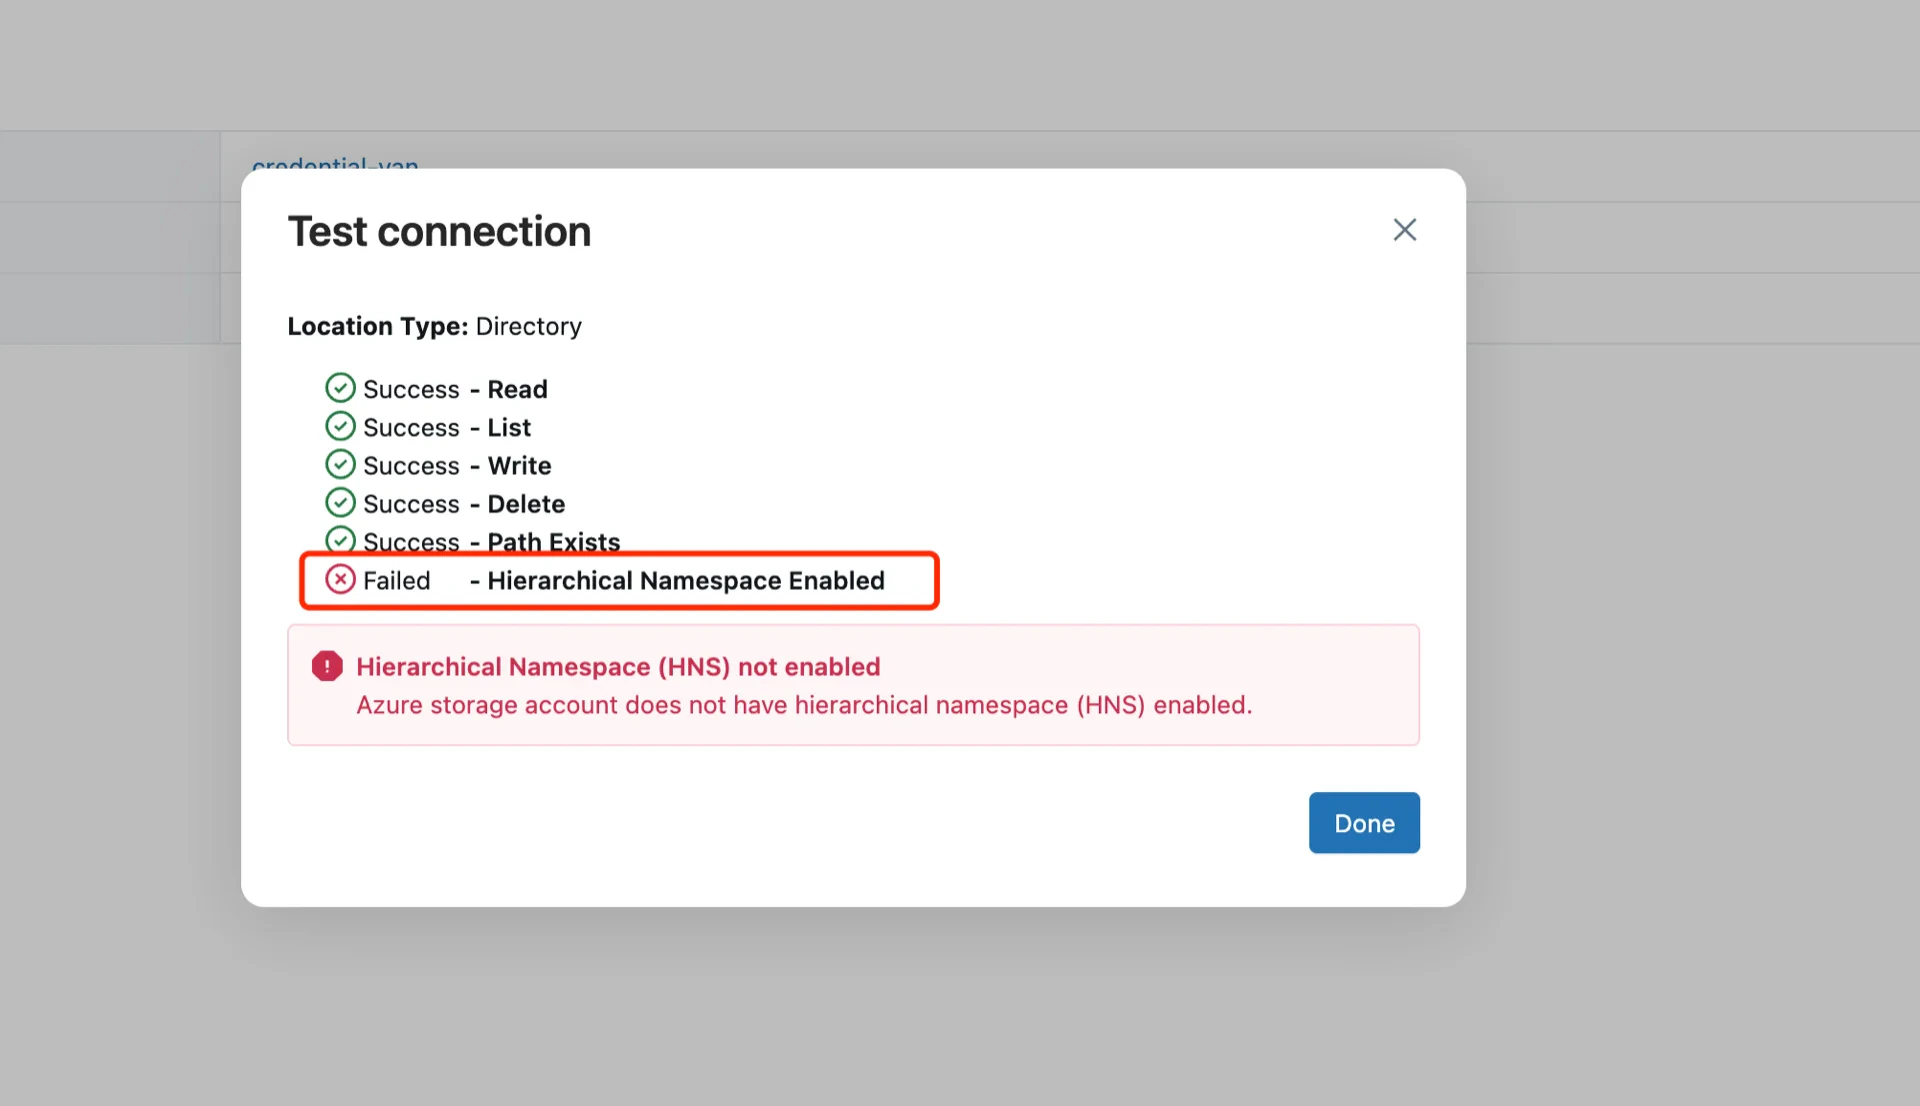
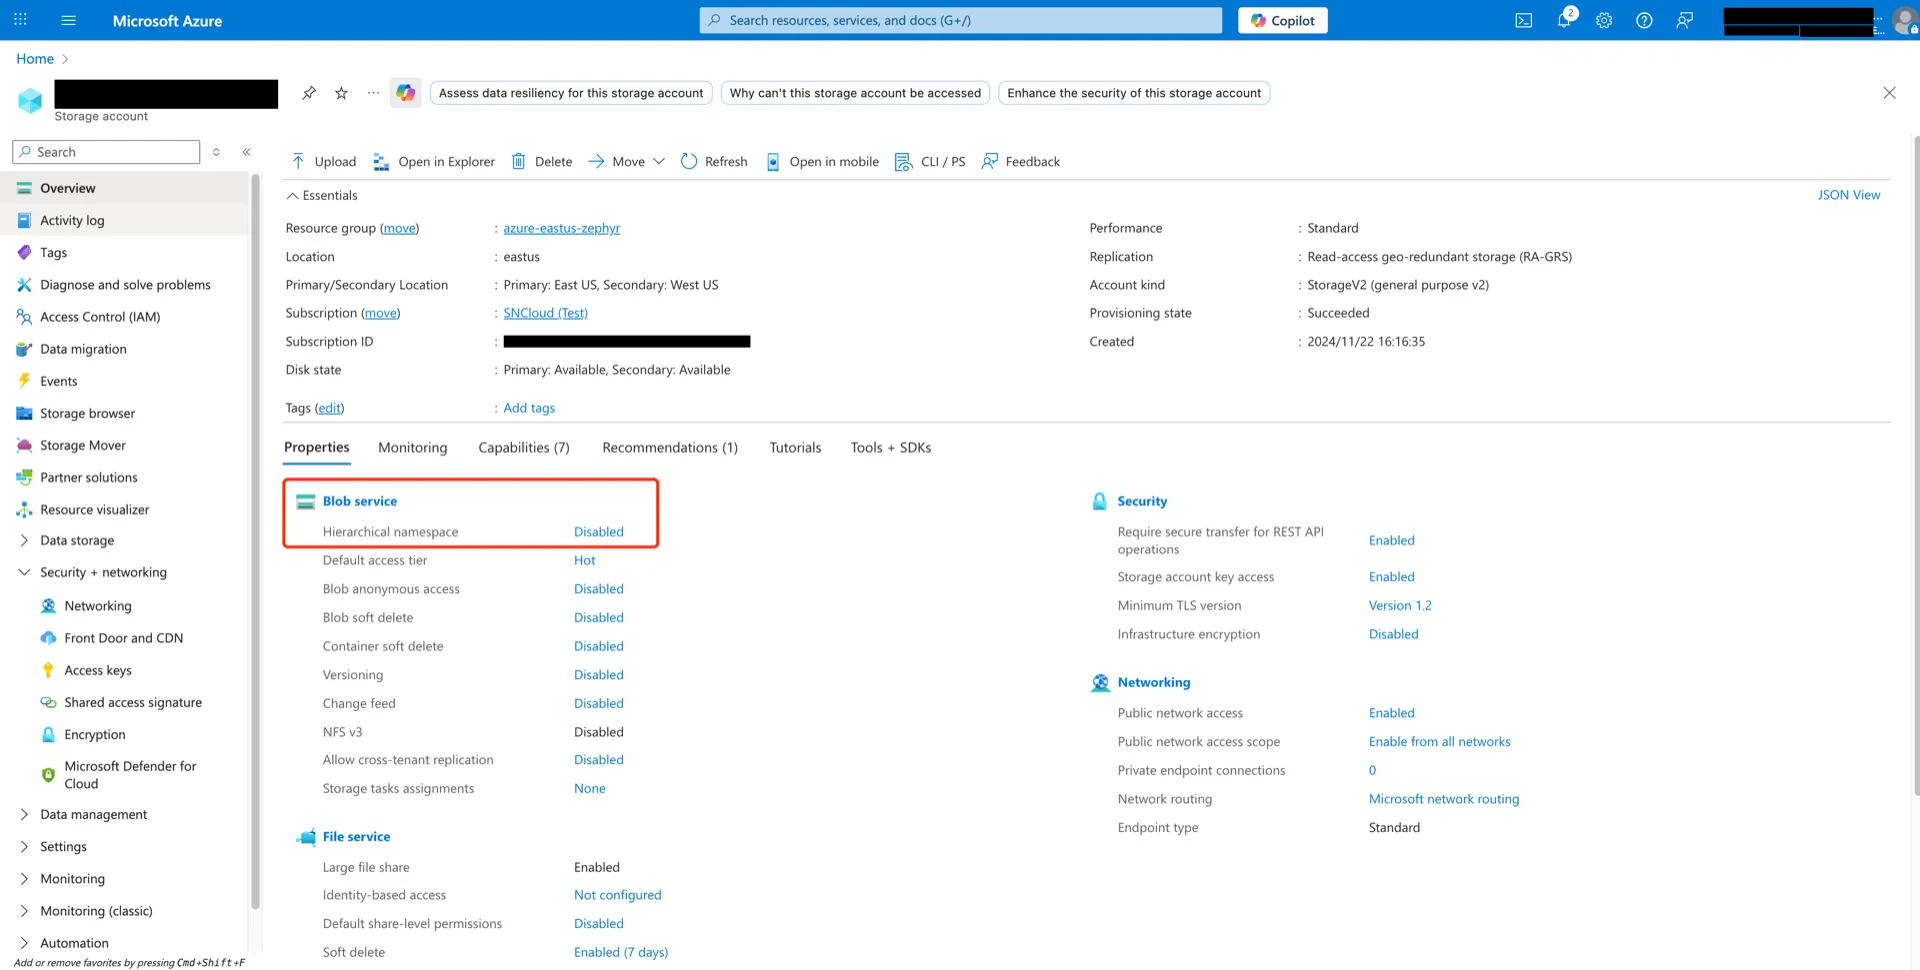
Troubleshooting: If the test fails with a Hierarchical Namespace Enabled error, ensure that Hierarchical namespace is enabled on the storage account.
Hierarchical namespace Hierarchical namespace

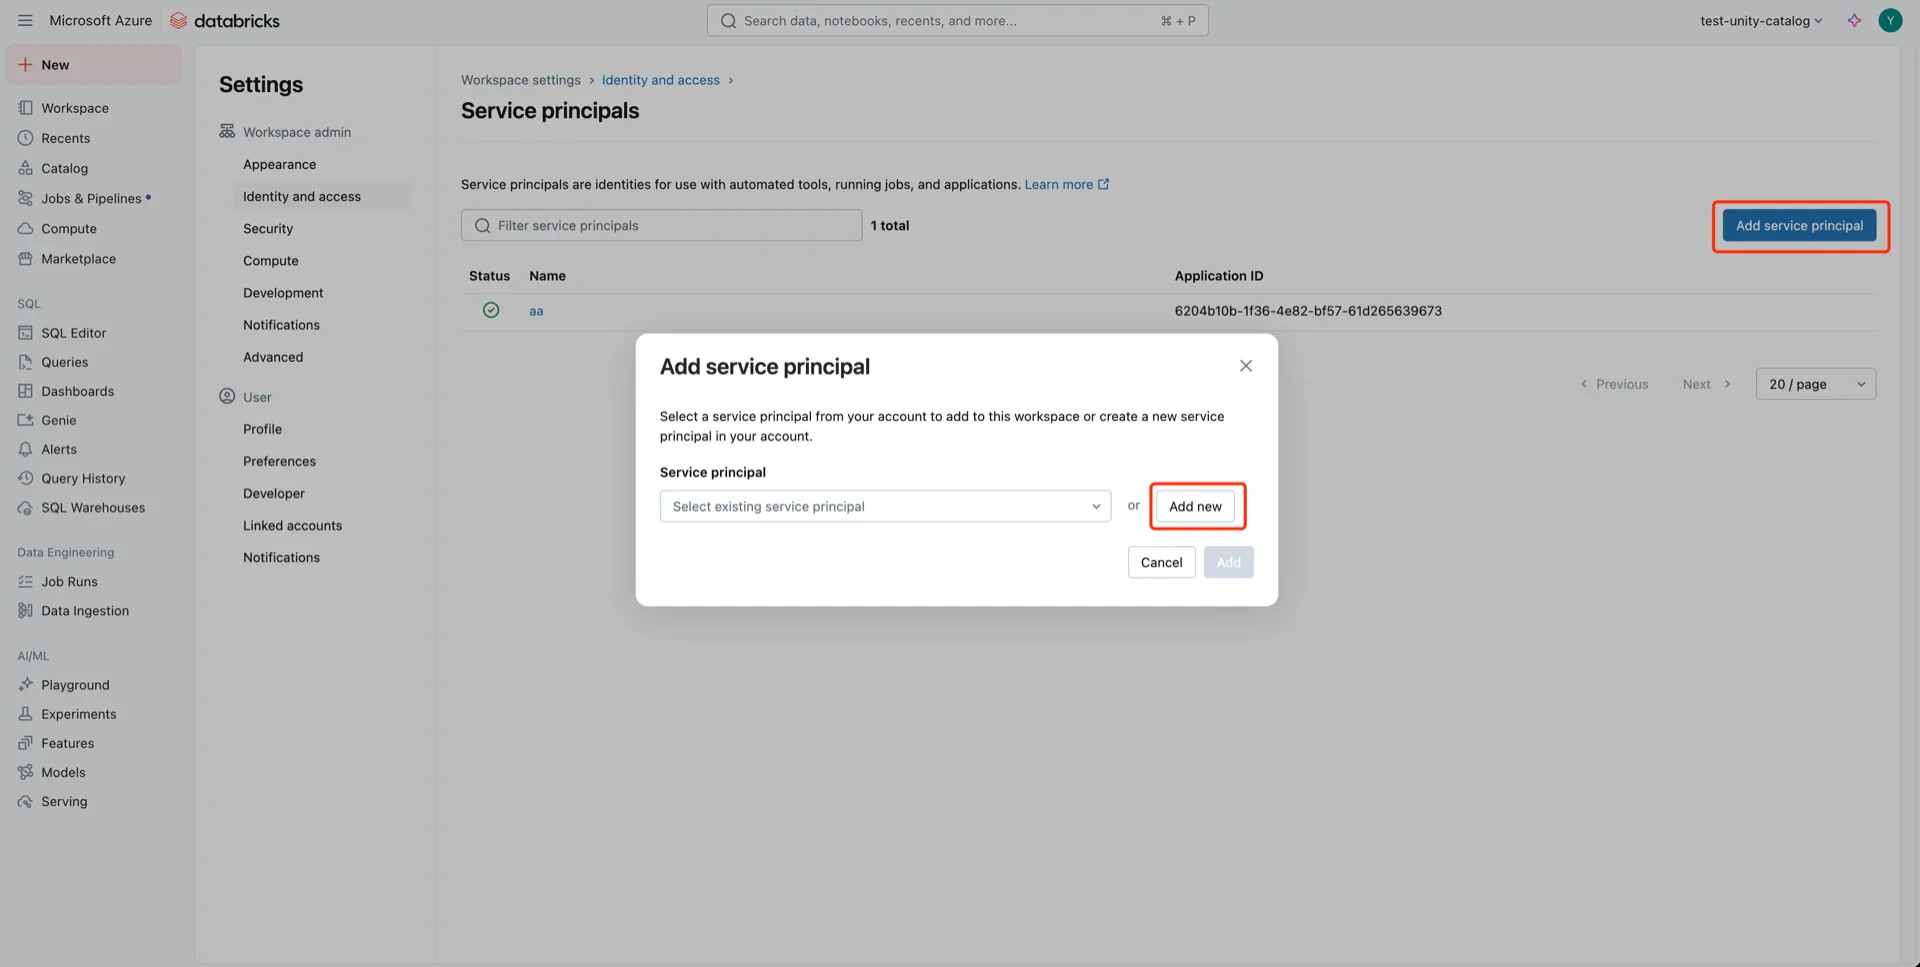
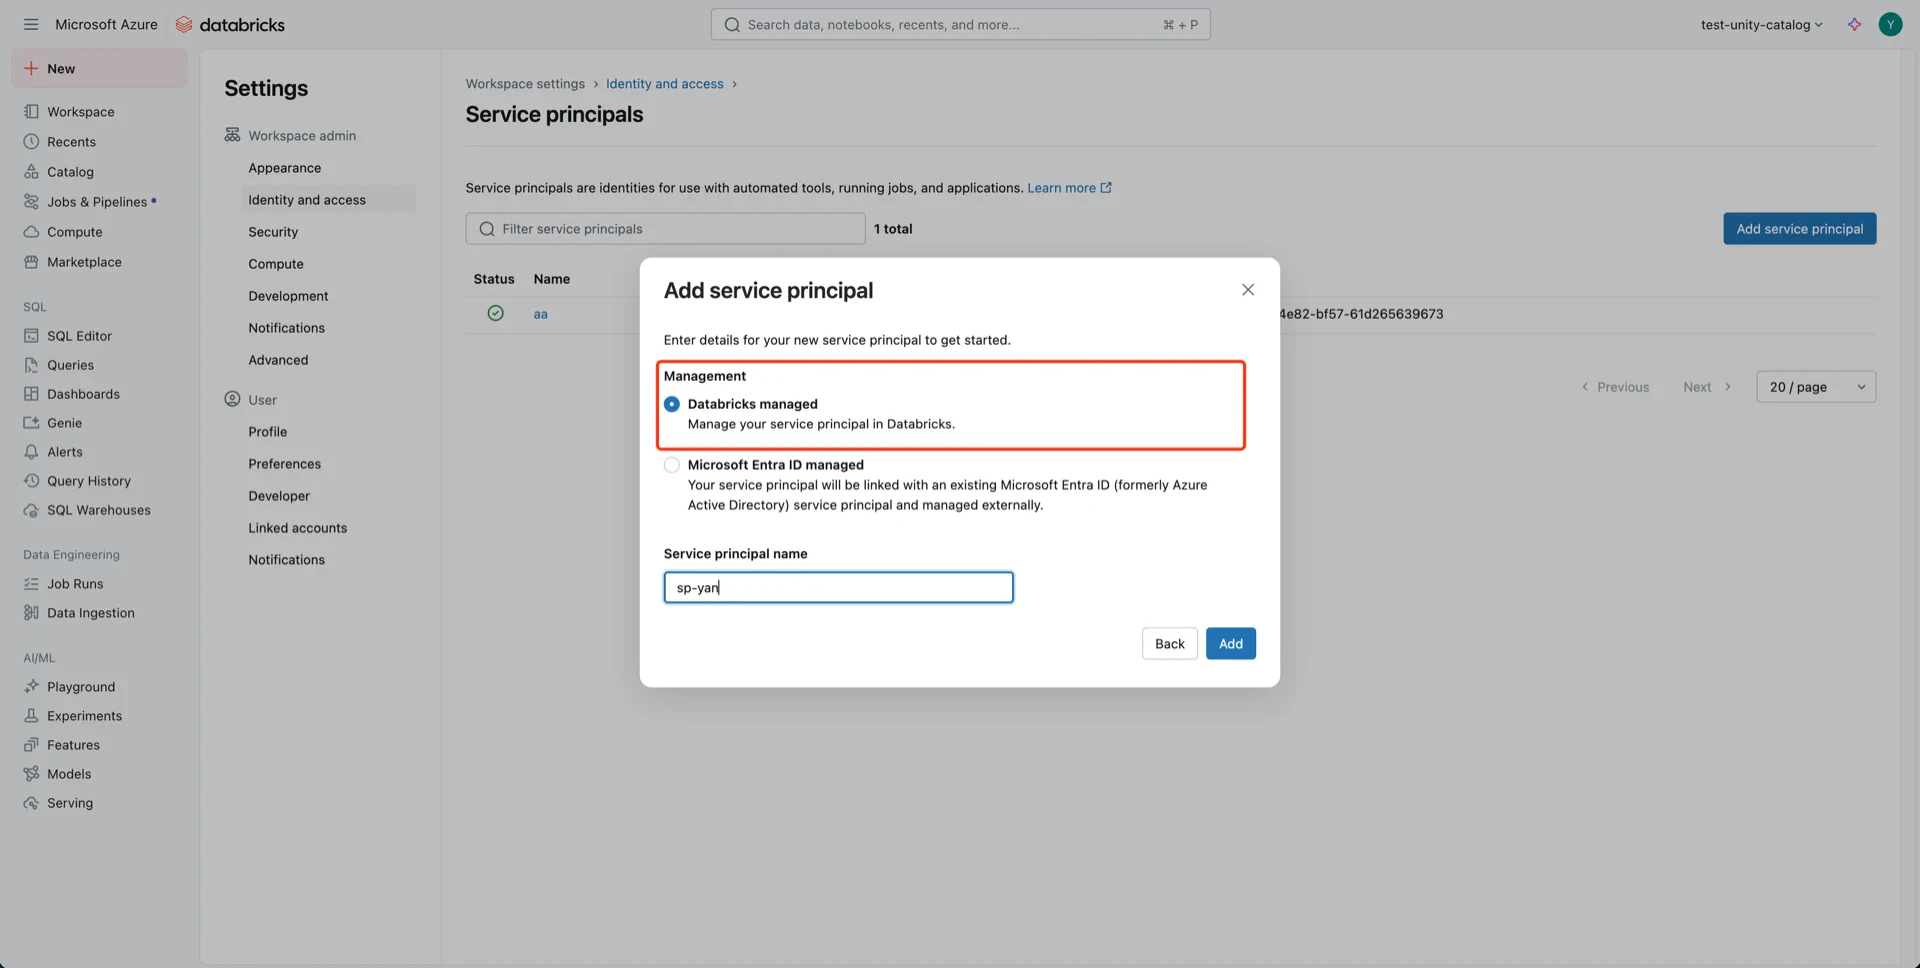
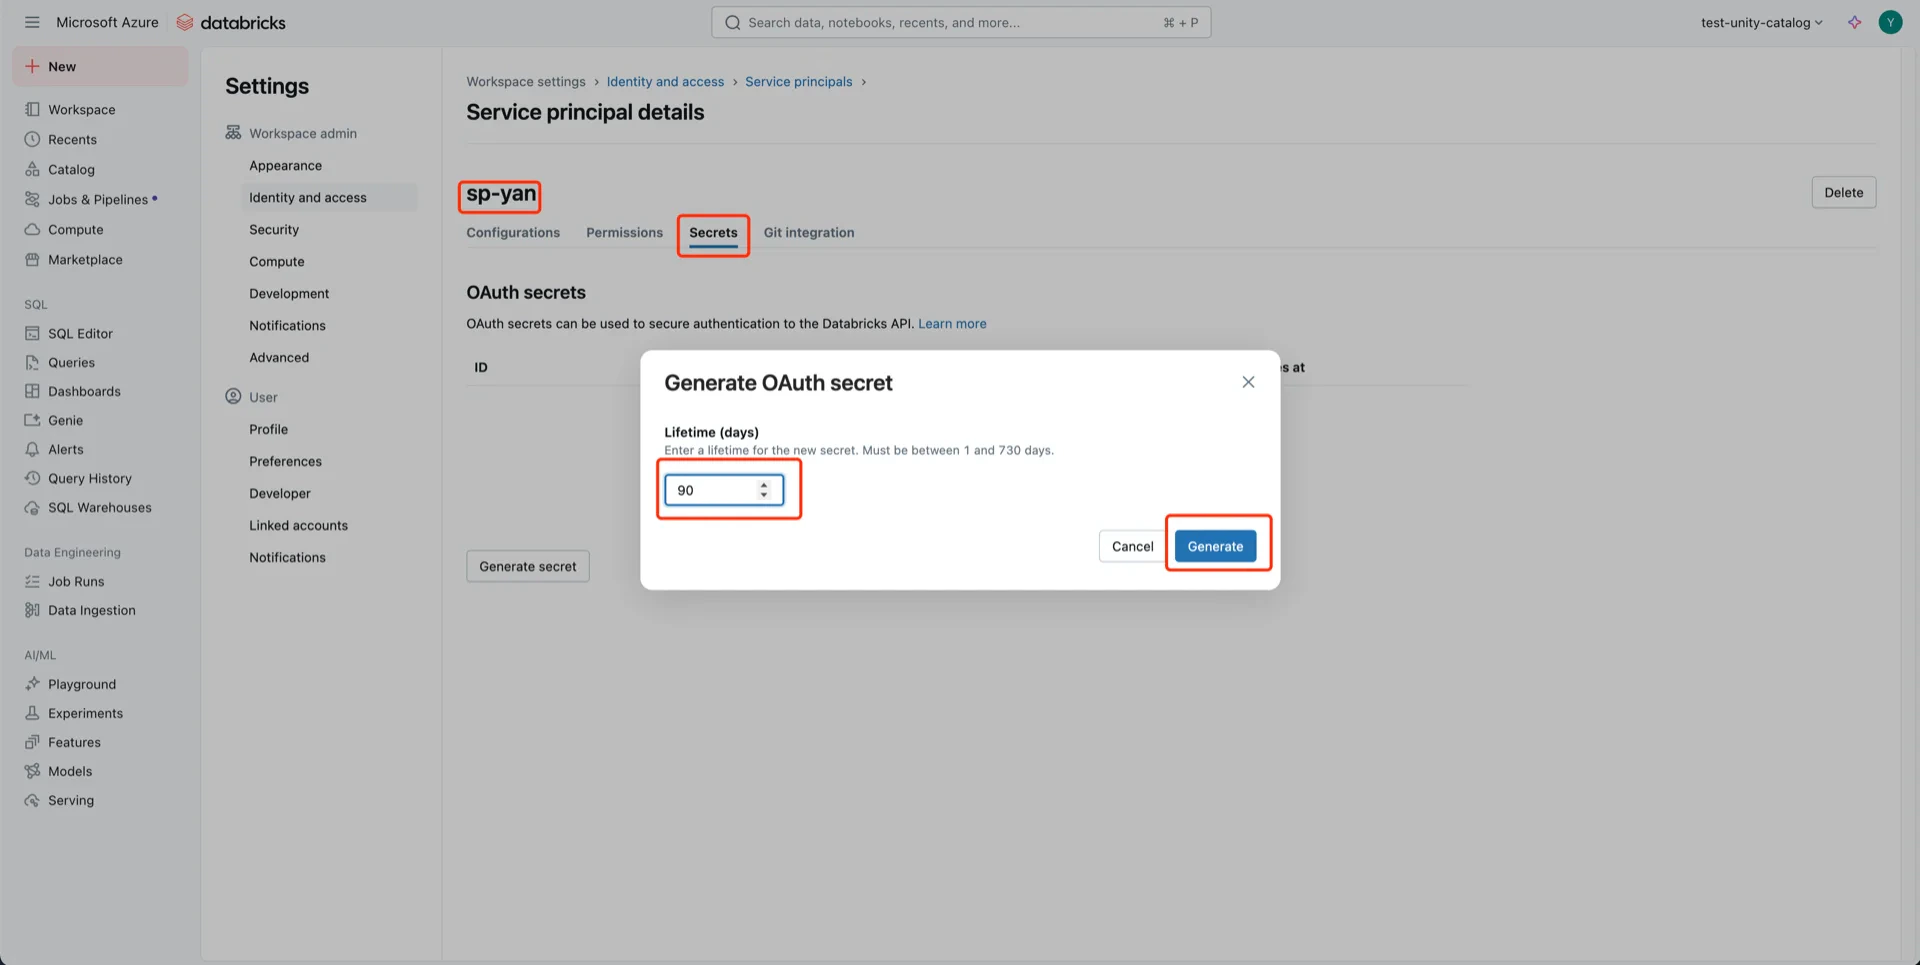
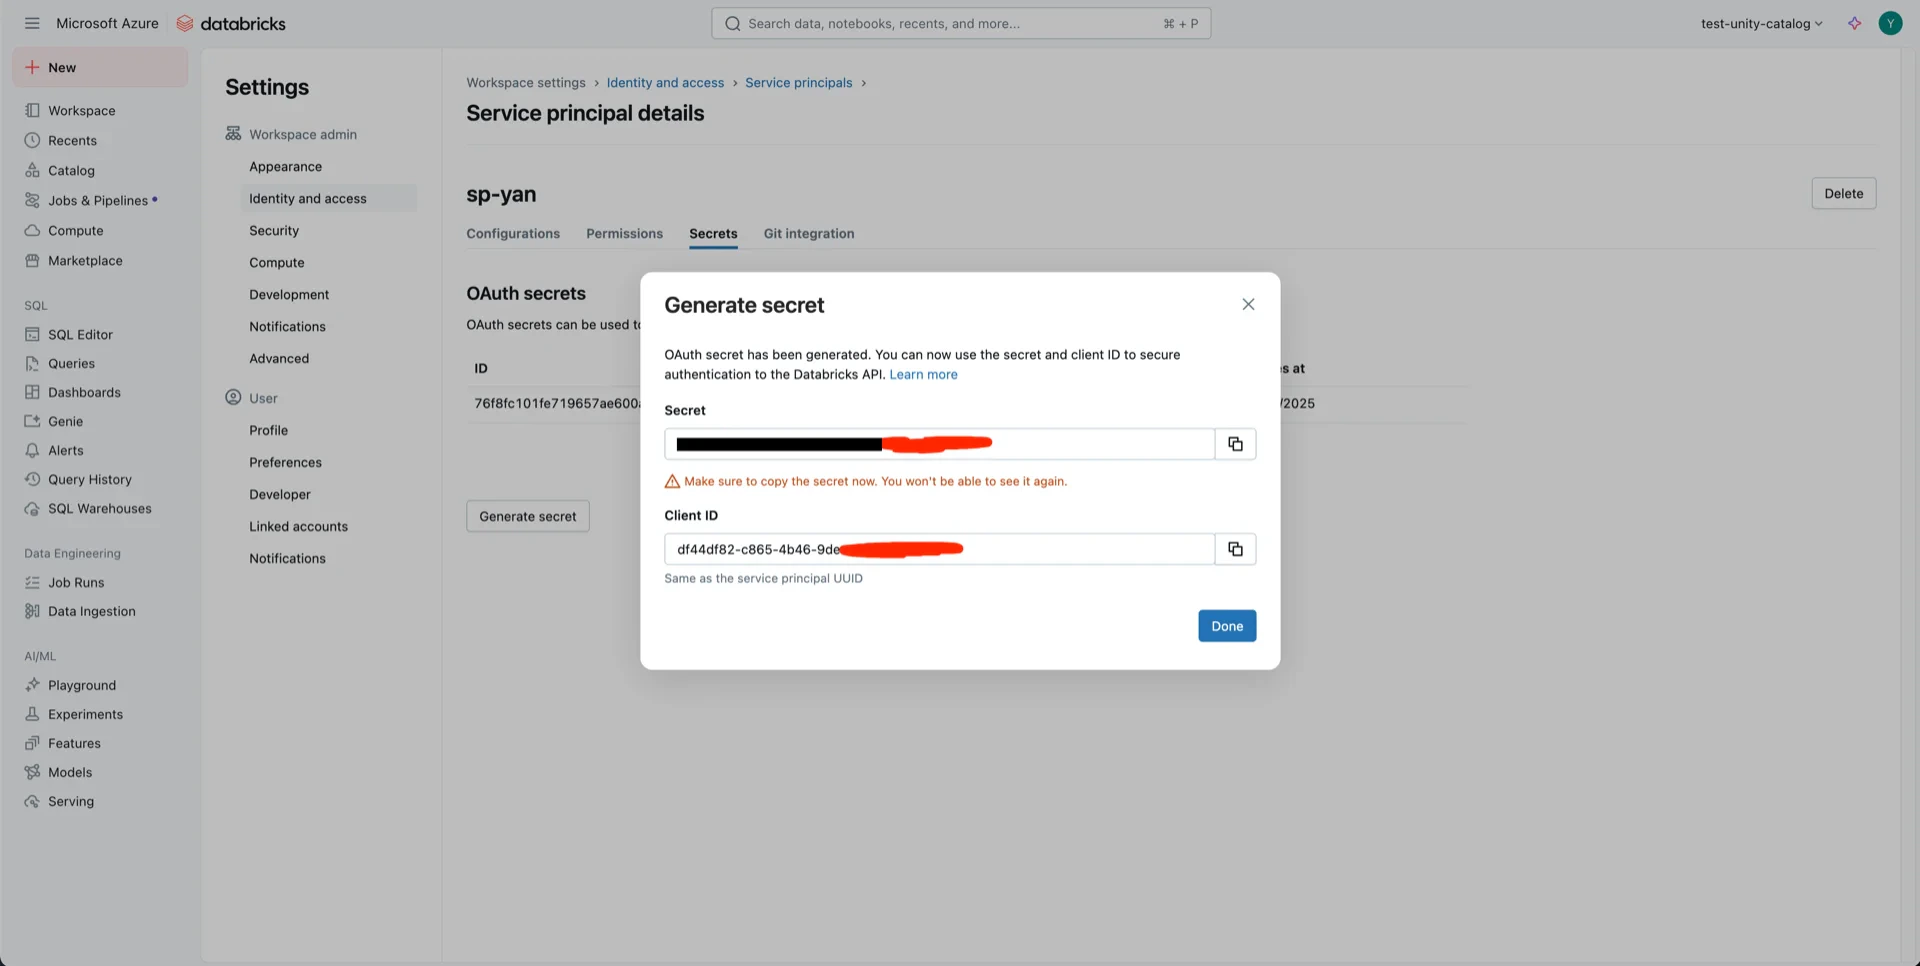
6. Create a Service Principal

Navigate to User -> Settings -> Identity and access -> Service principals -> Manage. Service principals Click Add service principal -> Add new. Add service principal Choose Databricks managed and provide a name. Name service principal Open the service principal, click Secrets, choose an expiration period, and Generate. Generate secret Record both the Client ID and Client Secret — the secret cannot be retrieved later. Secret and Client ID

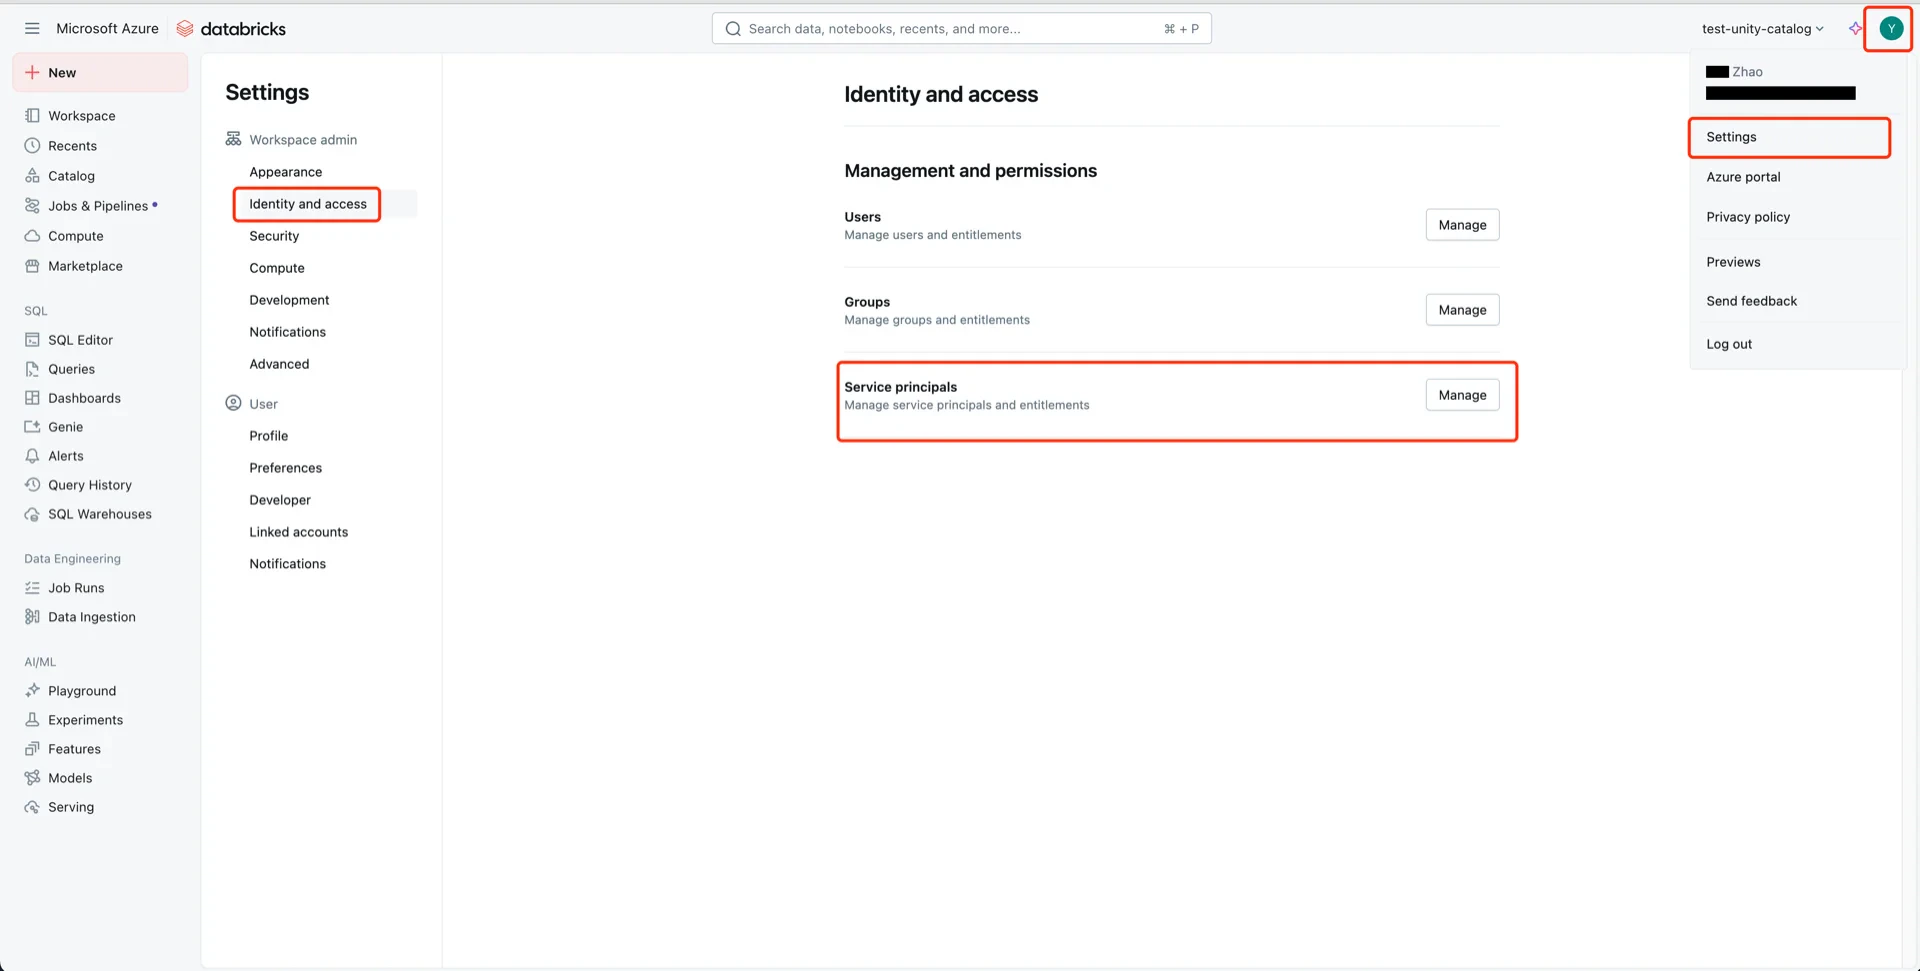
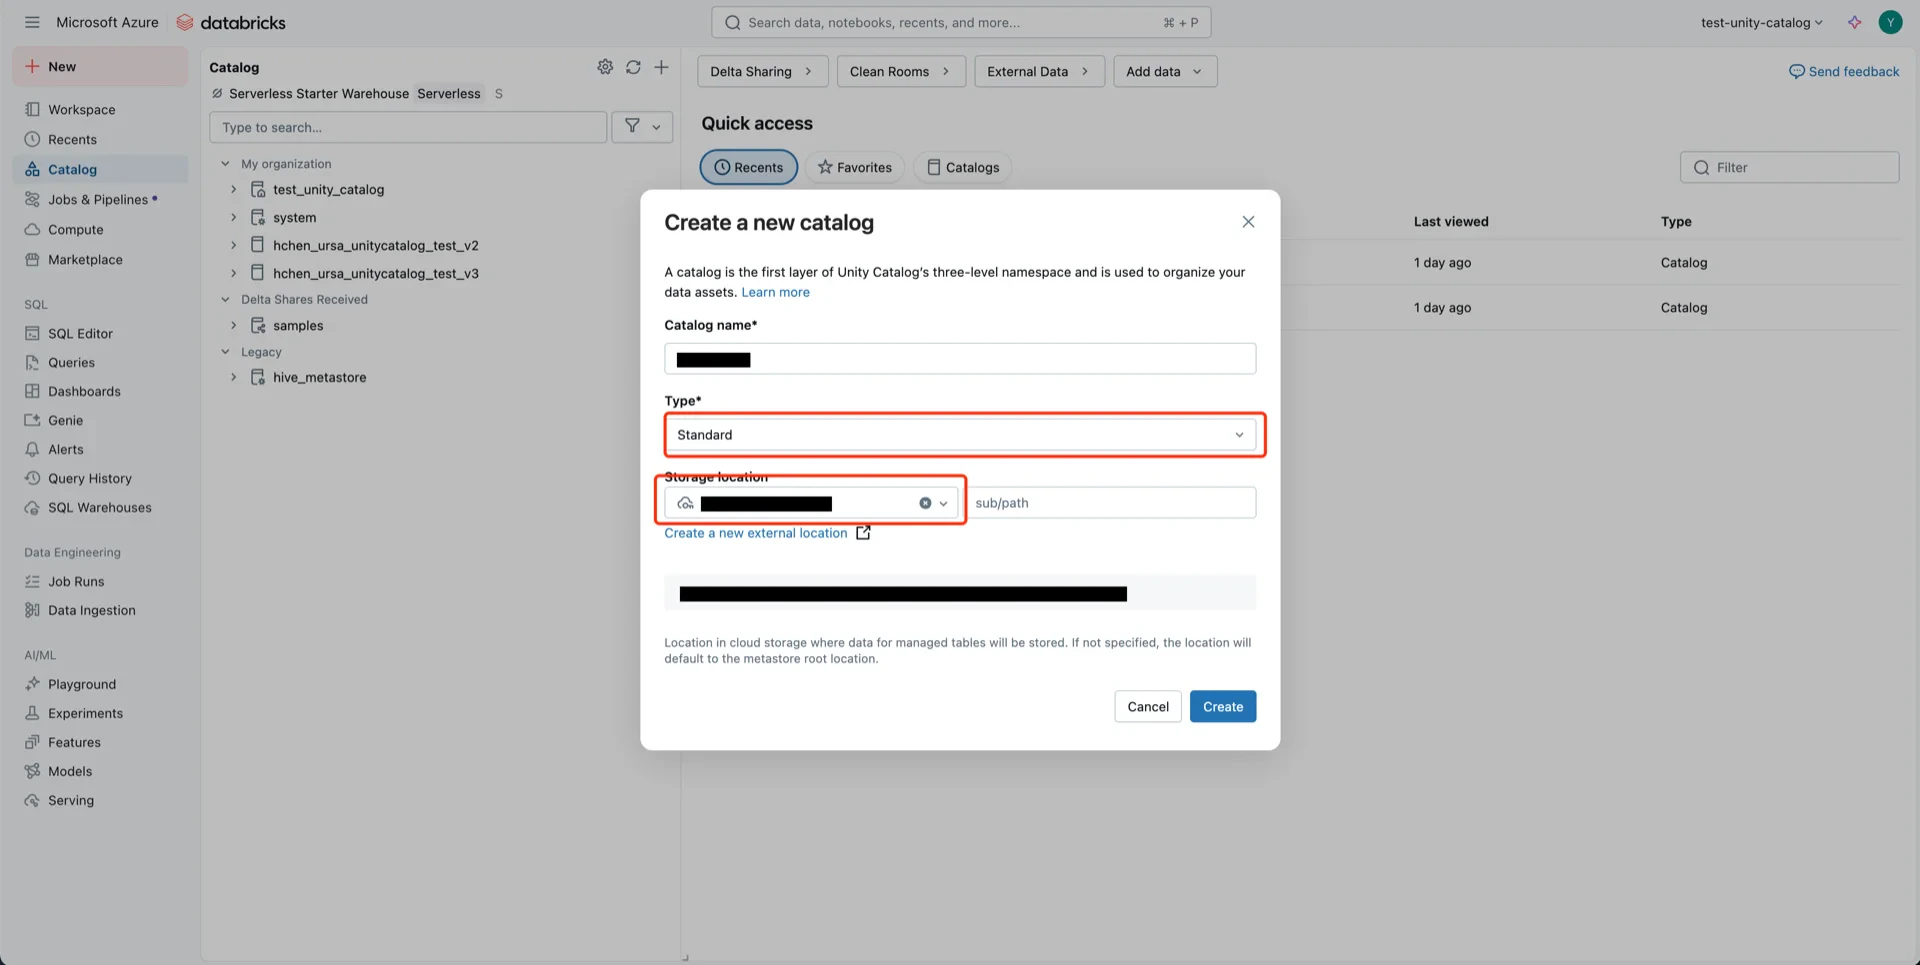
7. Create the Catalog

Create a new Catalog with Type: Standard and select the storage location created in step 5. Create catalog Catalog form

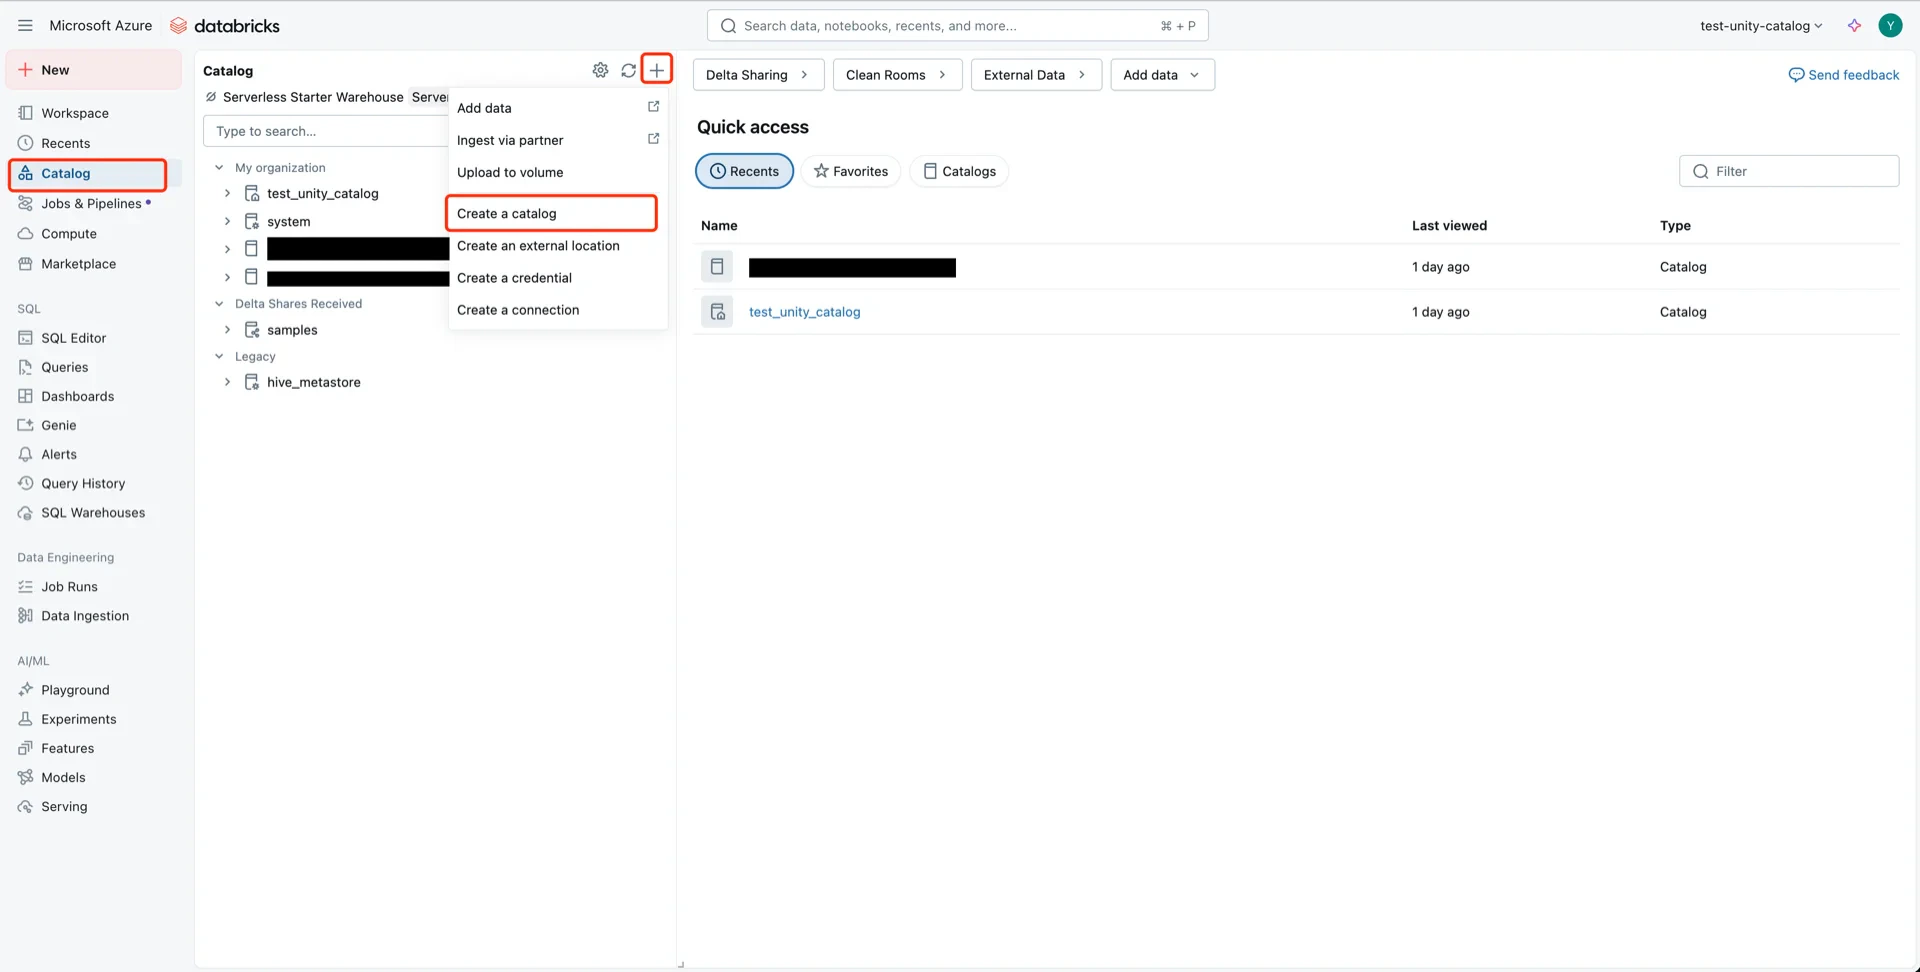
8. Grant Permissions to the Service Principal

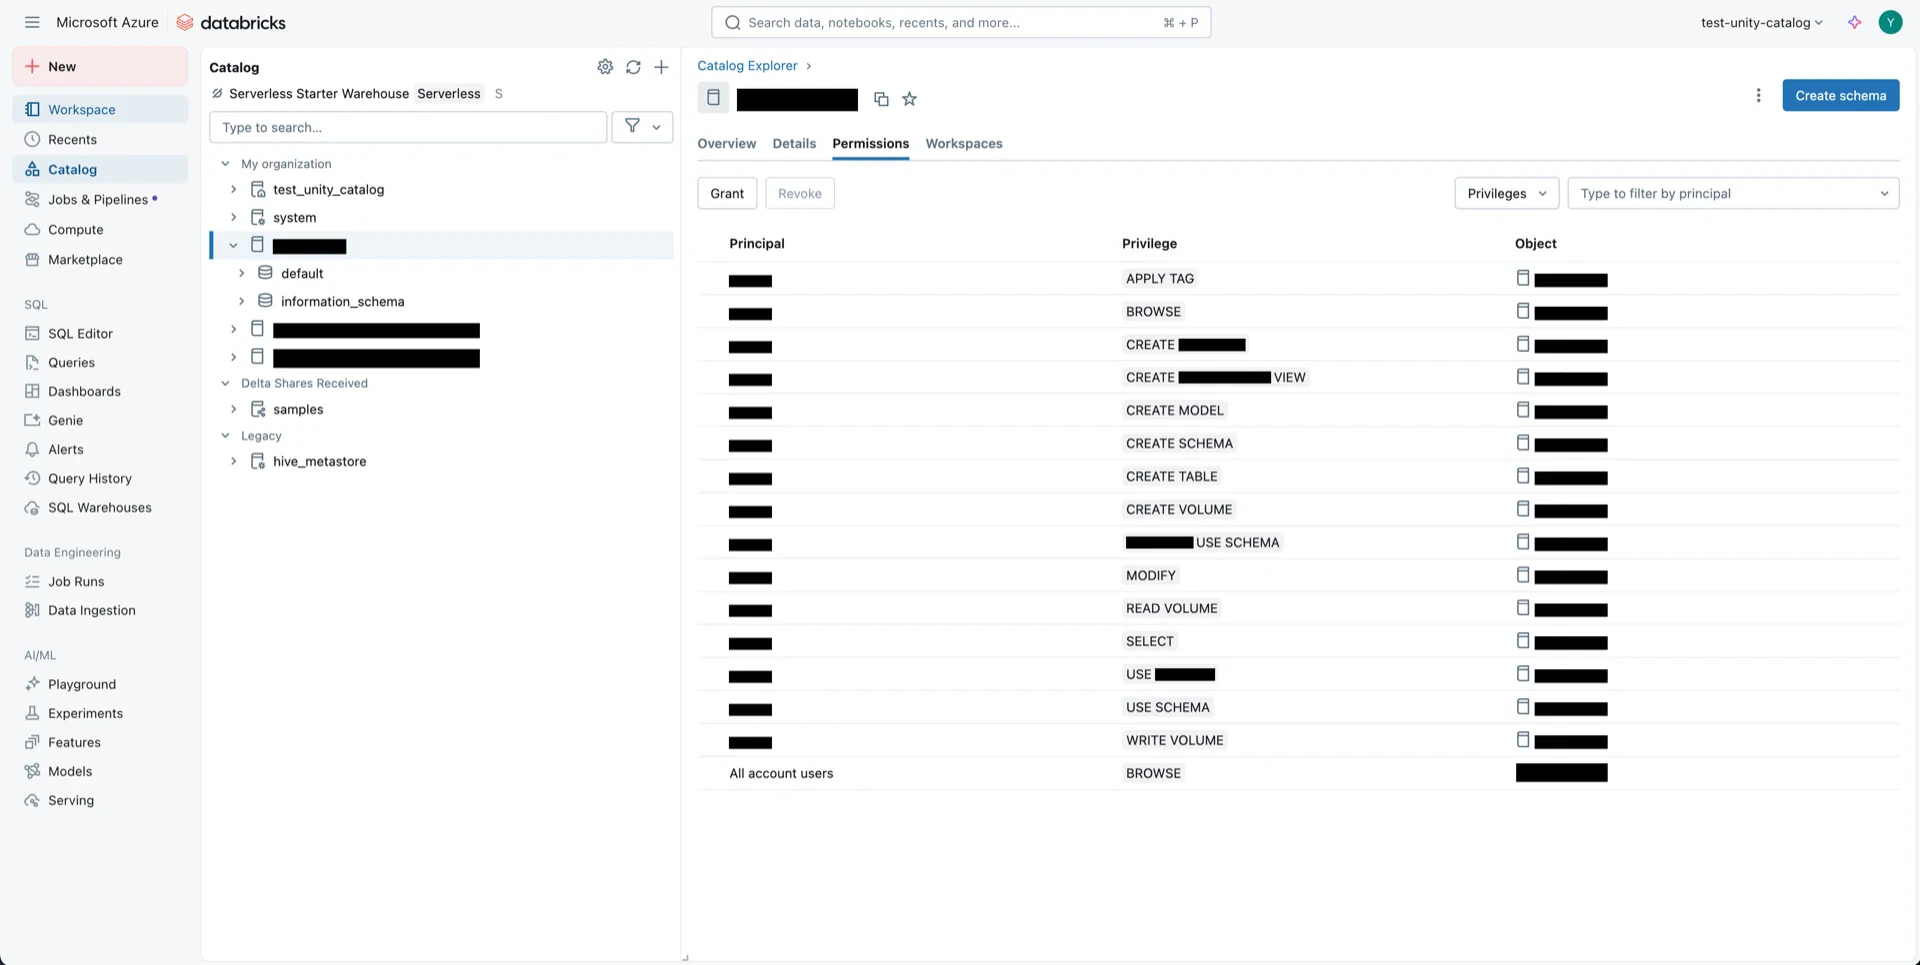
8.1 Catalog Permissions

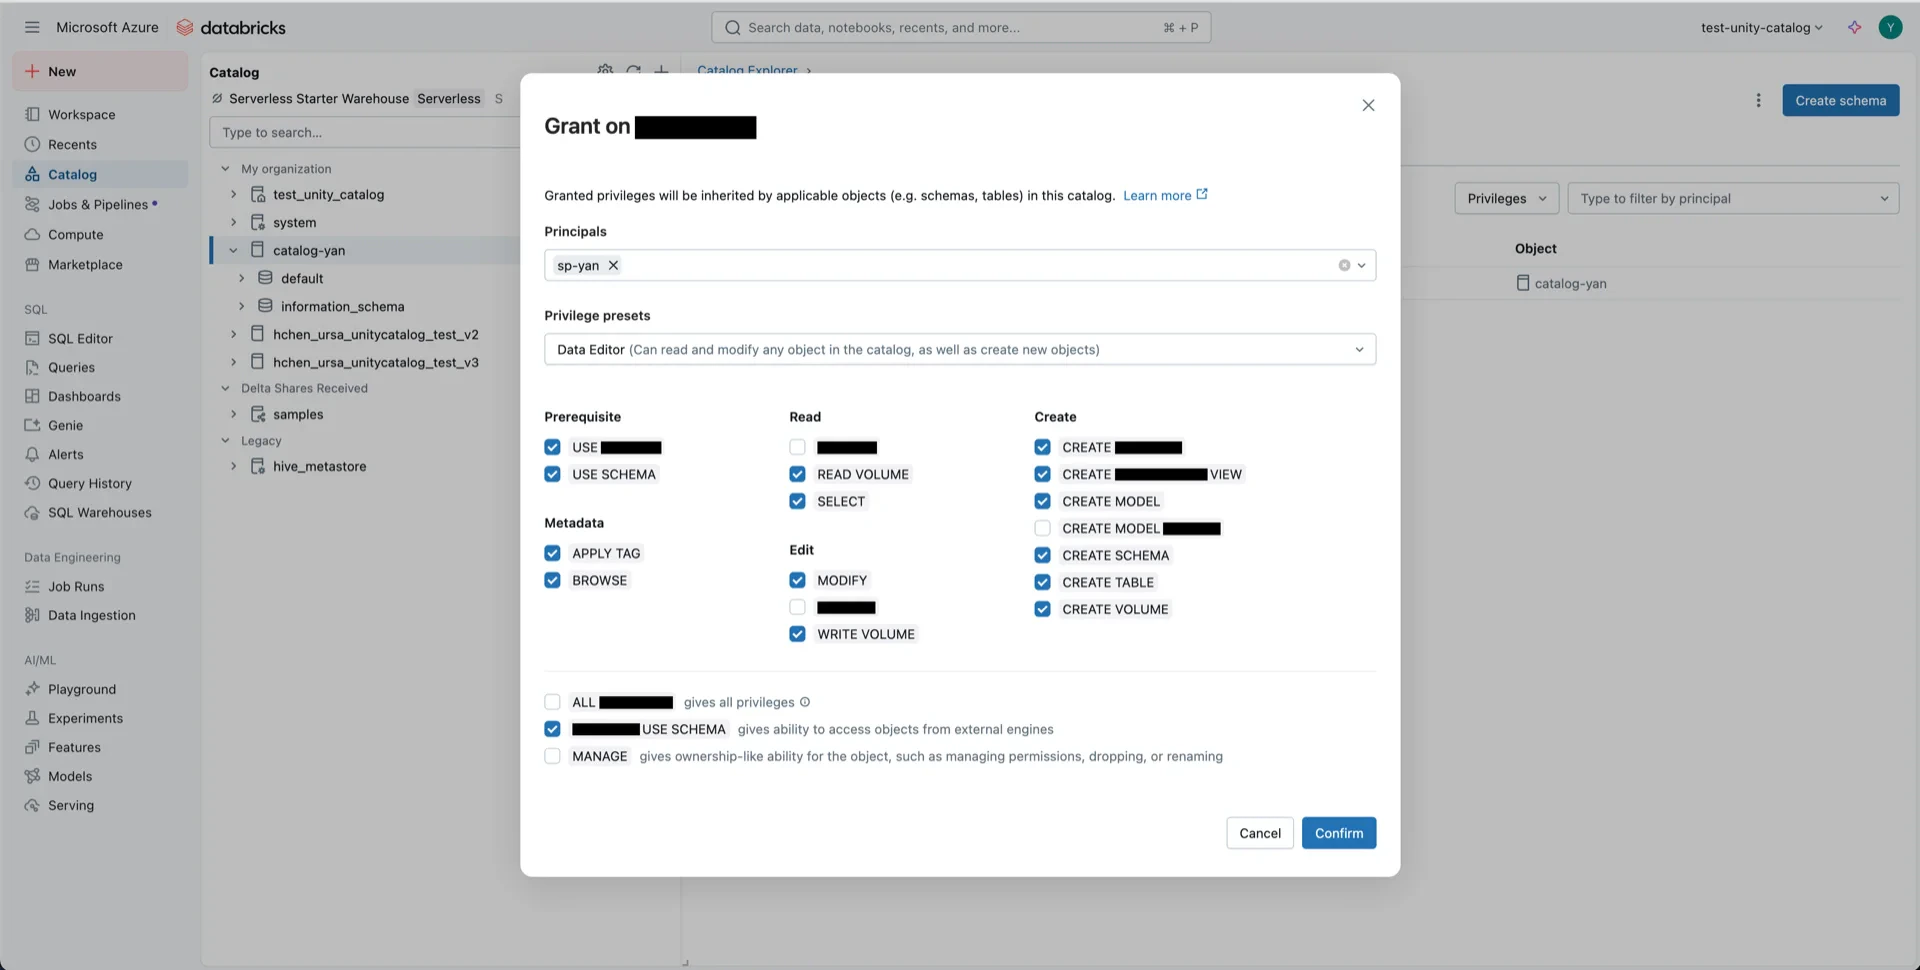
Navigate to the new catalog and click Permissions -> Grant. Catalog permissions Configure:
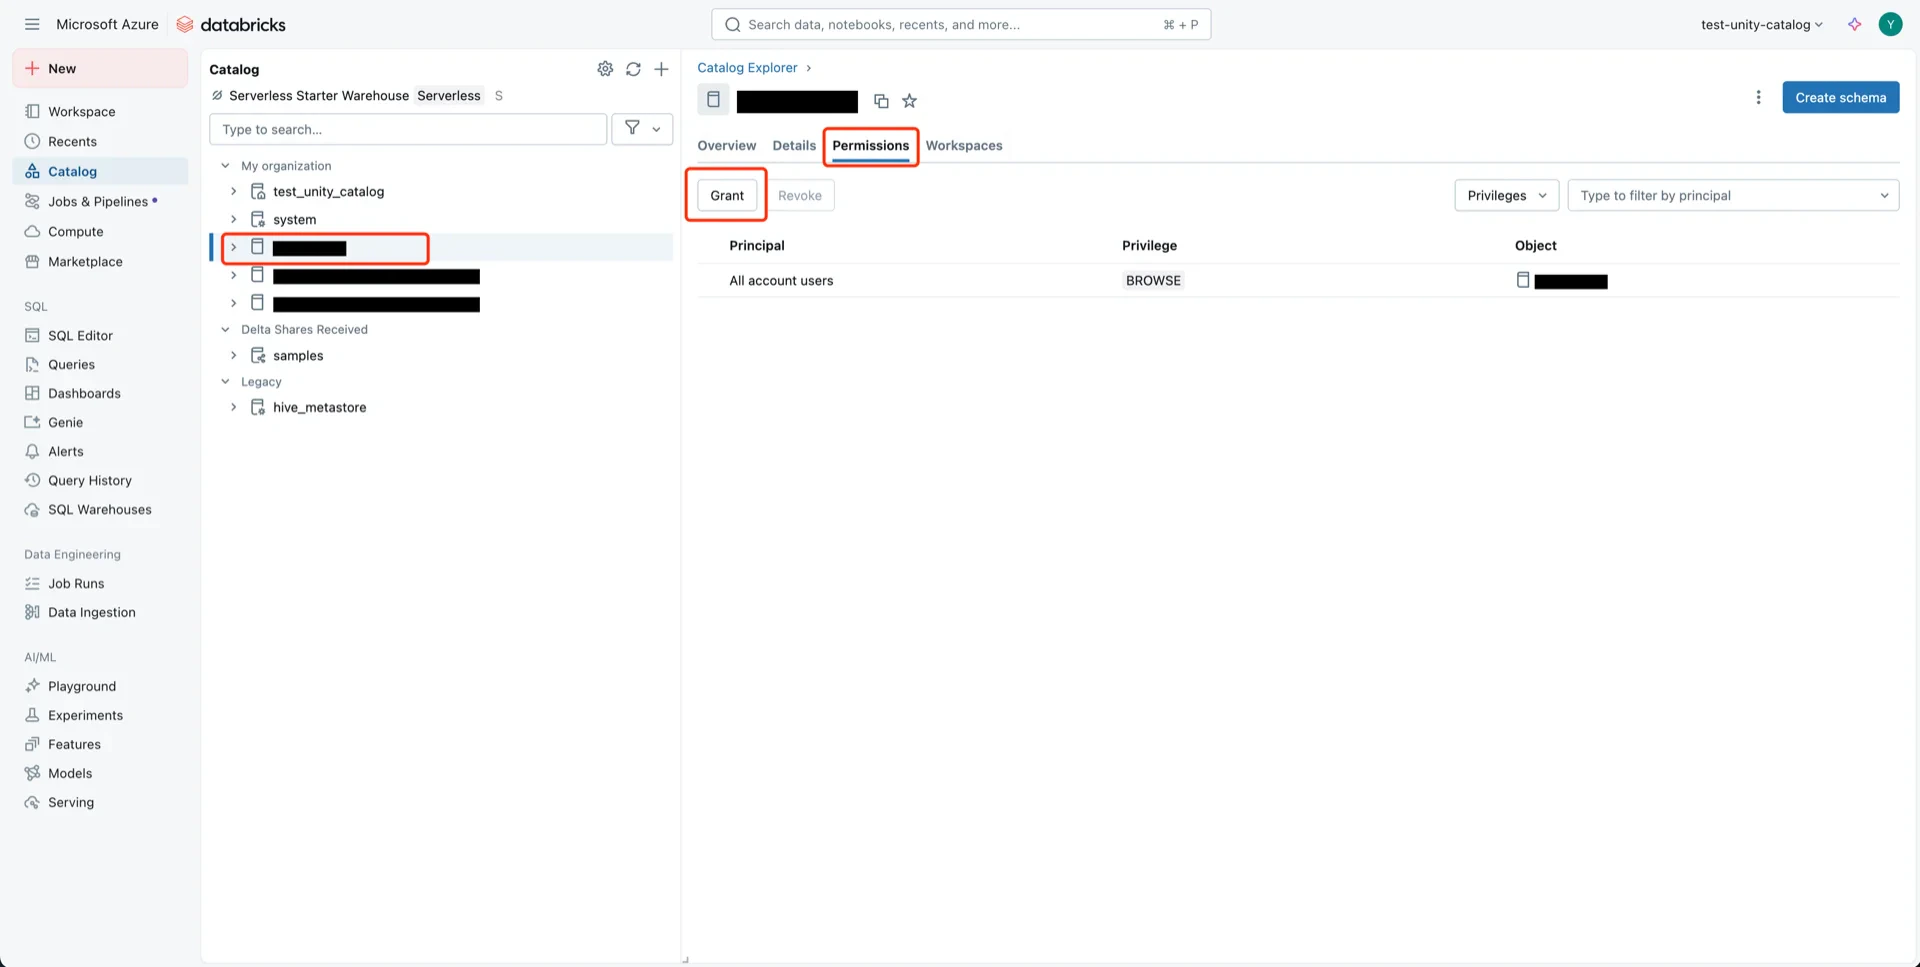
  • Principals: the service principal from step 6
  • Privilege presets: Data Editor
  • EXTERNAL USE SCHEMA: Enabled
Grant catalog permissions Permissions granted

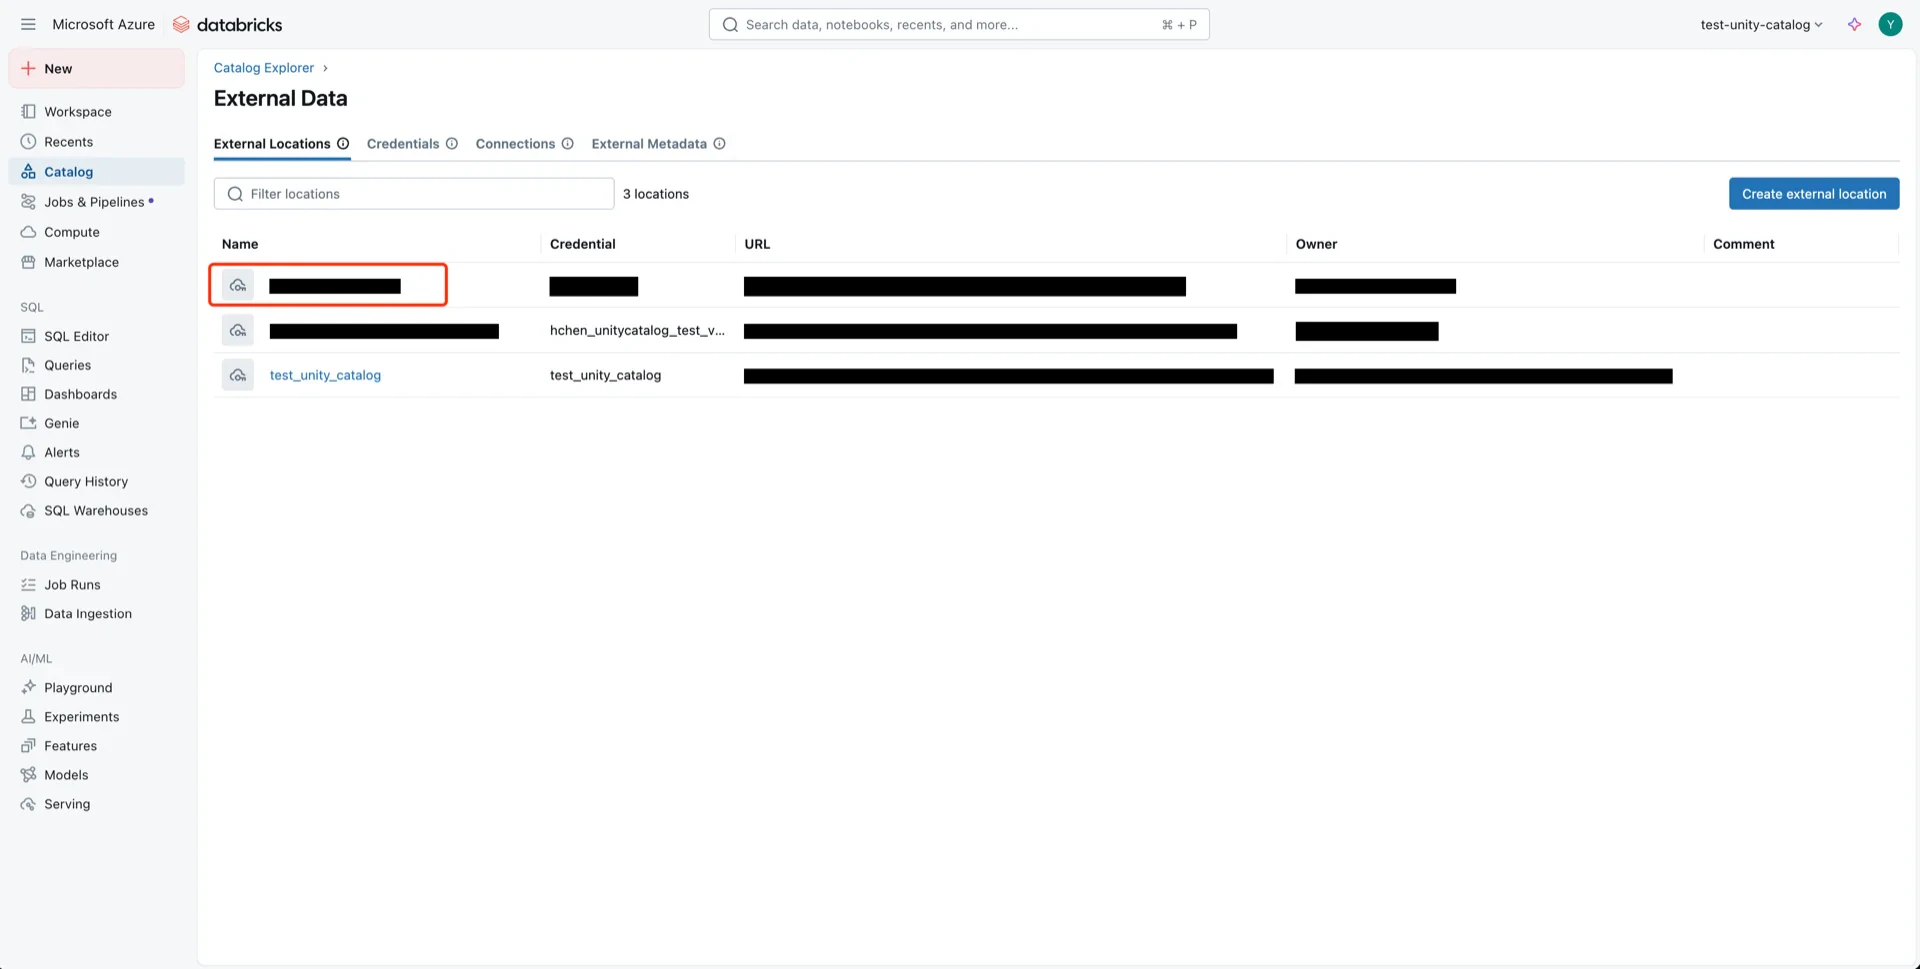
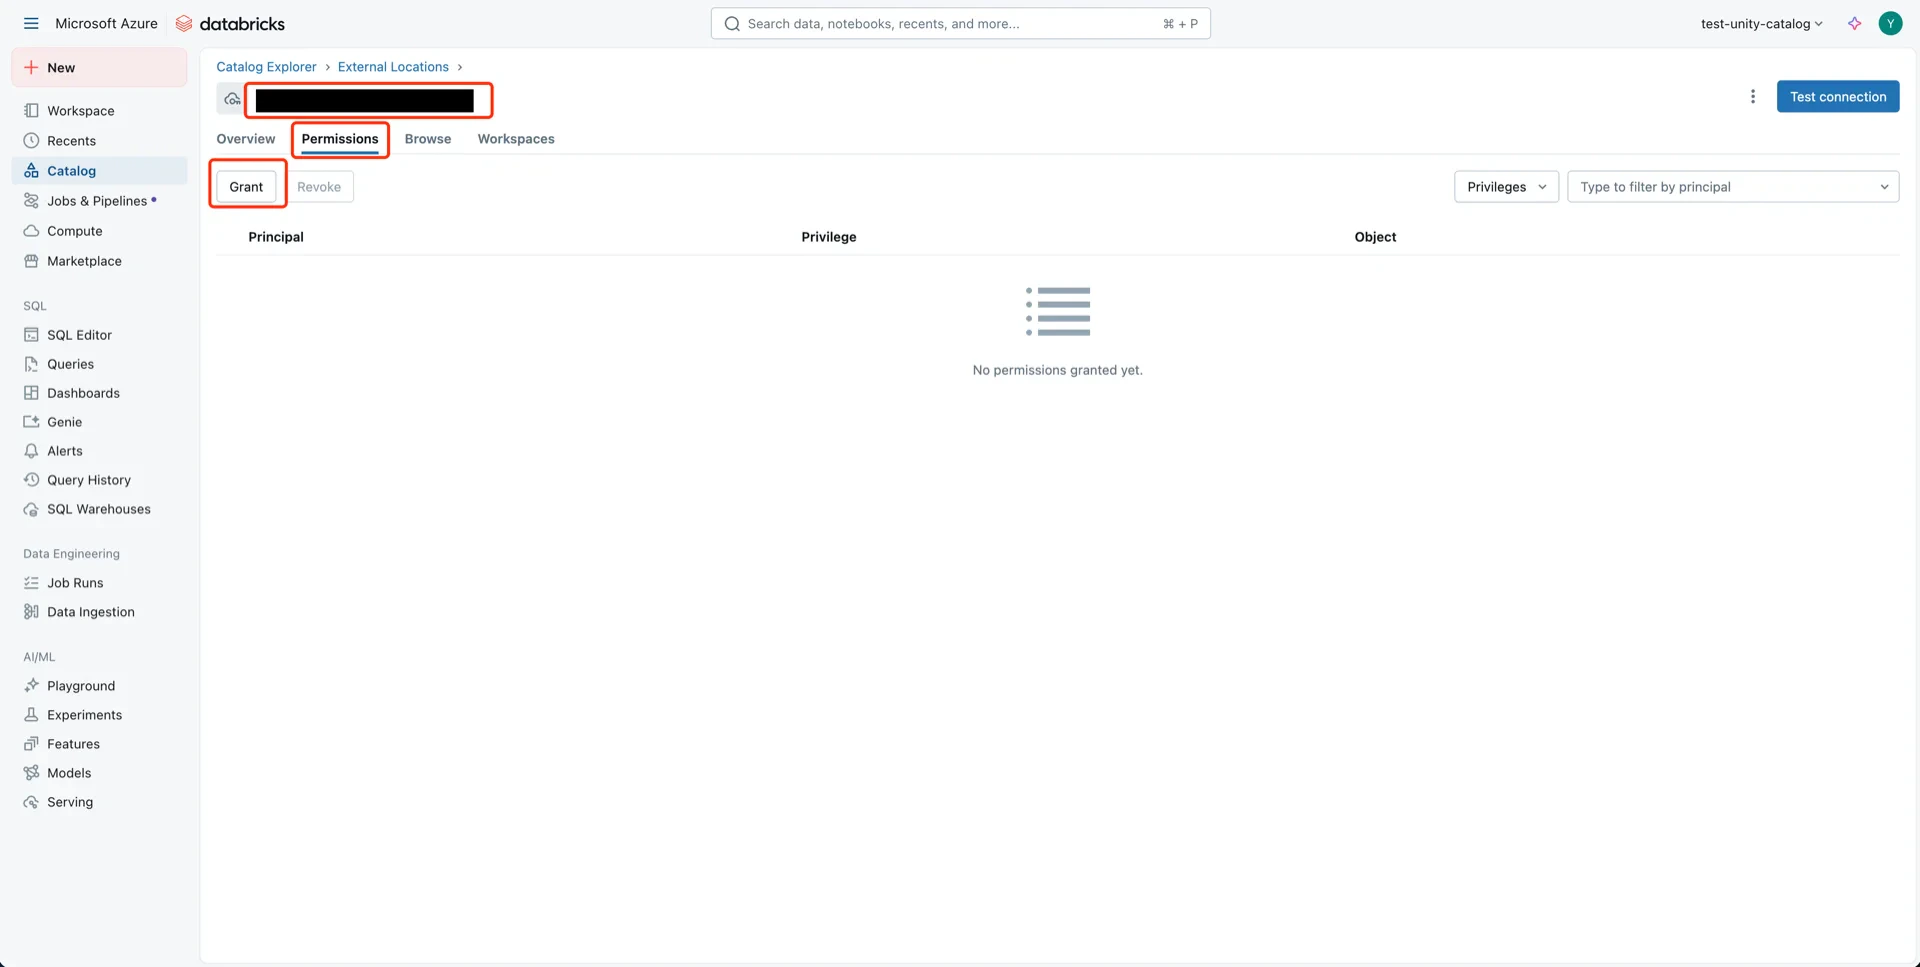
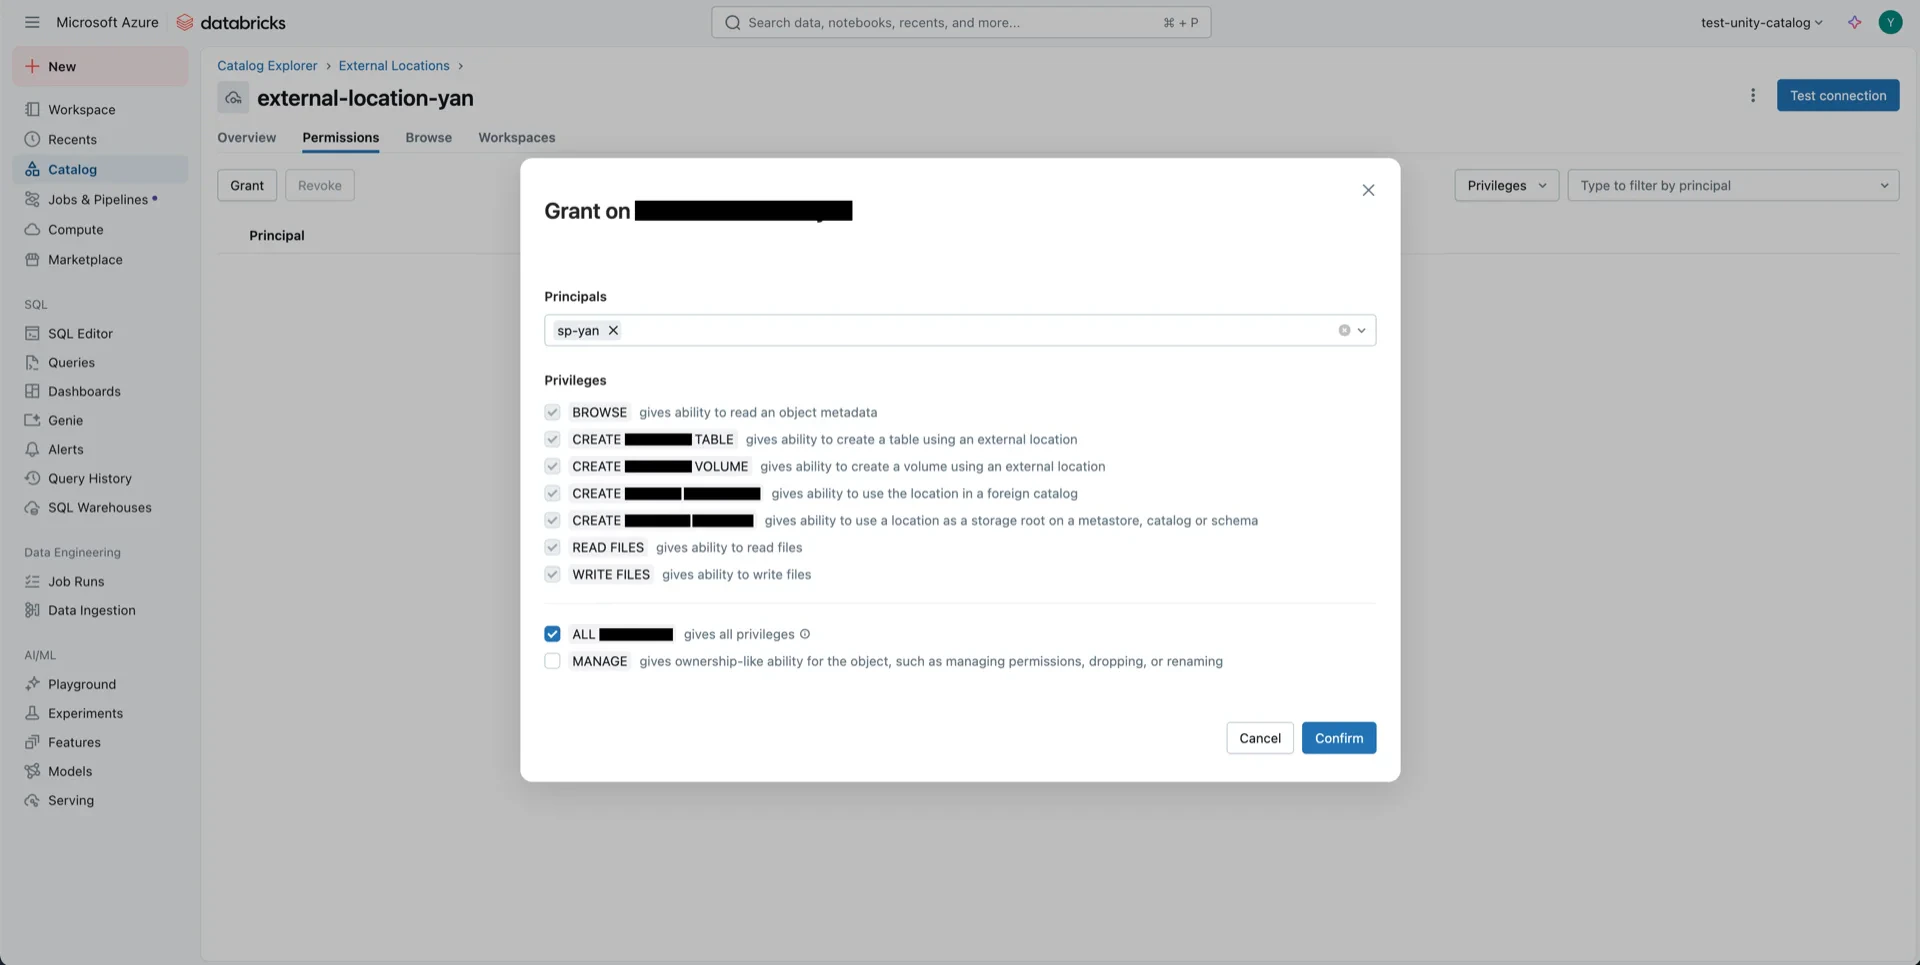
8.2 External Location Permissions

Open the external location from step 5. External location details External location details Click Grant, choose the service principal, select ALL PRIVILEGES, and click Confirm. Grant external location permission Permission granted

Catalog Information Summary

When the steps above are complete, collect the following values for the StreamNative Ursa compaction service:
ValueDescription
unityCatalogUriDatabricks workspace URL (e.g., https://adb-<workspace-id>.azuredatabricks.net)
unityCatalogNameThe Unity Catalog name created in step 7
unityCatalogClientId / unityCatalogClientSecretOAuth2 credentials from step 6
For the next steps, see Configure Lakehouse Catalogs.