
Documentation Index

Fetch the complete documentation index at: https://docs.streamnative.io/llms.txt

Use this file to discover all available pages before exploring further.

This guide describes how to prepare a Snowflake Horizon Catalog for use with StreamNative Ursa as an Iceberg catalog on AWS. For background, see the Snowflake documentation: Write to Apache Iceberg tables using an external query engine through Snowflake Horizon Catalog.

Prerequisites

  • A Snowflake account with Horizon Catalog enabled
  • An AWS account with permissions to create S3 buckets and IAM roles
  • The ACCOUNTADMIN role in Snowflake (required for several SQL operations below)

1. Create an External Volume

The Horizon Catalog uses a Snowflake External Volume to access object storage. Reference: Tutorial: Create your first Apache Iceberg table.

1.1 Identify the Snowflake Account Region

Find the region of your Snowflake account so the S3 bucket can be created in the same region. Snowflake region

1.2 Create an S3 Bucket

Create an S3 bucket in the AWS console, in the same region as your Snowflake account. Create S3 bucket

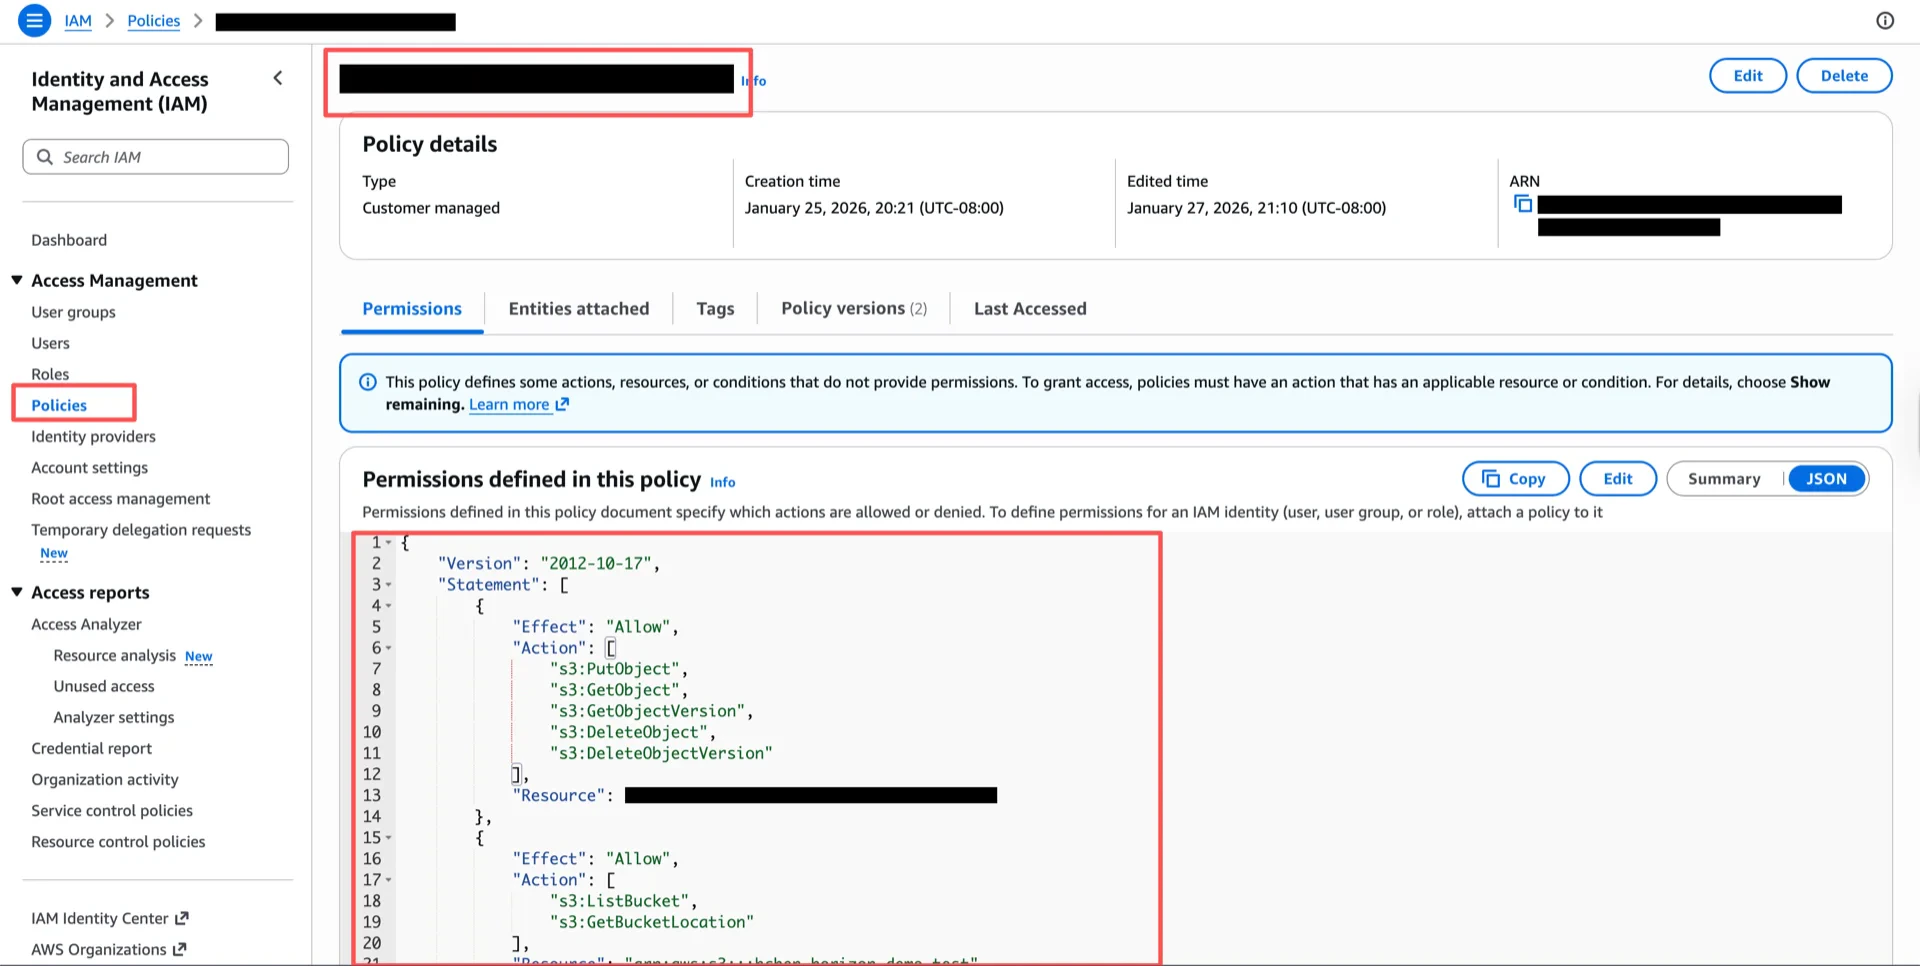
1.3 Create an IAM Policy

Create an IAM policy granting access to the bucket. Replace <your-bucket> with the bucket name from step 1.2.
{
  "Version": "2012-10-17",
  "Statement": [
    {
      "Effect": "Allow",
      "Action": [
        "s3:PutObject",
        "s3:GetObject",
        "s3:GetObjectVersion",
        "s3:DeleteObject",
        "s3:DeleteObjectVersion"
      ],
      "Resource": "arn:aws:s3:::<your-bucket>/*"
    },
    {
      "Effect": "Allow",
      "Action": [
        "s3:ListBucket",
        "s3:GetBucketLocation"
      ],
      "Resource": "arn:aws:s3:::<your-bucket>",
      "Condition": {
        "StringLike": {
          "s3:prefix": ["*"]
        }
      }
    }
  ]
}
IAM policy

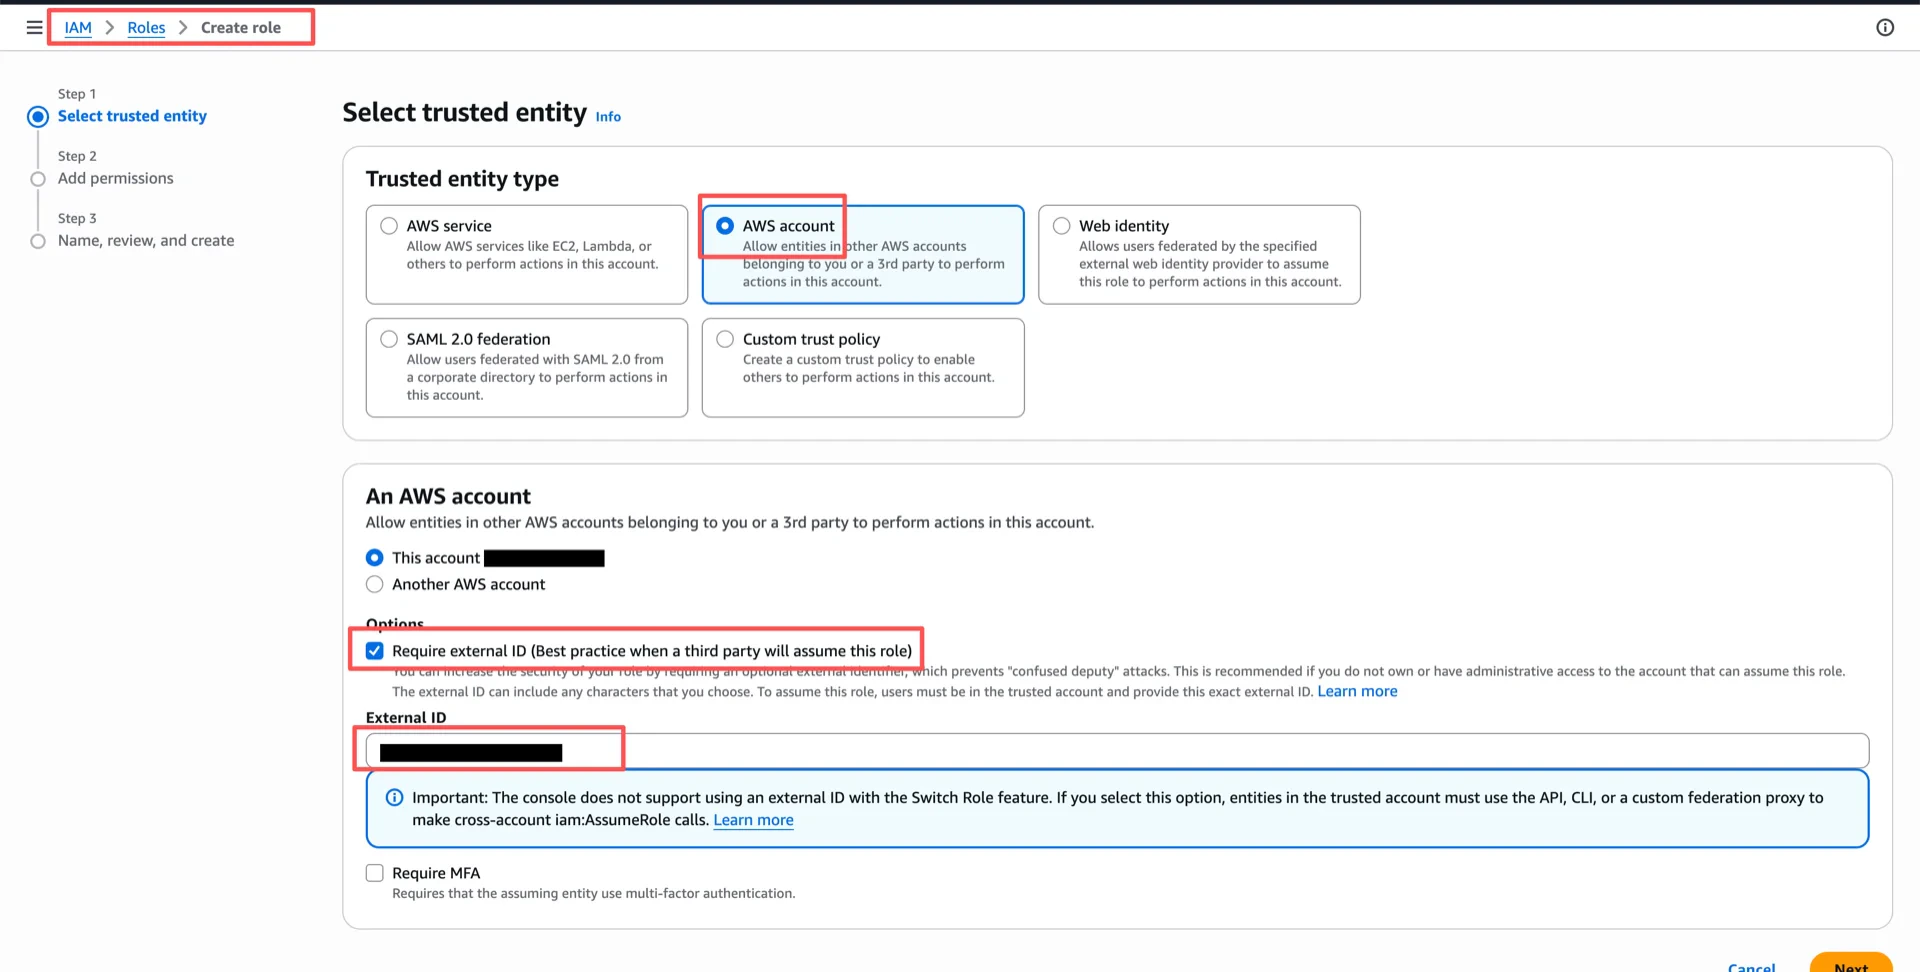
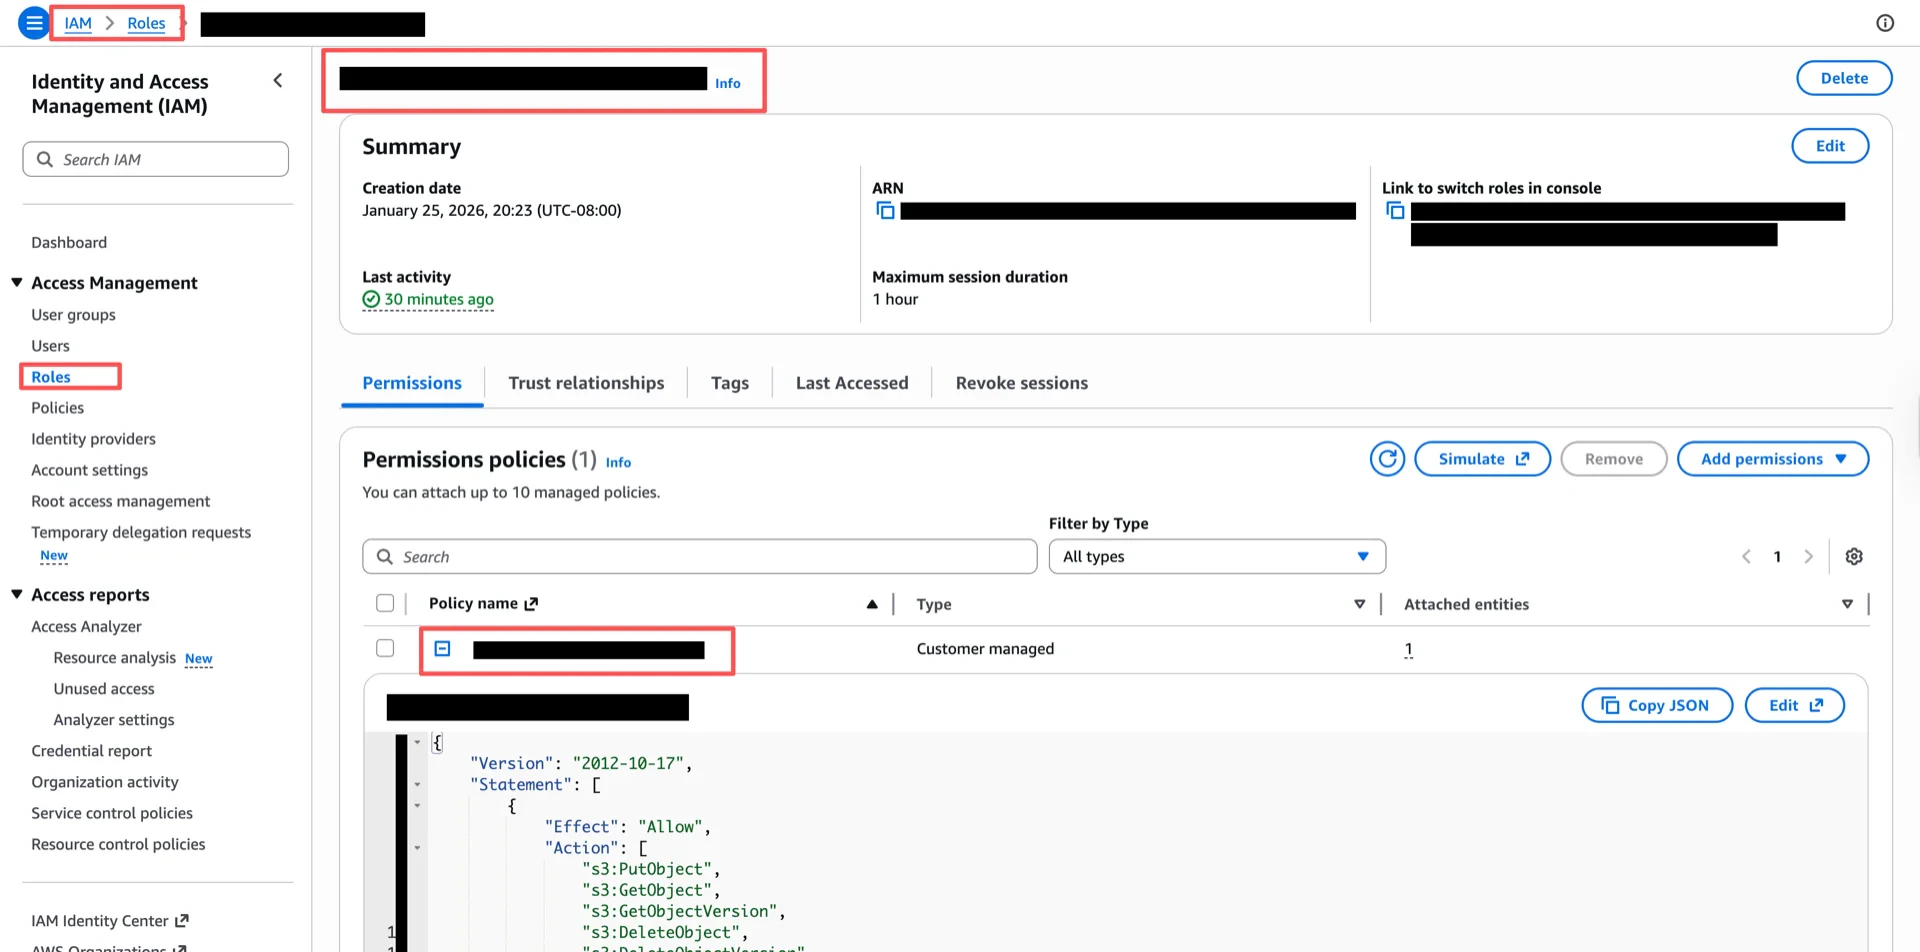
1.4 Create an IAM Role

Create an IAM role with an External ID (for example, iceberg_table_external_id). The trust policy will be updated in step 1.6. Create IAM role Attach the policy from step 1.3 to the role. Bind policy to role

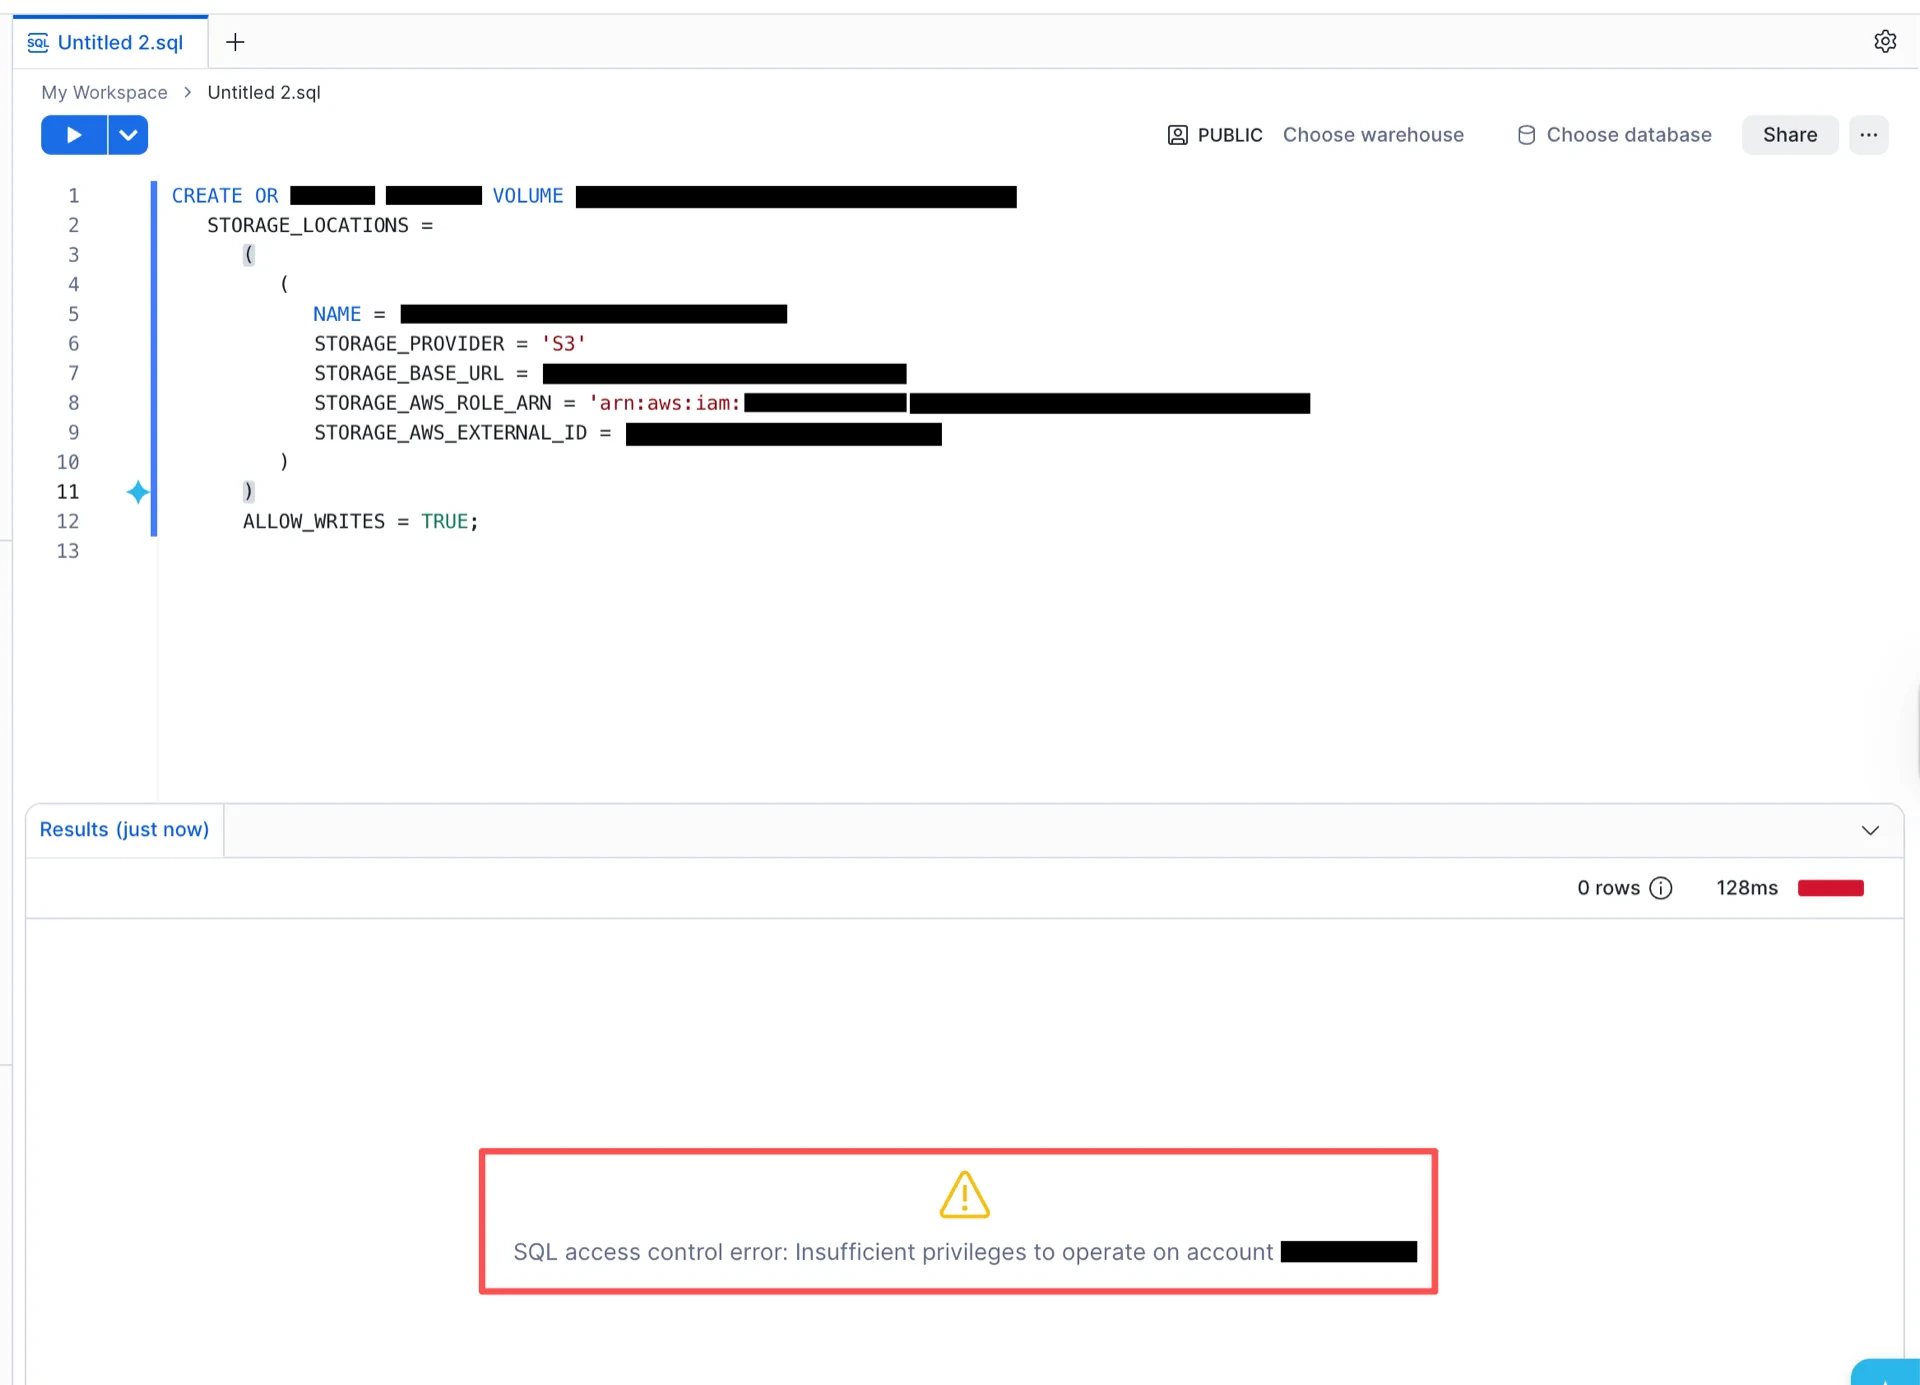
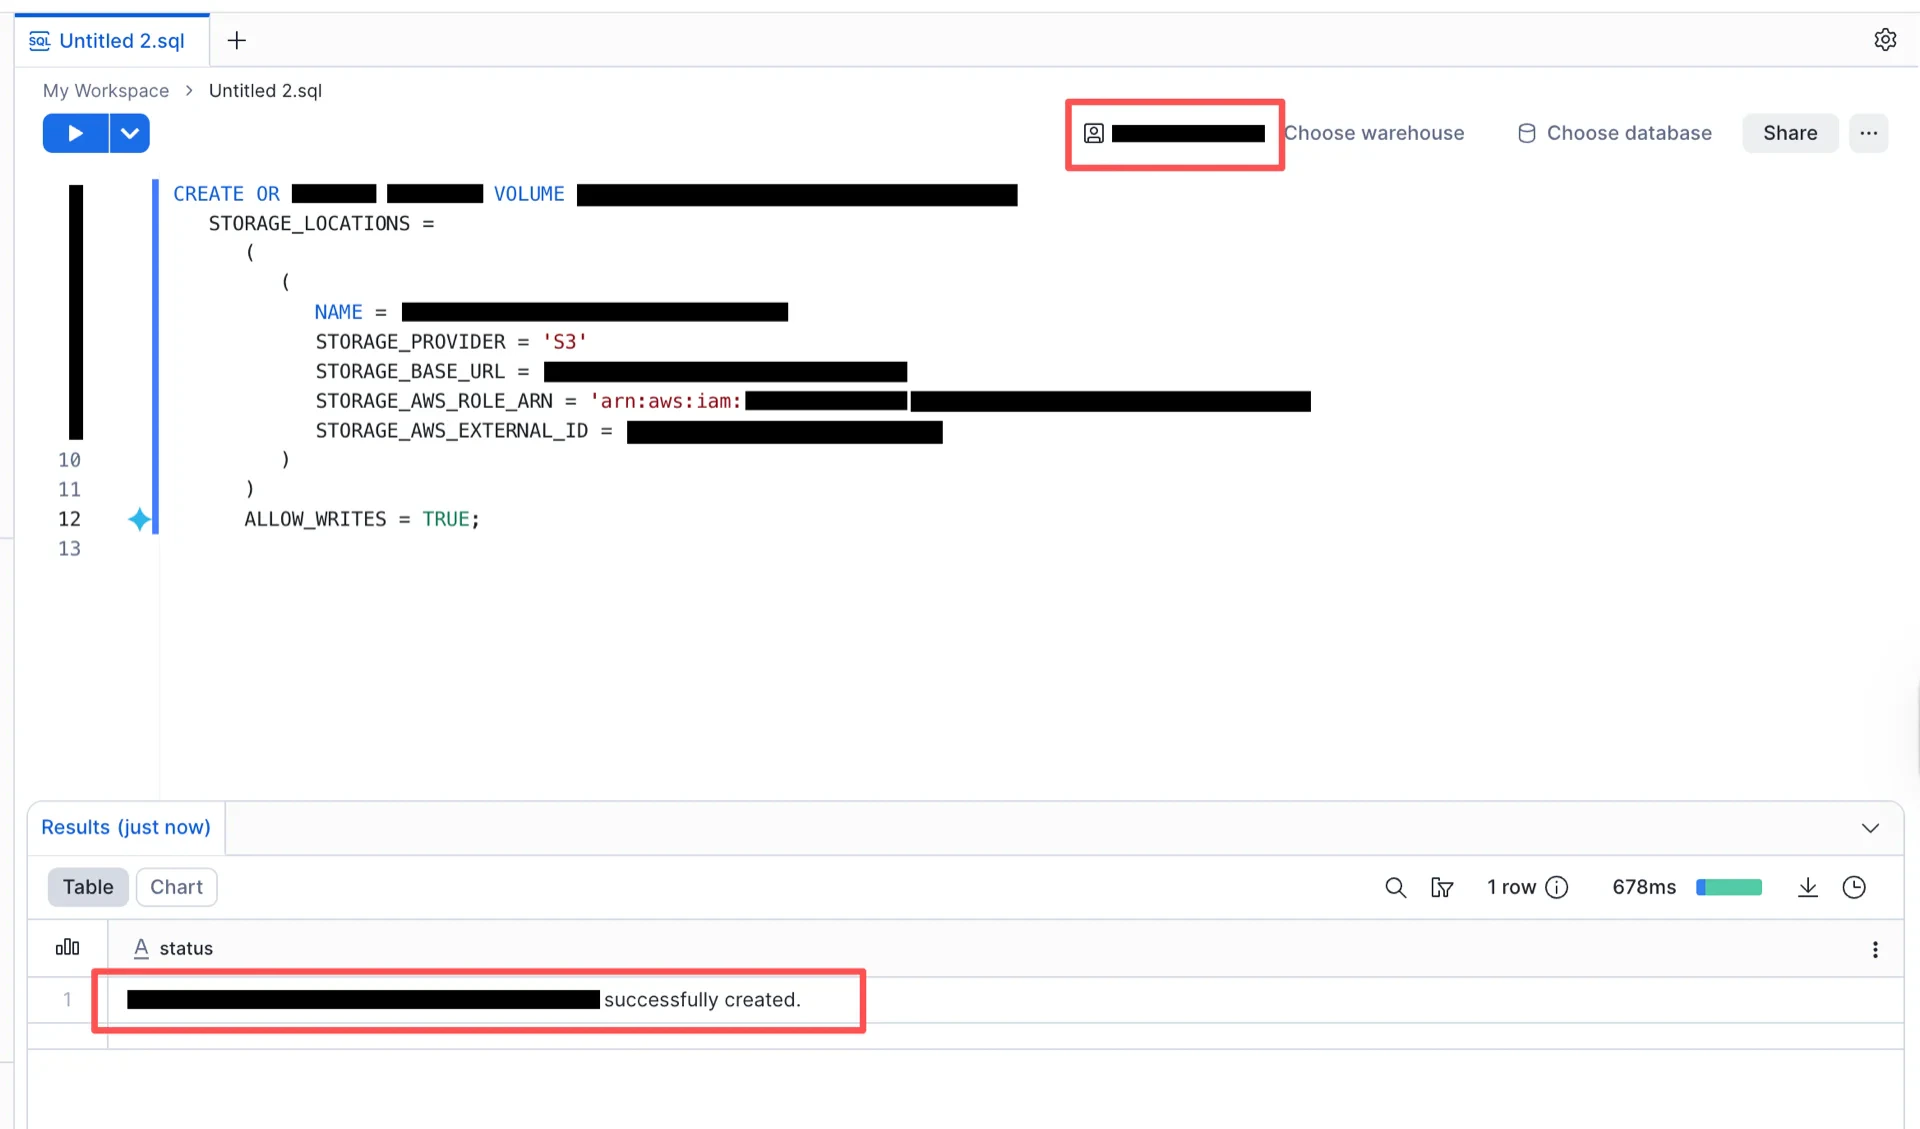
1.5 Create the External Volume in Snowflake

Switch to the ACCOUNTADMIN role and run the following SQL, substituting your values:
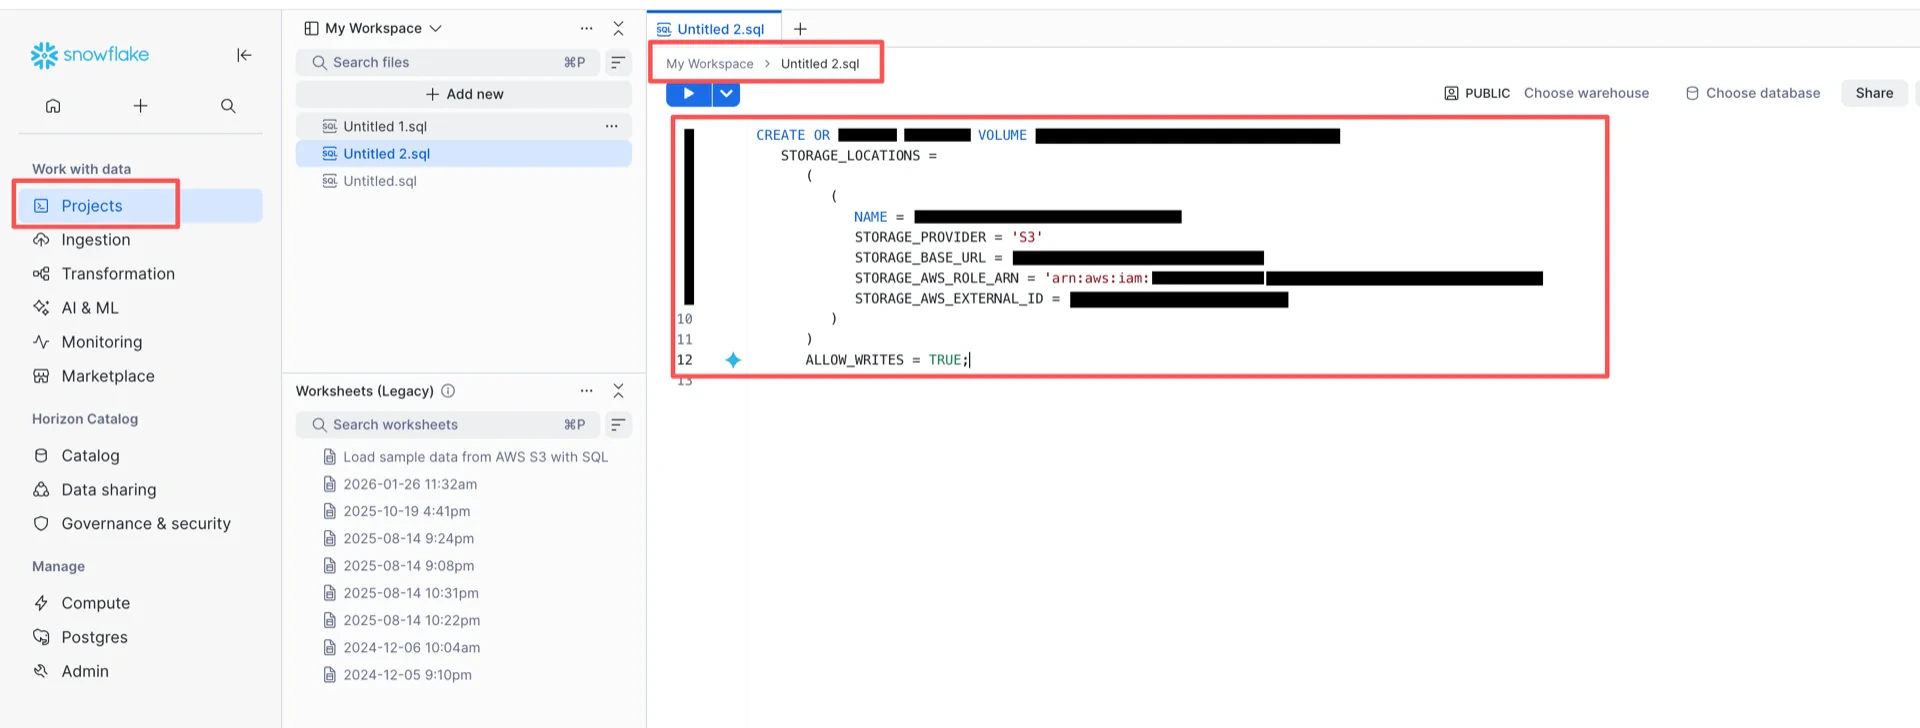
CREATE OR REPLACE EXTERNAL VOLUME <volume_name>
   STORAGE_LOCATIONS = (
      (
         NAME = '<location-name>'
         STORAGE_PROVIDER = 'S3'
         STORAGE_BASE_URL = 's3://<your-bucket>/'
         STORAGE_AWS_ROLE_ARN = 'arn:aws:iam::<your-account-id>:role/<your-role-name>'
         STORAGE_AWS_EXTERNAL_ID = '<your-external-id>'
      )
   )
   ALLOW_WRITES = TRUE;
External volume If the command fails with a permission error, ensure you are using the ACCOUNTADMIN role: Permission issue Switch to ACCOUNTADMIN

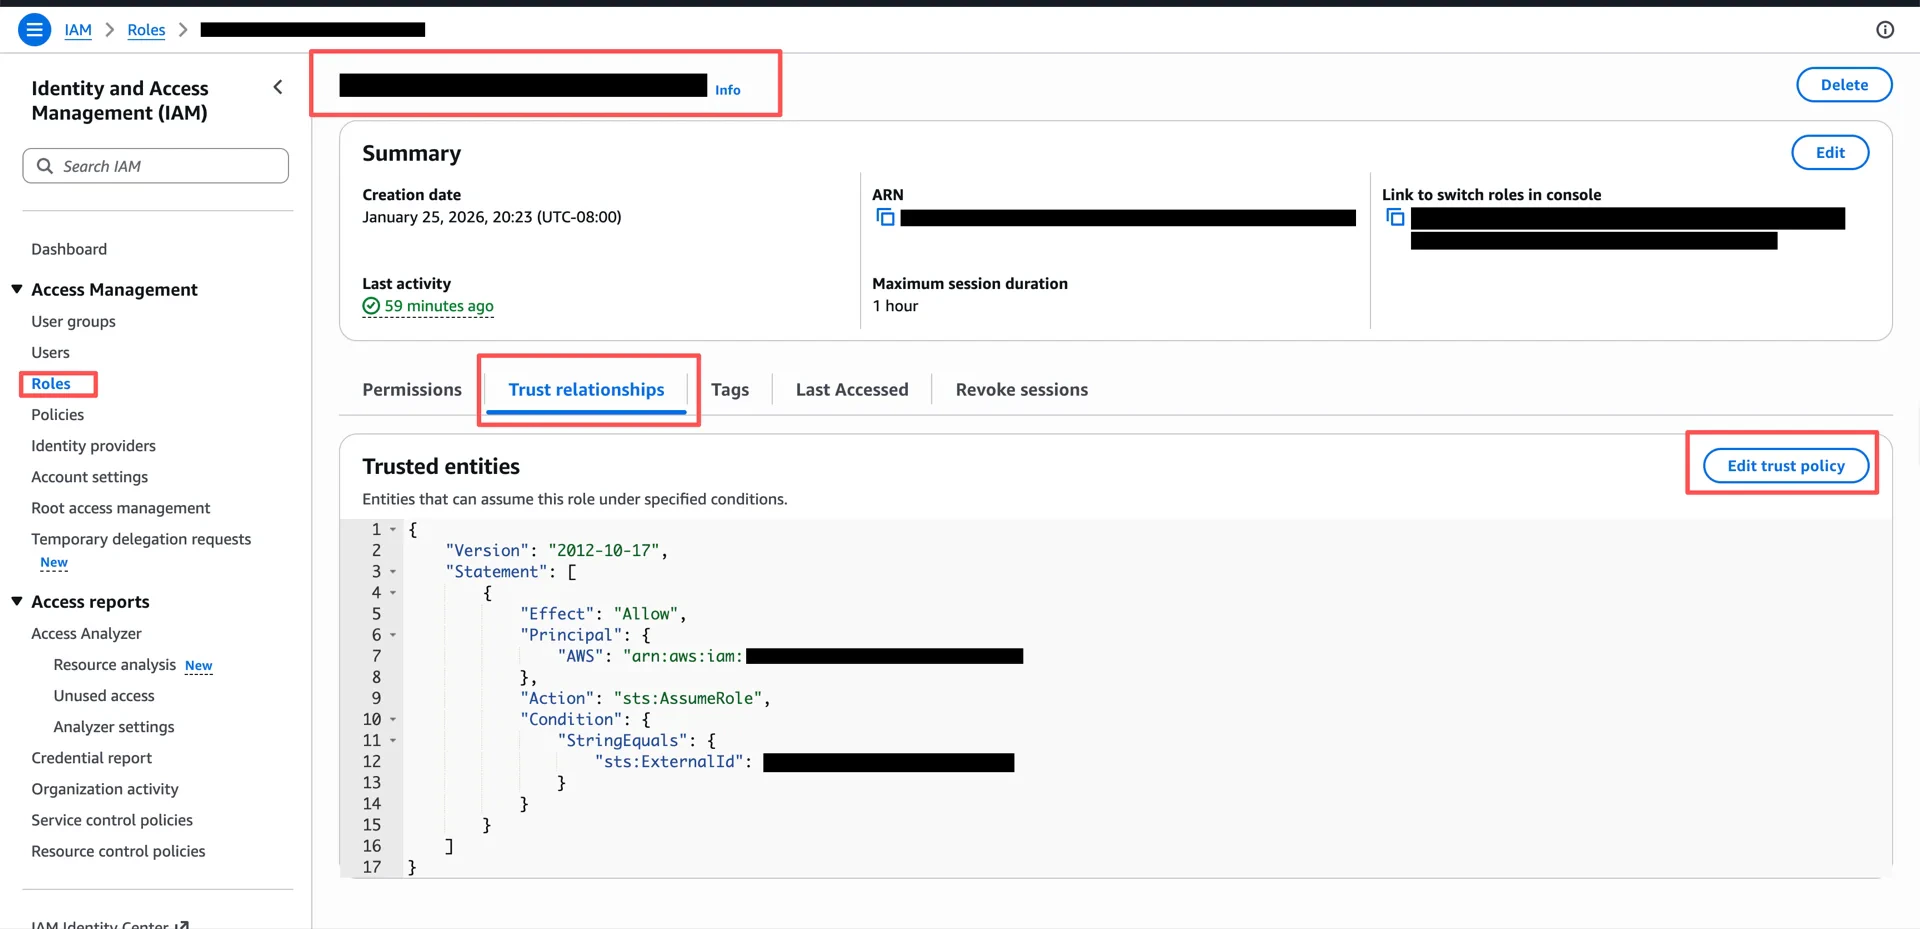
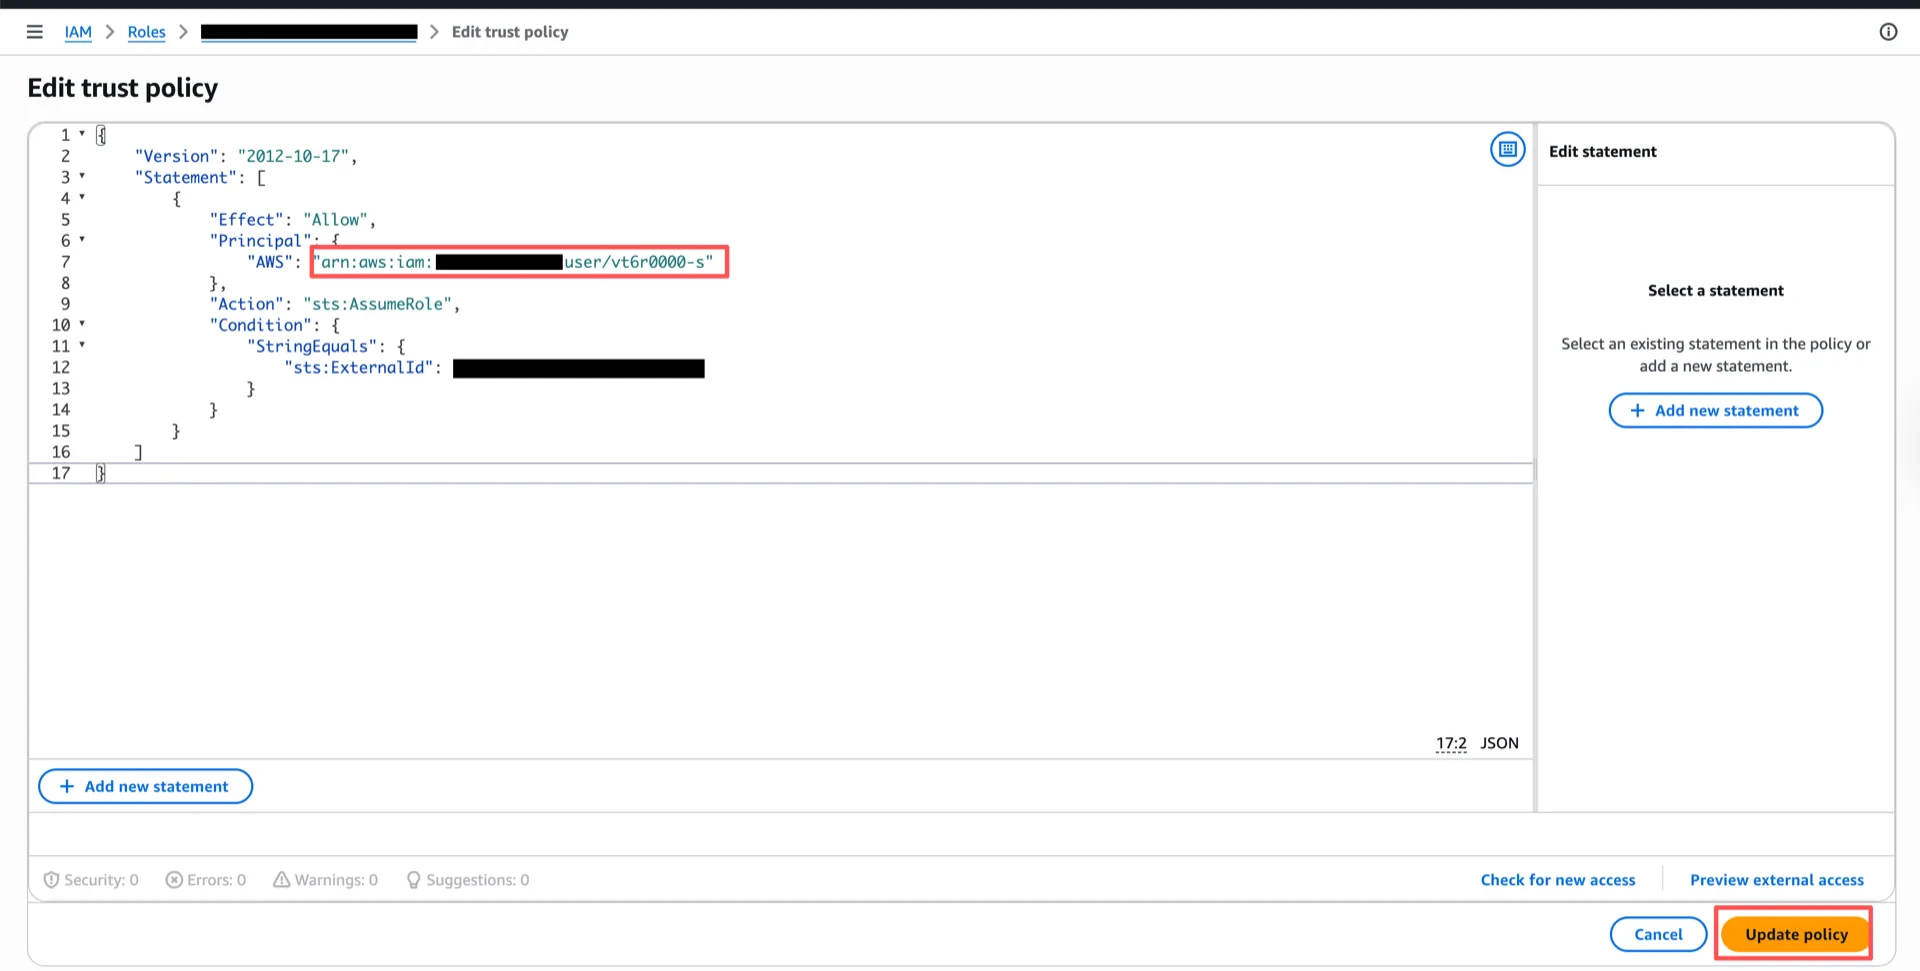
1.6 Configure the Trust Relationship

After the external volume is created, retrieve the Snowflake-generated IAM user ARN:
DESC EXTERNAL VOLUME <volume_name>;
The STORAGE_AWS_IAM_USER_ARN field contains the value (for example, arn:aws:iam::<snowflake-account>:user/<id>). Volume info Return to the AWS IAM console and update the trust policy of the role created in step 1.4 to allow STORAGE_AWS_IAM_USER_ARN to assume the role. Update trust policy Update trust policy

2. Configure Access Control

Note: If you already have roles configured with access to the Iceberg tables you want to use, you can skip this section.
For details, see Configuring access control.
GRANT ROLE ACCOUNTADMIN, SYSADMIN TO USER <username>;
Grant roles

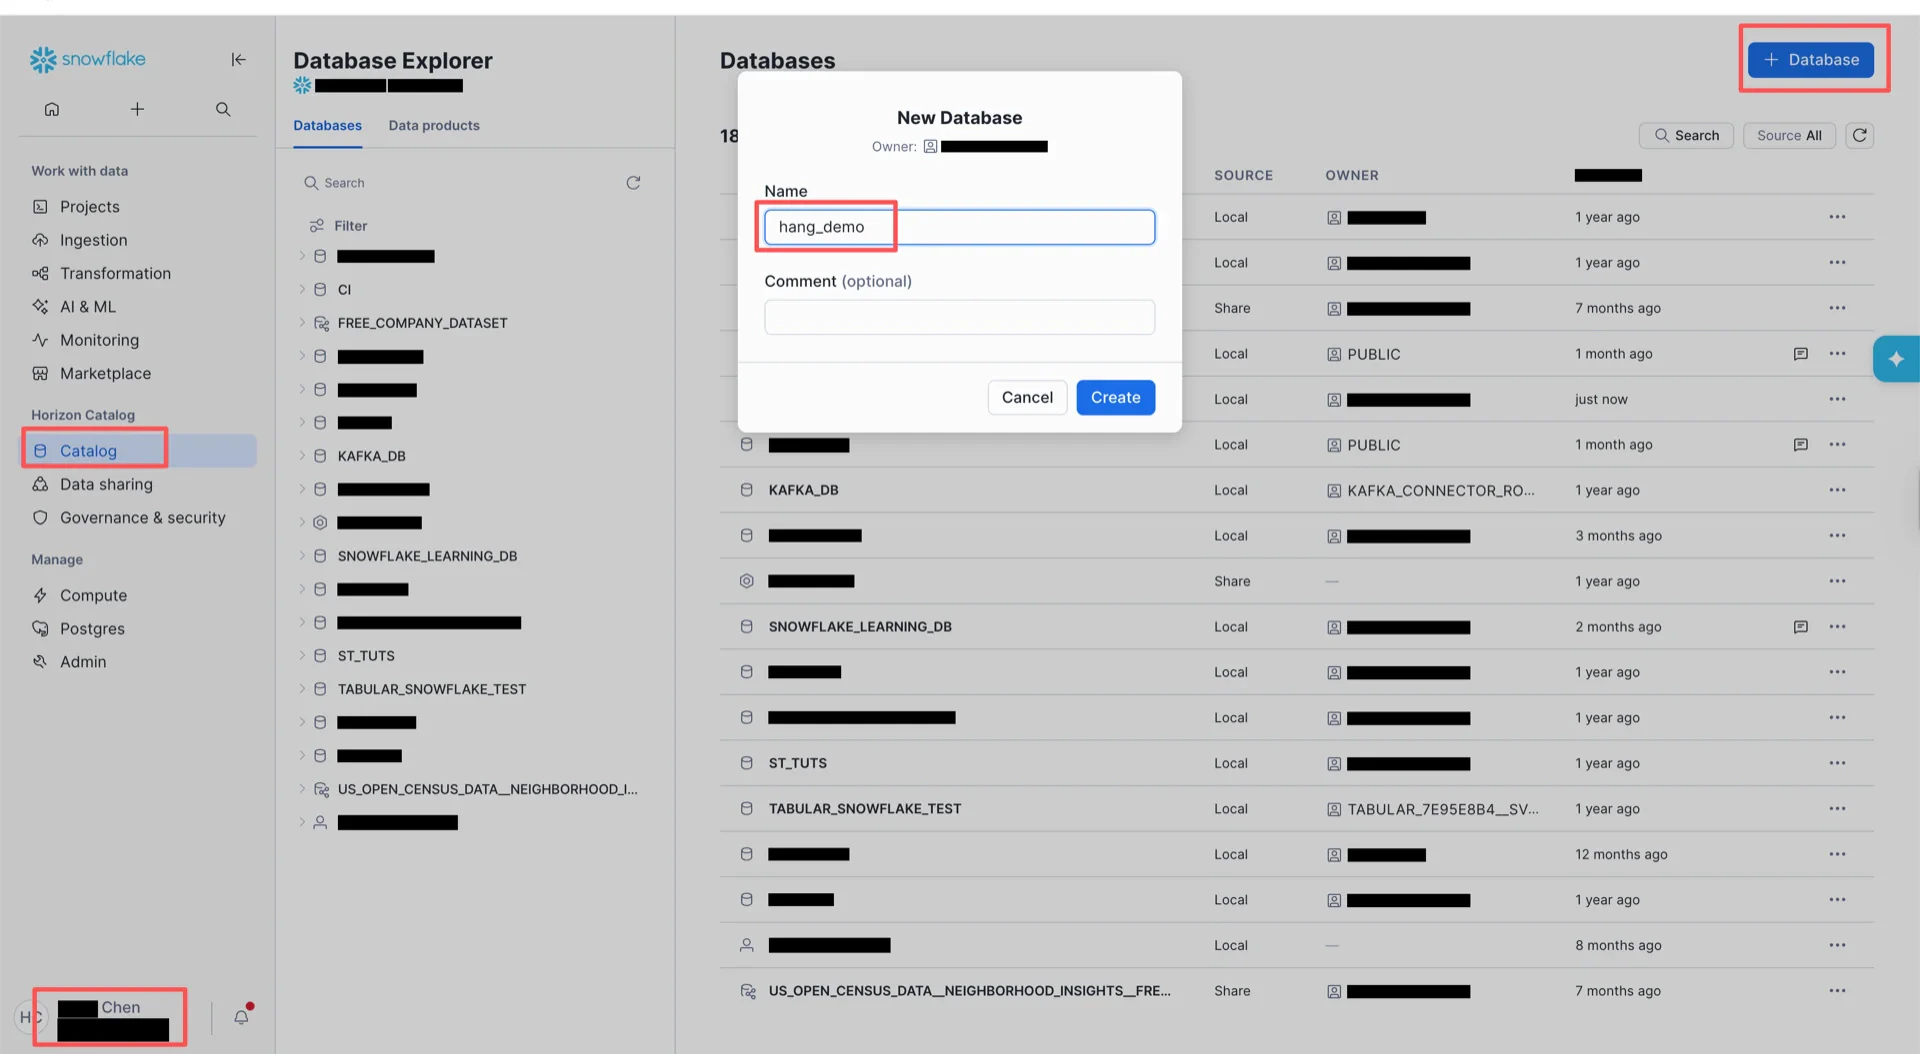
3. Create the Catalog Database

Switch to ACCOUNTADMIN and create the catalog database in the Snowflake UI. Then bind the database to the external volume:
ALTER DATABASE <db_name> SET CATALOG = 'SNOWFLAKE';
ALTER DATABASE <db_name> SET EXTERNAL_VOLUME = '<volume_name>';
Create catalog

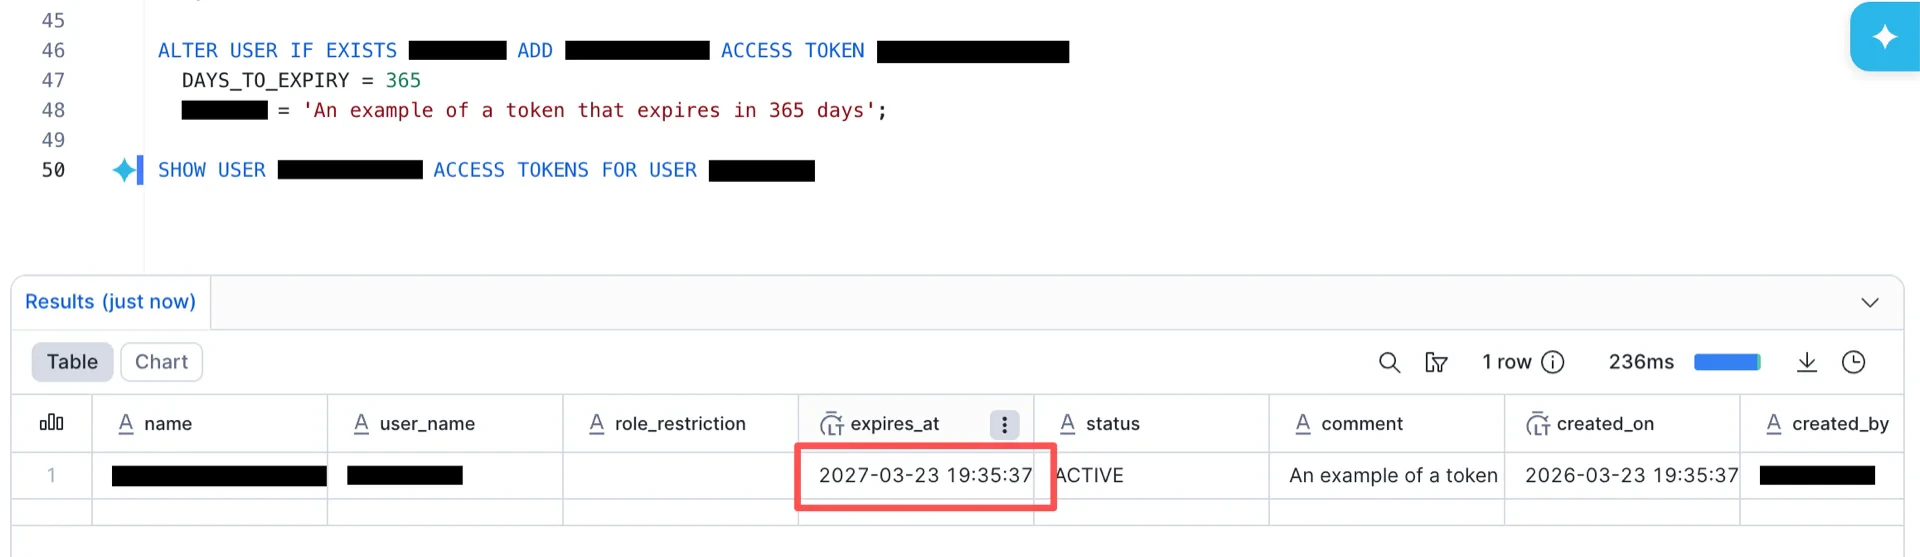
4. Obtain an Access Token

Snowflake Horizon supports three authentication methods: External OAuth, Key-pair authentication, and Programmatic Access Token (PAT). This guide uses PAT.

4.1 Create an Authentication Policy

Switch to ACCOUNTADMIN and run:
USE <db_name>;

CREATE AUTHENTICATION POLICY <policy_name>
  PAT_POLICY=(NETWORK_POLICY_EVALUATION = ENFORCED_NOT_REQUIRED);

ALTER ACCOUNT SET AUTHENTICATION POLICY <policy_name>;

ALTER AUTHENTICATION POLICY <policy_name>
  SET AUTHENTICATION_METHODS = ('OAUTH', 'PASSWORD', 'PROGRAMMATIC_ACCESS_TOKEN');

ALTER AUTHENTICATION POLICY <policy_name>
  SET PAT_POLICY = (MAX_EXPIRY_IN_DAYS=365, DEFAULT_EXPIRY_IN_DAYS=365);

ALTER USER IF EXISTS <username> ADD PROGRAMMATIC ACCESS TOKEN <token_name>
  DAYS_TO_EXPIRY = 365
  COMMENT = 'PAT for StreamNative Ursa';
Record the generated PAT. Generate PAT

4.2 Verify the Endpoint

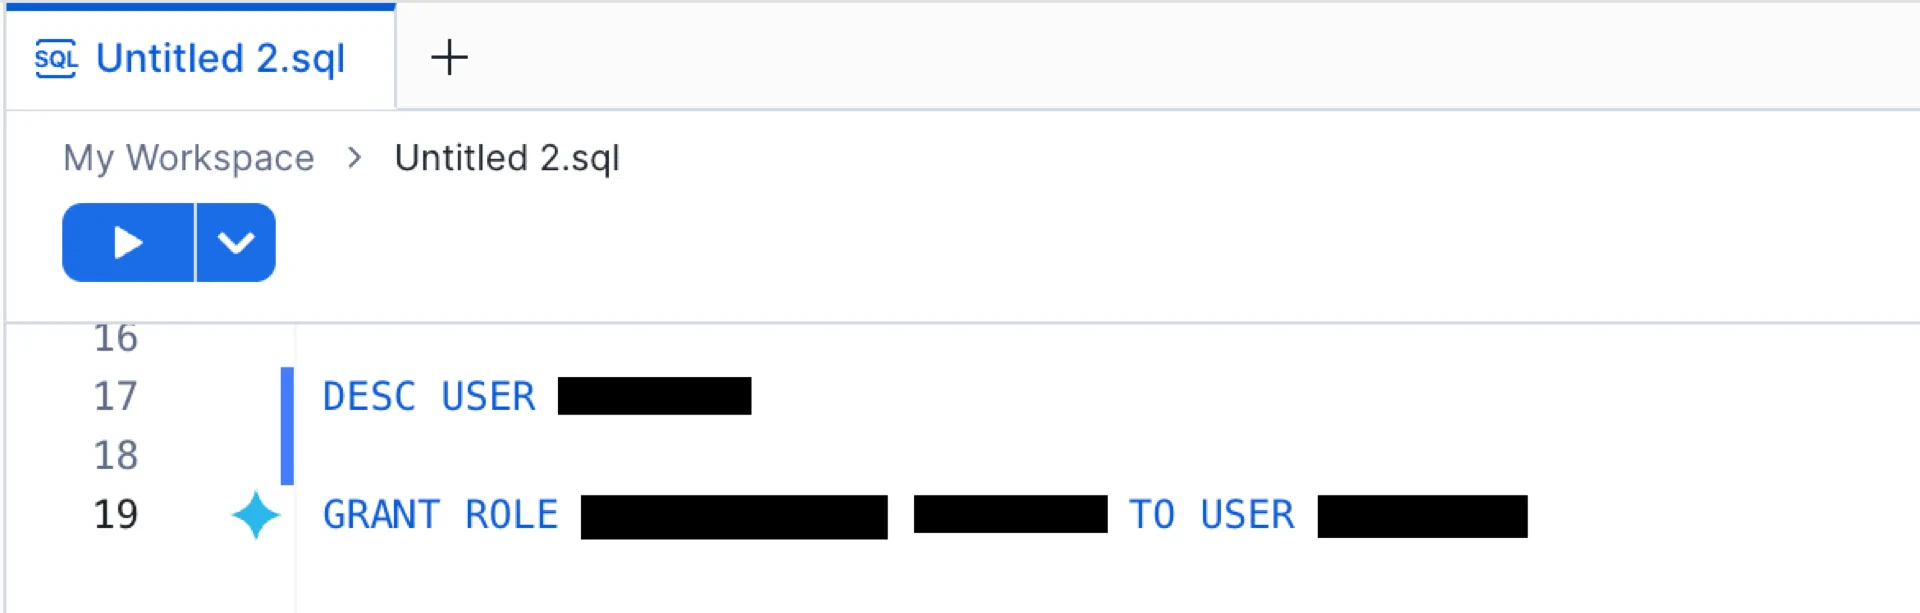
Generate an OAuth access token using the PAT and verify the Horizon REST endpoint:
curl -i --fail -X POST \
  "https://<account_identifier>.snowflakecomputing.com/polaris/api/catalog/v1/oauth/tokens" \
  --header 'Content-Type: application/x-www-form-urlencoded' \
  --data-urlencode 'grant_type=client_credentials' \
  --data-urlencode 'scope=session:role:<role>' \
  --data-urlencode 'client_secret=<PAT>'

curl -i --fail -X GET \
  "https://<account_identifier>.snowflakecomputing.com/polaris/api/catalog/v1/config?warehouse=<database_name>" \
  -H "Authorization: Bearer <access_token>" \
  -H "Content-Type: application/json"

4.3 Grant Permissions

GRANT ROLE PUBLIC TO USER <username>;
GRANT USAGE ON DATABASE <db_name> TO ROLE PUBLIC;
GRANT USAGE ON EXTERNAL VOLUME <volume_name> TO ROLE PUBLIC;

Catalog Information Summary

When the steps above are complete, collect the following values for the StreamNative Ursa compaction service:
-- Determine the URI prefix
SELECT CURRENT_ORGANIZATION_NAME() || '-' || CURRENT_ACCOUNT_NAME();
ValueDescription
iceberg.urihttps://<organization>-<account>.snowflakecomputing.com/polaris/api/catalog
iceberg.warehouseThe catalog database name created in step 3
iceberg.credentialThe PAT generated in step 4.1
iceberg.scopesession:role:<role> (e.g., session:role:PUBLIC)
For the next steps, see Configure Lakehouse Catalogs.