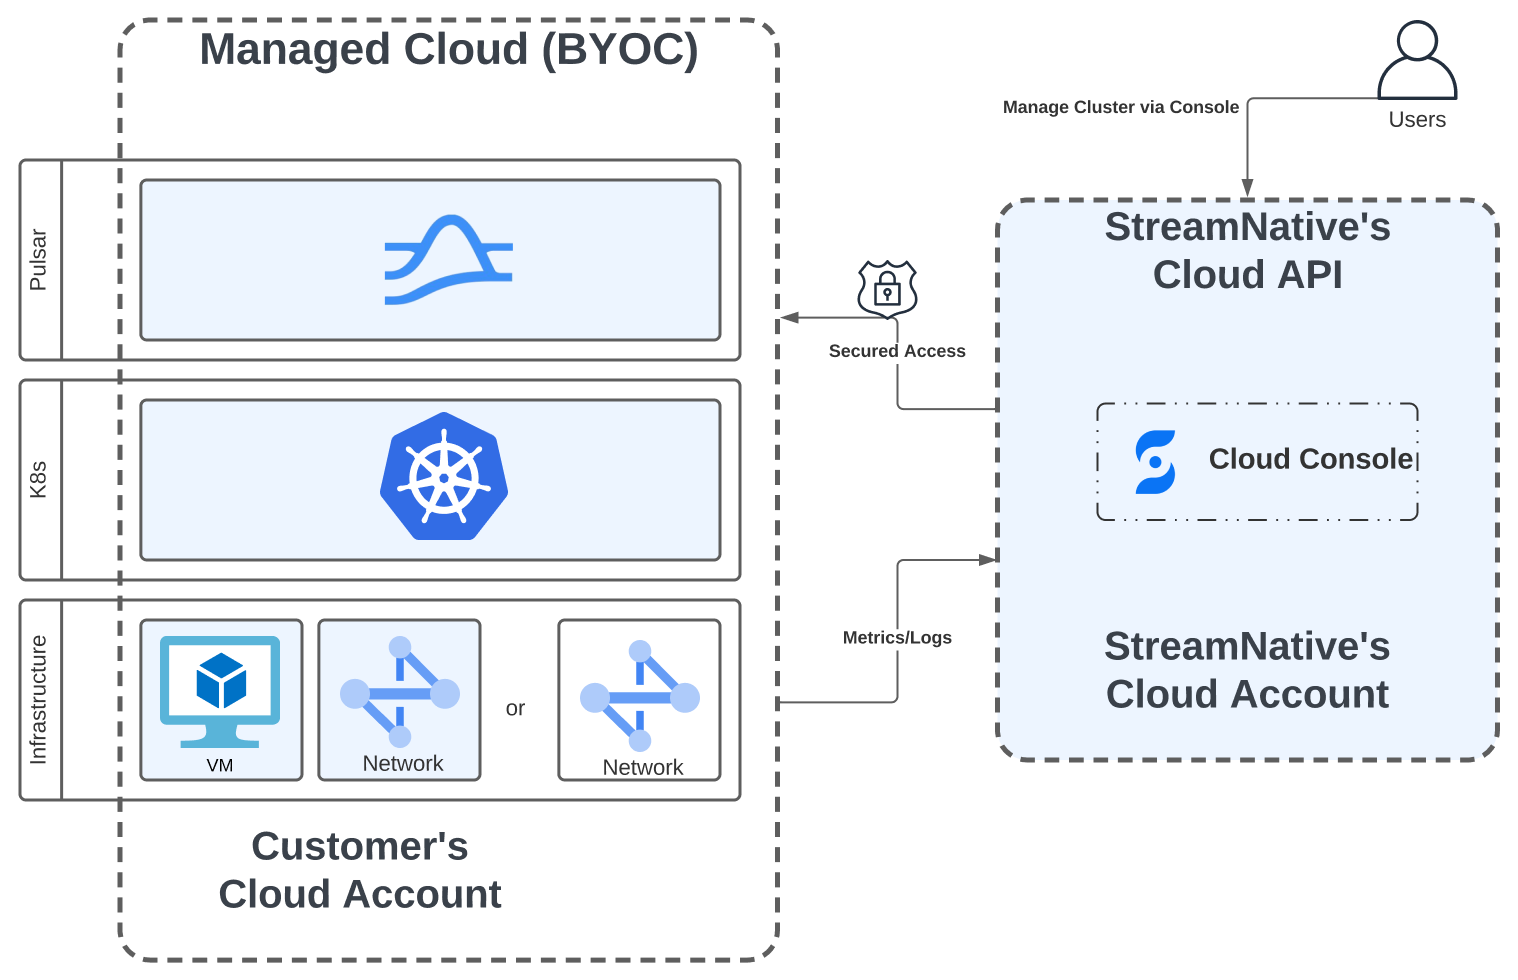
- The infrastructure and network are under your ownership but managed by StreamNative.
- You utilize your own public cloud accounts (AWS, GCP, and Azure).
- The system requires minimal administration on your part.
- You control security protocols, maintain data visibility, and comply with data sovereignty requirements.
Responsibility model
The responsibilities under the StreamNative BYOC model differ from those of the StreamNative Hosted model. For a comparison of responsibilities across different cloud deployment options, refer to the Responsibility Model.How to provision a BYOC infrastructure pool
To deploy a StreamNative cluster within your cloud account, you must first set up a BYOC infrastructure pool.- Grant StreamNative Vendor Access: Authorize the StreamNative Cloud control plane to access your cloud account by applying the StreamNative Vendor Access Terraform module. This module ensures only the minimum necessary access is used to establish your Pulsar clusters. For detailed information on our access approach, please see our access model.
- Create a Cloud Connection: After granting access, establish a Cloud Connection to allow the StreamNative Cloud control plane to interact with your cloud account.
- Create Cloud Environments: With a Cloud Connection in place, you can then create one or more Cloud Environments. Each Cloud Environment encompasses the essential infrastructure resources—compute, storage, and networking—needed for deploying Pulsar clusters.
When you create an Instance with
snctl, you need to specify a poolRef. This poolRef refers to your Cloud Connection.BYOC Provisioning FAQs
- Can I create multiple Cloud Environments in the same region under one Cloud Connection? Yes - you can create multiple Cloud Environments in the same region under a single Cloud Connection.
- Can I create multiple Cloud Environments in different regions under one Cloud Connection? Yes - you can create multiple Cloud Environments in different regions under a single Cloud Connection.
- Can I create multiple Cloud Connections pointing to the same AWS/GCP/Azure account? Yes - within an organization, you can create multiple Cloud Connections that point to the same AWS, GCP, or Azure account. However, unless you have specific requirements, this is not recommended as it can cause confusion.
- What are the requirements for geo replication? For geo replication, all Pulsar clusters under the same Pulsar Instance must be deployed within the same Cloud Environments under the same Cloud Connection.
Next steps
Deploy BYOC Clusters on AWS
- Grant StreamNative access to your AWS account.
- Create a Cloud Connection to your AWS account.
- Create Cloud Environments in your AWS account.
- Create a BYOC Instance using the established cloud connection.
- Create a BYOC cluster.
Deploy BYOC Clusters on GCP
- Grant StreamNative access to your GCP project.
- Create a Cloud Connection to your GCP project.
- Create Cloud Environments in your GCP project.
- Create a BYOC Instance using the established cloud connection.
- Create a BYOC cluster.
Deploy BYOC Clusters on Azure
- Grant StreamNative access to your Azure account.
- Create a Cloud Connection to your Azure account.
- Create Cloud Environments in your Azure account.
- Create a BYOC Instance using the established cloud connection.
- Create a BYOC cluster.