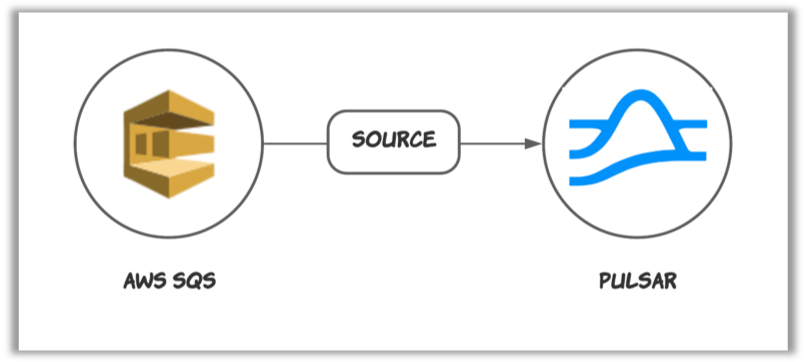
The AWS Simple Queue Service (SQS) source connector feeds data from Amazon AWS SQS and writes data to Pulsar topics.
How to get
You can get the SQS source connector using one of the following methods.
Use it with Function Worker
Download the NAR package from here.
Build it from the source code.
Clone the source code to your machine.
git clone https://github.com/streamnative/pulsar-io-sqs.git
Assume that
PULSAR_IO_SQS_HOME
is the home directory for thepulsar-io-sqs
repo. Build the connector in the${PULSAR_IO_SQS_HOME}
directory.mvn clean install -DskipTests
After the connector is successfully built, a
NAR
package is generated under thetarget
directory.ls target pulsar-io-sqs-2.9.5.4.nar
Use it with Function Mesh
Pull the SQS connector Docker image from here.
How to configure
Before using the SQS source connector, you need to configure it. Below are the properties and their descriptions.
Name | Type | Required | Default | Description |
---|---|---|---|---|
awsEndpoint | String | false | " " (empty string) | AWS SQS end-point URL. You can find it at AWS SQS Service endpoints. |
awsRegion | String | true | " " (empty string) | Supported AWS region. For example, us-west-1, us-west-2. |
awsCredentialPluginName | String | false | " " (empty string) | Fully-qualified class name of implementation of AwsCredentialProviderPlugin . Built-in options are listed below. It is a factory class that creates an AWSCredentialsProvider that is used by the SQS connector. If it is empty, the SQS connector creates a default AWSCredentialsProvider which accepts a JSON-format map of credentials in awsCredentialPluginParam . |
awsCredentialPluginParam | String | true | " " (empty string) | The JSON parameter to initialize AwsCredentialsProviderPlugin . |
queueName | String | true | " " (empty string) | Name of the SQS queue that messages should be read from or written to. |
batchSizeOfOnceReceive | int | false | 1 | The maximum number of messages that are pulled from SQS at one time. By default, it is set to 1. The value ranges from 1 to 10. |
numberOfConsumers | int | false | 1 | The expected numbers of consumers. You can scale consumers horizontally to achieve high throughput. By default, it is set to 1. The value ranges from 1 to 50. |
Note
The batchSizeOfOnceReceive
and numberOfConsumers
options are available for SQS source 2.8.4.3+, 2.9.4.1+, and 2.10.1.13+. For details about how to test AWS SQS source performance, see Performance Test on AWS SQS Source Connector.
AWS Credential permissions
The provided AWS credentials must have permissions to access AWS resources. To use the SQS source connector, make sure the AWS credentials have the following permissions to Amazon SQS API:
- sqs:CreateQueue
- sqs:DeleteMessage
- sqs:ChangeMessageVisibility
- sqs:GetQueueUrl
- sqs:GetQueueAttributes
- sqs:ReceiveMessage
Built-in AWS Credential plugins
The following are built-in AwsCredentialProviderPlugin
plugins:
If the plugin is empty, the SQS connector creates a default AWSCredentialsProvider which accepts a JSON-format map of credentials in awsCredentialPluginParam
.
The configuration of the default AWSCredentialsProvider is as follows:
{
"accessKey": "myKey",
"secretKey": "mySecretKey",
}
org.apache.pulsar.io.aws.AwsDefaultProviderChainPlugin
This plugin takes no configuration, it uses the default AWS provider chain.
For more information, see AWS documentation.
org.apache.pulsar.io.aws.STSAssumeRoleProviderPlugin
This plugin takes a configuration (via the awsCredentialPluginParam
) that describes a role to assume when running the SQS Client.
This configuration takes the form of a small JSON-format document like below:
{"roleArn": "arn...", "roleSessionName": "name"}
For more information about Amazon SQS API permissions, see Amazon SQS API permissions: Actions and resource reference.
Configure it with Function Worker
You can create a configuration file (JSON or YAML) to set the properties as below.
Example
JSON
{ "tenant": "public", "namespace": "default", "name": "sqs-source", "topicName": "test-queue-pulsar", "archive": "connectors/pulsar-io-sqs-2.9.5.4.nar", "parallelism": 1, "configs": { "awsEndpoint": "https://sqs.us-west-2.amazonaws.com", "awsRegion": "us-west-2", "queueName": "test-queue", "awsCredentialPluginName": "", "awsCredentialPluginParam": '{"accessKey":"myKey","secretKey":"my-Secret"}' } }
YAML
tenant: "public" namespace: "default" name: "sqs-source" topicName: "test-queue-pulsar" archive: "connectors/pulsar-io-sqs-2.9.5.4.nar" parallelism: 1 configs: awsEndpoint: "https://sqs.us-west-2.amazonaws.com" awsRegion: "us-west-2" queueName: "test-queue" awsCredentialPluginName: "" awsCredentialPluginParam: '{"accessKey":"myKey","secretKey":"my-Secret"}'
Configure it with Function Mesh
You can submit a CustomResourceDefinitions (CRD) to create an SQS source connector. Using CRD makes Function Mesh naturally integrate with the Kubernetes ecosystem. For more information about Pulsar source CRD configurations, see here.
You can define a CRD file (YAML) to set the properties as below.
apiVersion: compute.functionmesh.io/v1alpha1
kind: Source
metadata:
name: sqs-source-sample
spec:
image: streamnative/pulsar-io-sqs:2.9.5.4
className: org.apache.pulsar.ecosystem.io.sqs.SQSSource
replicas: 1
maxReplicas: 1
output:
topic: persistent://public/default/destination
typeClassName: “[B”
sourceConfig:
awsEndpoint: "https://sqs.us-west-2.amazonaws.com"
awsRegion: "us-west-2"
queueName: "test-queue"
awsCredentialPluginName: ""
awsCredentialPluginParam: '{"accessKey":"myKey","secretKey":"my-Secret"}'
pulsar:
pulsarConfig: "test-pulsar-source-config"
resources:
limits:
cpu: "0.2"
memory: 1.1G
requests:
cpu: "0.1"
memory: 1G
java:
jar: connectors/pulsar-io-sqs-2.9.5.4.nar
clusterName: test-pulsar
How to use
You can use the SQS source connector with Function Worker or Function Mesh.
Use it with Function Worker
You can use the SQS source connector as a non built-in connector or a built-in connector.
Use it as non built-in connector
If you already have a Pulsar cluster, you can use the SQS source connector as a non built-in connector directly.
This example shows how to create an SQS source connector on a Pulsar cluster using the pulsar-admin sources create
command.
PULSAR_HOME/bin/pulsar-admin sources create \
--archive pulsar-io-sqs-2.9.5.4.nar \
--source-config-file sqs-source-config.yaml \
--classname org.apache.pulsar.ecosystem.io.sqs.SQSSource \
--name sqs-source
Use it as built-in connector
You can make the SQS source connector as a built-in connector and use it on a standalone cluster or on-premises cluster.
Standalone cluster
This example describes how to use the SQS source connector to feed data from SQS and write data to Pulsar topics in standalone mode.
Prepare SQS service.
For more information, see Getting Started with Amazon SQS.
Copy the NAR package to the Pulsar connectors directory.
cp pulsar-io-sqs-2.9.5.4.nar PULSAR_HOME/connectors/pulsar-io-sqs-2.9.5.4.nar
Start Pulsar in standalone mode.
PULSAR_HOME/bin/pulsar standalone
Run the SQS source connector locally.
PULSAR_HOME/bin/pulsar-admin sources localrun \ --source-type sqs \ --source-config-file sqs-source-config.yaml
Consume the message from the Pulsar topic.
PULSAR_HOME/bin/pulsar-client consume -s "sub-products" public/default/test-queue-pulsar -n 0
Send a message to the SQS queue using the AWS SQS CLI tool.
aws sqs send-message --queue-url ${QUEUE_URL} --message-body "Hello From SQS"
Now you can see the message "Hello From SQS" from the Pulsar consumer.
On-premises cluster
This example explains how to create an SQS source connector in an on-premises cluster.
Copy the NAR package of the SQS connector to the Pulsar connectors directory.
cp pulsar-io-sqs-2.9.5.4.nar $PULSAR_HOME/connectors/pulsar-io-sqs-2.9.5.4.nar
Reload all built-in connectors.
PULSAR_HOME/bin/pulsar-admin sources reload
Check whether the SQS source connector is available on the list or not.
PULSAR_HOME/bin/pulsar-admin sources available-sources
Create an SQS source connector on a Pulsar cluster using the
pulsar-admin sources create
command.PULSAR_HOME/bin/pulsar-admin sources create \ --source-type sqs \ --source-config-file sqs-source-config.yaml \ --name sqs-source
Use it with Function Mesh
This example demonstrates how to create an SQS source connector through Function Mesh.
Prerequisites
Create and connect to a Kubernetes cluster.
Create a Pulsar cluster in the Kubernetes cluster.
Install the Function Mesh Operator and CRD into the Kubernetes cluster.
Prepare SQS service.
For more information, see Getting Started with Amazon SQS.
Step
Define the SQS source connector with a YAML file and save it as
source-sample.yaml
.This example shows how to publish the SQS source connector to Function Mesh with a Docker image.
apiVersion: compute.functionmesh.io/v1alpha1 kind: Source metadata: name: sqs-source-sample spec: image: streamnative/pulsar-io-sqs:2.9.5.4 className: org.apache.pulsar.ecosystem.io.sqs.SQSSource replicas: 1 maxReplicas: 1 output: topic: persistent://public/default/destination typeClassName: “[B” sourceConfig: awsEndpoint: "https://sqs.us-west-2.amazonaws.com" awsRegion: "us-west-2" queueName: "test-queue" awsCredentialPluginName: "" awsCredentialPluginParam: '{"accessKey":"myKey","secretKey":"my-Secret"}' pulsar: pulsarConfig: "test-pulsar-source-config" resources: limits: cpu: "0.2" memory: 1.1G requests: cpu: "0.1" memory: 1G java: jar: connectors/pulsar-io-sqs-2.9.5.4.nar clusterName: test-pulsar
Apply the YAML file to create the SQS source connector.
Input
kubectl apply -f <path-to-source-sample.yaml>
Output
source.compute.functionmesh.io/sqs-source-sample created
Check whether the SQS source connector is created successfully.
Input
kubectl get all
Output
NAME READY STATUS RESTARTS AGE pod/sqs-source-sample-0 1/1 Running 0 77s
After that, you can produce and consume messages using the SQS source connector between Pulsar and SQS.