Prerequisites
Before creating a BYOC instance and clusters, you need to prepare for the BYOC infrastructure. See BYOC Overview for more information. After you have prepared the BYOC infrastructure, you can create a BYOC instance and clusters.Create an instance
When creating an instance, you need to make a choice of cloud provider.- Console
- Terraform
Please make sure you have created a cloud environment before creating a BYOC instance.
- Navigate to the Organization Dashboard.
- Click Instances on the left navigation pane to go to the Instances page.
- Click + New Instance button to start the instance creation process.
- On the Choose the deployment type for your instance page, click Deploy BYOC to start the instance creation process. If you see the dialog “Cloud Environment required”, you need to create a cloud environment first. After creating the cloud environment, return to step 1 to create the instance.
-
On the Instance Configuration page, enter the Instance Name and select the Cloud Provider.
Item Description Instance Name Enter a name for the instance. An instance name starts with a lowercase letter, contains any combination of lowercase letters (a-z), numbers (0-9), and hyphens (-), and must be 4-40 characters. Cloud Connection Select the cloud connection - Click Cluster Location to enter the cluster details.
Cluster Configuration
The configuration steps may vary based on the cluster profile selection. Please follow the instructions specific to the selected cluster profile outlined below.Create Latency Optimized Cluster
Follow the details listed below to create a cluster based on Latency Optimized Profile.Cluster Details
Enter the Cluster Name, select the Cloud Environment from the dropdown list, select Latency Optimized Cost Profile, select Availability Zone, then click Lakehouse Table.| Item | Description |
|---|---|
| Cluster Name | Enter a name for the cluster. A cluster name starts with a lowercase letter, contains any combination of lowercase letters (a-z), numbers (0-9), and hyphens (-), and must be 4-10 characters. |
| Cloud Environment | Select the cloud environment from the dropdown list. |
| Cluster Profile | Select Latency Optimized Cluster profile |
| Availability Zone | Select Single AZ to deploy the instance across single availability zone or Multiple AZ for Multiple Availability Zone |
Lakehouse Tables
You can optionally enable Lakehouse table by selecting a Catalog Provider, selecting a registered catalog from dropdown, and optionally applying the setting to all topics.Cluster Operations
On the Cluster Operation page:- Select the Release Channel: LTS or Rapid. Please note that Rapid channel is required for running Cost Optimized Cluster.
-
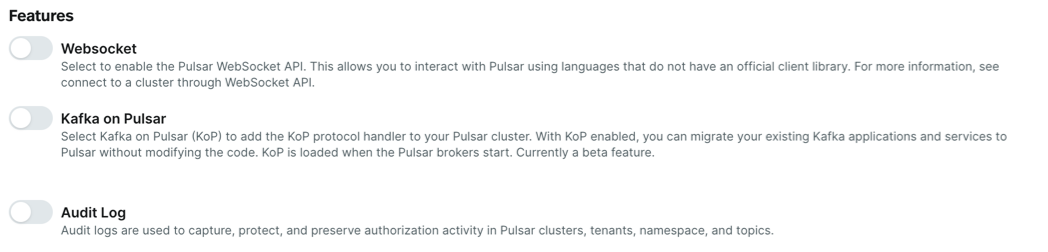
(Optional) Enable or disable the Features you want on your cluster. You can enable or disable these features at any time by editing your cluster after it has been created.
- (Optional) If you have a Enterprise or Production support plan, you can customize the maintenance window for the cluster. Otherwise, you can skip this step.
- (Optional) Expand the Add optional custom configurations section to specify optional custom configuration parameters.
- Click Cluster Size.
Create Cost Optimized Cluster
Follow the details listed below to create a cluster based on Cost Optimized Profile.Cluster Details
Enter the Cluster Name, select the Cloud Environment from the dropdown list, select Availability Zone, then click Lakehouse Storage Configuration.| Item | Description |
|---|---|
| Cluster Name | Enter a name for the cluster. A cluster name starts with a lowercase letter, contains any combination of lowercase letters (a-z), numbers (0-9), and hyphens (-), and must be 4-10 characters. |
| Cloud Environment | Select the cloud environment from the dropdown list. |
| Cluster Profile | Select Cost Optimized Profile. |
| Availability Zone | Select Single AZ to deploy the instance across single availability zone or Multiple AZ for Multiple Availability Zone |
Lakehouse Tables
-
Select the Storage Location: Use Your Own Bucket or Use Existing BYOC Bucket.
-
For the Use Your Own Bucket option, enter following details
- AWS role ARN
- Region
- Bucket name
- Bucket path
- Confirm that StreamNative has been granted the necessary permissions to access your bucket.
- For the Use Existing BYOC Bucket, the bucket is created by BYOC Cloud environment.
-
For the Use Your Own Bucket option, enter following details
-
Select Catalog integration : Enable or Disable
- Enable Catalog integration
- Lakehouse tables :
- Managed Table
- Select catalog provider
- Databricks Unity Catalog - Follow these steps to configure Databricks Unity Catalog details and configure authentication
- Snowflake Open Catalog - Follow these steps to configure Snowflake Open Catalog details and configure authentication
- Select catalog provider
- External Table
- Select catalog provider
- Snowflake Open Catalog - Follow these steps to configure Snowflake Open Catalog details and configure authentication
- Amazon S3 Tables - Follow these steps to configure Amazon S3 Tables details and configure authentication
- Select catalog provider
- Managed Table
- Lakehouse tables :
- Disable Catalog integration
- Storage table format
- Delta Lake : This option allows you to write topics data as Delta Tables
- Apache Iceberg : This option allows you write topics data as Iceberg tables.
- Storage table format
- Enable Catalog integration
- Click Cluster Size.
-
On the Cluster Size page:
- Use the slider to adjust the throughput according to your needs.
- In the Advanced section, you can manually configure the number of brokers, bookies, and their corresponding resources.
- Note that bookies configuration is only required for Latency Optimized Clusters. For Cost Optimized Clusters, bookie configuration is not needed.
- Click Finish to start the cluster creation process.
Manage instances
- Console
- snctl
- Terraform
To view instances created for an organization, follow these steps.
- In the upper-right corner of the StreamNative Cloud Console, click your Profile and select Organizations.
- Click the name of the organization you want to check.
- Select Instances from the left navigation pane.
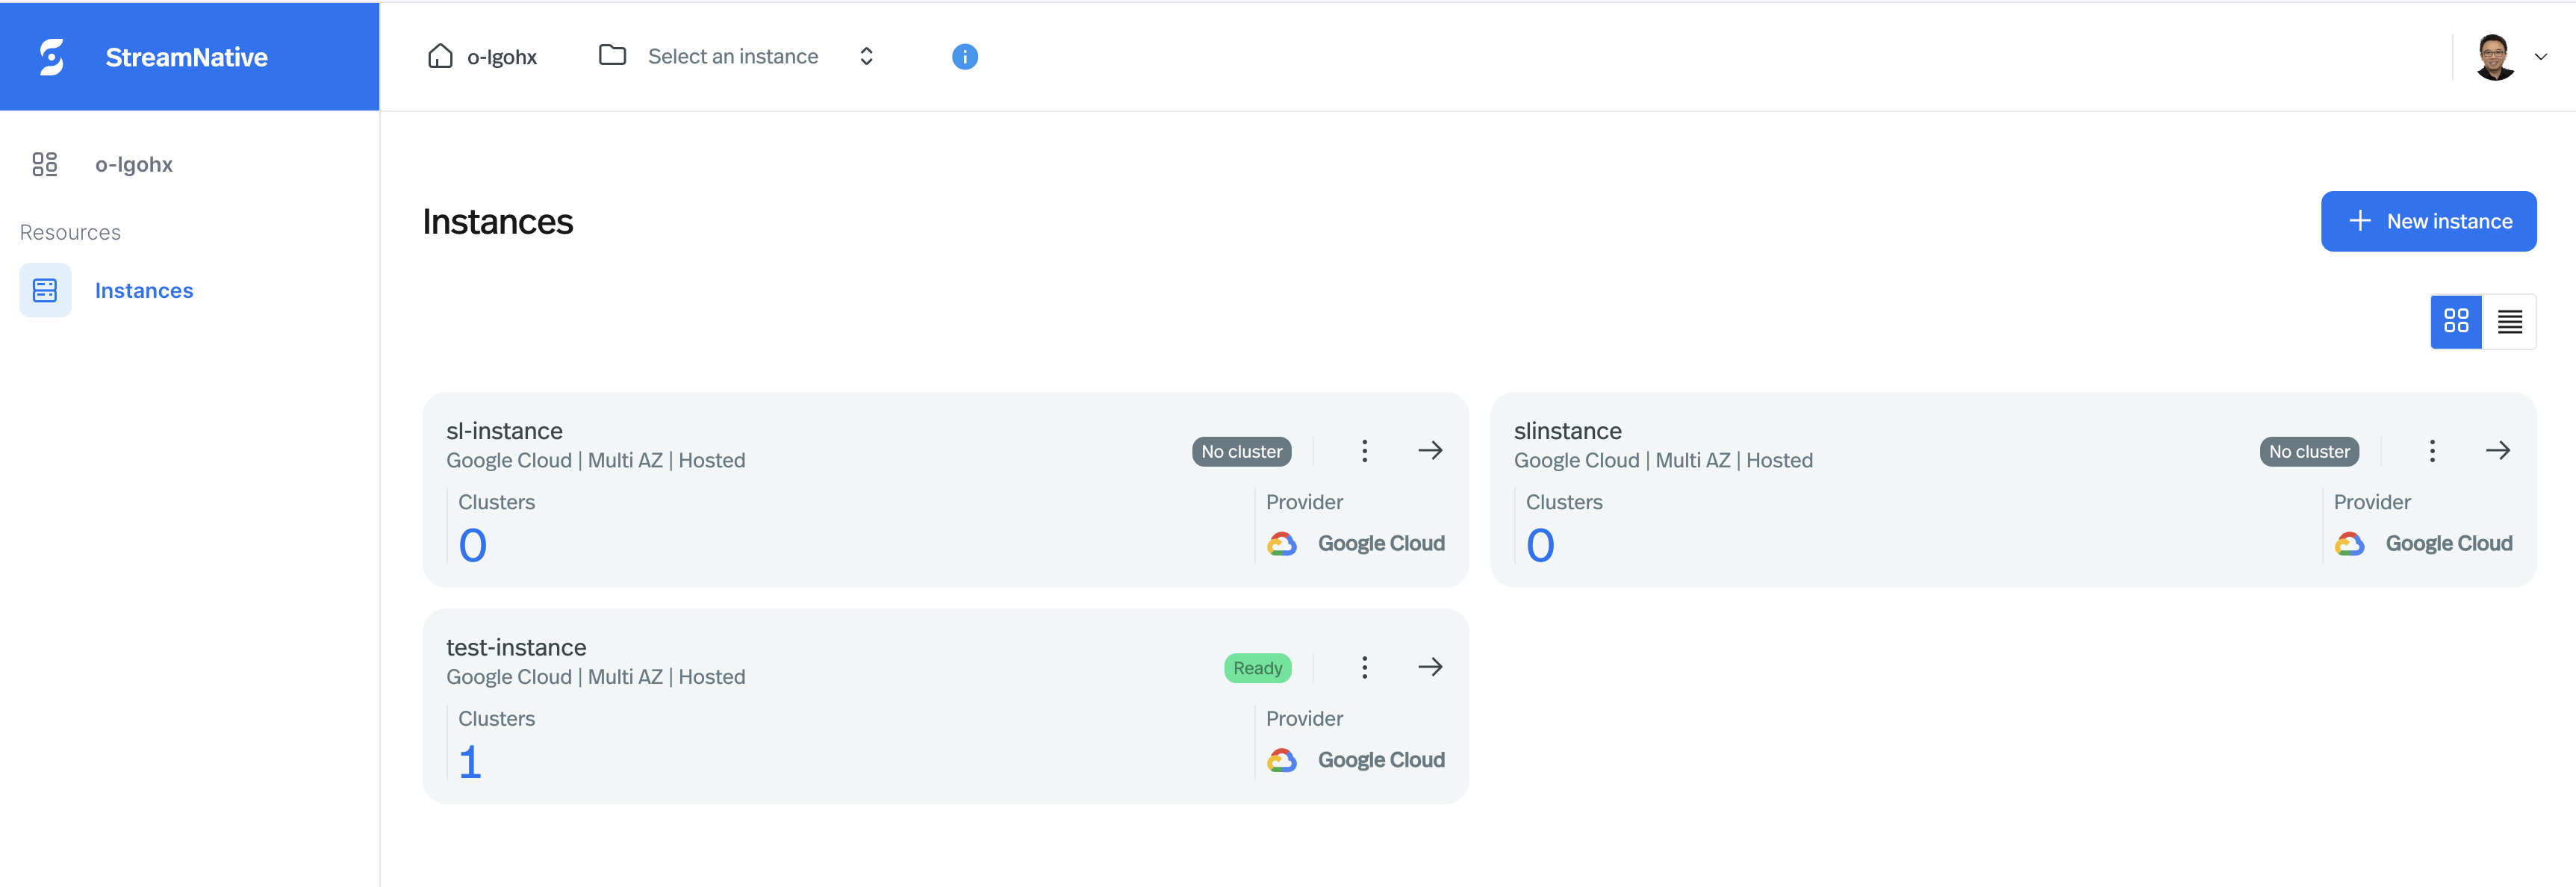
-
On the Instances page, you should able to see the list of instances available for the organization. In each Instance Card, you are able to see Instance Name, Status, Cloud Provider, Number of Clusters, and etc. You can also click the right arrow icon to go the Instance Dashboard page.
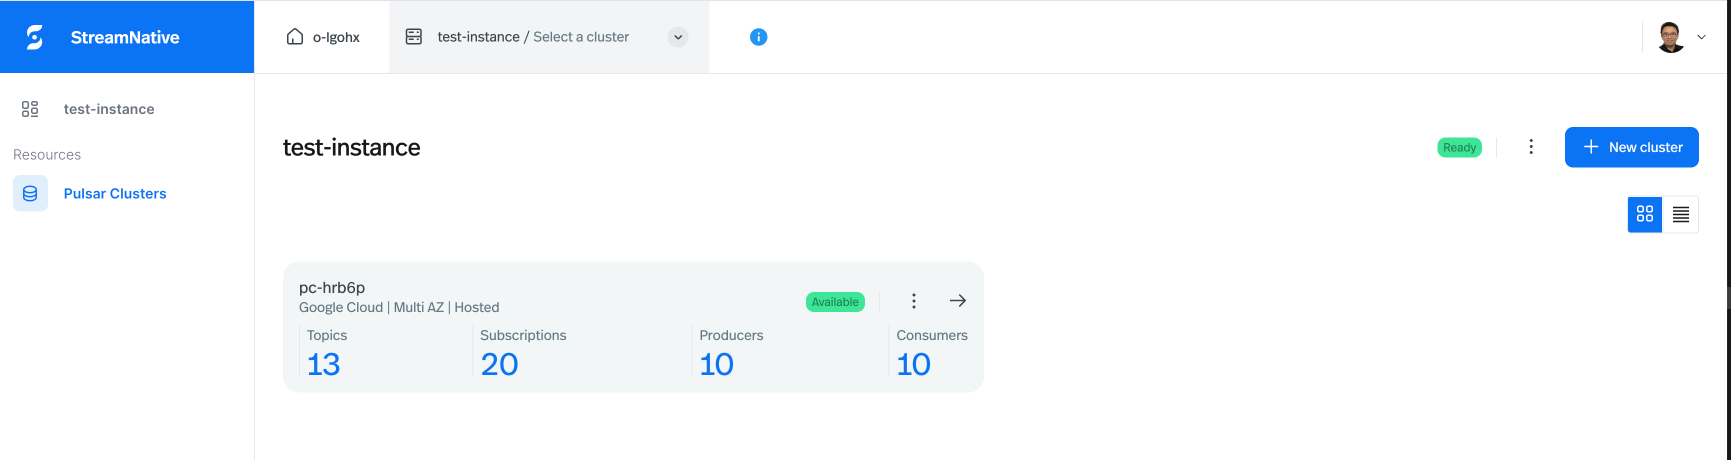
-
On the Instance Dashboard page, you are able to see the list of clusters available for the instance. In each Cluster Card, you are able to see Cluster Name, Status, Number of Topics, Number of Subscriptions, Number of Producers, Number of Consumers, and etc. You can also click the right arrow icon to go the Cluster Dashboard page.
Delete an instance
You cannot delete an instance if there are resources associated with the instance.
- Console
- snctl
- Terraform
- Navigate to the Instances page.
- Click the ellipsis at the top right corner of the instance card that you want to delete, and then click Delete.
- In the Delete instance dialog, enter the instance name and then click Confirm.
Next steps
Related topics
- Check other types of instances: