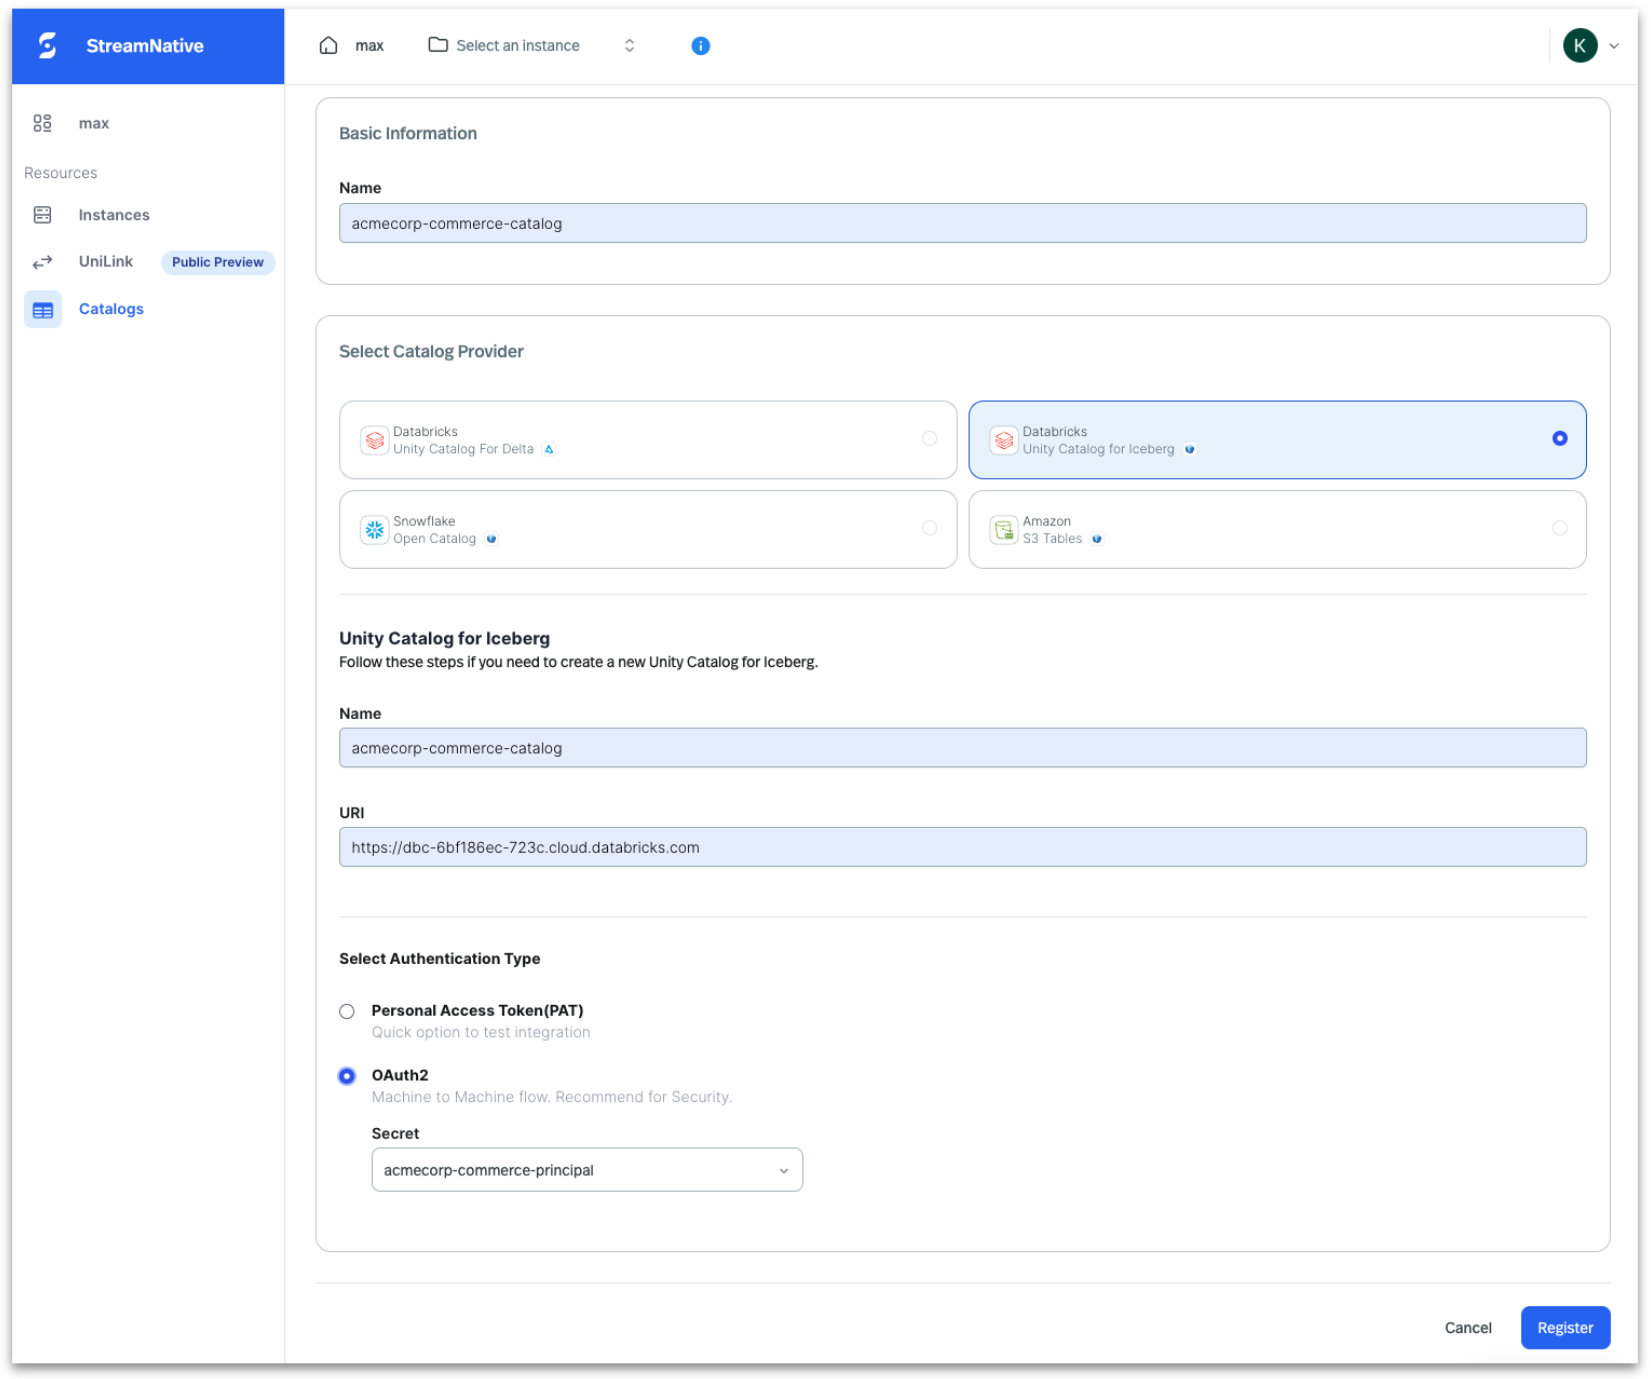
Databricks Unity Catalog (Delta Lake and Iceberg)
- Name – Enter a unique name for the catalog in StreamNative Cloud.
- Catalog Provider – Select the catalog provider where you want to ingest data.
- Catalog Name – Enter the name of the catalog that exists in Databricks Unity Catalog.
- URI – Provide the URI of the catalog.
- Authentication Type – Select the appropriate authentication method for connecting to the catalog provider.
Snowflake Open Catalog
- Name – Enter a unique name for the catalog in StreamNative Cloud.
- Catalog Provider – Select the catalog provider where you want to ingest data.
- Warehouse – Enter the name of the warehouse that exists in Snowflake Open Catalog.
- URI – Provide the URI of the catalog.
- Authentication Type – Select the appropriate authentication method for connecting to the catalog provider.
Amazon S3 Tables
- Name – Enter a unique name for the catalog in StreamNative Cloud.
- Catalog Provider – Select the catalog provider where you want to ingest data.
- S3 Table Bucket – Enter the ARN of the S3 Table bucket.
Google BigLake metastore
The Google BigLake metastore is an Iceberg REST catalog for Google Cloud that integrates with BigQuery, so streamed tables are queryable from BigQuery without an extra import step.- Name – Enter a unique name for the catalog in StreamNative Cloud.
- Catalog Provider – Select Google BigLake as the catalog provider.
- Google Project – Enter the name of the Google project.
- Warehouse – Enter the name of the Google Cloud Storage Warehouse.
Snowflake Horizon (Polaris) Catalog
The Snowflake Horizon Catalog is an Iceberg REST catalog hosted on Snowflake. Access is governed by Snowflake roles, so existing Snowflake RBAC policies apply to streamed tables.- Name – Enter a unique name for the catalog in StreamNative Cloud.
- Catalog Provider – Select Snowflake Horizon as the catalog provider.
- Account – Enter the Snowflake account identifier hosting the Horizon catalog.
- Warehouse – Enter the name of the warehouse that exists in Snowflake Horizon.
- URI – Provide the URI of the Polaris REST catalog endpoint.
- Authentication Type – Select the appropriate authentication method (for example, OAuth2 client credentials) for connecting to Snowflake Horizon.
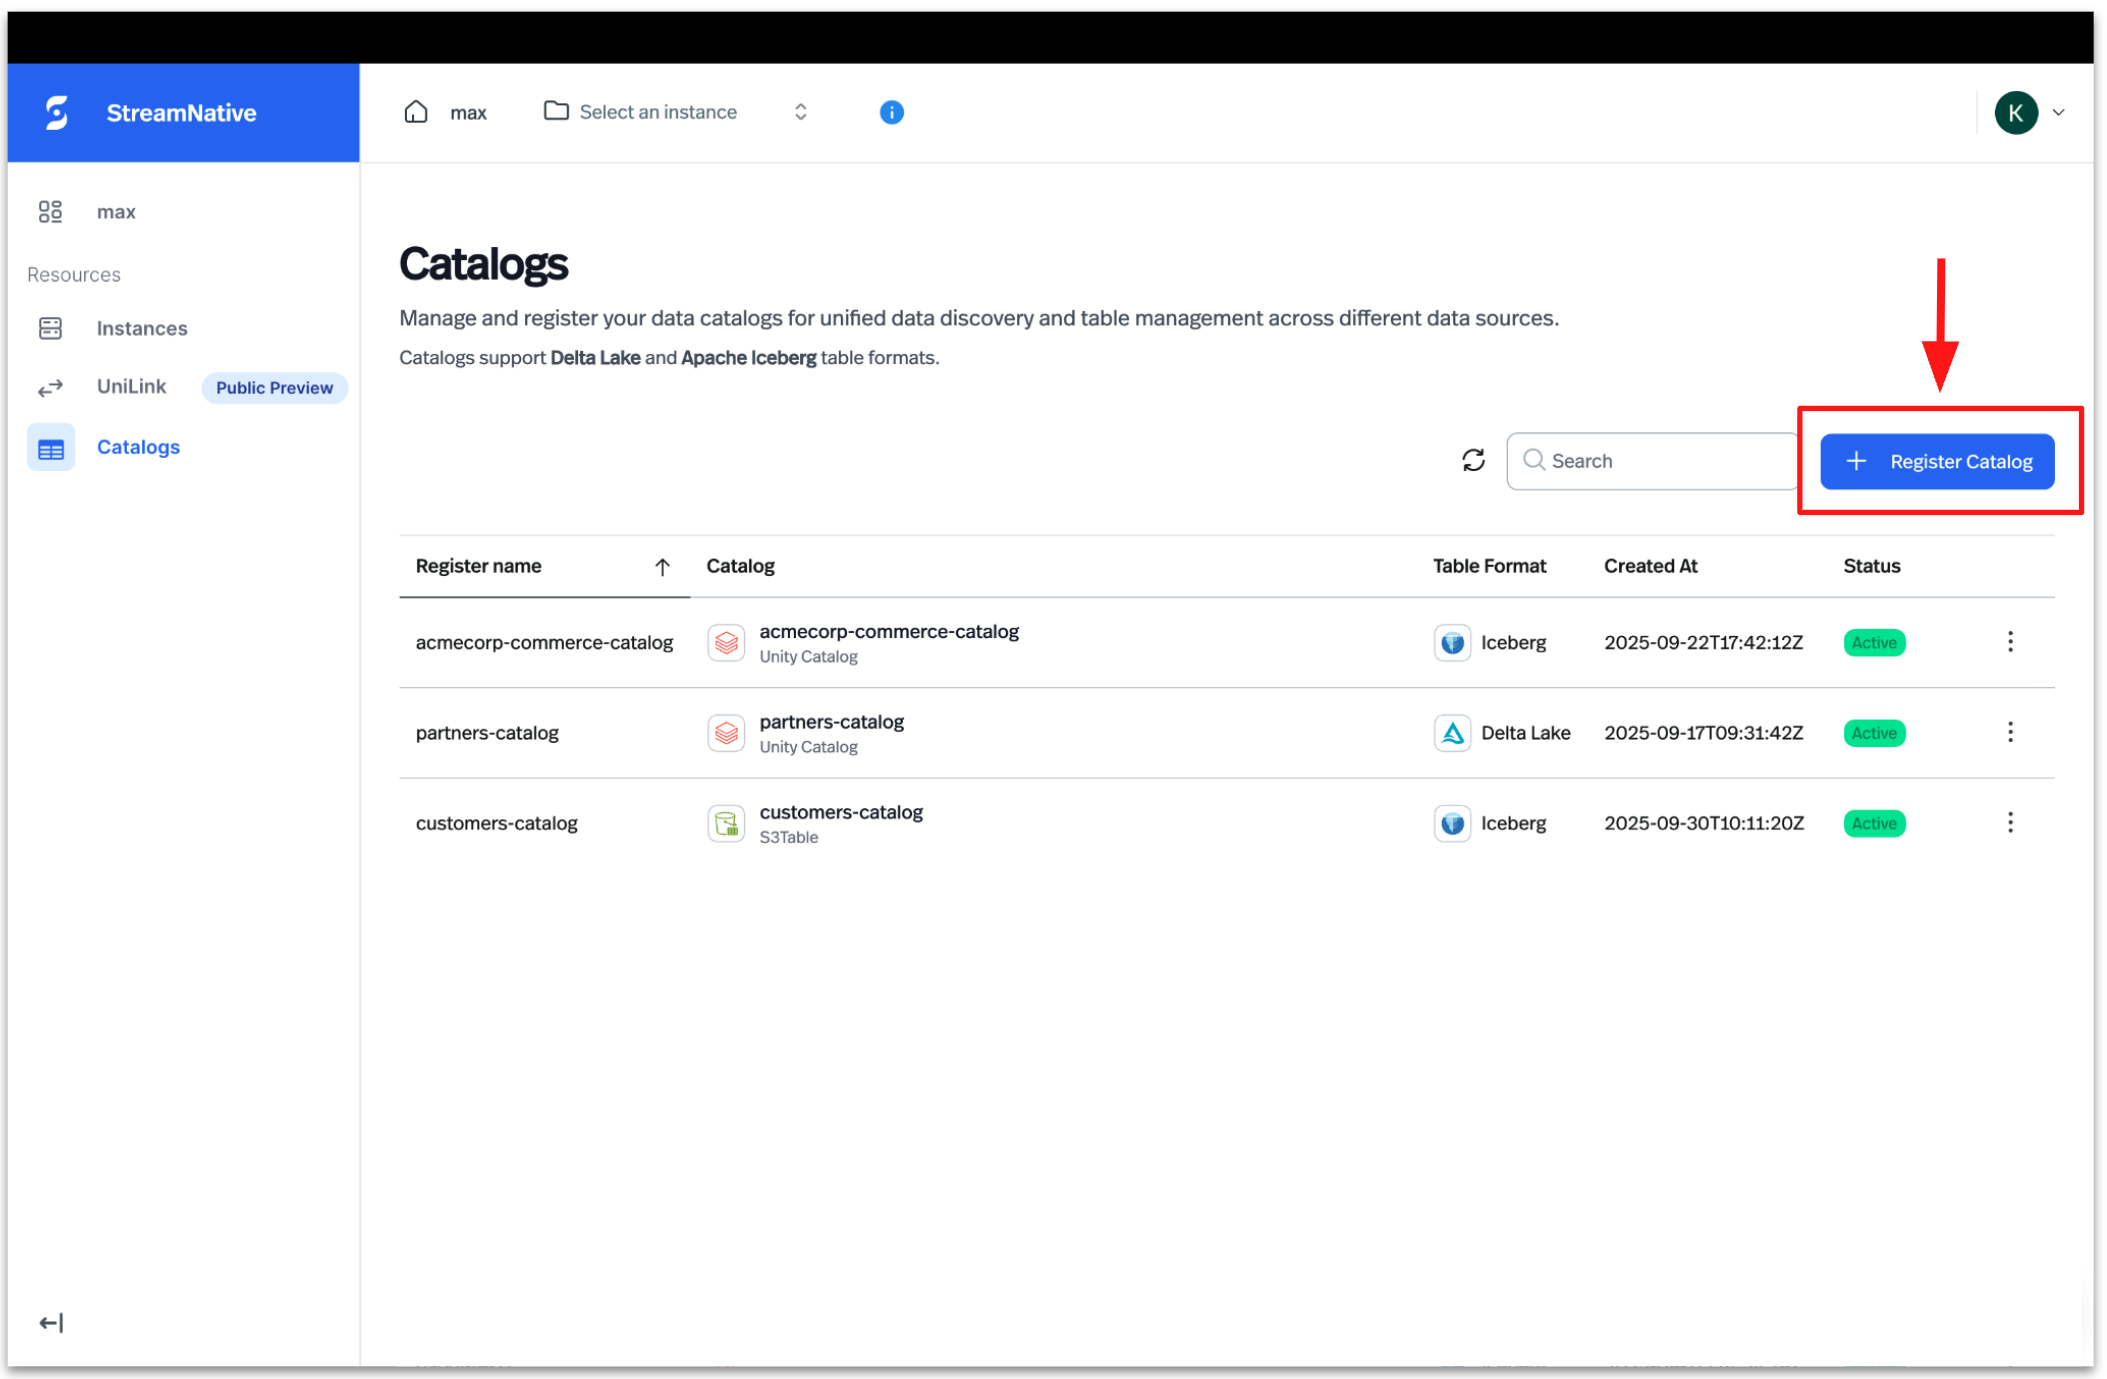
Register multiple catalogs per cluster
A single StreamNative cluster can be associated with multiple registered catalogs. This lets you route different topics to different catalogs — for example, landing some topics into BigLake for BigQuery analytics and others into Snowflake Horizon for governed Snowflake access — all from one Pulsar or Kafka cluster. Repeat the registration steps above for each catalog you want to make available to the cluster.