- Review the requirements and considerations below.
- Ensure you provision a BYOC Cloud Environment with proper networking configuration at the time of provisioning.
- Get the VPC Endpoint Service Name of your BYOC Cluster.
- Provision PrivateLink endpoints in your AWS account that runs your application.
Requirements and considerations
Review the following requirements and considerations before you set up an Inbound PrivateLink in AWS with your BYOC Clusters:- The AWS Inbound PrivateLink described in this document is only available for use with BYOC & BYOC Pro clusters.
- If you are using OAuth2 authentication, your VPC must allow outbound internet connections to Auth0, StreamNative’s OAuth2 service provider. API Keys authentication doesn’t require this restriction.
- The default gateway type for BYOC Cloud Environment can be either public or private. But you can’t switch the gateway type after the BYOC Cloud Environment is created. If you need to switch the gateway type, you have to re-provision a new BYOC Cloud Environment with the desired gateway type.
Provision BYOC Cloud Environment
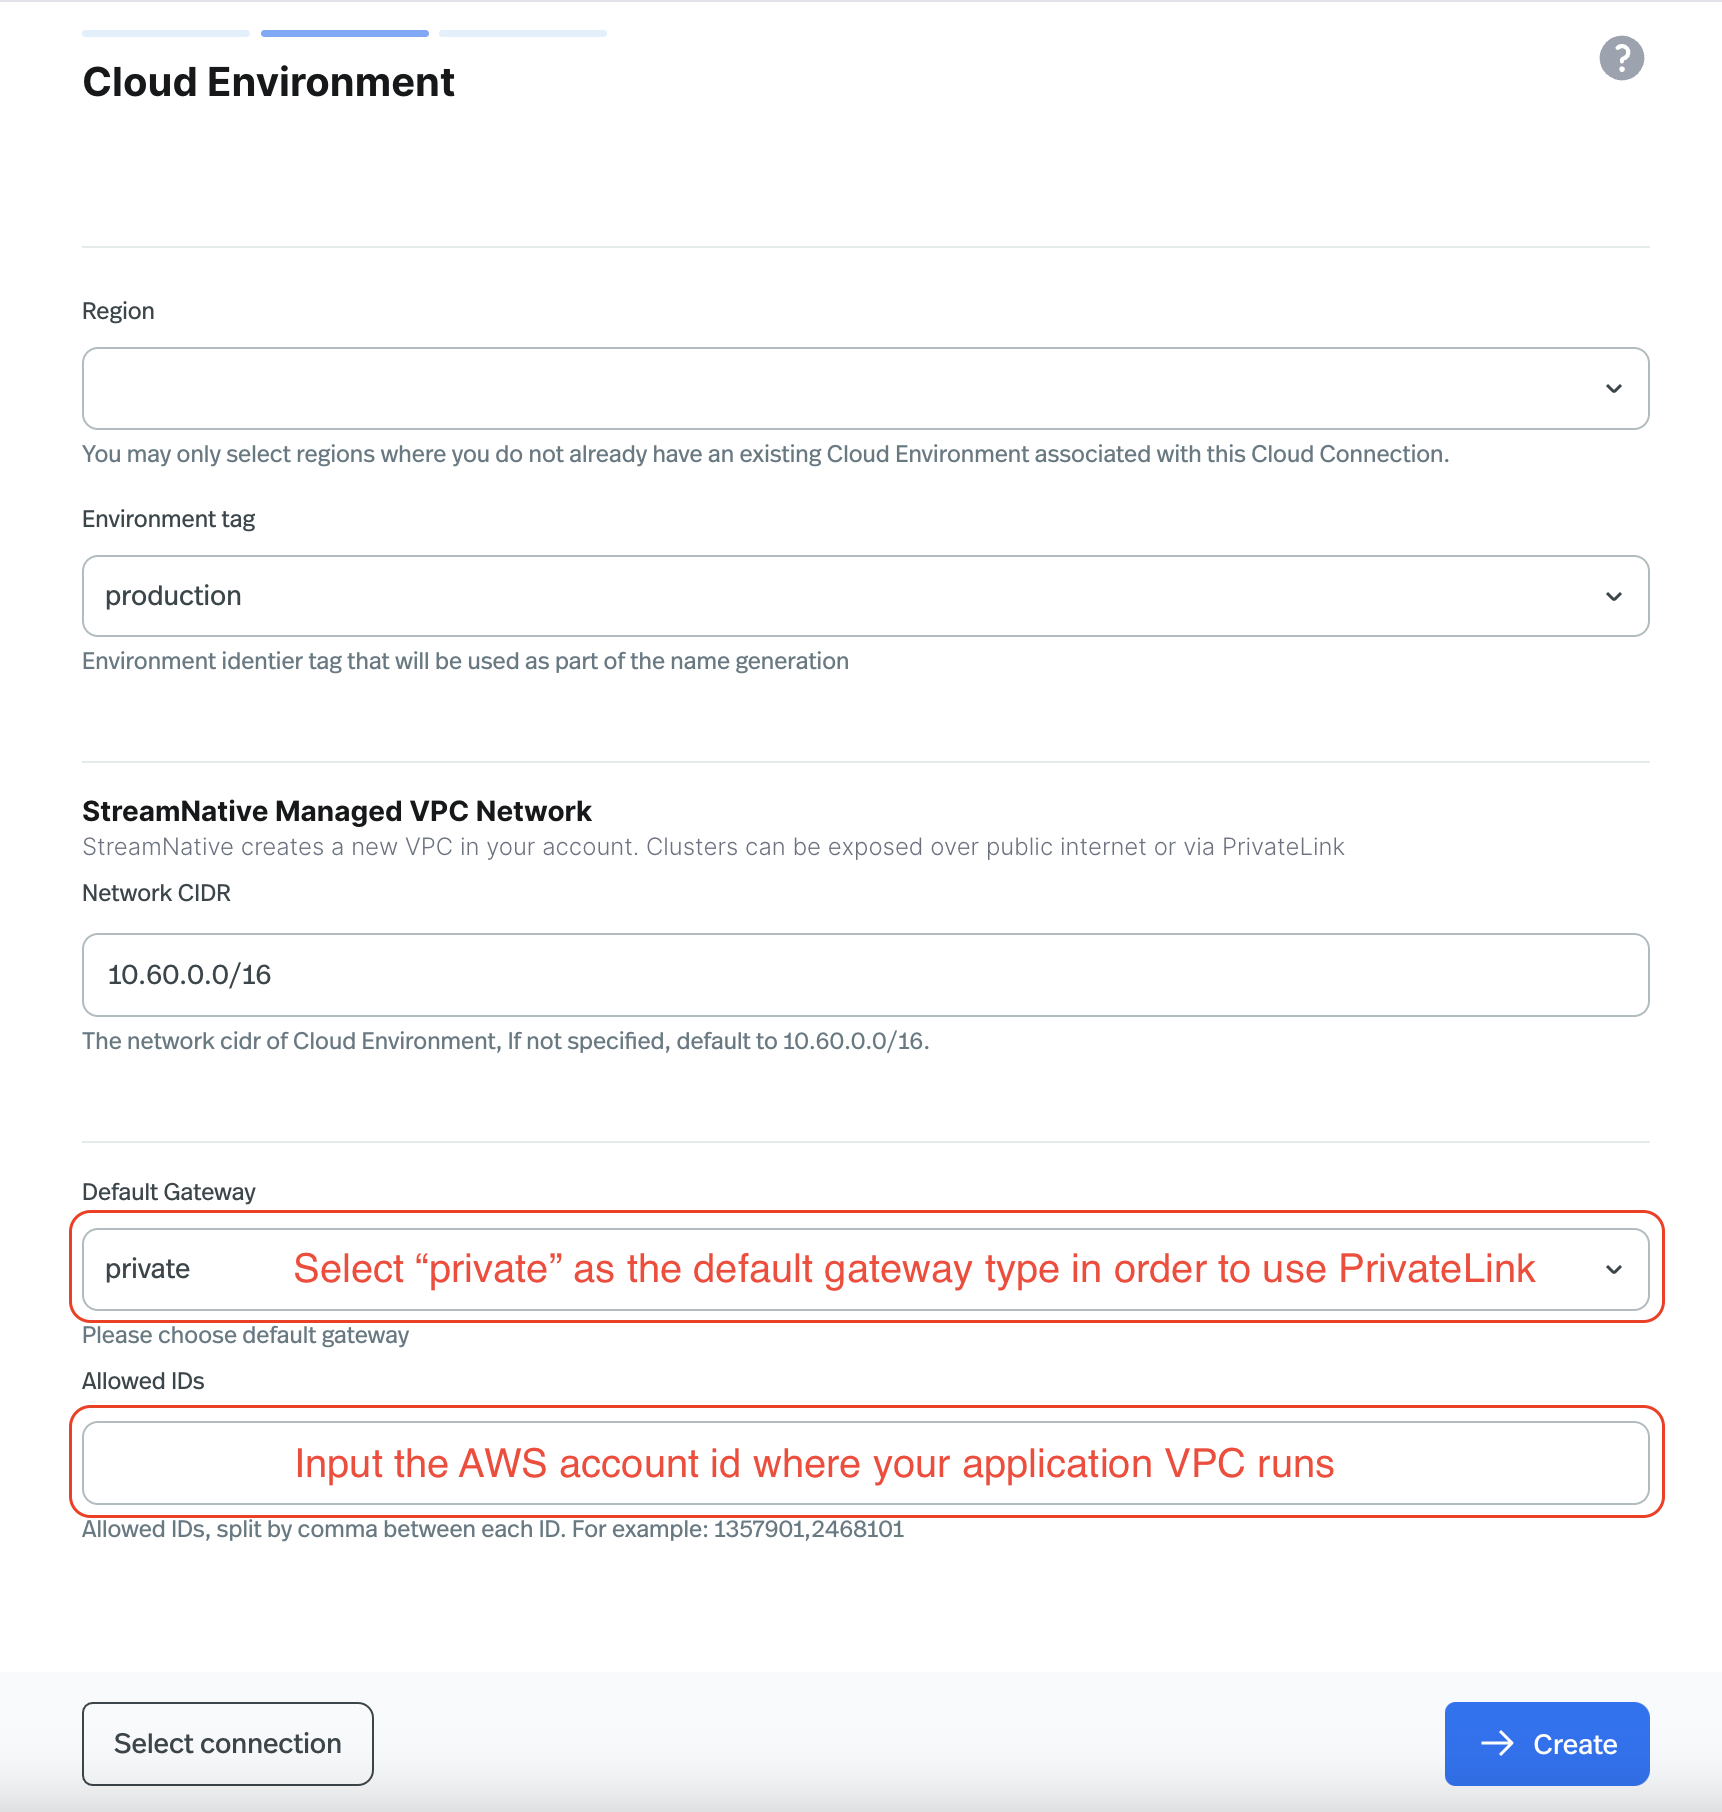
StreamNative Clusters are exposed to external networks through a gateway service. Each BYOC Cloud Environment is provisioned with a default gateway type, either public or private. You can’t switch the gateway type after the Cloud Environment is created. If you need to switch the gateway type, you have to re-provision a new Cloud Environment with the desired gateway type. So in order to set up AWS Inbound PrivateLink for your BYOC Cluster, you must provision a BYOC Cloud Environment with the right settings at the time of provisioning:- Set the default gateway type to private.
- Add the AWS Account ID where your application VPC is located to the allowed IDs list of the private service.
- Console
- snctl
- Terraform
When creating a BYOC Cloud Environment on the StreamNative Cloud Console, make sure to select private as the Default Gateway type and input the AWS Account ID where your application VPC is located in the Allowed IDs field. See the screenshot below for reference.

Get the VPC Endpoint Service Name
Before you can provision PrivateLink endpoints in your AWS account, you need to get the VPC Endpoint Service Name of your BYOC Cluster. You can get the VPC Endpoint Service Name from the StreamNative Cloud Console orsnctl.
- Console
- snctl
- Navigate to the Cloud Environments page in the StreamNative Cloud Console.
- Find the BYOC Cloud Environment that you want to set up PrivateLink for.
- You will find your VPC Endpoint Service Name under the column Default gateway and click the copy icon to copy the value.
Provision PrivateLink endpoints in AWS
After your BYOC Cloud Environment is ready, you can create the StreamNative Instance and Cluster. The cluster will expose its services through the private gateway. To access these services, you’ll need to provision a VPC private endpoint in your application VPC within your AWS account. This endpoint will establish the AWS PrivateLink connection to your StreamNative BYOC cluster. For the current process to create VPC private endpoints, refer to Create a VPC endpoint.StreamNative recommends using a Terraform module for setting up Private Link endpoints. This configuration automates the manual steps described below.
- AWS Console
- Terraform
AWS VPC dashboard
- Open the AWS VPC Console and browse to the VPC you want to use for the PrivateLink connection.
- Verify subnet availability in your AWS VPC, and confirm the selected subnets match the availability zones of StreamNative BYOC Clusters that you created in the previous steps.
The zones for the StreamNative BYOC VPC and cluster must match the zones of the VPC you want to make the AWS PrivateLink connections from. Have the matching subnets in your VPC for those zones so that IP addresses can be allocated fromthem.
- Verify that Enable DNS resolution and Enable DNS hostnames are enabled. If the settings are not enabled, click Actions > VPC settings, and enable Enable DNS resolution and Enable DNS hostnames settings.
-
Create or edit a security group you want to use for the new VPC endpoint.
- Add four inbound rules for each of ports
443,6651,9093, and8883from your desired source (your VPC CIDR). The Protocol should be TCP for all four rules.
- Add four inbound rules for each of ports
-
Create a VPC endpoint.
- In the navigation menu under Virtual Private Cloud, click Endpoints.
-
Click Create endpoint, and specify the following settings for the endpoint:
- Service category: Select Endpoint services that use NLBs and GWLBs.
- Service settings: Enter the Service name for your BYOC Cluster VPC Endpoint service name, that you noted in the step 1. Click Verify service. If you get an error, ensure that your account is allowed to create PrivateLink connections.
- VPC: Select the VPC in which to create your endpoint.
- Subnets: Select the subnet for the availability zones for your BYOC Cluster. Ensure that the desired subnet is selected for each zone. By default, a BYOC cluster is a regional cluster, which means it spans all availability zones in the region. Make sure to add all availability zones of that region to the subnets. Failure to add all zones of your BYOC cluster can cause connectivity issues to brokers in the omitted zones, resulting in an unusable cluster.
- Security groups: Select the security group that you previously created or edited.
- Enable Private DNS name: Make sure you check the box for Enable Private DNS name. This step is required to ensure that the private DNS name for the service resolves to the endpoint’s private IP address. The private DNS name is automatically associated with the endpoint in your VPC.
- Click Create endpoint. Your VPC endpoint is created and displayed. Since your application AWS account is already whitelisted when creating your BYOC environment, the PrivateLink connection is automatically established.