

- This QuickStart assumes that you have created a StreamNative cluster with the Kafka protocol enabled, created a service account, and granted the service account
produceandconsumepermissions to a namespace for the target topic. - This QuickStart is developed on a MAC Operating System (OS) environment. If you choose another OS, the commands might vary.
Before you begin
-
Get the OAuth2 credential file.
- On the left navigation pane, click Service Accounts.
- In the row of the service account you want to use, in the Key File column, click the Download icon to download the OAuth2 credential file to your local directory.
-
Get the service URL of your StreamNative cluster.
- On the left navigation pane, in the Admin area, click Pulsar Clusters.
- Select the Details tab, and in the Access Points area, click Copy at the end of the row of the Kafka Service URL (TCP).
- Install a recent version of Docker.
- Download the
jqCLI JSON processor, which provides a JSON-format output.
Configure Elasticsearch
-
Open a terminal, and run the command below to start an Elasticsearch instance with ports
9200and9300.You should see the following output: -
Verify that the Elasticsearch instance is started successfully.
You should see the following output:
Configure Kafka Connect
Kafka Connect is an integration tool that is released with the Apache Kafka project. It provides reliable data streaming between Apache Kafka and external systems and is both scalable and flexible. Kafka Connect works with Kafka on Pulsar (KoP), which is compatible with the Kafka API. Kafka Connect uses Source and Sink connectors for integration. Source connectors stream data from an external system to Kafka, while Sink connectors stream data from Kafka to an external system.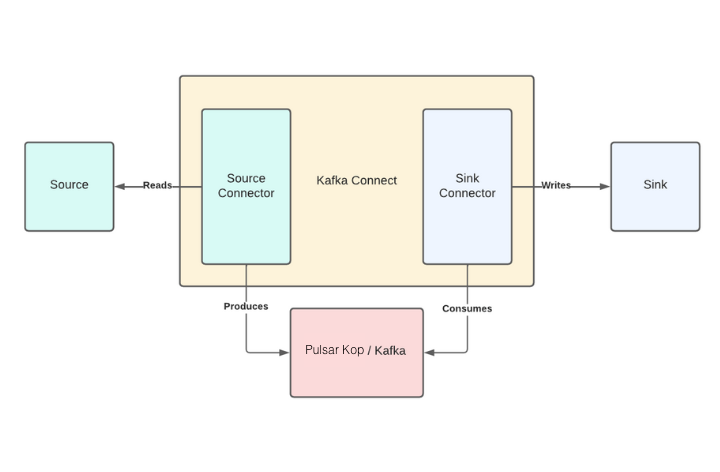
- Navigate to the Apache downloads page for Kafka, and click the suggested download link for the Kafka 3.1.0 binary package.
-
Extract the Kafka binaries folder in the
_YOUR_HOME_DIRECTORY_/kafka_2.13-3.1.0directory that you created earlier.
Download the StreamNative OAuth dependency
Download the Elasticsearch Sink connector
-
Create a
connectorsfolder to store all Kafka connectors. - Navigate to the Elasticsearch Sink connector and click Download to download the archived binaries.
-
Extract the file and copy the unzipped folder into the
connectorsdirectory.
Configure Kafka Connect
-
Create a configuration file (named
connect-sn-kop.properties). -
Add the following content to the
connect-sn-kop.propertiesfile.oauth.credentials.url: the path to your downloaded OAuth2 credential file.bootstrap.servers: the Kafka service URL of your StreamNative cluster.oauth.audience: theaudienceparameter is a combination of theurn:sn:pulsar, your organization name, and your Pulsar instance name.key.converterandvalue.converter: the converter that sends JSON-format messages to Kafka.plugin.path: the full path of theconnectorsfolder that is created in the previous step.
Configure the Elasticsearch Sink connector
Add the following content to theelasticsearch-sink-connector.properties file.
Run Kafka Connect
Open a new terminal and navigate to the Kafka folder, run the following command in the directory:Index data on the Elasticsearch server
This example shows how to send five JSON-format messages to thetest-elasticsearch-sink topic. These messages will be forwarded to the local Elasticsearch server.
-
Start a Kafka producer and send five JSON-format messages to the
test-elasticsearch-sinktopic.If everything goes well, the command will exit normally and output nothing. The records are sent to an Elasticsearch index calledtest-elasticsearch-sink. The name of the index is the same as the name of the Kafka topic. By default, the Elasticsearch Sink connector creates the index with the same name. For details about how to configure the Kafka configuration properties file, see get started with Kafka protocol. -
Verify that data is indexed on the Elasticsearch server.
Ten records should be returned.
-
Check the record count in the
test-elasticsearch-sinkindex.You should see the following output:You can see that the number of received records is identical to the number of sent messages. -
Verify the connectivity between Kafka and Pulsar by searching a keyword in the
test-elasticsearch-sinkindex. This example shows how to search the keywordhealthin thetest-elasticsearch-sinkindex.You should see the following output:You can see that all records have the wordhealthlisted in theircontentfield.