This document introduces the instructions for working with namespaces on StreamNative Console. The details may vary depending on the specific product and version number that you use.
Namespace Overview
A namespace represents an administrative unit within a tenant. The configuration policies set on a namespace apply to all the topics created in that namespace. You can create multiple namespaces for a tenant using the StreamNative Cloud Console, REST API or the pulsar-admin CLI tool.Permissions
In Pulsar, permissions are managed at the namespace level (within tenants and clusters). You can grant permissions to specific users for lists of operations such asproduce and consume. In addition, you can revoke permissions from specific users, which means that those users cannot access the specified namespace.
Backlog quotas
Backlogs are sets of unacknowledged messages for a topic that have been stored by bookies. Pulsar stores all unacknowledged messages in backlogs until they are processed and acknowledged. You can use the backlog quotas to control the allowable size of backlogs at the namespace level. You can set the following items for a backlog quota:- an allowable size threshold for each topic in the namespace
- a retention policy that determines the action the broker takes if the threshold is exceeded.
| Policy | Action |
|---|---|
producer_request_hold | The broker holds but does not persist producers’ request payload. |
producer_exception | The broker disconnects from the client by throwing an exception. |
consumer_backlog_eviction | The broker begins discarding backlog messages. |
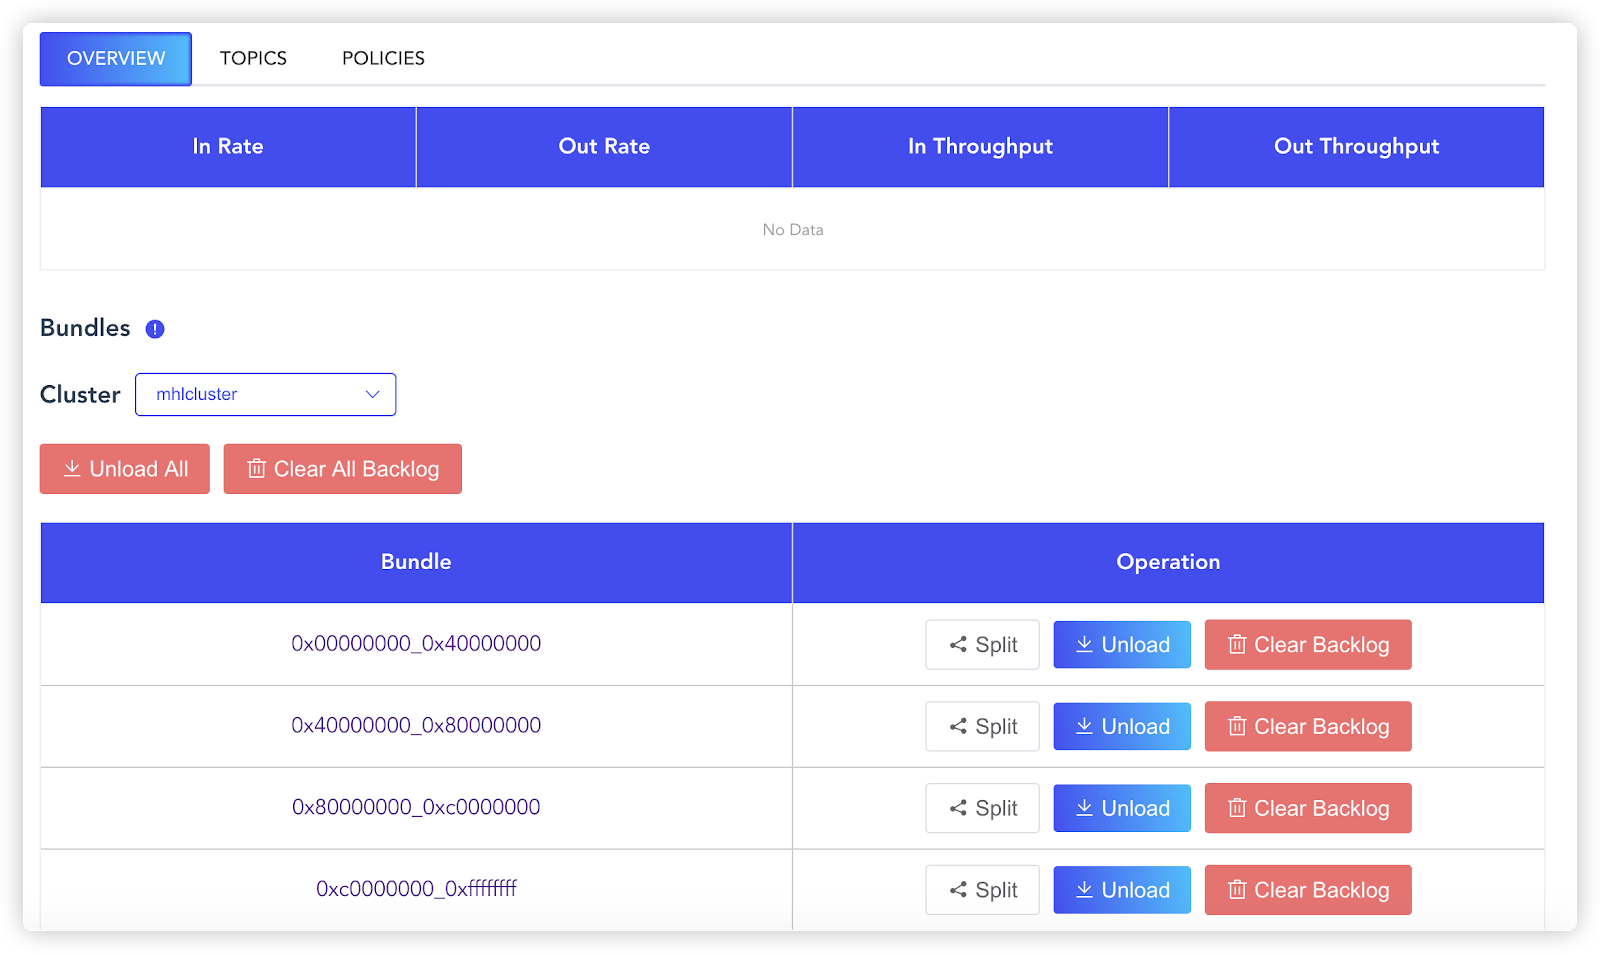
Bundles
For assignment, a namespace is sharded into a list of bundles, with each bundle comprising a portion of the overall hash range of the namespace. A bundle is a virtual group of topics that belong to the same namespace. A namespace bundle is defined as a range between two 32-bit hashes, such as 0x00000000 and 0xffffffff. By default, four bundles are supported for each namespace. Since the load for topics in a bundle might change over time, one bundle can be split into two bundles by brokers. Then, the new smaller bundle is reassigned to different brokers. By default, the newly split bundles are immediately offloaded to other brokers to facilitate the traffic distribution.Dispatch rate
Dispatch rate refers to the number of messages dispatched per second by topics for a namespace. Dispatch rate can be restricted by the number of messages per second (msg-dispatch-rate) or by the number of bytes of messages per second (byte-dispatch-rate). Dispatch rate is in seconds and it can be configured with dispatch-rate-period. By default, msg-dispatch-rate and byte-dispatch-rate are both set to -1, which indicates that throttling is disabled.
Create a namespace
- StreamNative Console
To create a namespace, follow these steps.
- On the left navigation pane, under Tenants/Namespaces, select the name of the tenant you want to associate with the new namespace, and click New Namespace.
- On the Namespace page, click New Namespace.
- Enter a name for the namespace and then click Confirm. A namespace name can contain any combination of lowercase letters (a-z), numbers (0-9), and hyphens (-).
Manage a namespace
- StreamNative Console
This section describes how to manage namespaces through the StreamNative Console.
- On the left navigation pane, under Tenants/Namespaces, select the name of the Tenant/Namespace you want to manage.
-
Select the OVERVIEW tab to check statistics about the namespace, as well as unload and split bundles. The following table lists statistics about the namespace.
Item Description In Rate The ingress rate of the namespace. Out Rate The egress rate of the namespace. In Throughput The ingress throughput of the namespace. Out Throughput The egress throughput of the namespace. - Select the TOPICS tab to check the number of topics included in the namespace and statistics about topics. In addition, you can update specific topics. For details about how to update topics, see edit topics.
- Select the POLICIES tab to configure related policies for the namespace. For details, see configure policies for a namespace.
Unload bundles for a namespace
- StreamNative Console
For an assignment, a namespace is sharded into a list of bundles, with each bundle comprising a portion of the overall hash range of the namespace. By default, four bundles are supported for each namespace.To unload bundles for a namespace, follow these steps.
- On the left navigation pane, under Tenants/Namespaces, select the name of the Tenant/Namespace you need to edit, and click New Namespace.
- Click Edit in the Actions column.
-
Select the OVERVIEW tab.
-
In the Bundle section, select the target cluster from the Cluster drop-down list, and then do one of the following:
- Click Unload All to unload all bundles for the namespaces in the cluster.
- Click Unload in the Operation column to unload a specific bundle for the namespace.
Split bundles for a namespace
- StreamNative Console
Because the load for topics in a bundle might change over time, one bundle can be split in two bundles by brokers. Then, the new smaller bundles are reassigned to different brokers. By default, the newly split bundles are immediately offloaded to other brokers to facilitate the traffic distribution.To split bundles for a namespace, follow these steps.
- From the left navigation pane, click Namespaces.
- Click Edit icon (it looks like a pencil.) in the Action column or click the link of the namespace name.
-
Select OVERVIEW tab.
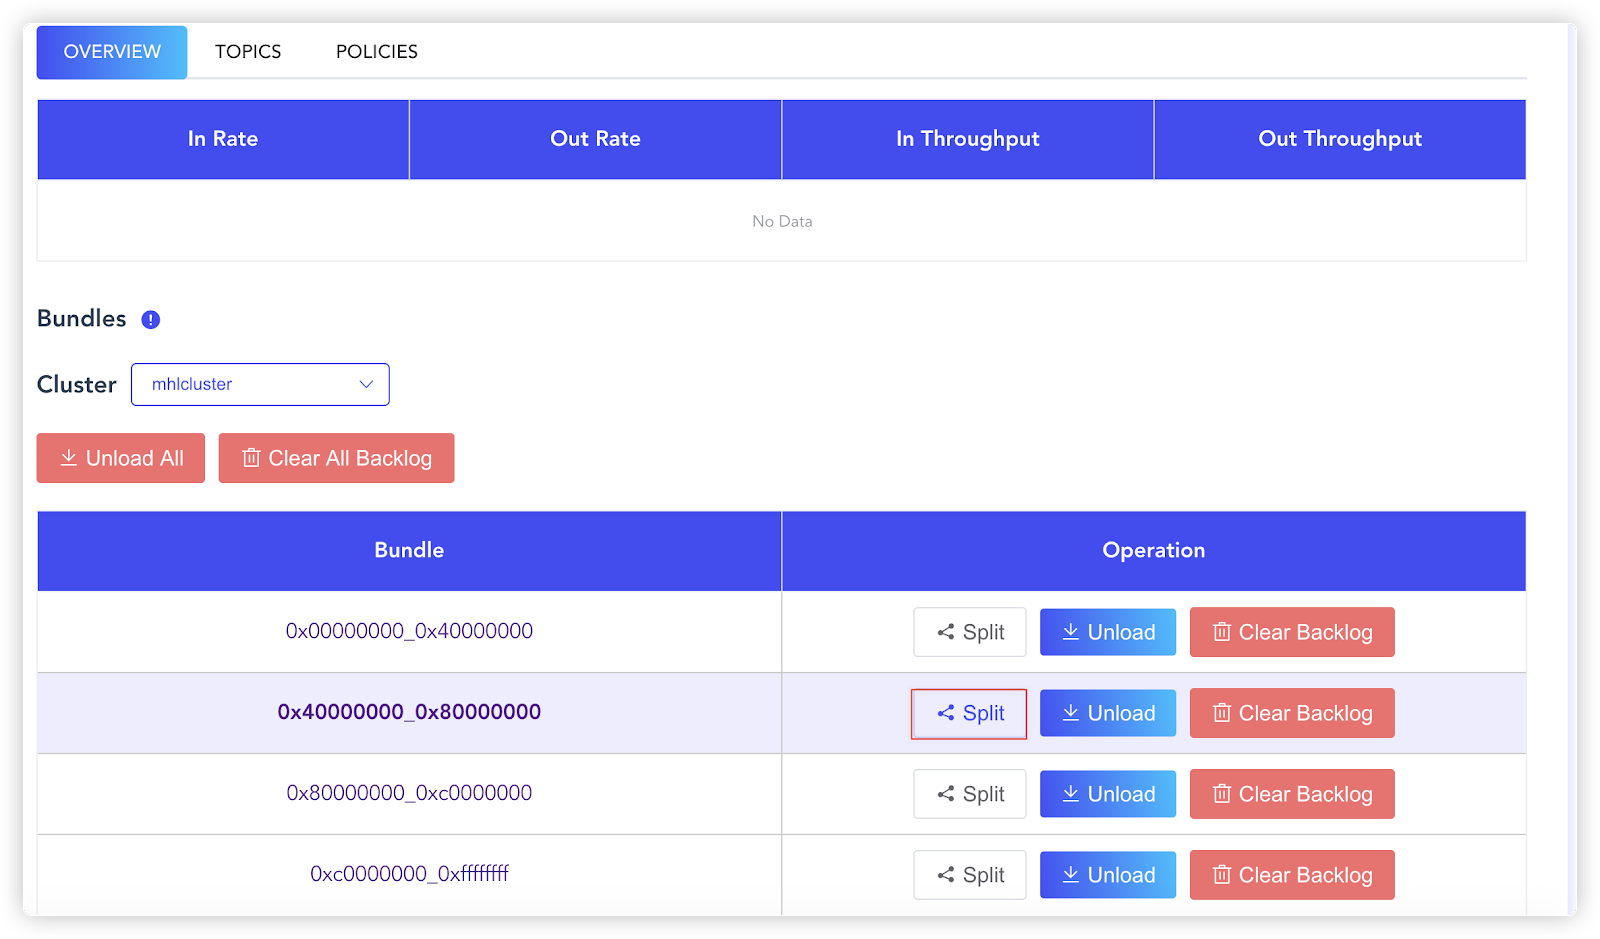
- Click Split.
Clear namespace backlog
- StreamNative Console
To clear backlog for bundles of a namespace, follow these steps.
- On the left navigation pane, under ADMIN, click Tenants/Namespaces.
- Select the name of the tenant that is associated with the target namespace.
- Click the name of the namespace that you want to clear backlog for.
- In the Bundle section of the OVERVIEW tab, click Clean All Backlog to clear the backlog for all the topics of the namespace.
Configure policies for a namespace
- StreamNative Console
To configure policies for a namespace, follow these steps.
- From the left navigation pane, click Namespaces.
- Click Edit in the Action column or click the link of the namespace name.
-
Select the Policies tab.

-
Configure policies for the namespace, as listed in the following table.
Item Description Clusters Select a replication cluster. Messages of the topics in this namespace are asynchronically replicated between the configured replication clusters. Currently, this item is set to the cluster you created because there is only one cluster available for an instance.
Delete a namespace
You cannot delete a namespace if there are resources associated with the namespace.
- StreamNative Console
To delete a namespace, follow these steps.
- On the left navigation pane, in the Admin section, click Namespaces.
- In the Warning section at the bottom of the Namespace Policy page, click Delete Namespace. A dialog box displays asking, Are you sure you want to delete this?
- Enter the namespace name and then click Confirm.
Next step
Related content
- Learn more information about managing namespaces using Pulsar Admin API, see Managing Namespaces.