- Node.js
- Tutorial
Create Topic
In a StreamNative Cluster, topics are grouped into tenants and namespaces. In this guide, we will use the existing public/default namespace.
Authorize the Service Account
Note
If you create a super-user service account, you can skip this step.
Before configuring the producer and consumer clients, you need to authorize the service account to grant the necessary permissions for the service account to interact with your StreamNative Cloud cluster.
To grant the service account permissions on the namespace level, follow these steps:
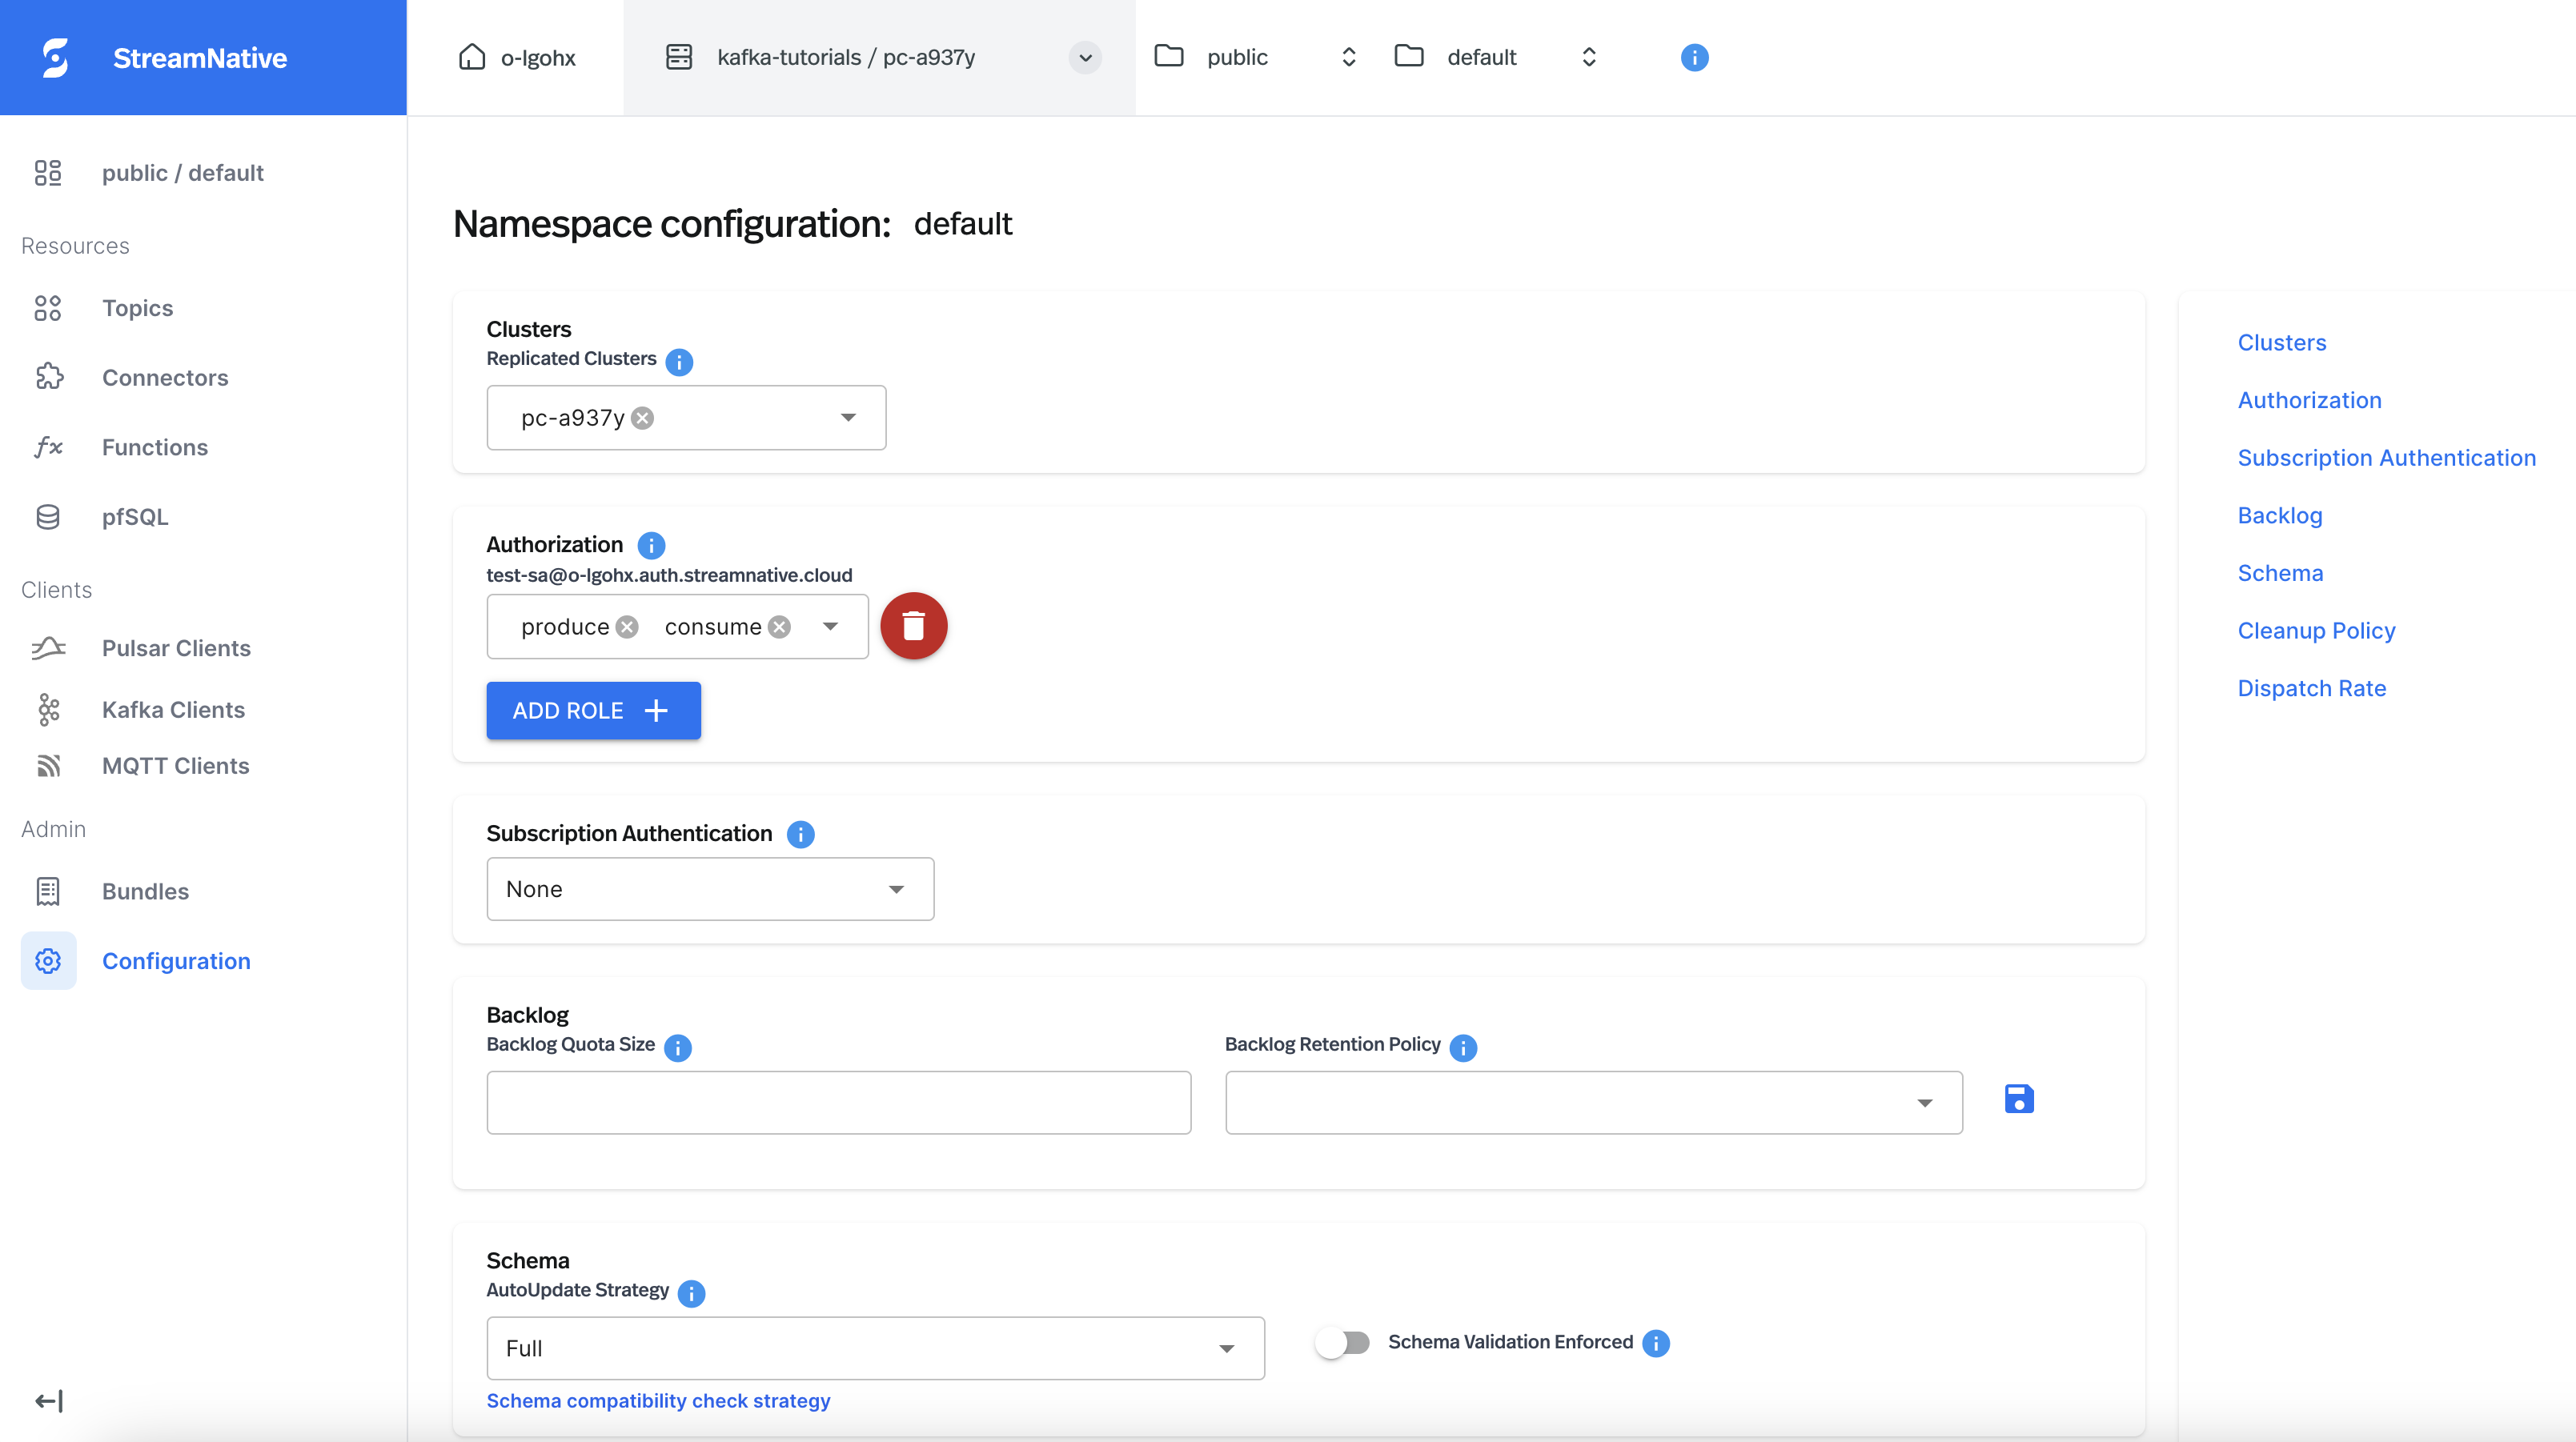
Navigate to the Namespace Dashboard page by switching to the namespace workspace.
On the Namespace Dashboard page, click Configuration on the left navigation pane.
On the Namespace configuration page, click ADD ROLE, and select the service account that you want to authorize.
On the drop-down menu below the service account, select the proper permissions to assign to the service account. There are six permissions in total:
consume: allow the service account to consume messages.produce: allow the service account to publish messages.functions: allow the service account to submit and manage functions.sinks: allow the service account to create and manage sink connectors.sources: allow the service account to create and manage source connectors.packages: allow the service account to upload and manage pulsar packages. If you want to submit a customized function/connector, then you will need to upload the function/connector’s JAR/NAR/Python file first, which requires thepackagespermission.

In this guide, we will authorize the service account with the produce and consume permissions for the public/default namespace.
Create a Topic
Navigate to the Namespace Dashboard page of the public/default namespace and follow the instructions below to create a topic, purchases, which you will use to produce and consume events.
To create a topic, follow these steps.
Navigate to the desired Namespace Dashboard page by switching to the namespace workspace.
On the left navigation pane, under Resources, click Topics.
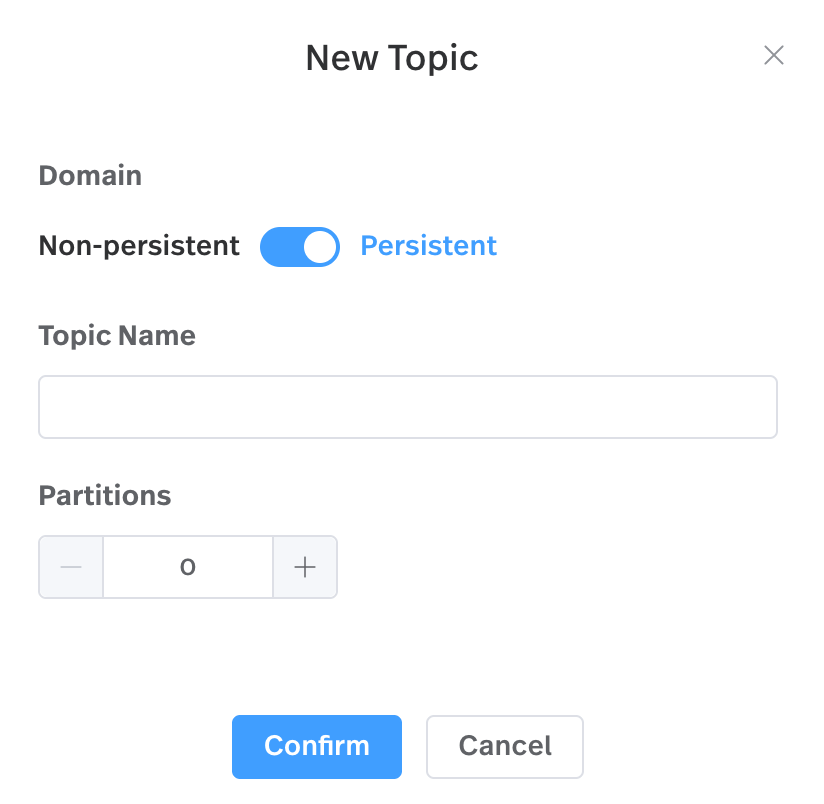
Click New Topic.

Configure the topic, as outlined in the following table.
Item Description Persistent Configure the type of the topic.
- Persistent: messages in a persistent topic are durably persisted on the storage disk.
- Non-persistent: messages in a non-persistent topic are not persisted on the storage disk.
By default, it is set to Persistent.Topic Name Enter a name for the topic. It is a string of up to 40 characters, supporting lowercase letters (a-z), numeric characters (0-9), and the special character hyphen (-). Partitions (Optional) Configure the number of partitions for a partitioned topic. You can have from 1 up to 100 partitions per topic. It's recommended to have at least 1 partition. Click Confirm.