Prerequisites
- A Databricks workspace on Azure with Unity Catalog and Iceberg Managed Table enabled
- An Azure subscription with permissions to create storage accounts and Access Connectors
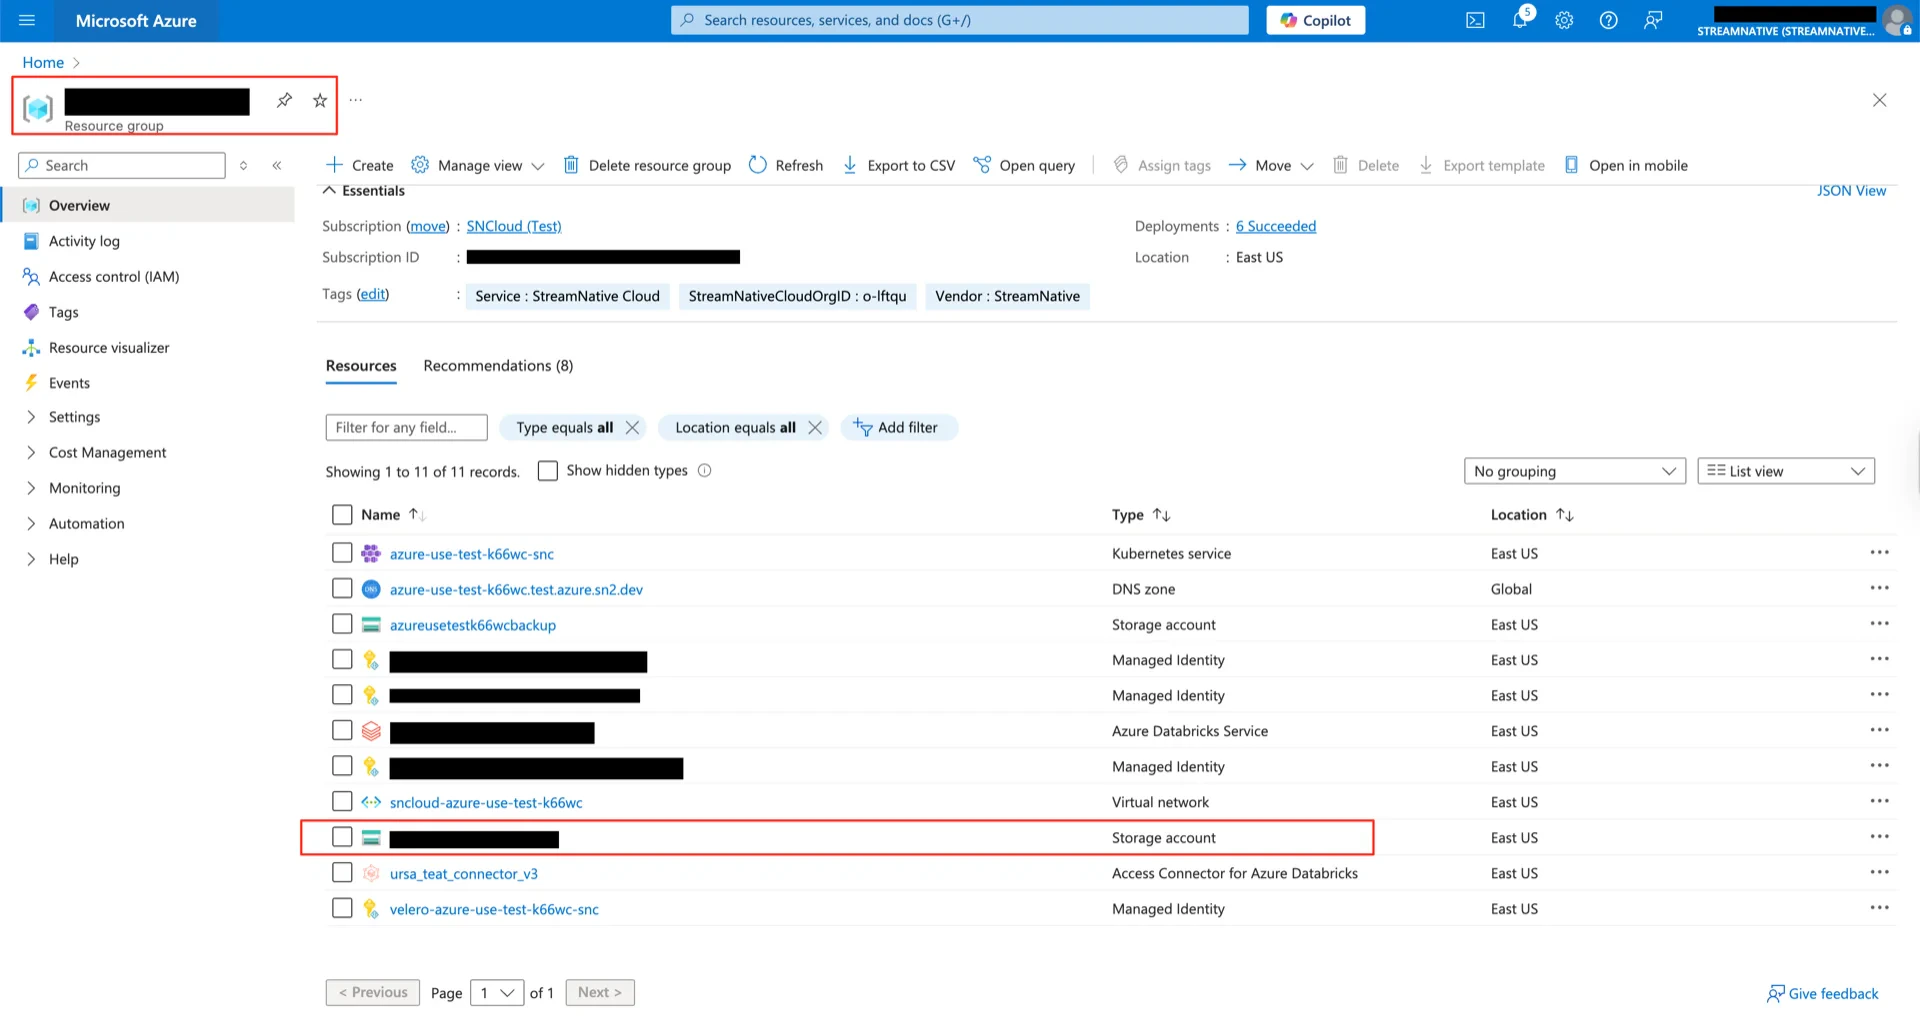
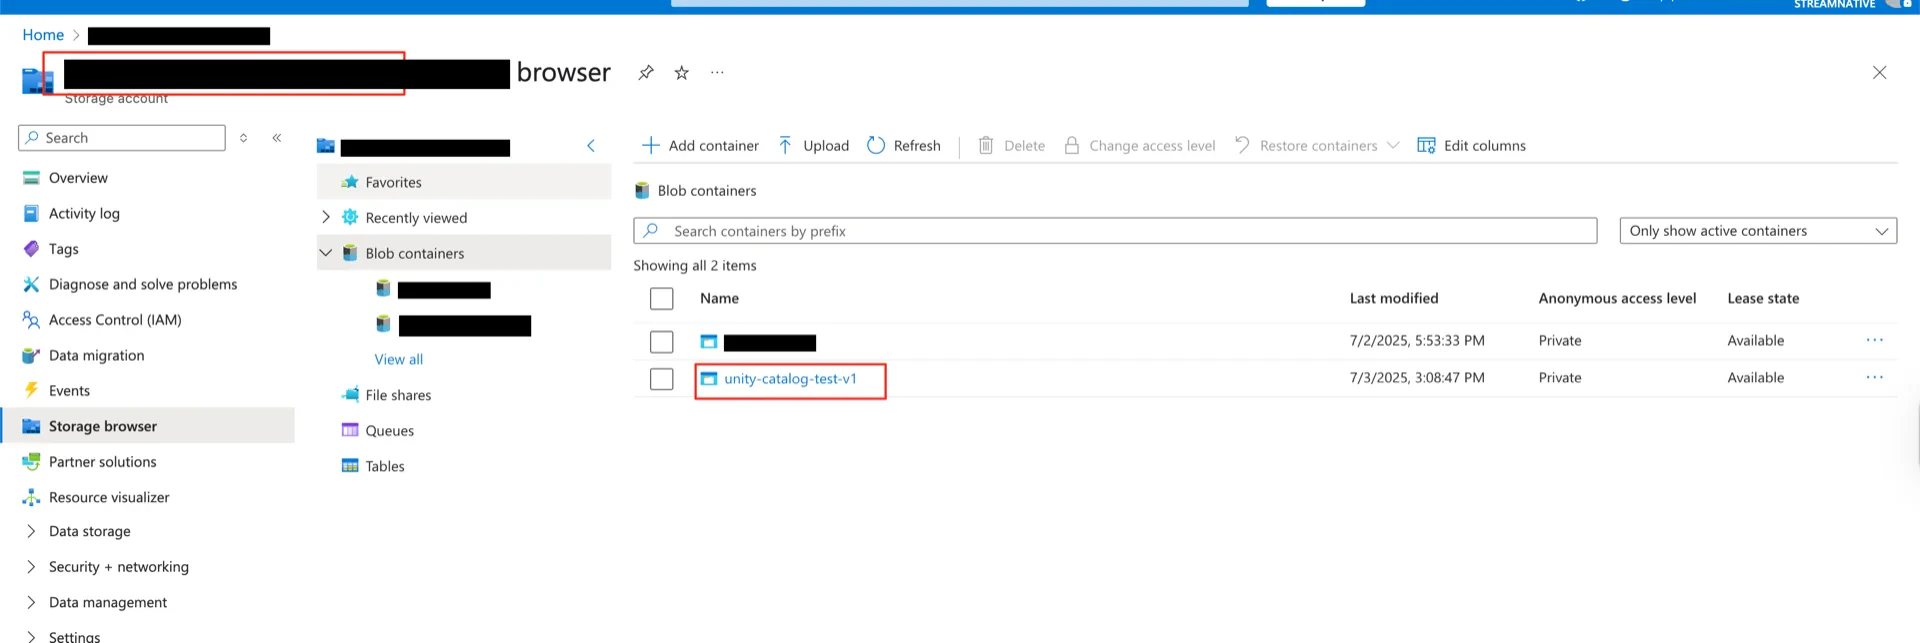
1. Create an Azure Storage Container
Create a storage container in your Azure Storage Account (for example,unity-catalog-iceberg). The container path will follow the format:
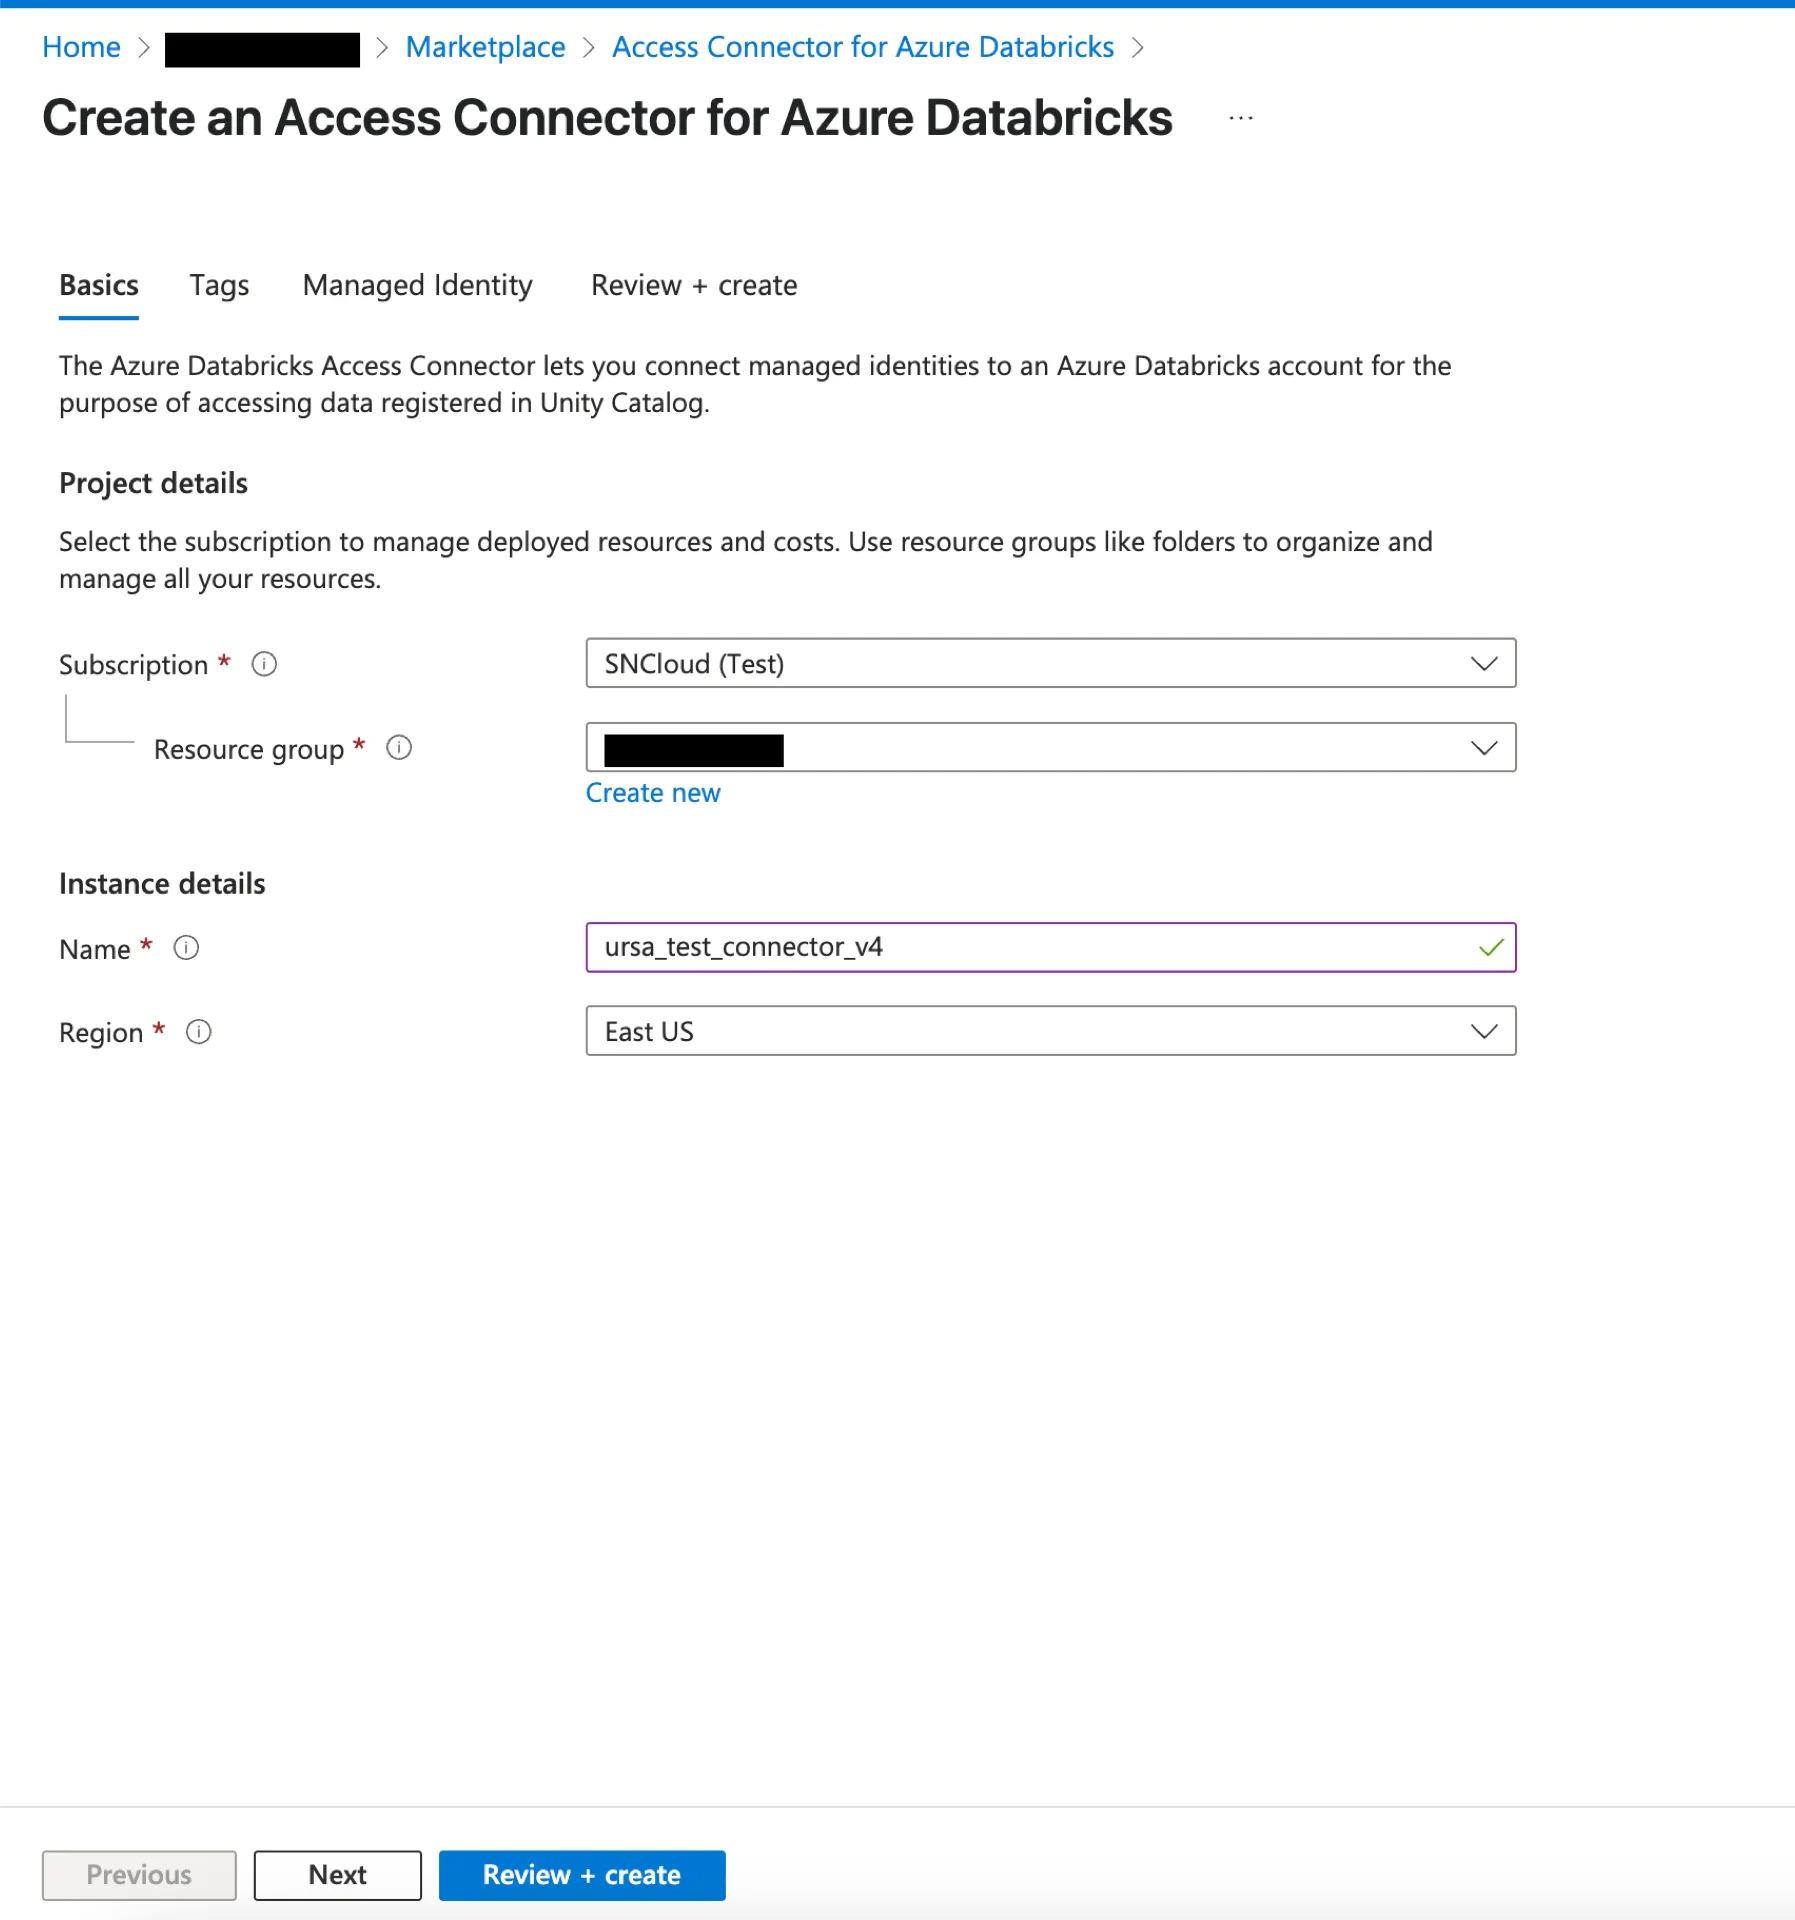
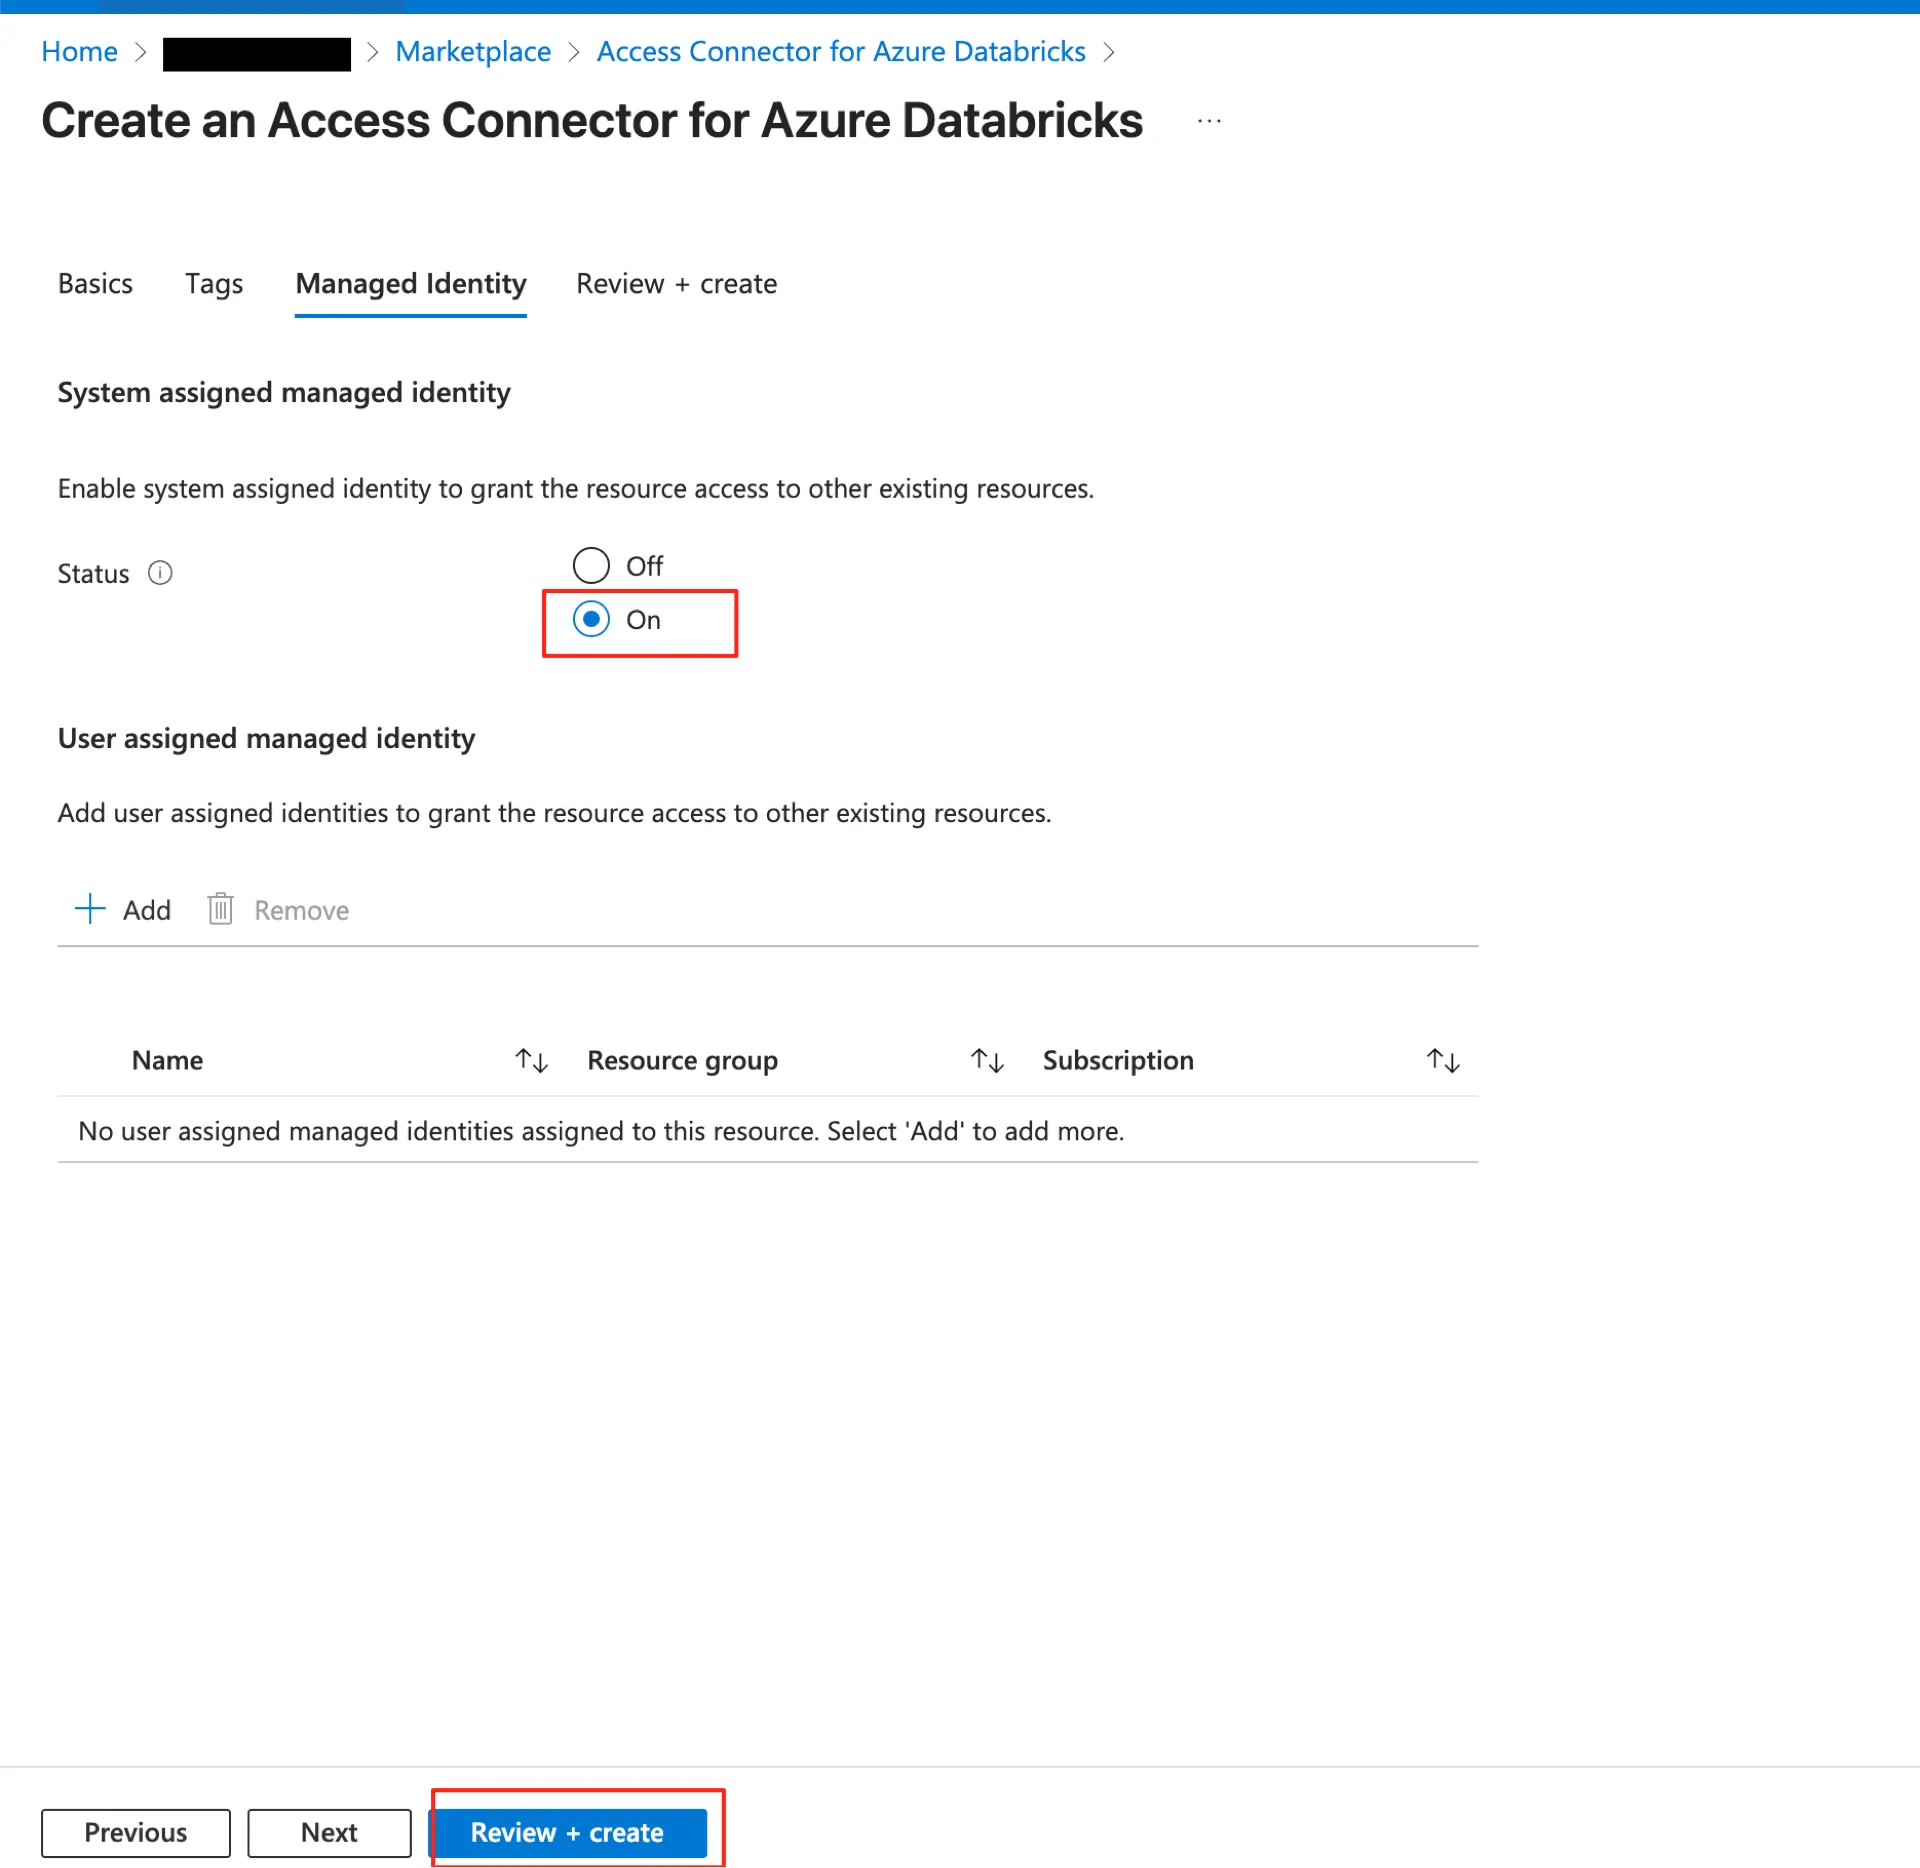
2. Create an Access Connector for Azure Databricks
Refer to the Azure Databricks Managed Identities documentation for the canonical procedure. In the Azure Portal, create an Access Connector for Azure Databricks.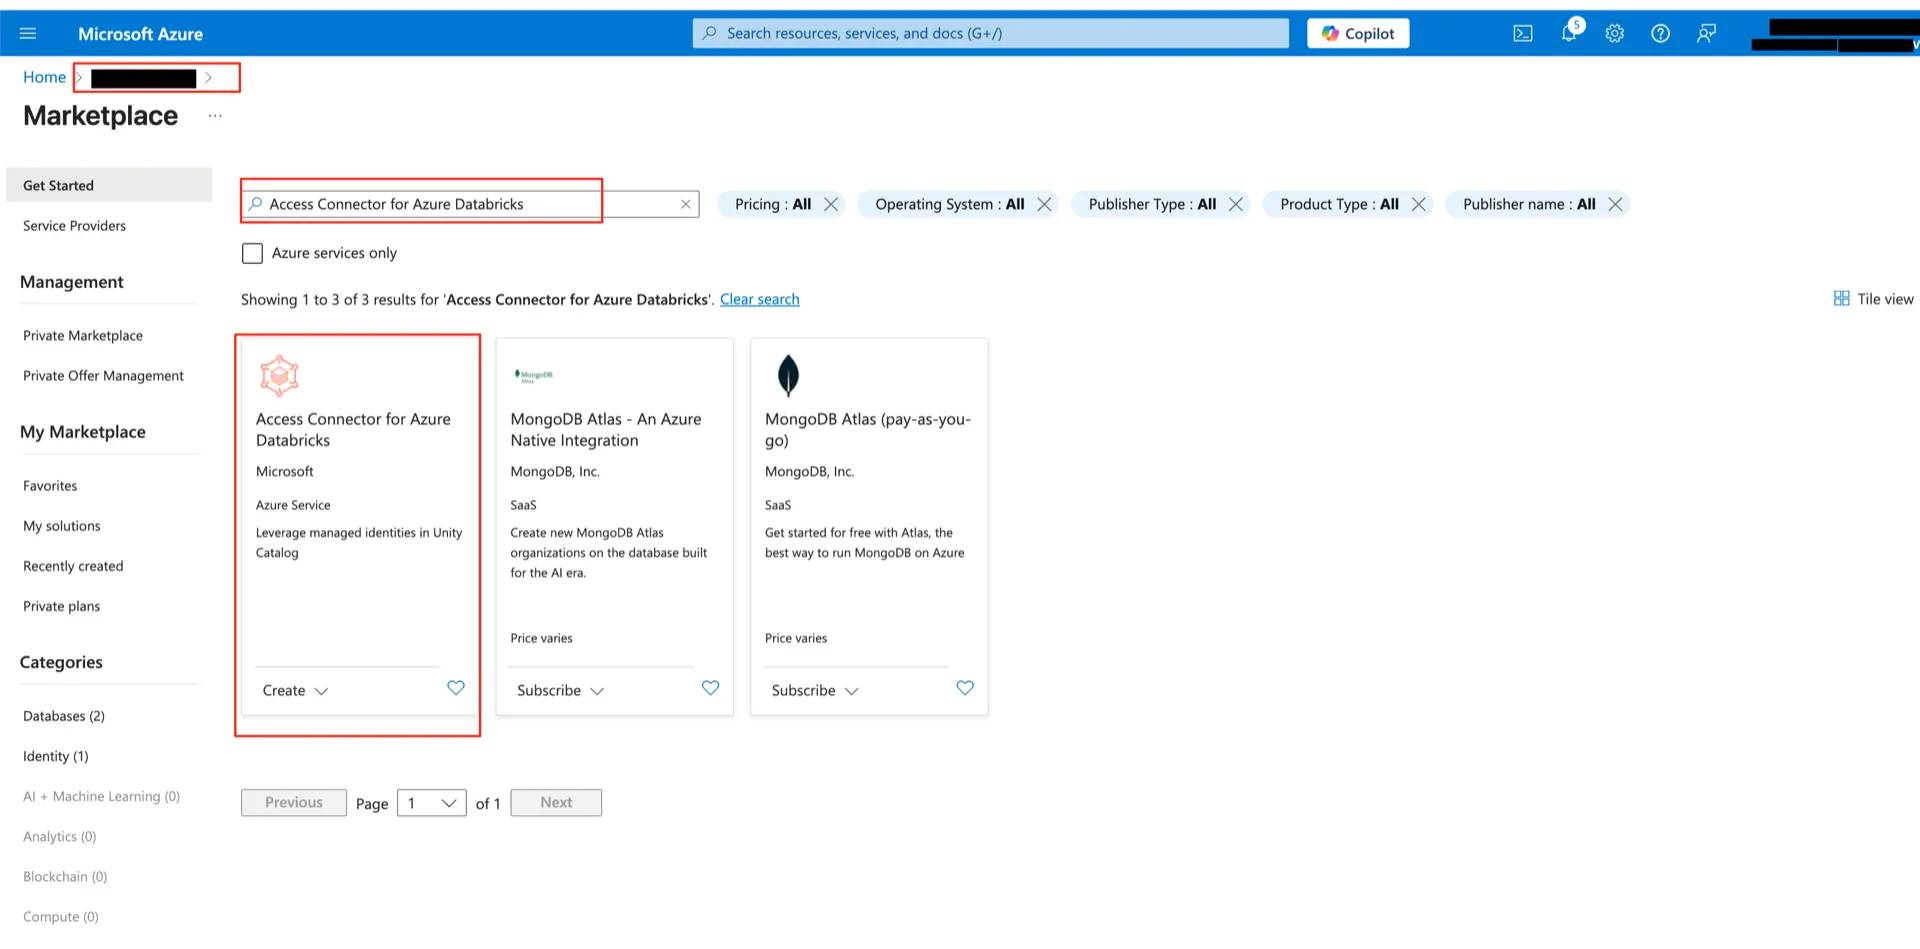
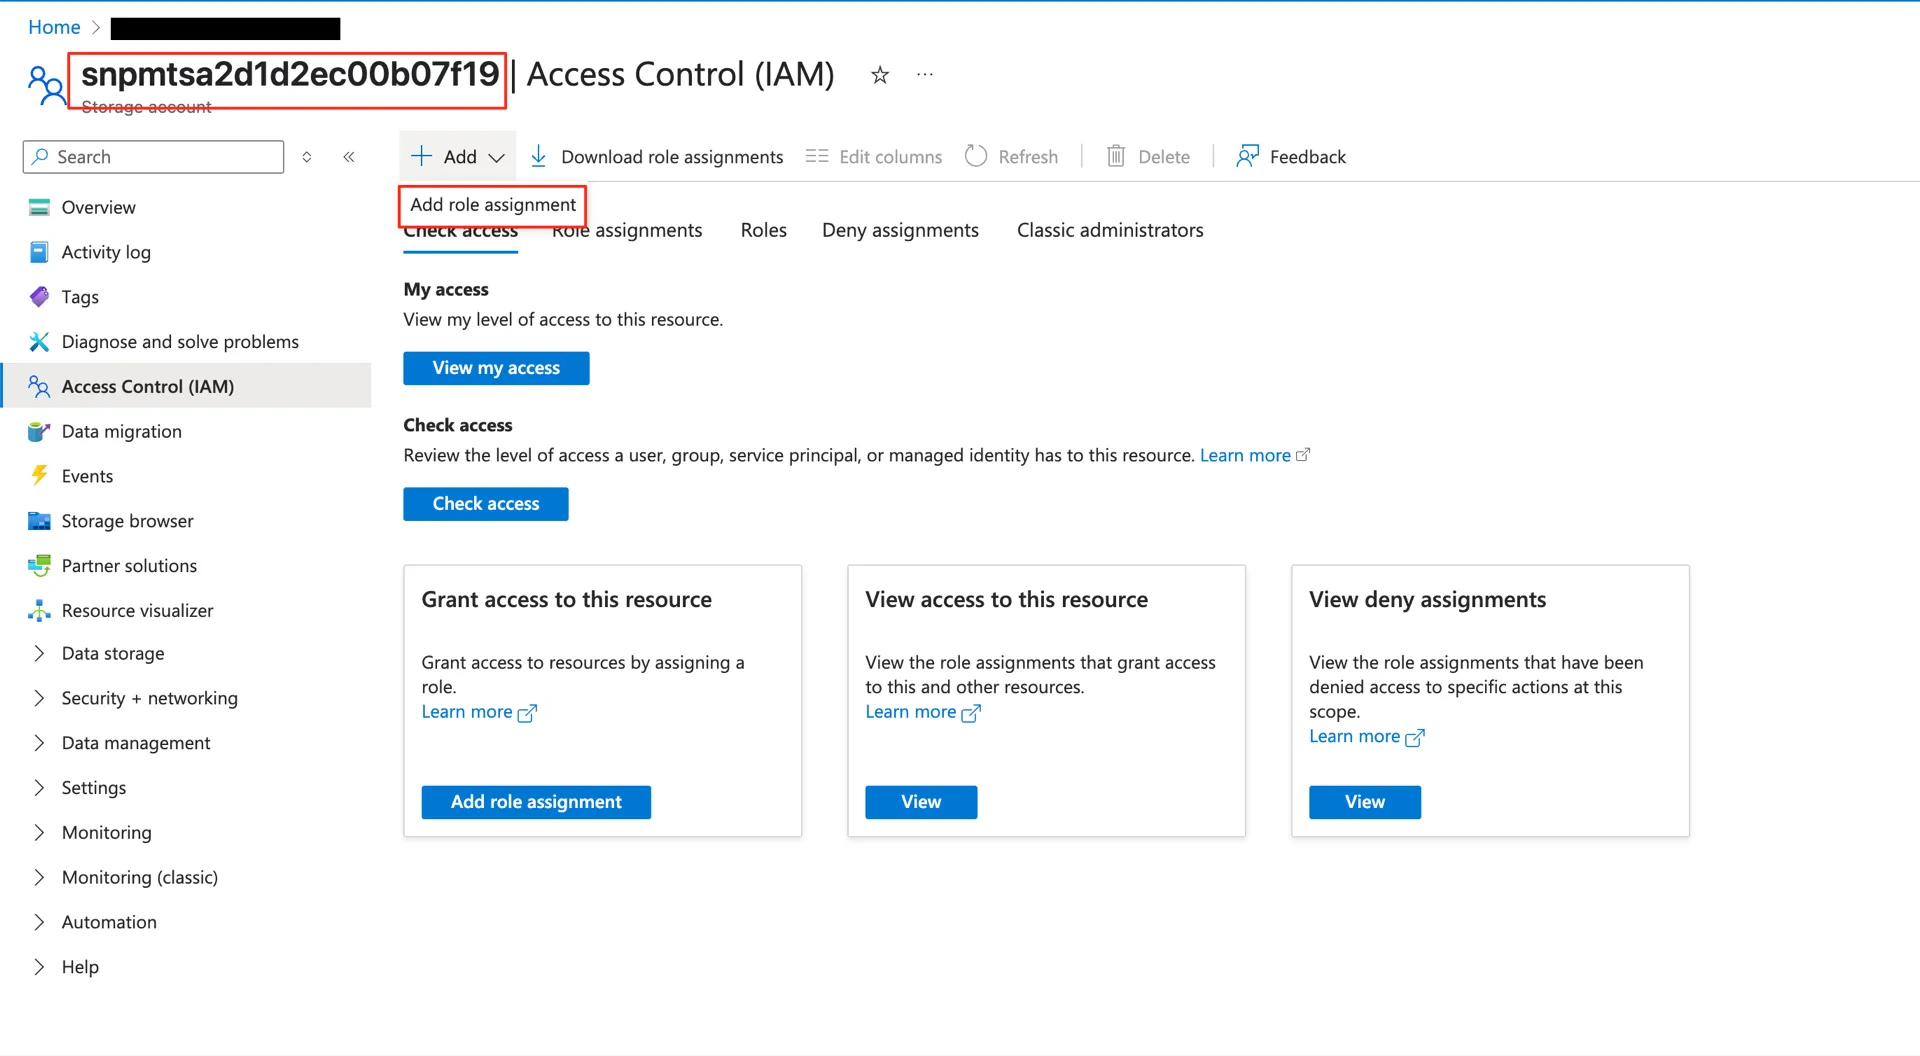
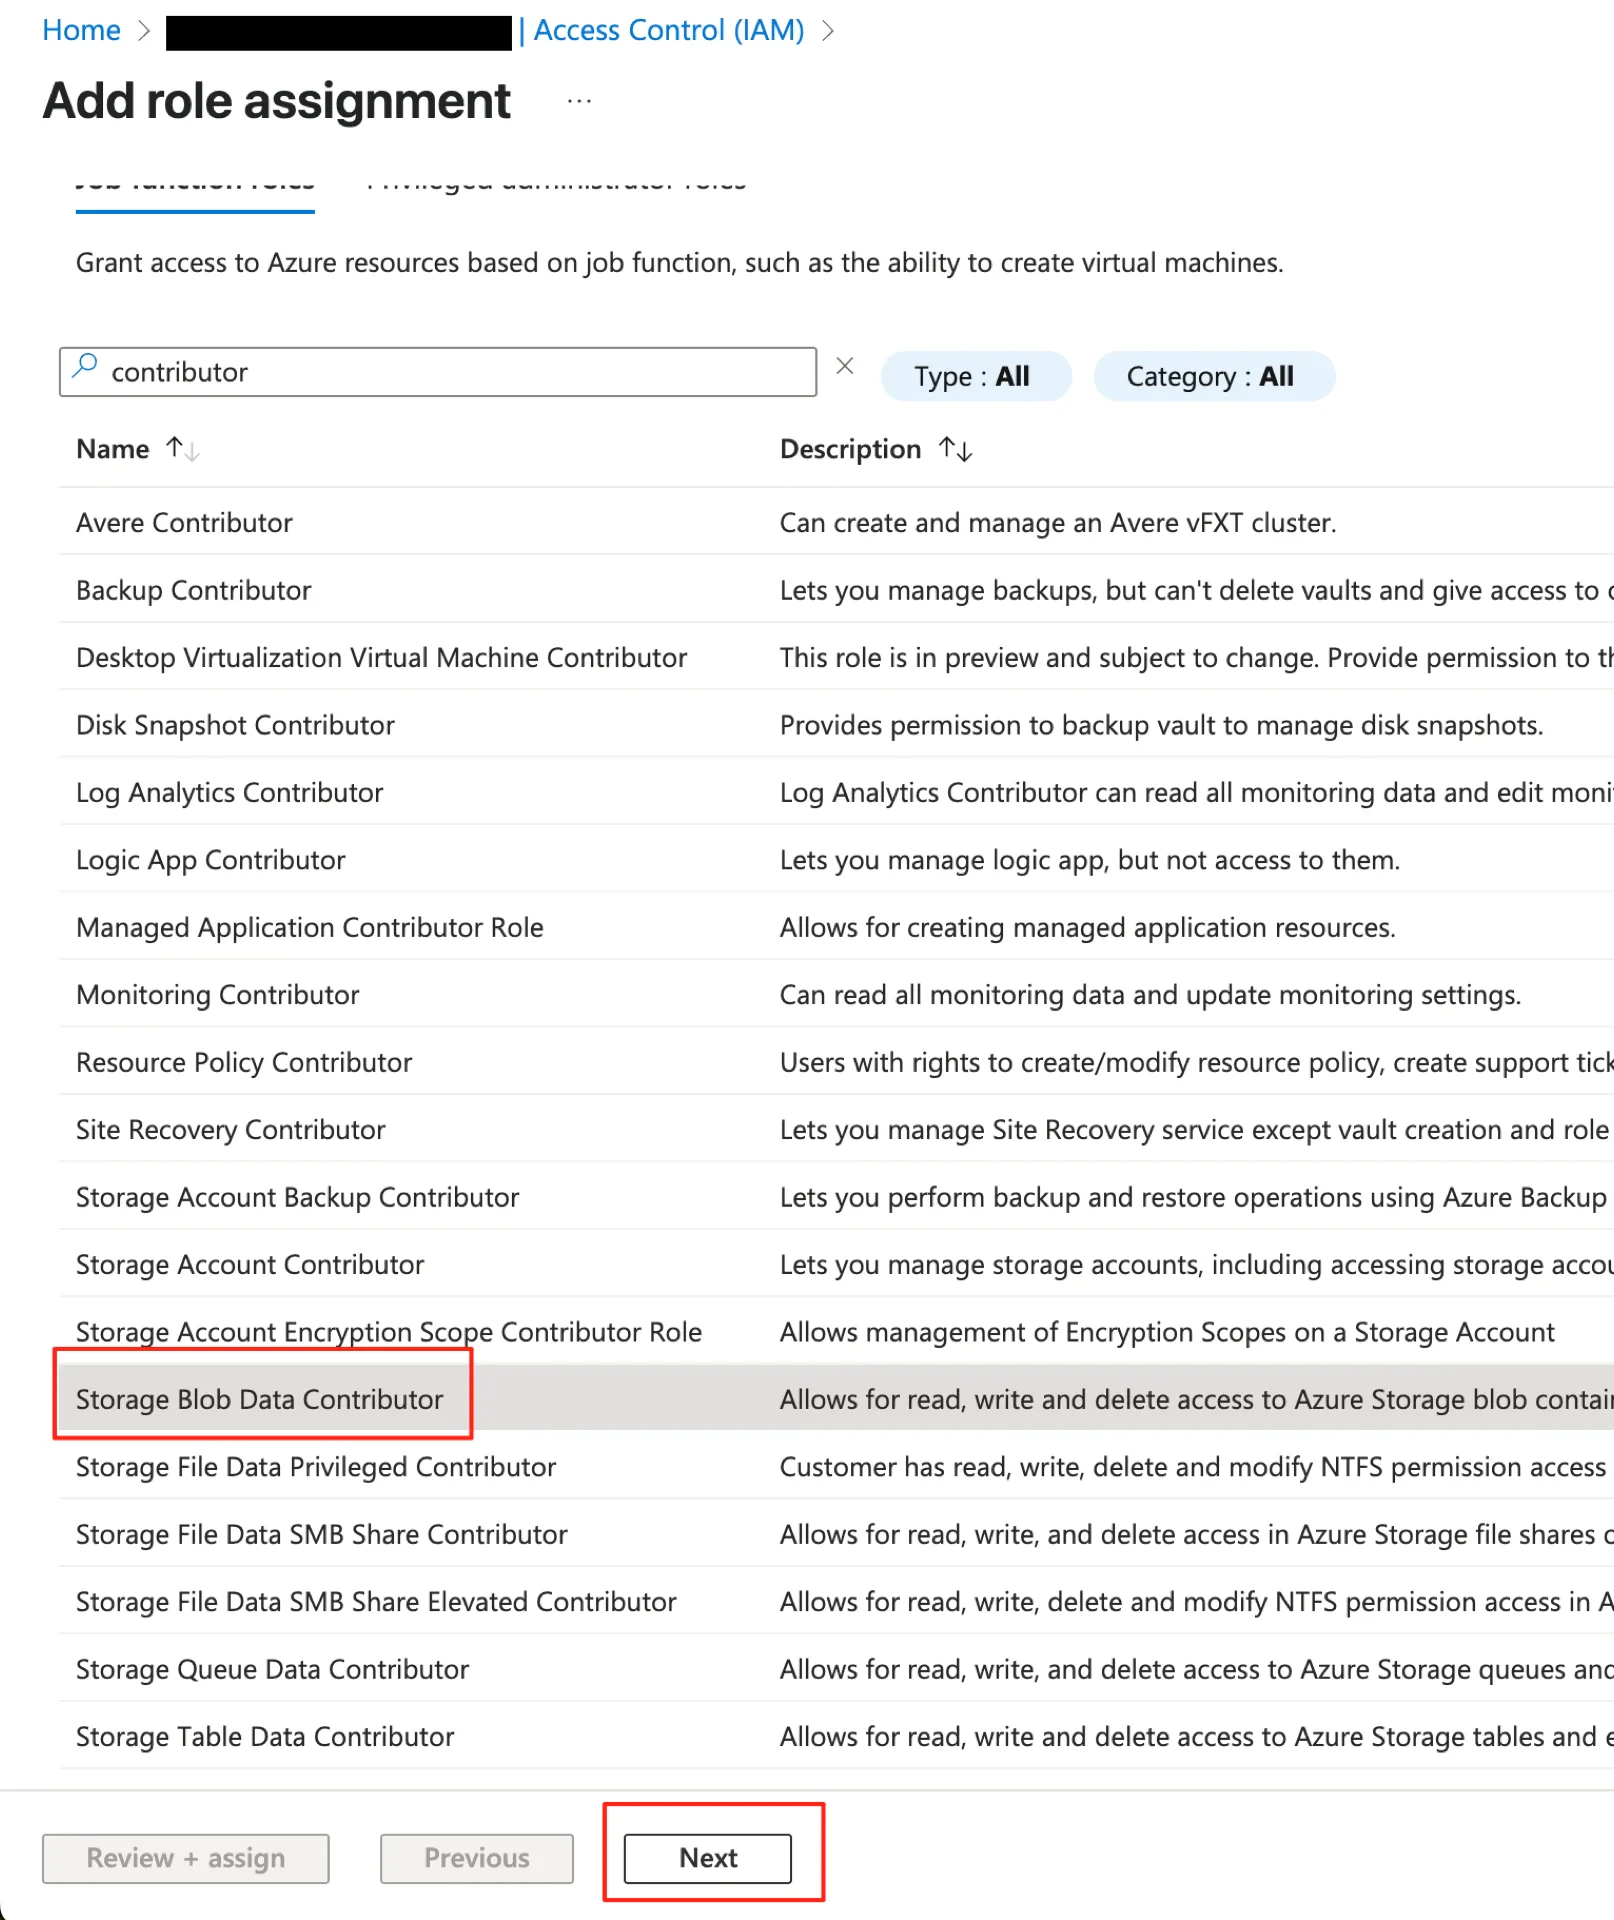
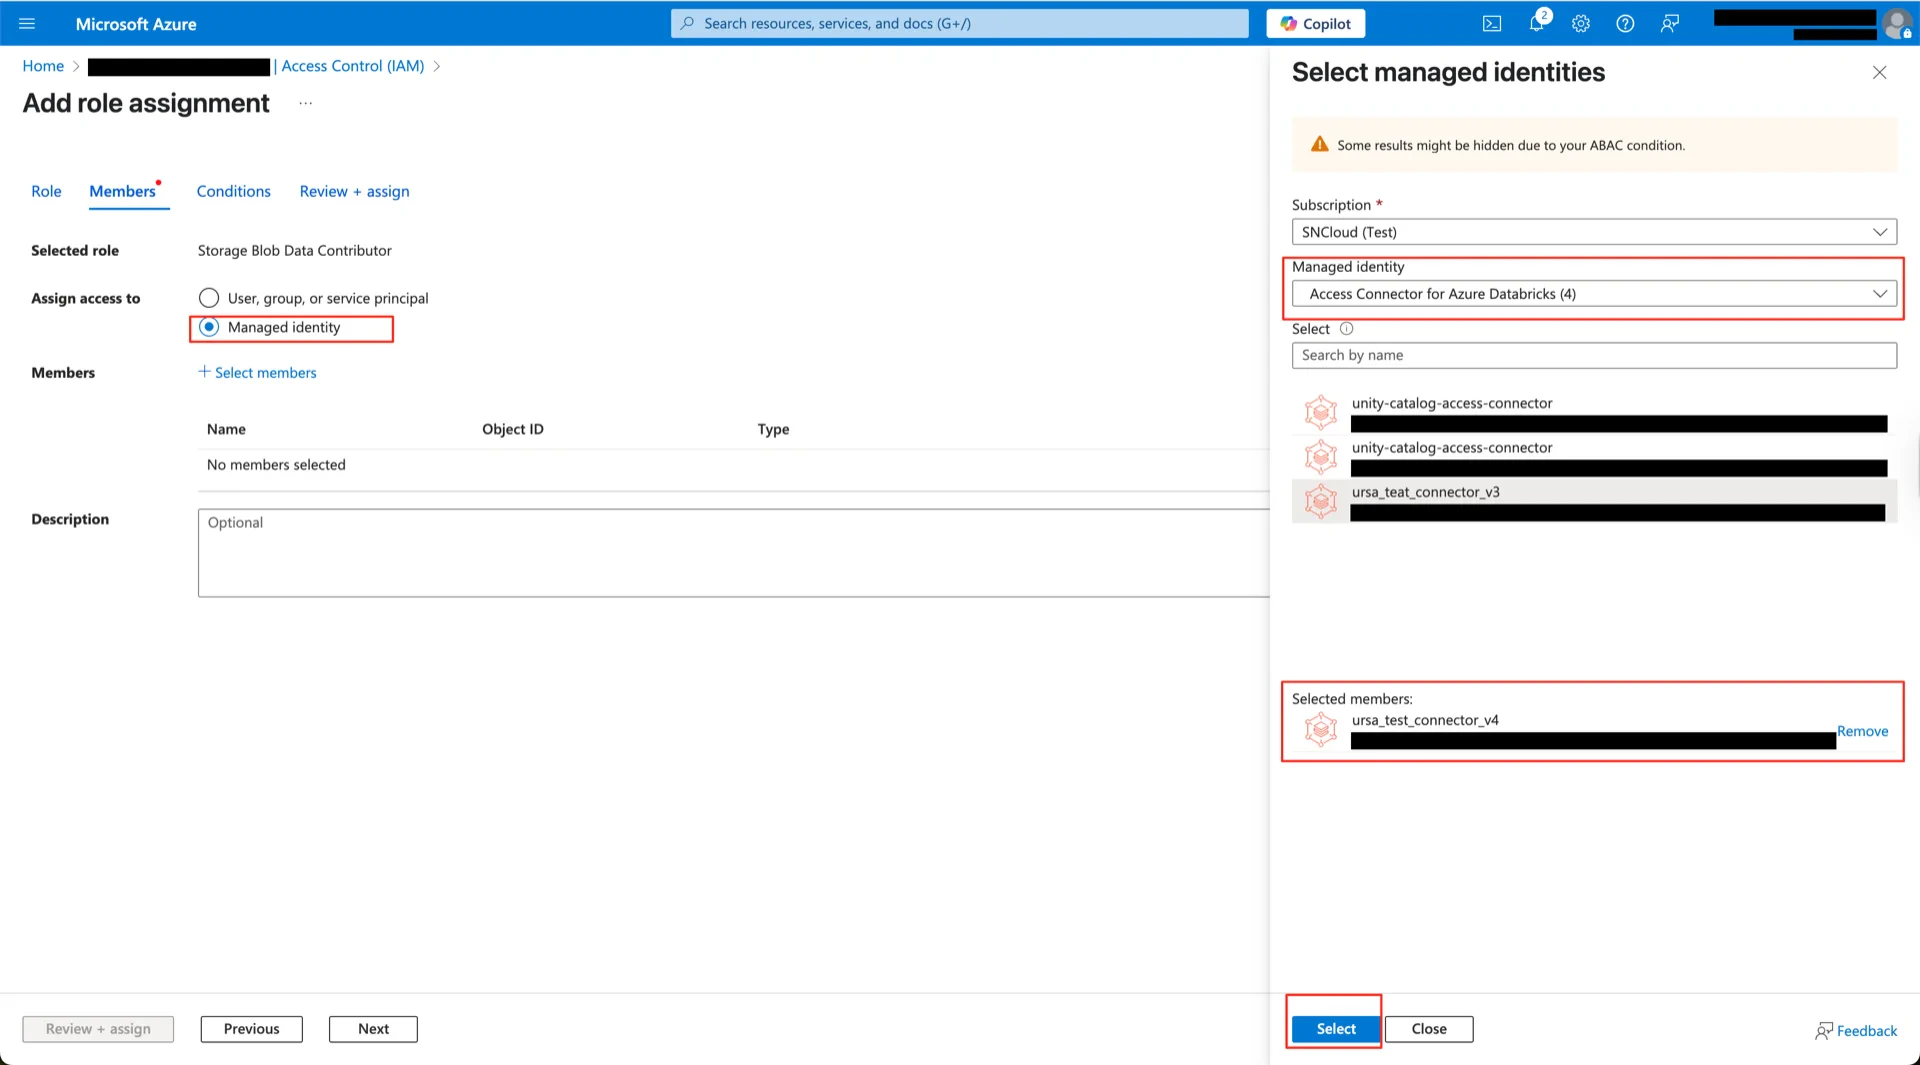
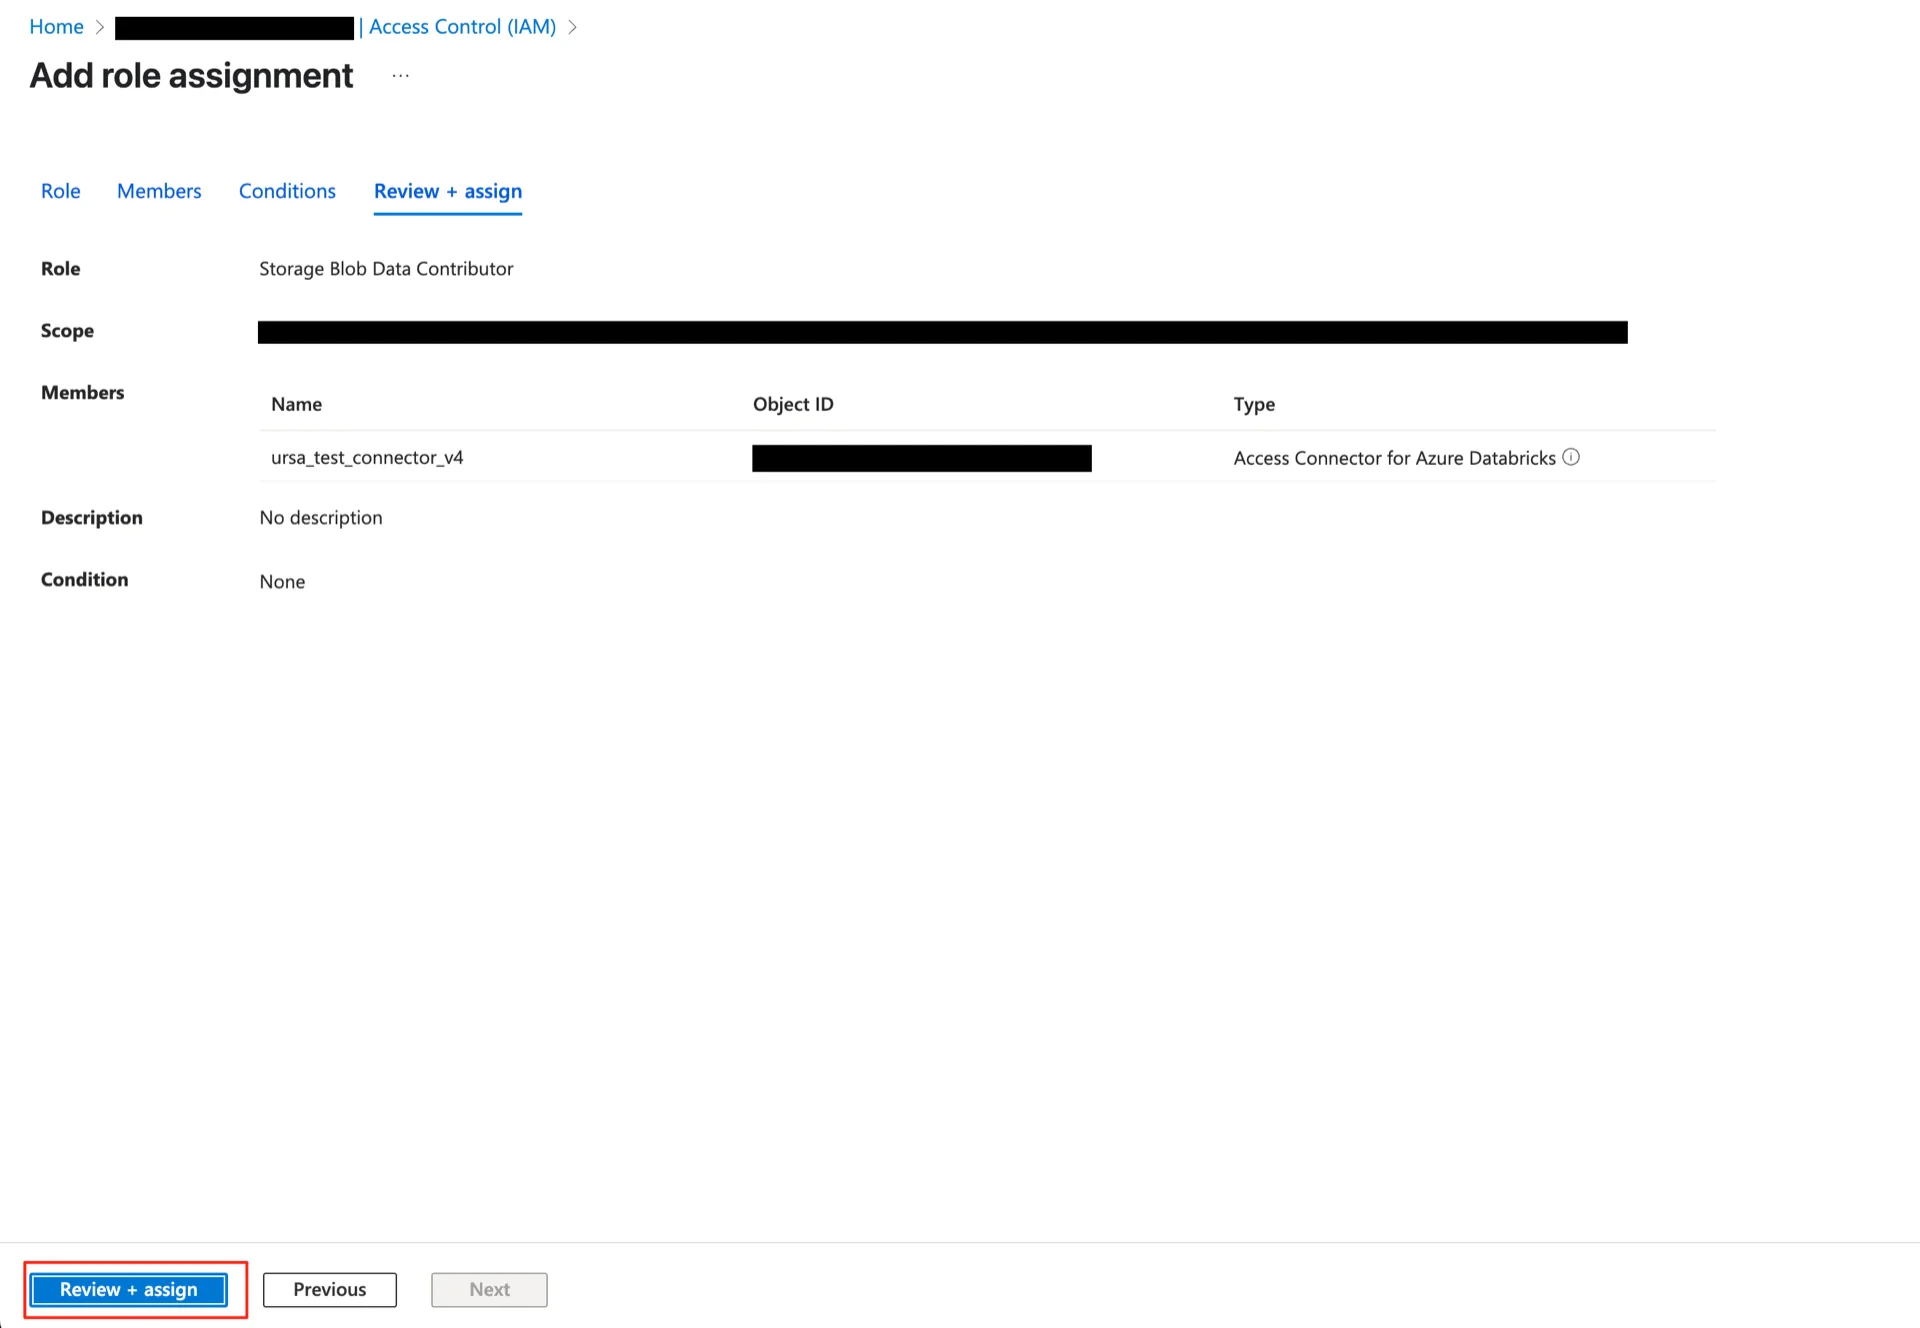
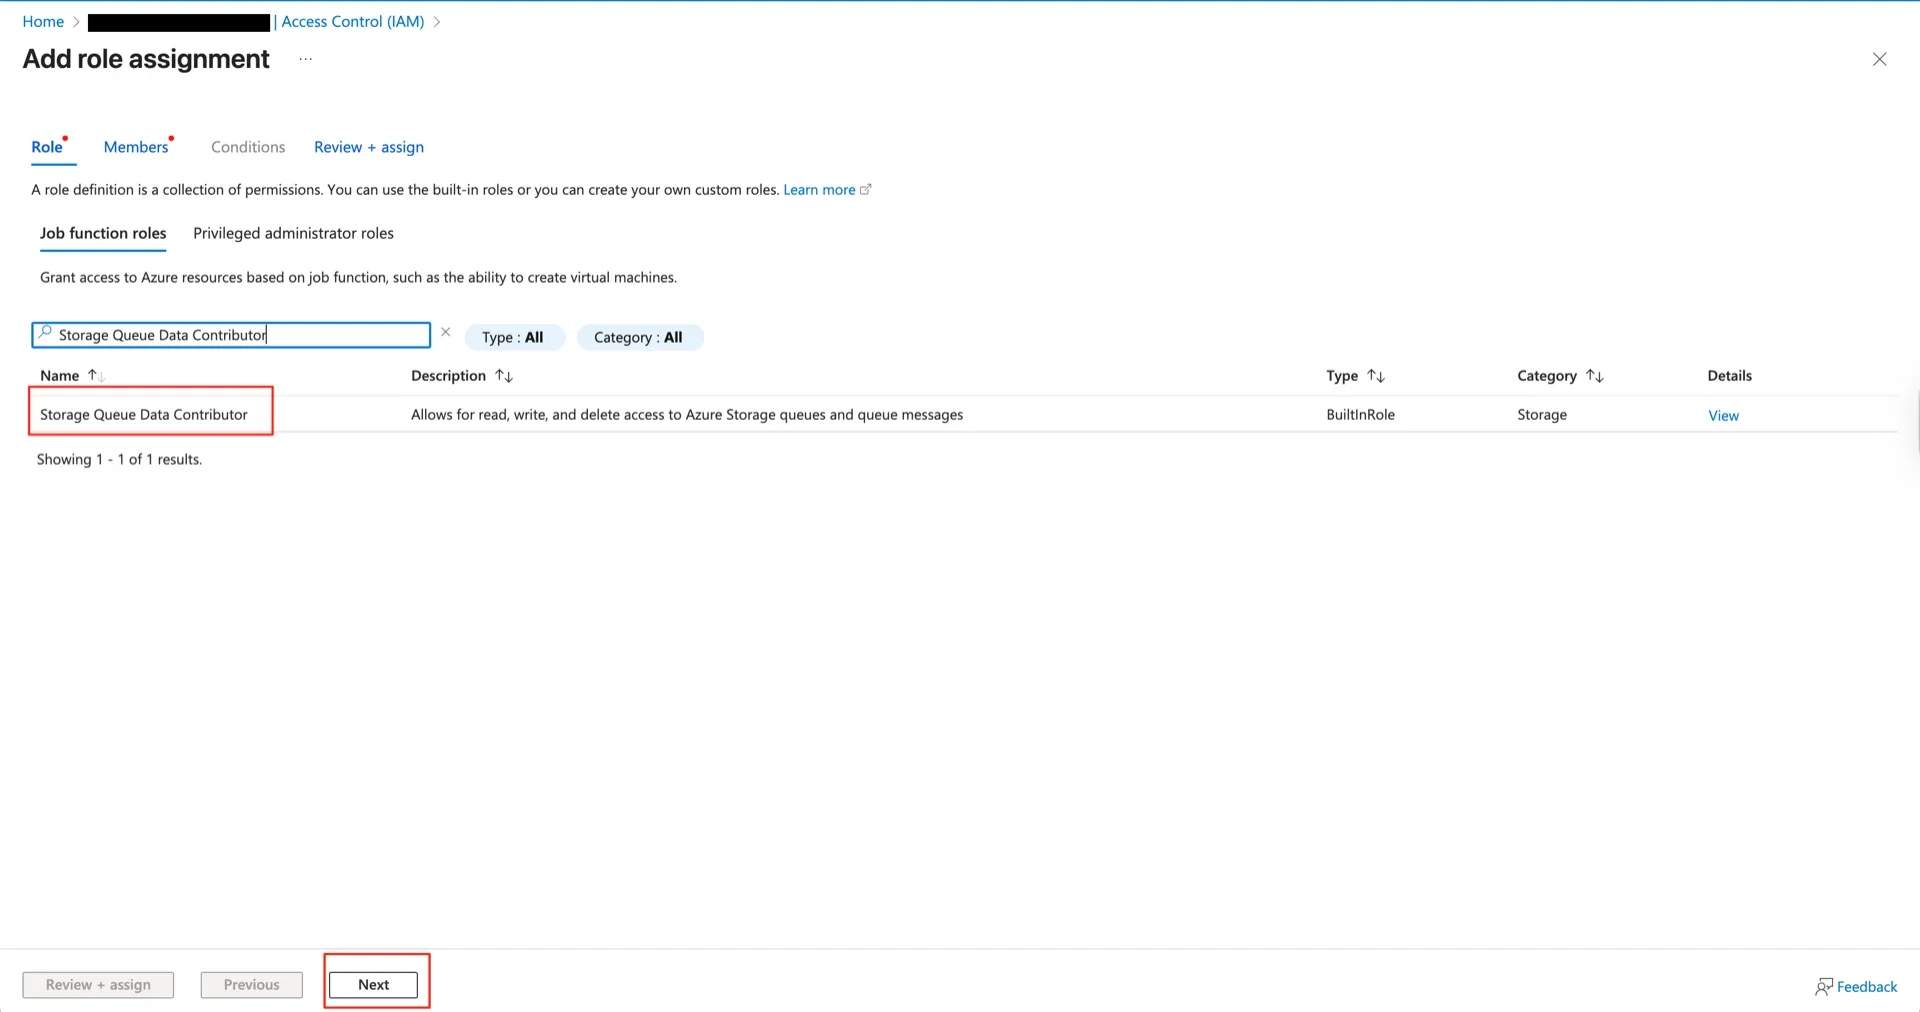
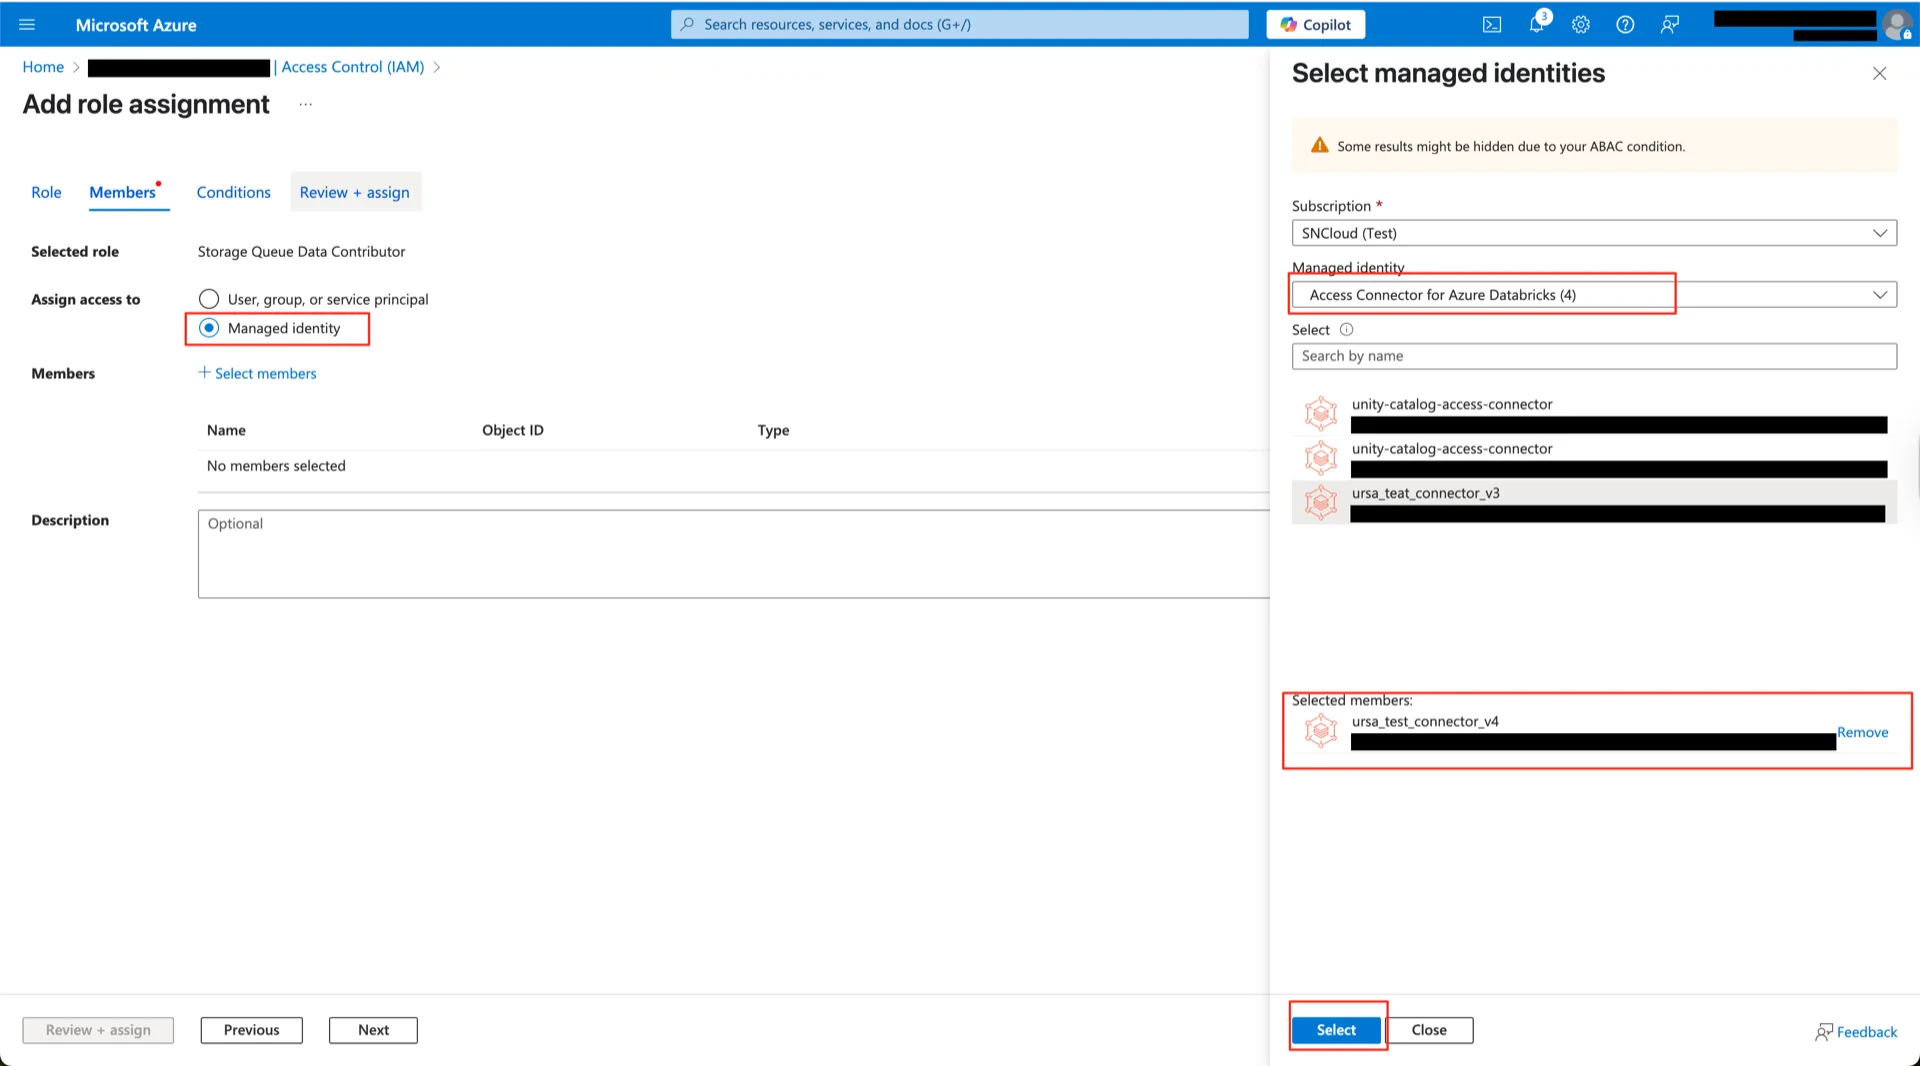
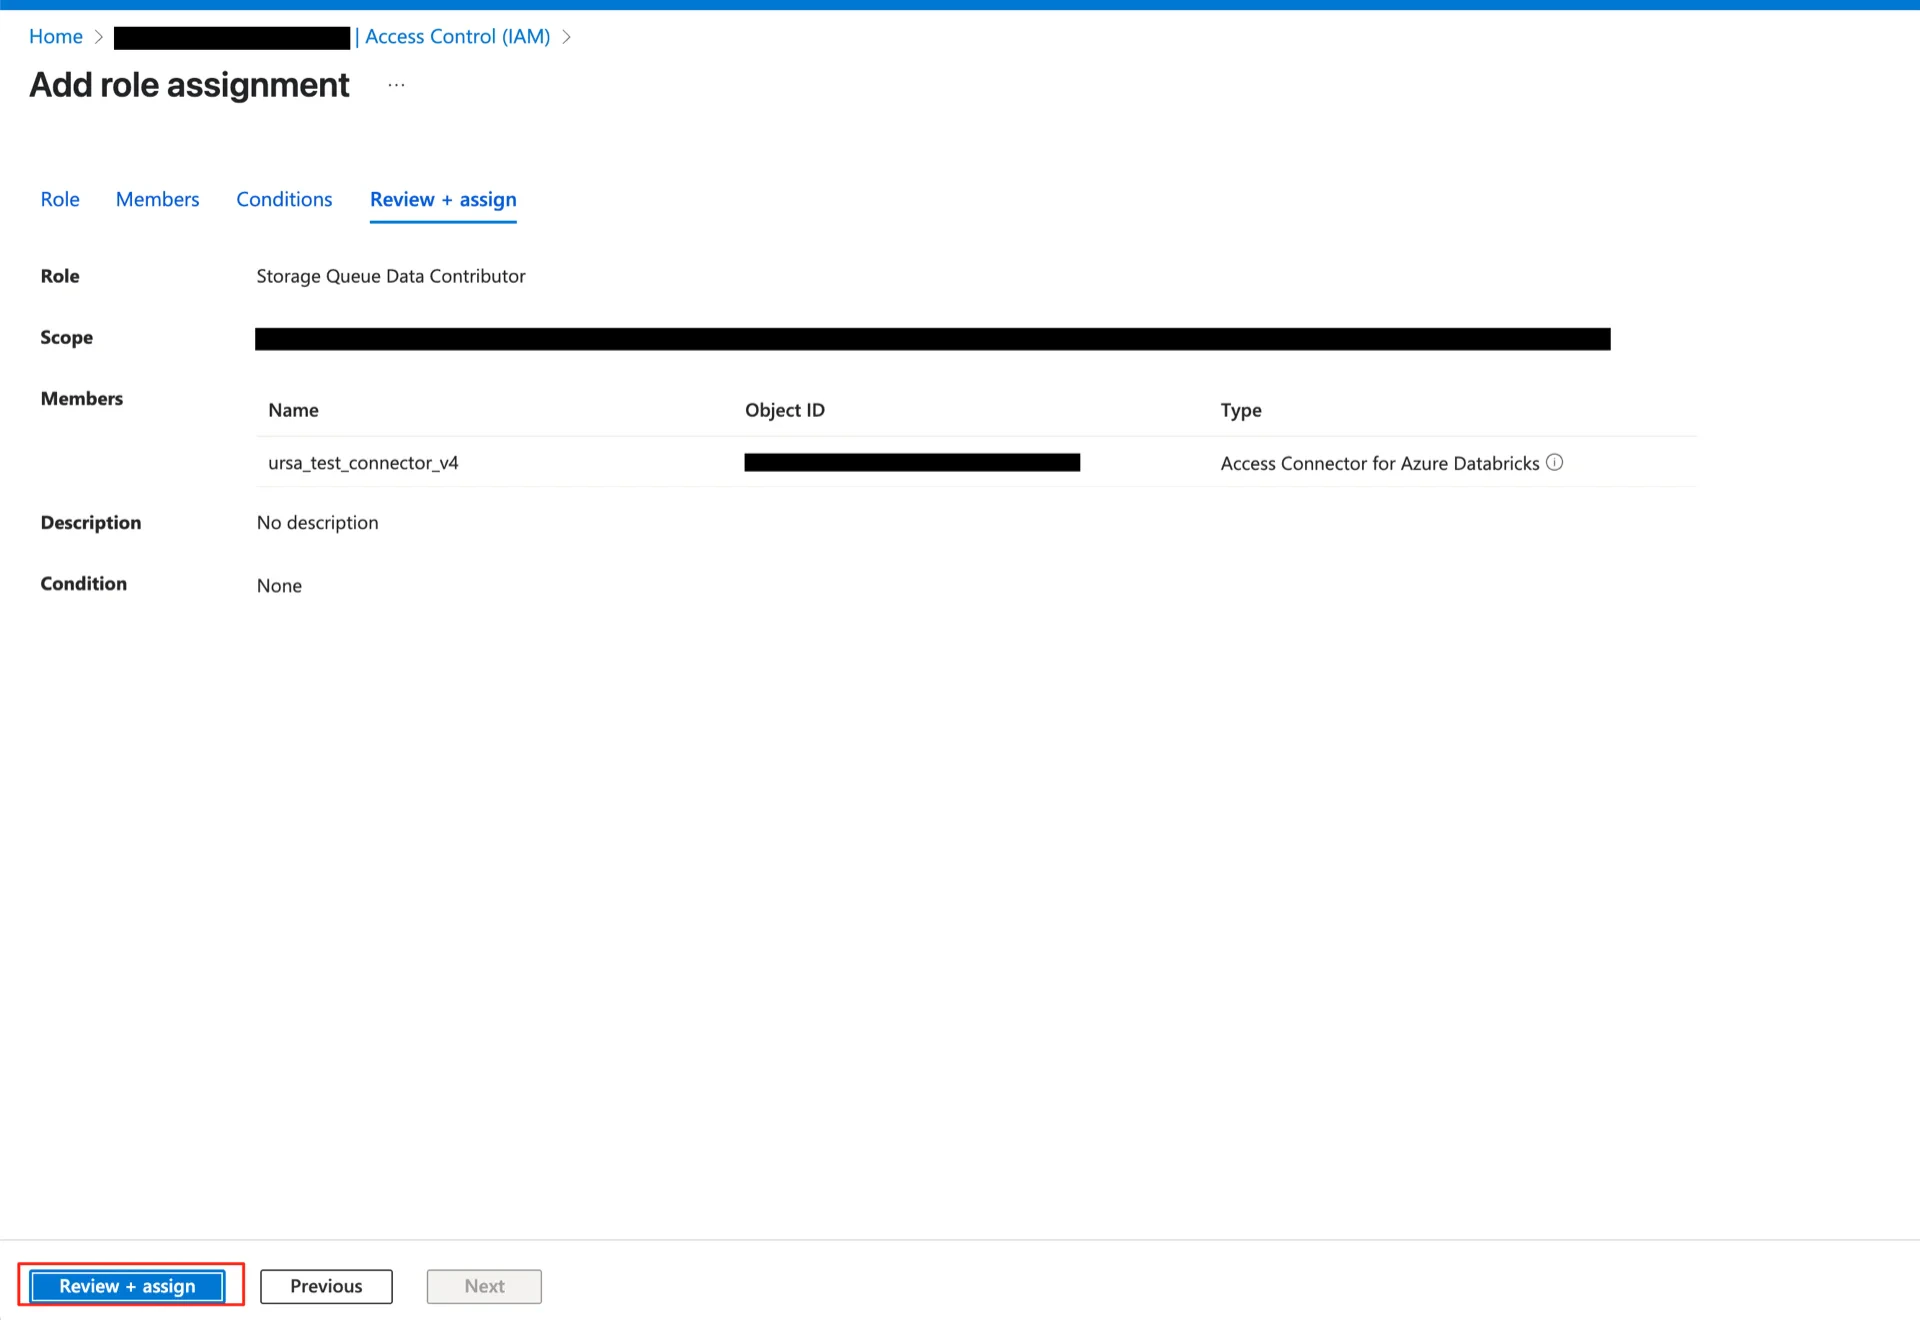
3. Grant Storage Permissions to the Access Connector
The Access Connector identity requires the following roles:| Scope | Role |
|---|---|
| Storage Account | Storage Blob Data Contributor |
| Storage Account | Storage Queue Data Contributor |
| Resource Group | EventGrid EventSubscription Contributor |
3.1 Grant Storage Blob Data Contributor
3.2 Grant Storage Queue Data Contributor
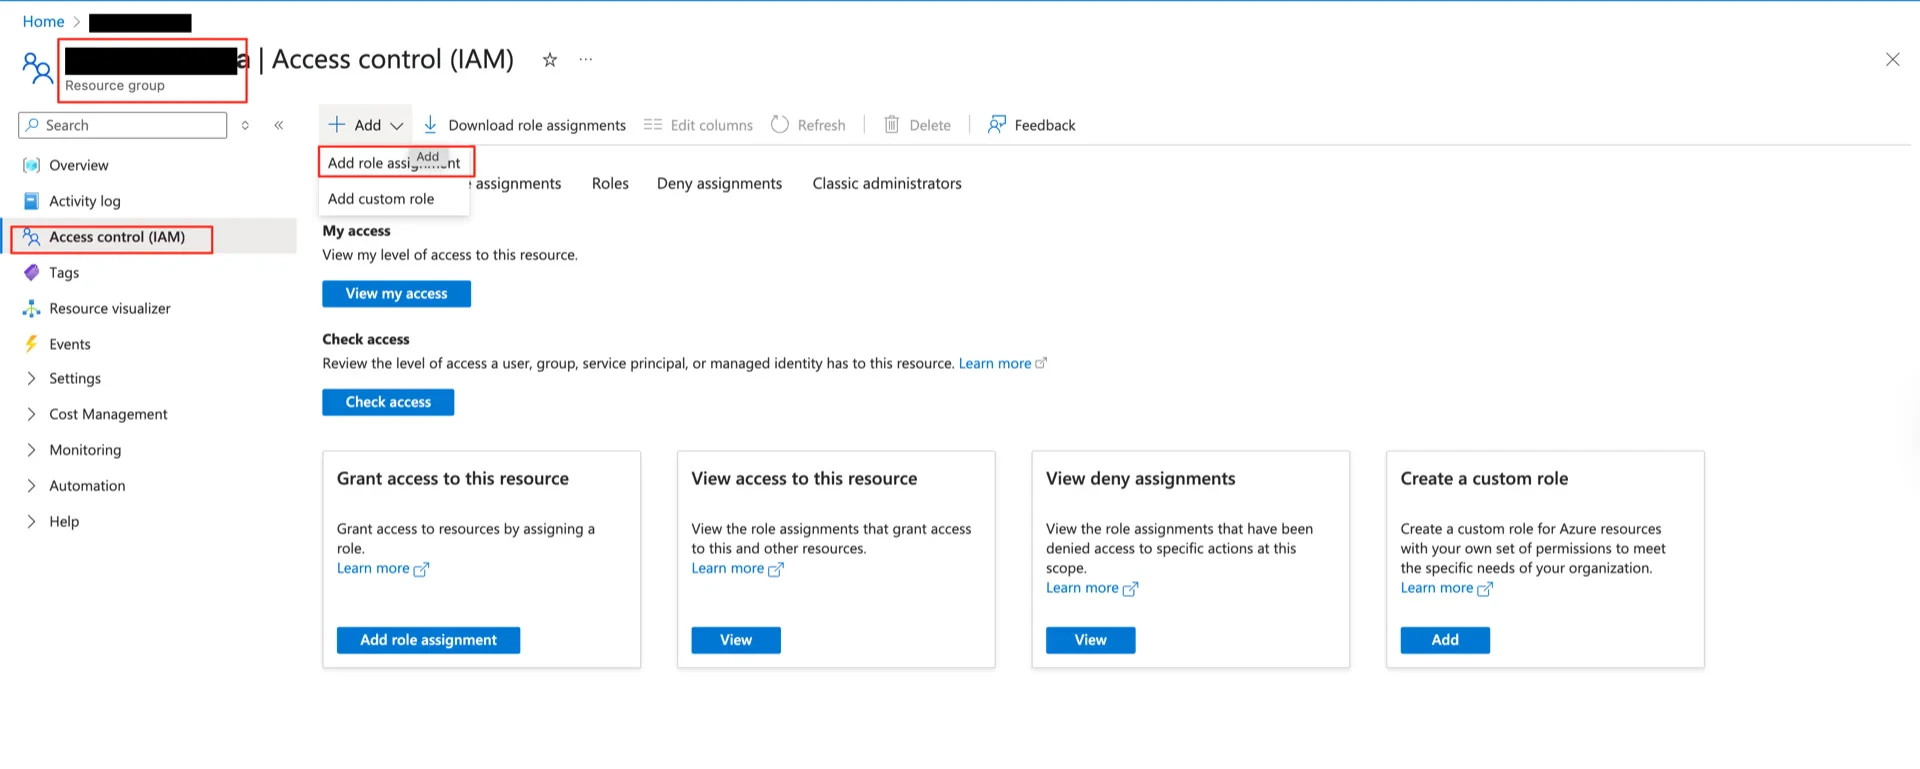
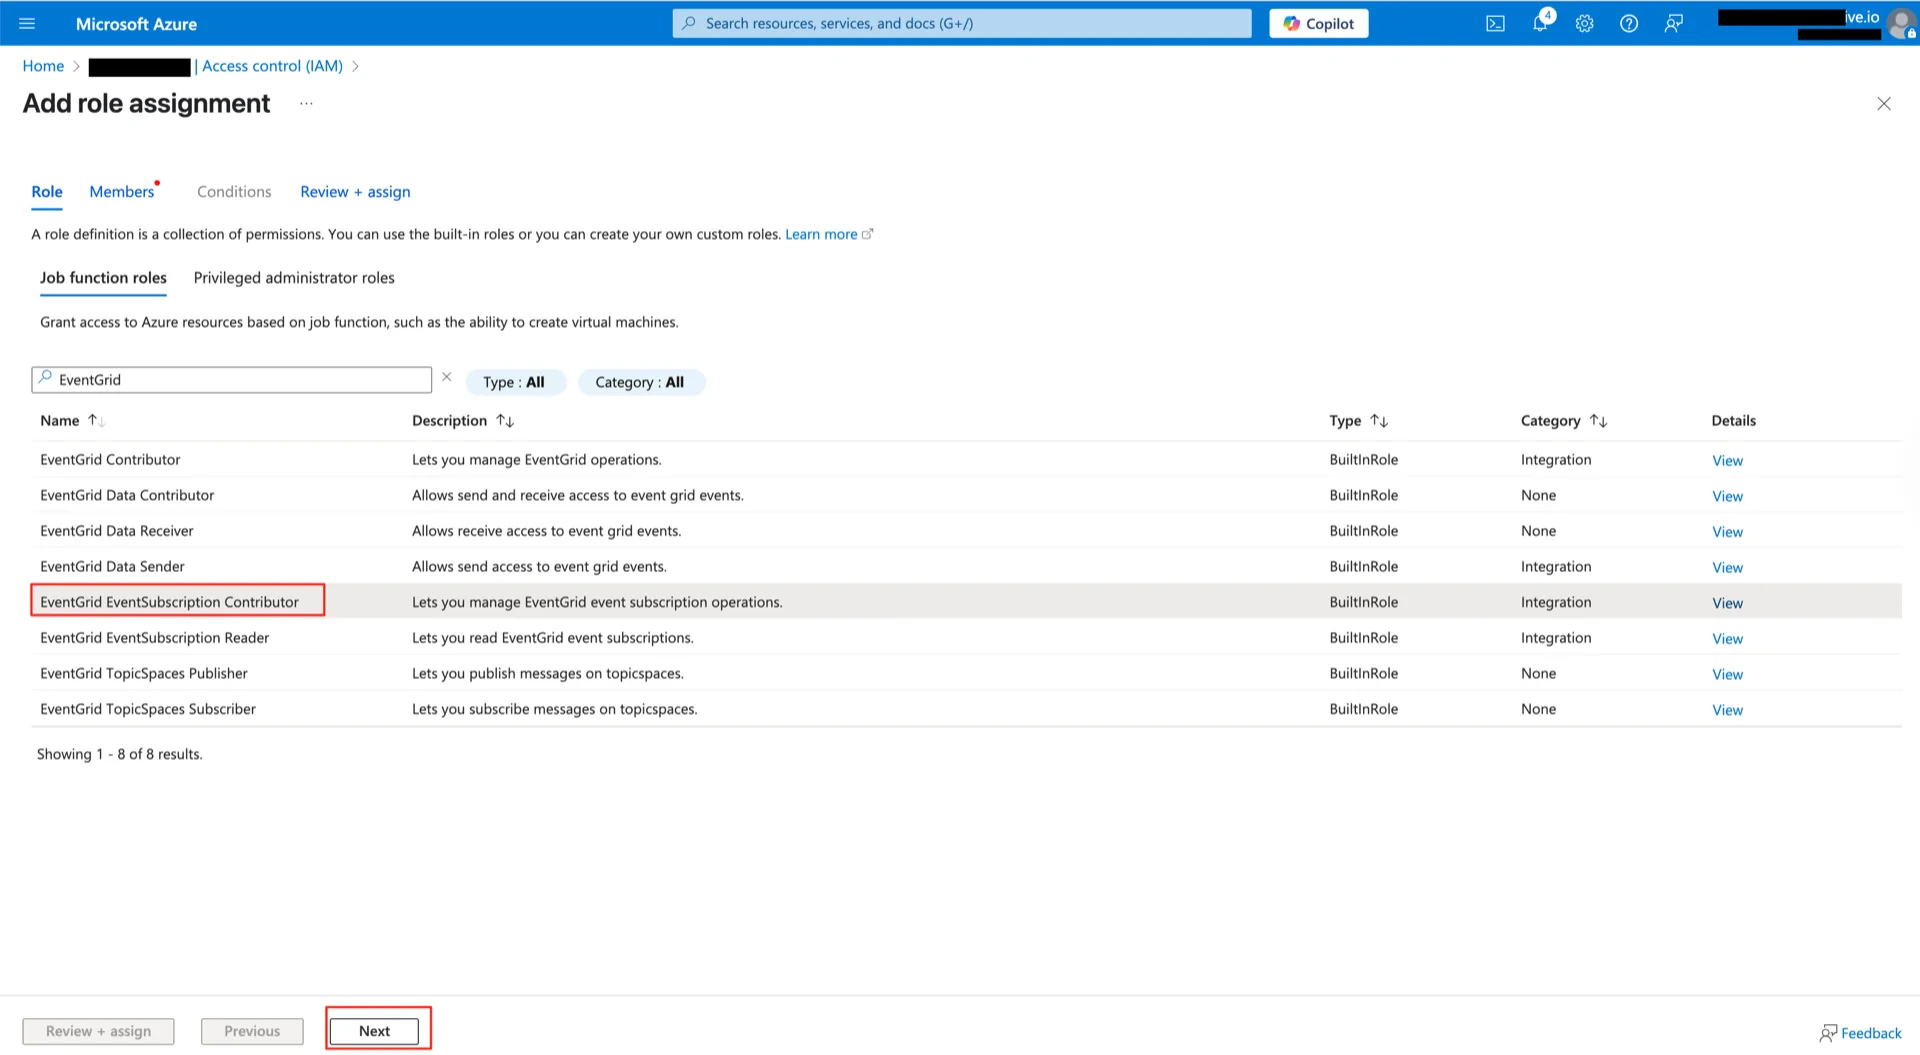
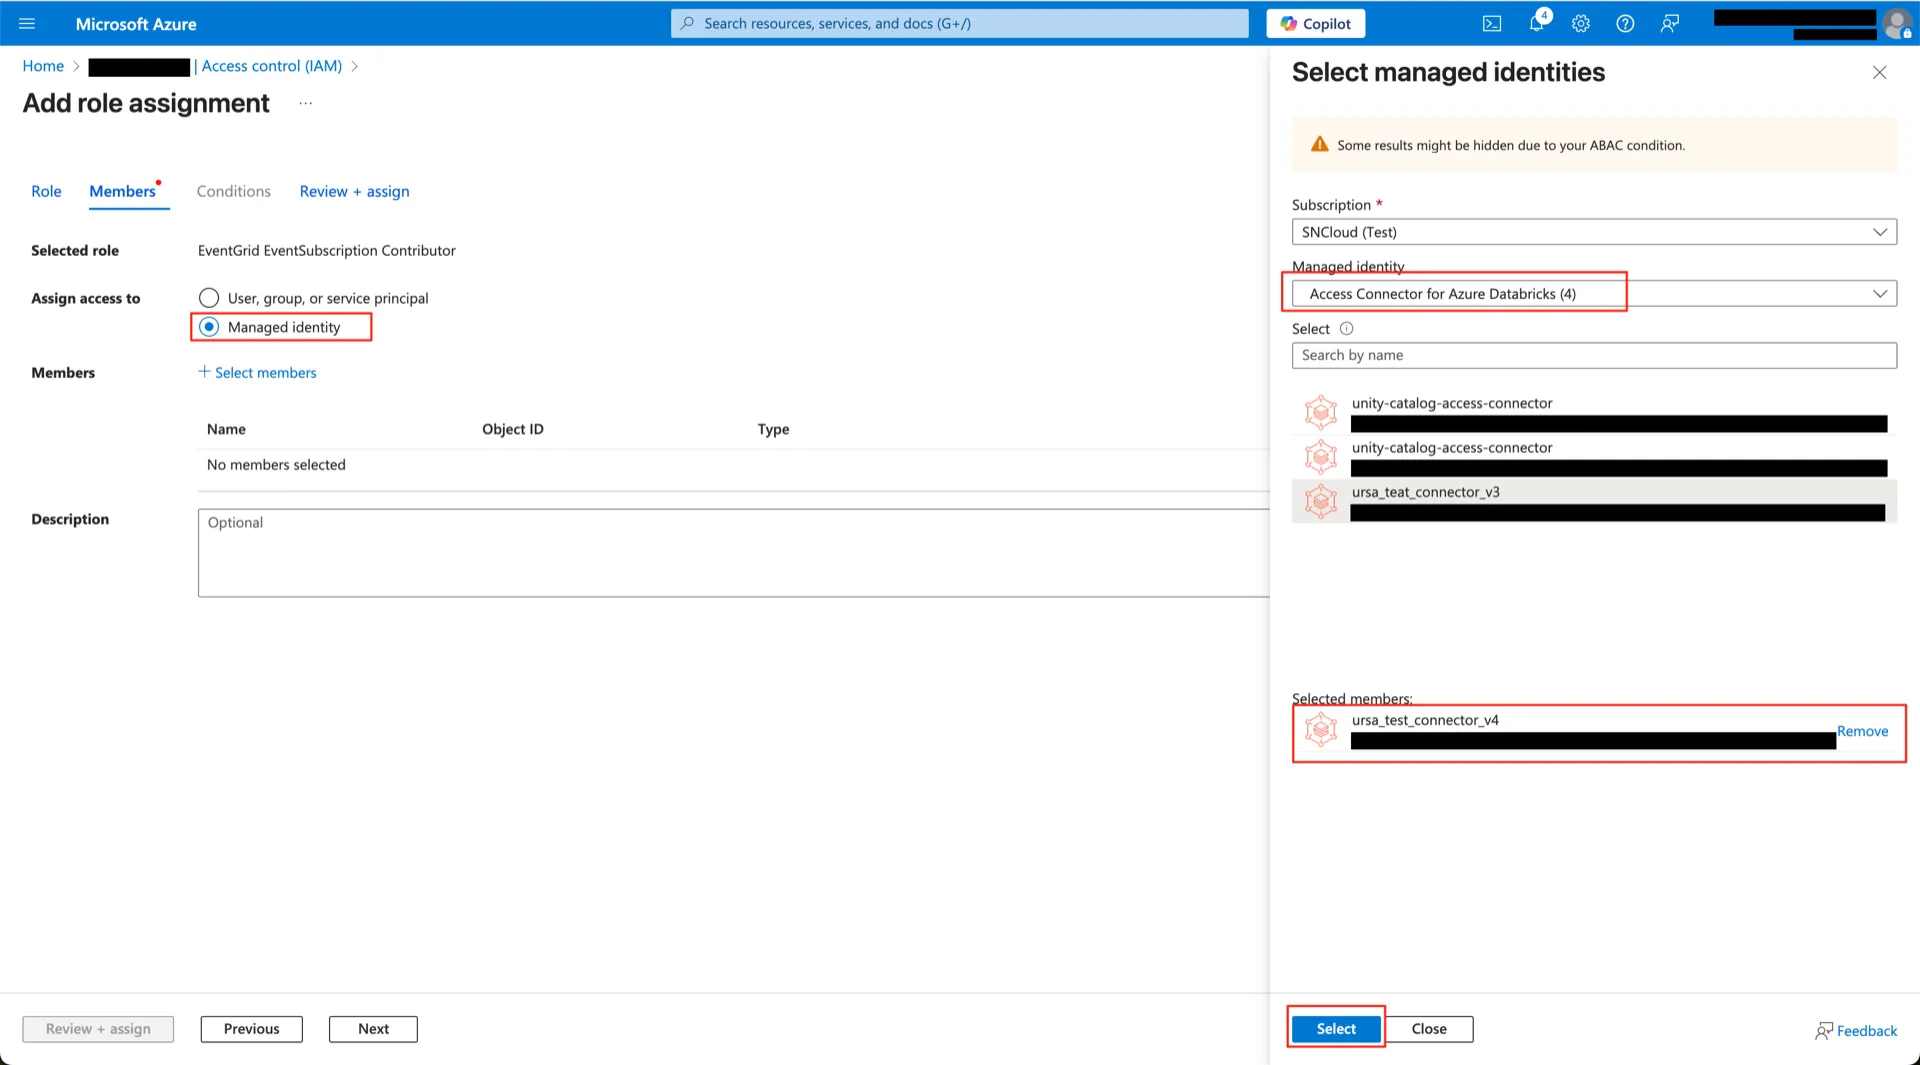
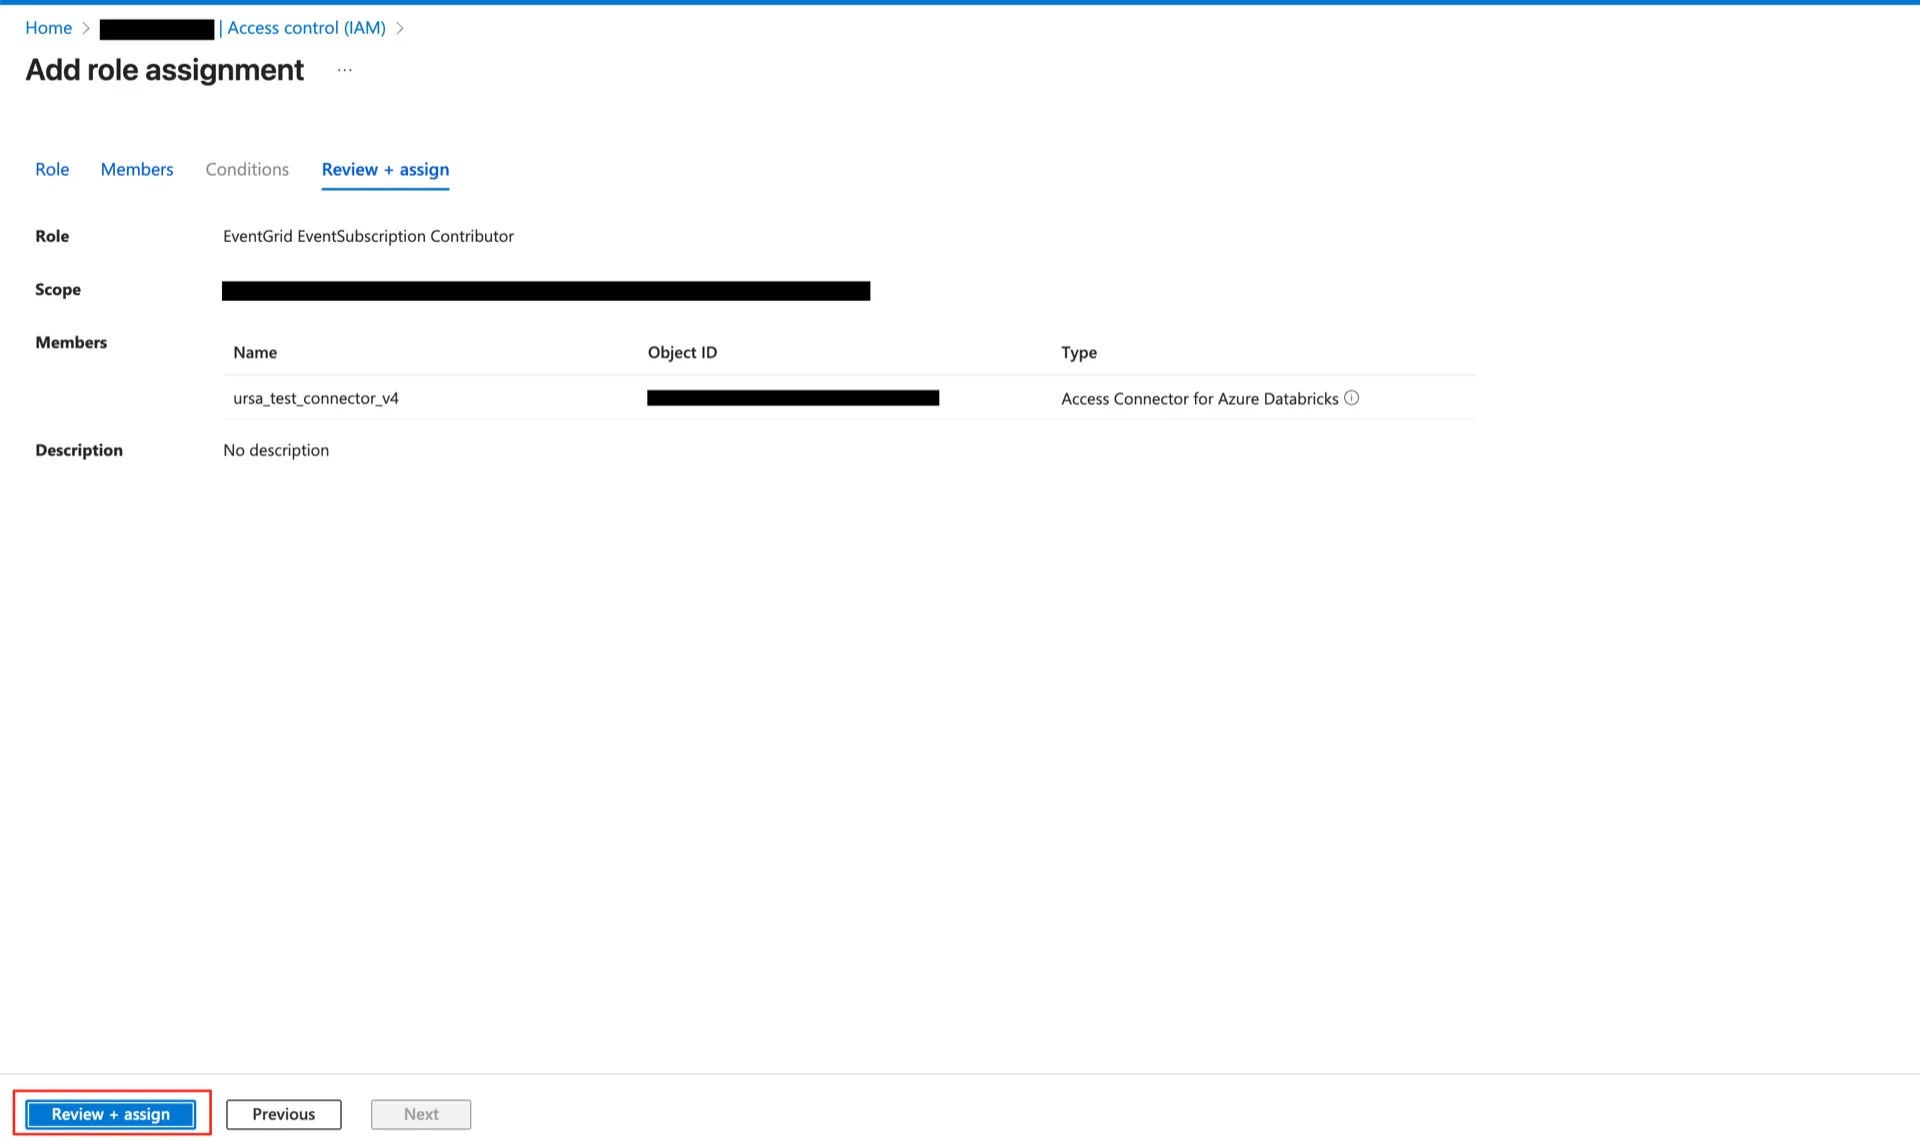
3.3 Grant EventGrid EventSubscription Contributor
4. Create the Unity Catalog Metastore
Create the Unity Catalog metastore in Databricks.
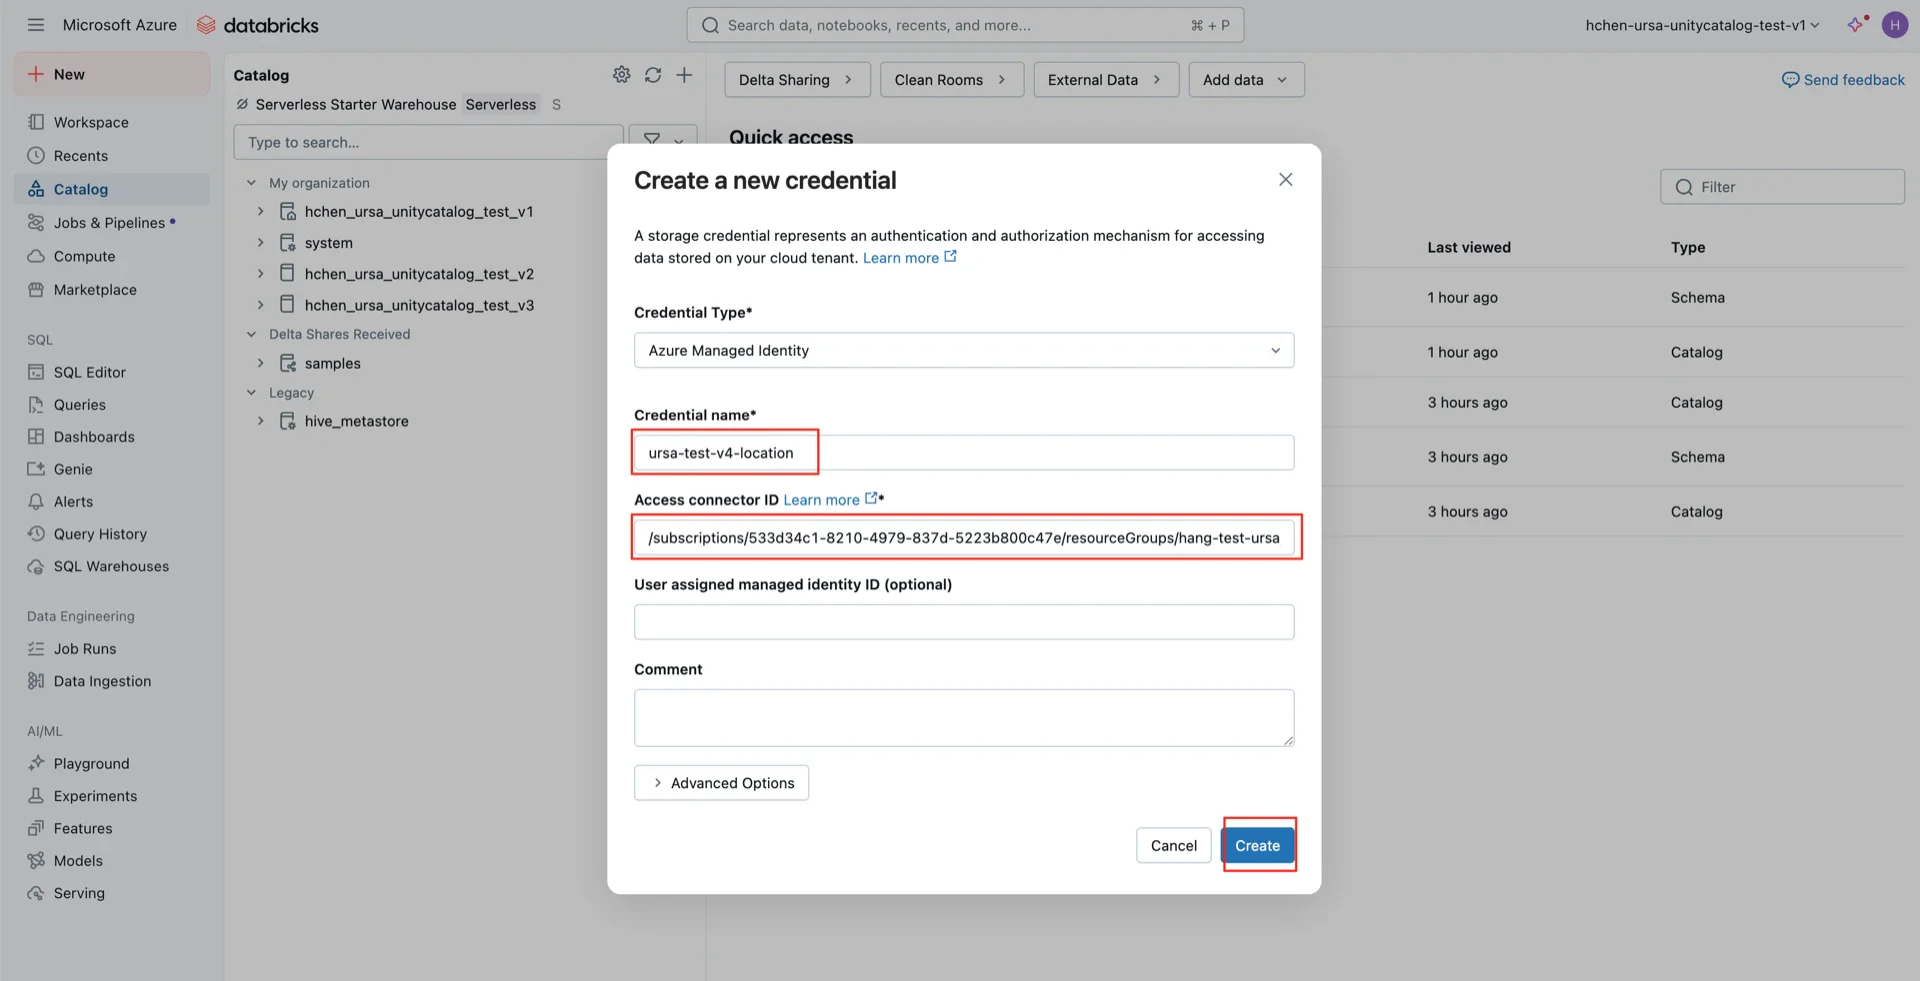
5. Create a Storage Credential
In the Databricks Catalog console, create a storage credential linked to the Access Connector created in step 2.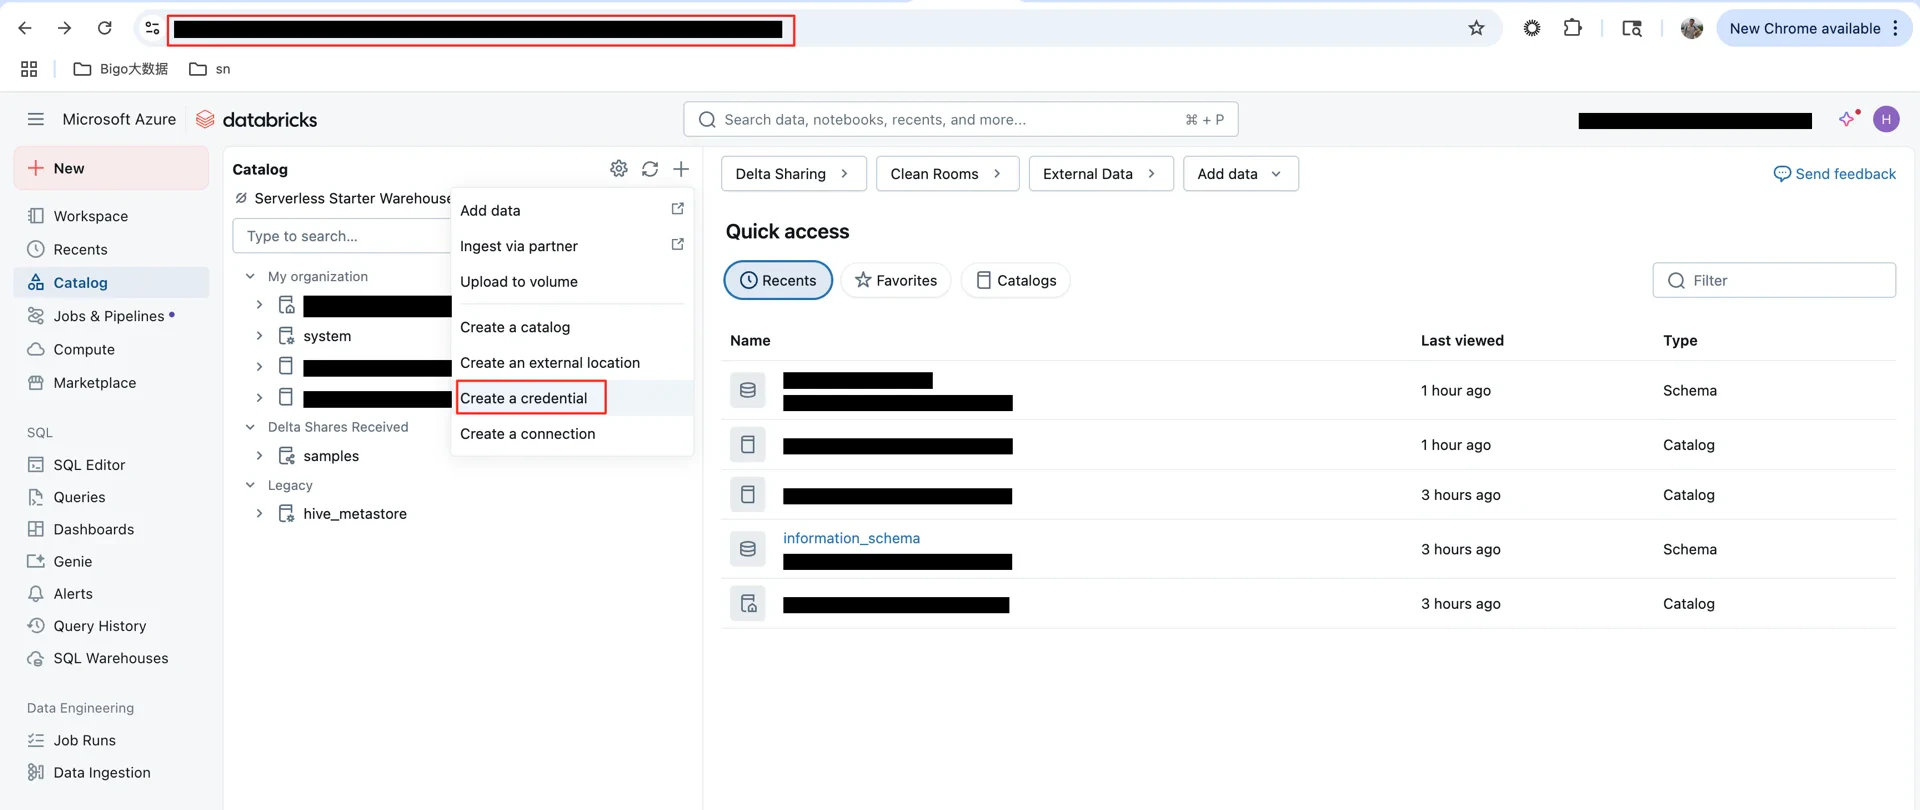
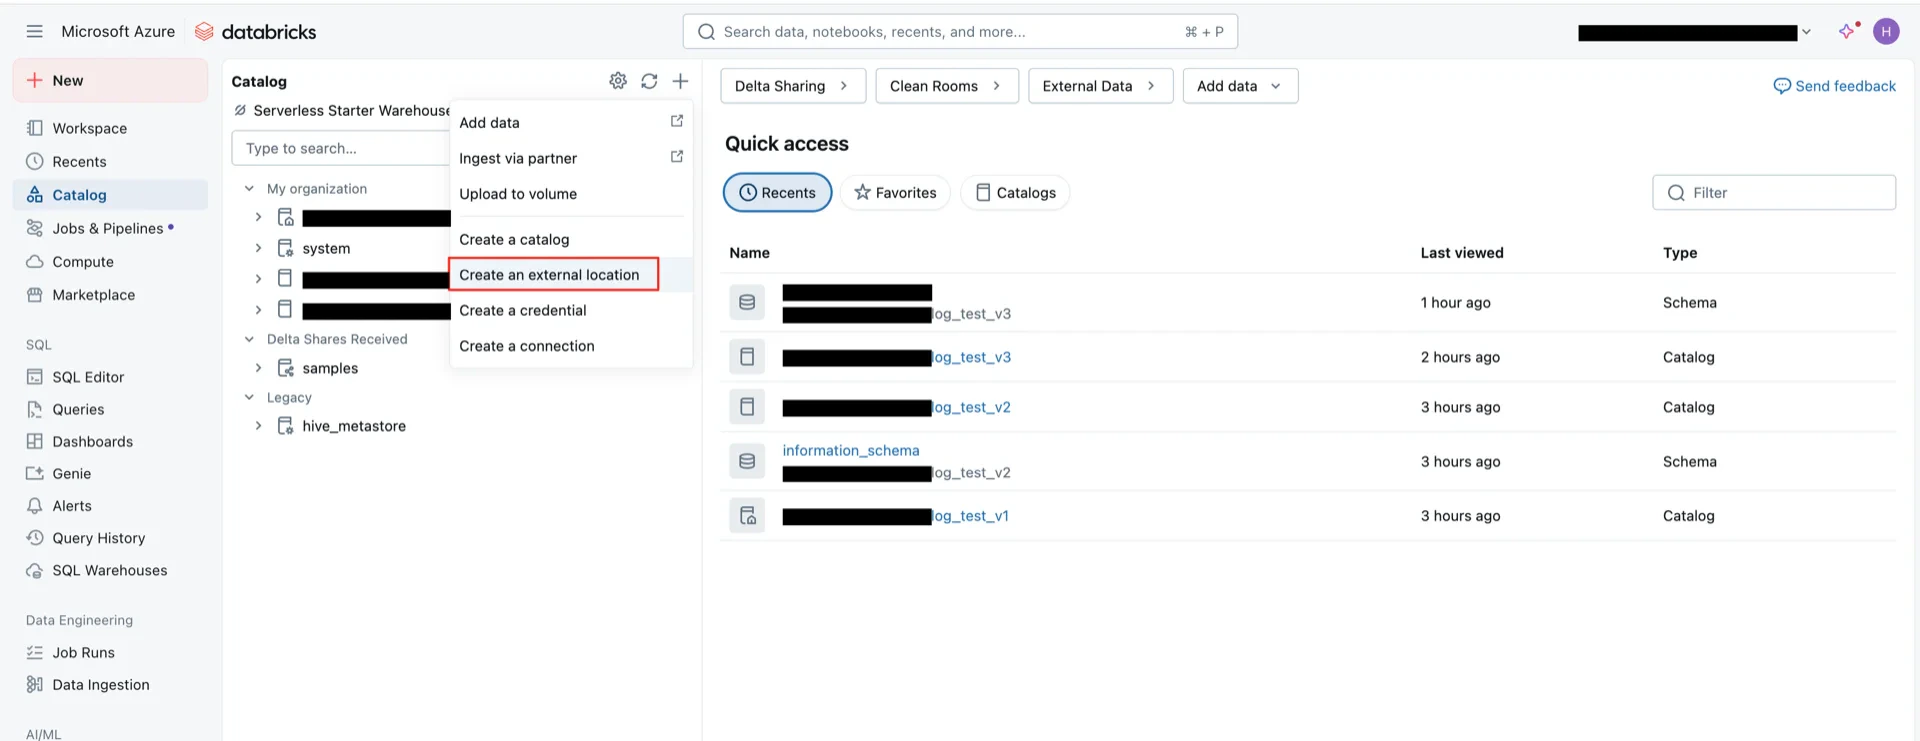
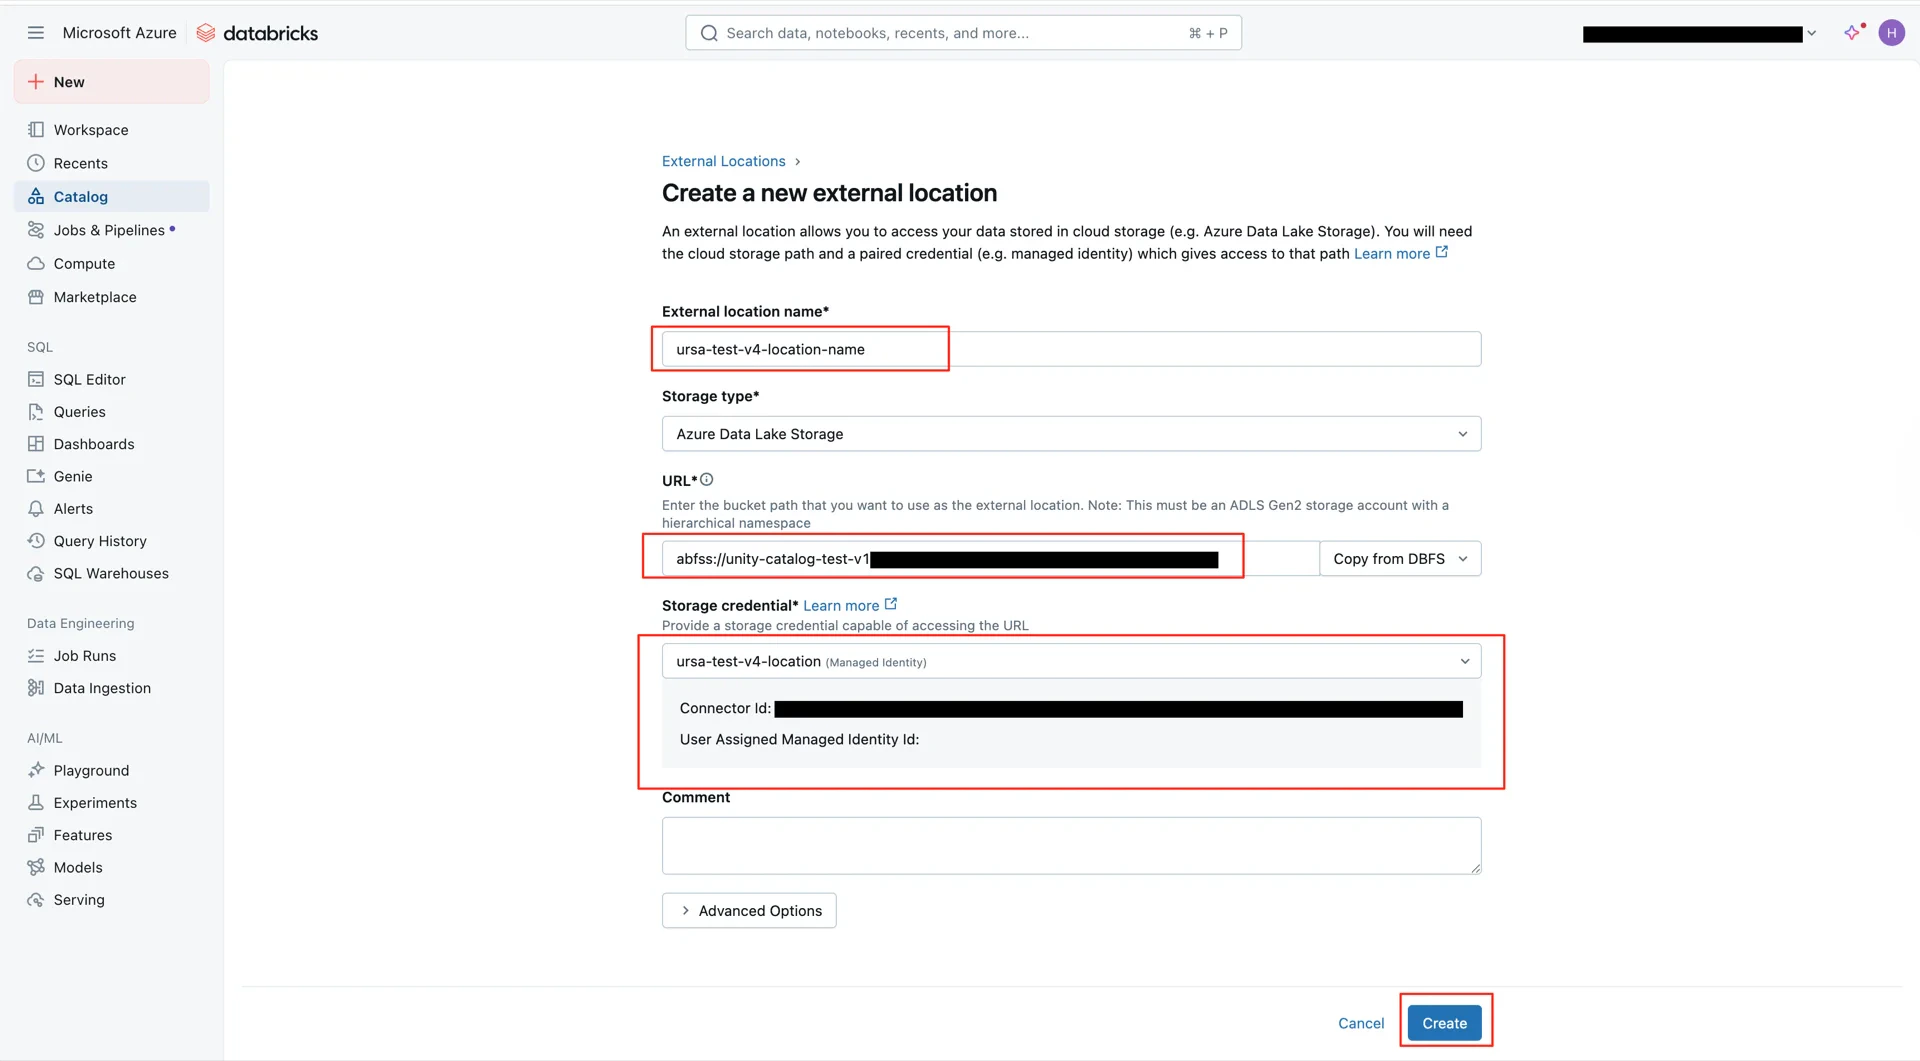
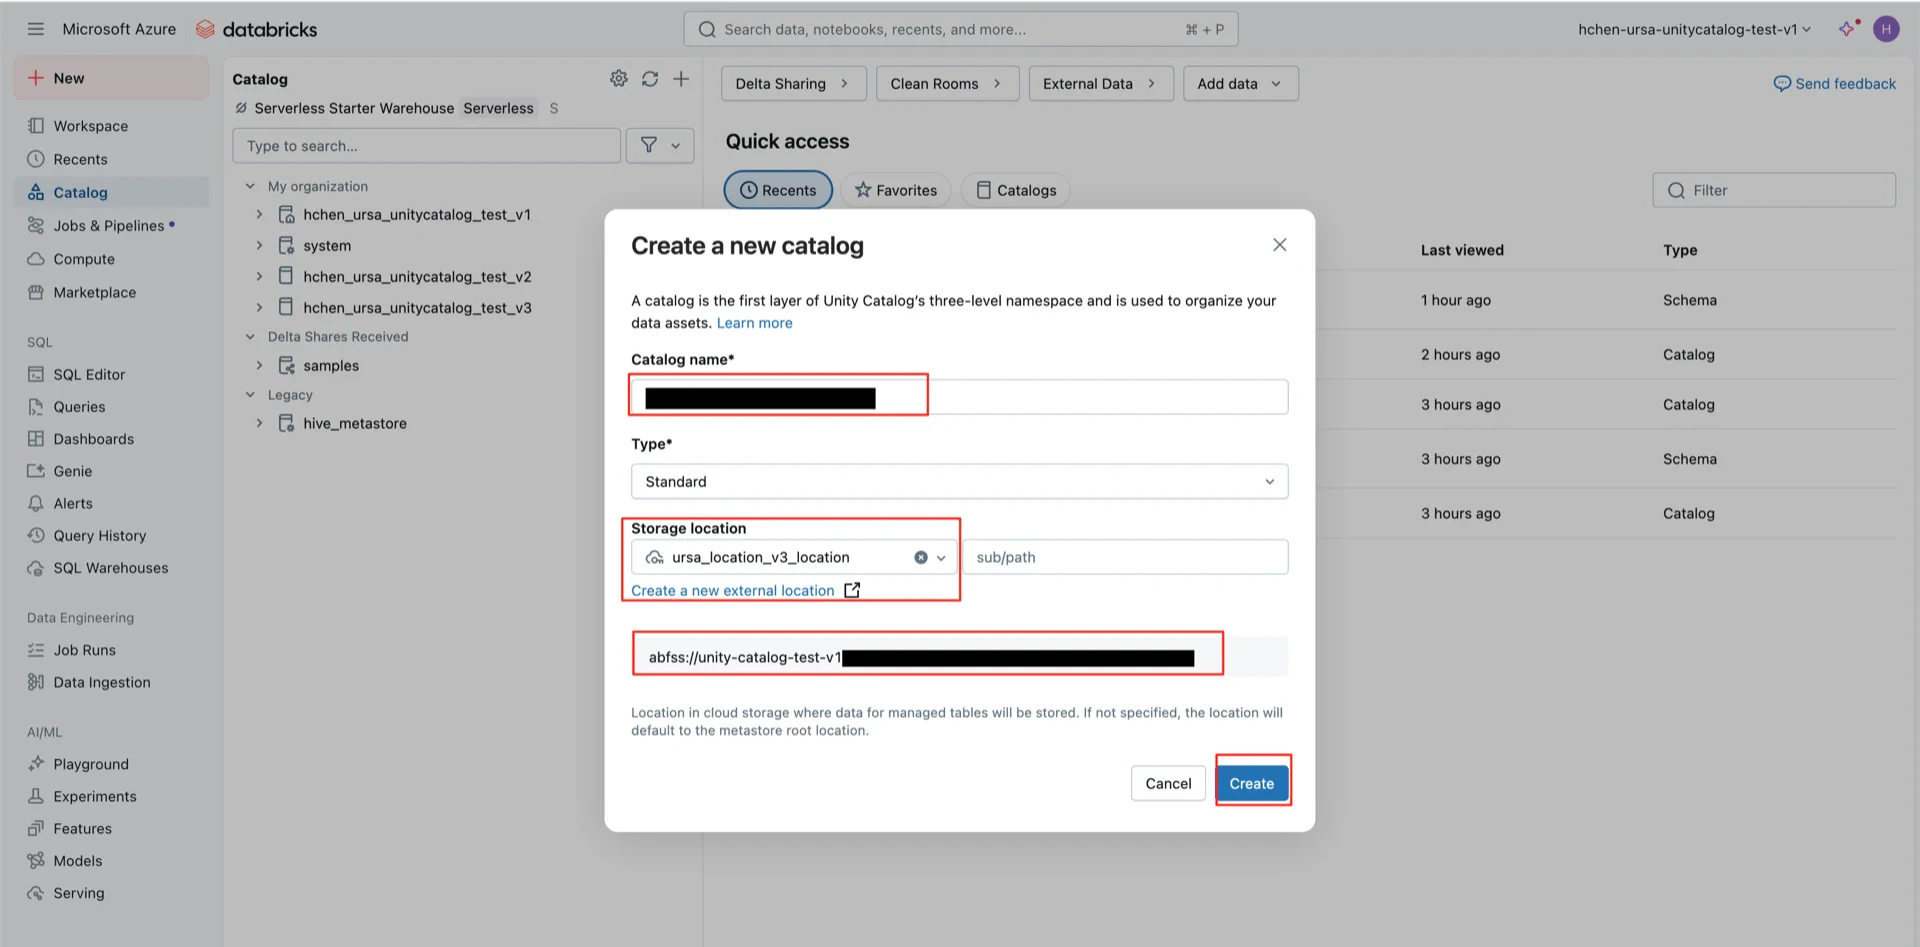
6. Create the External Location
Create an external location pointing to the Azure storage container:- URL:
abfss://<container>@<storage-account>.dfs.core.windows.net - Storage credential: the credential created in step 5
7. Create the Unity Catalog
Create a new Catalog and bind it to the external location created in step 6.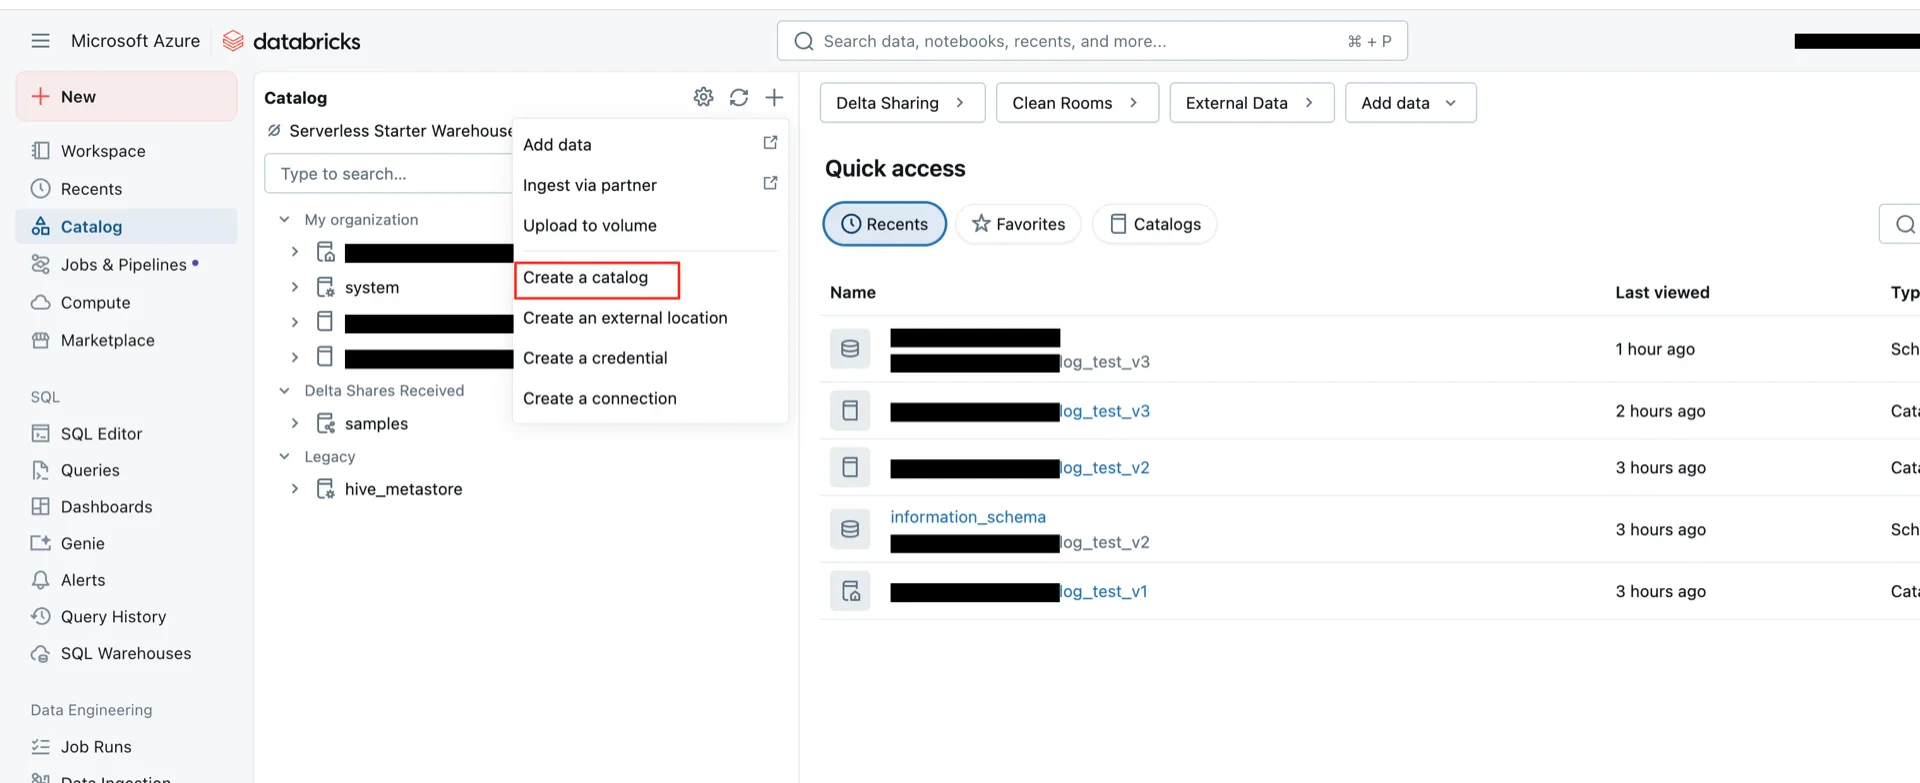
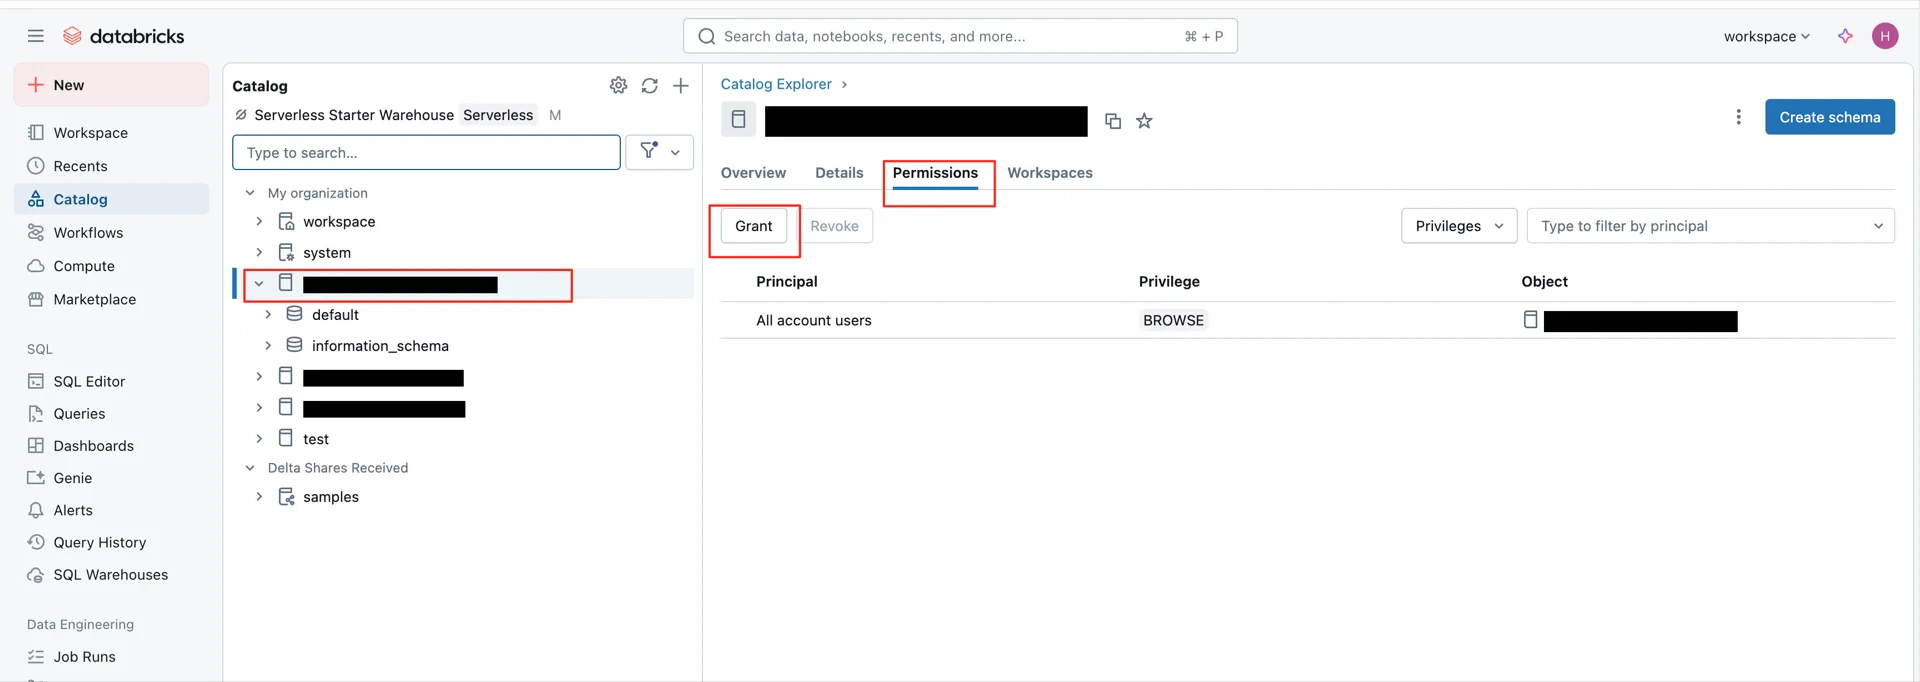
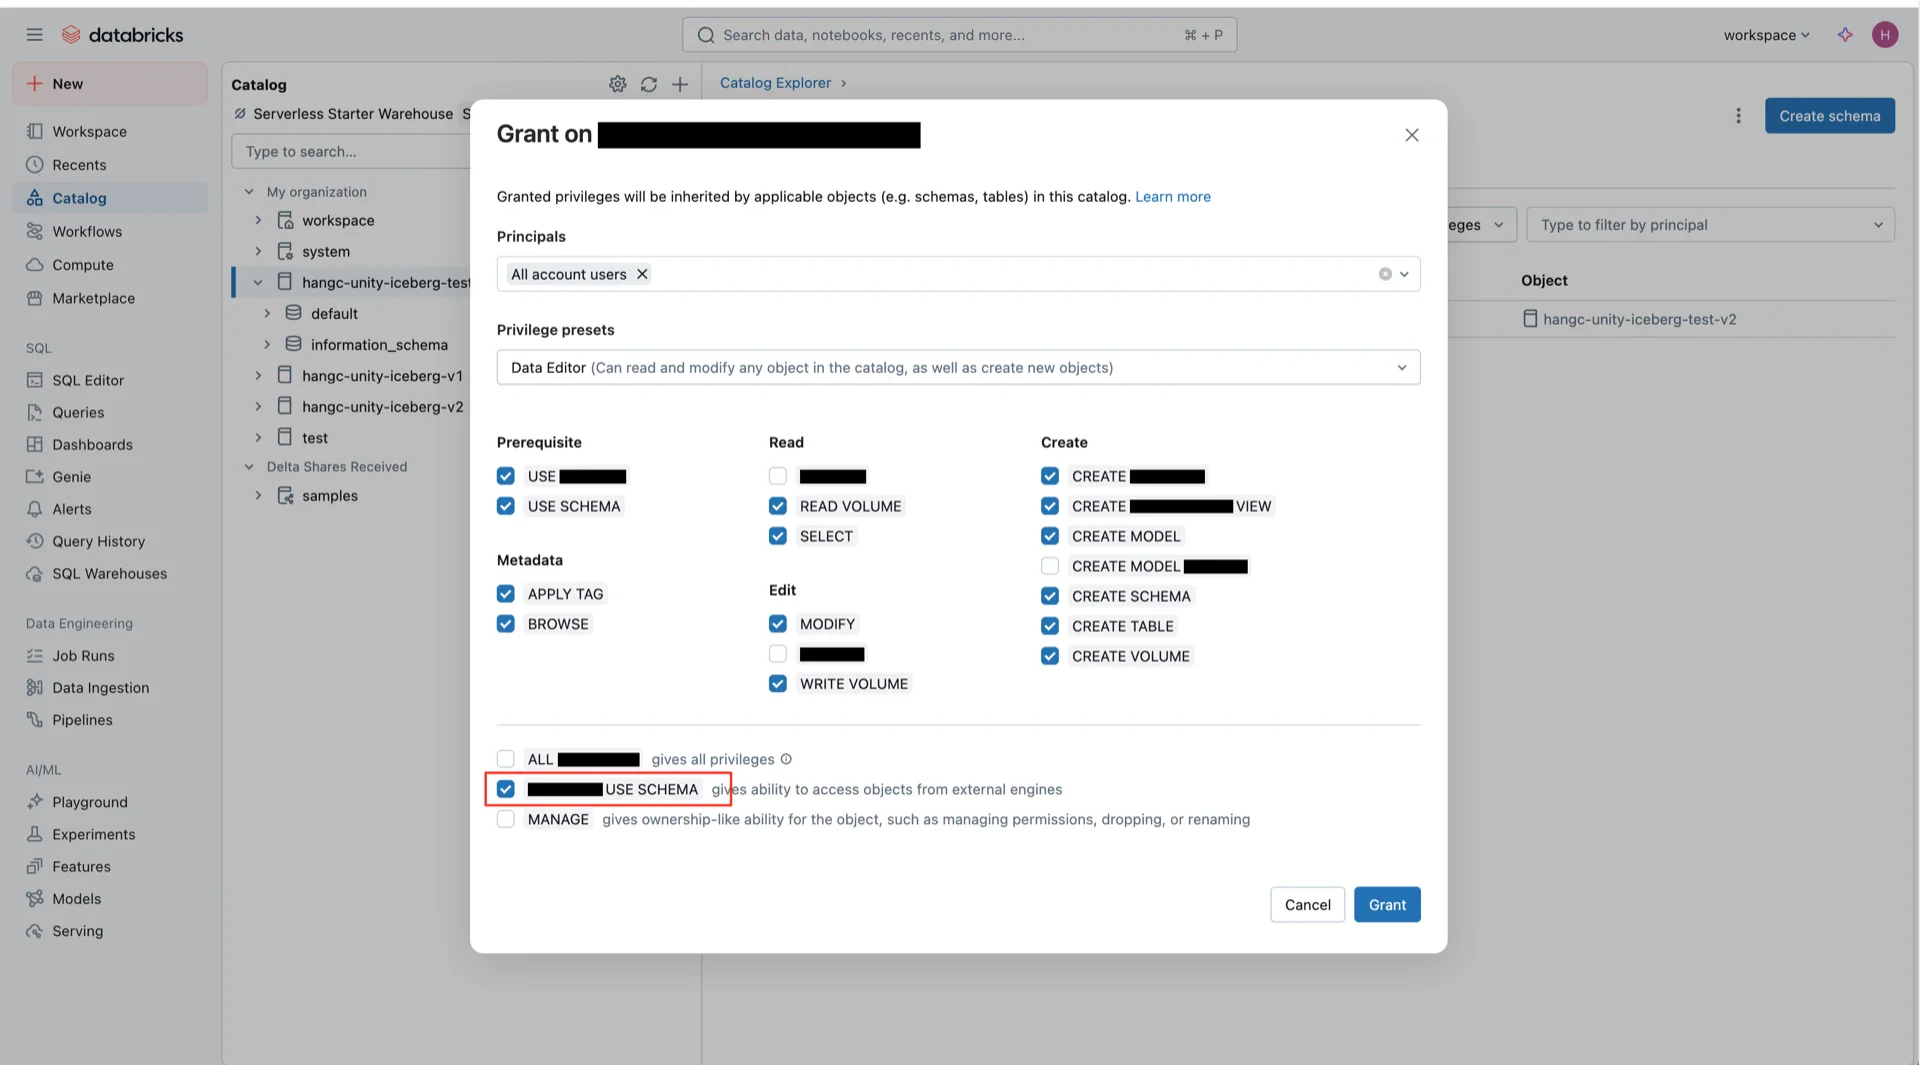
8. Grant Catalog Permissions
Grant permissions on the catalog. TheEXTERNAL_USE_SCHEMA permission is required for Iceberg Managed Tables in Unity Catalog.
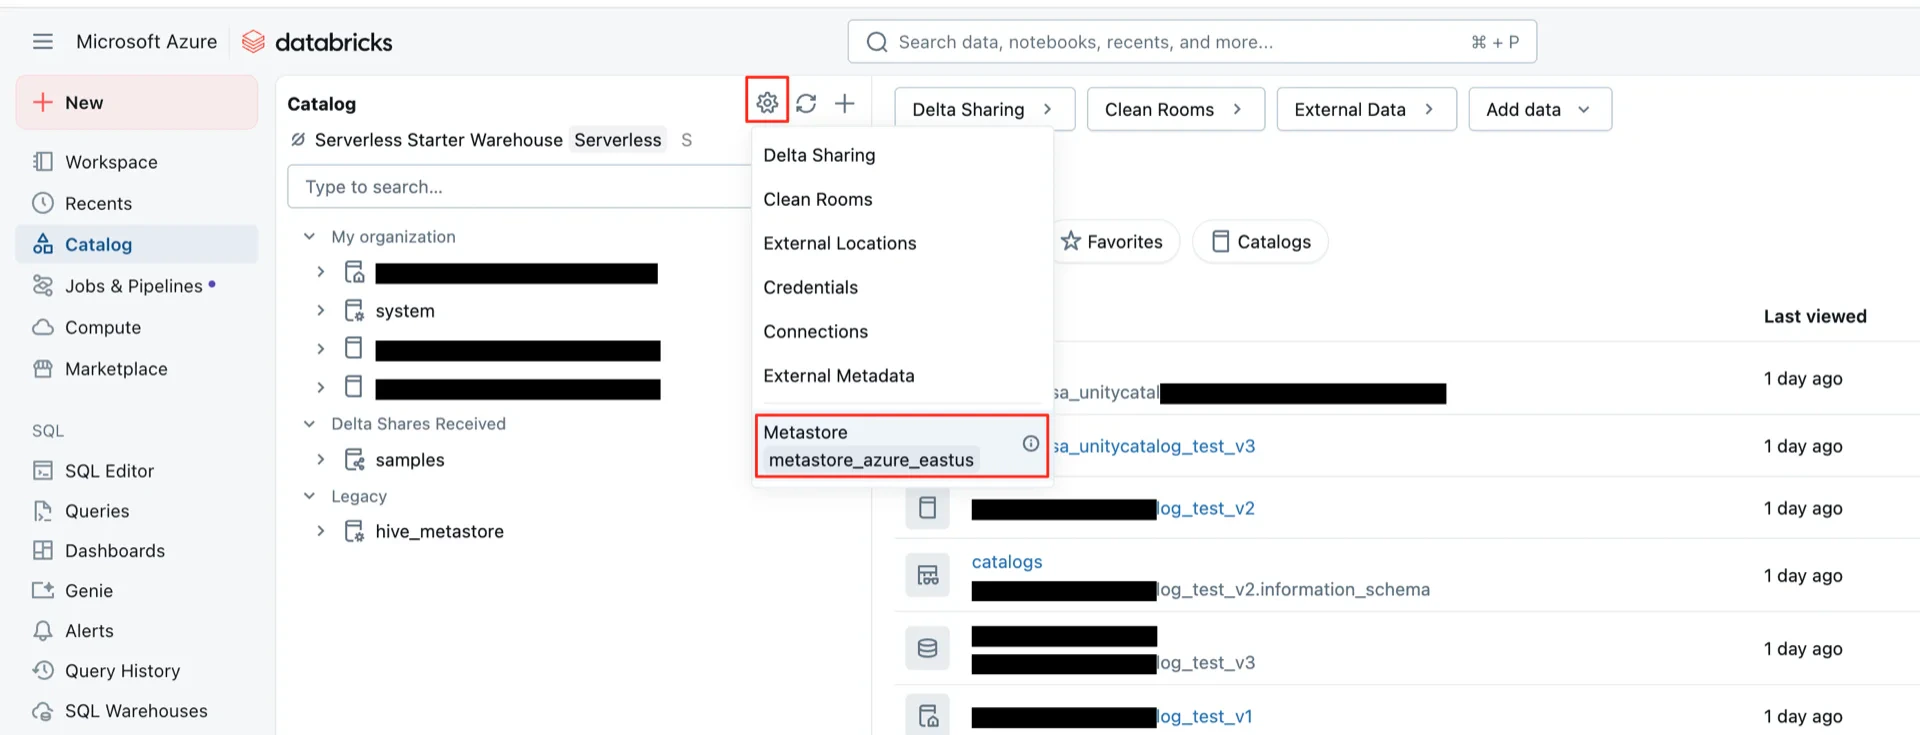
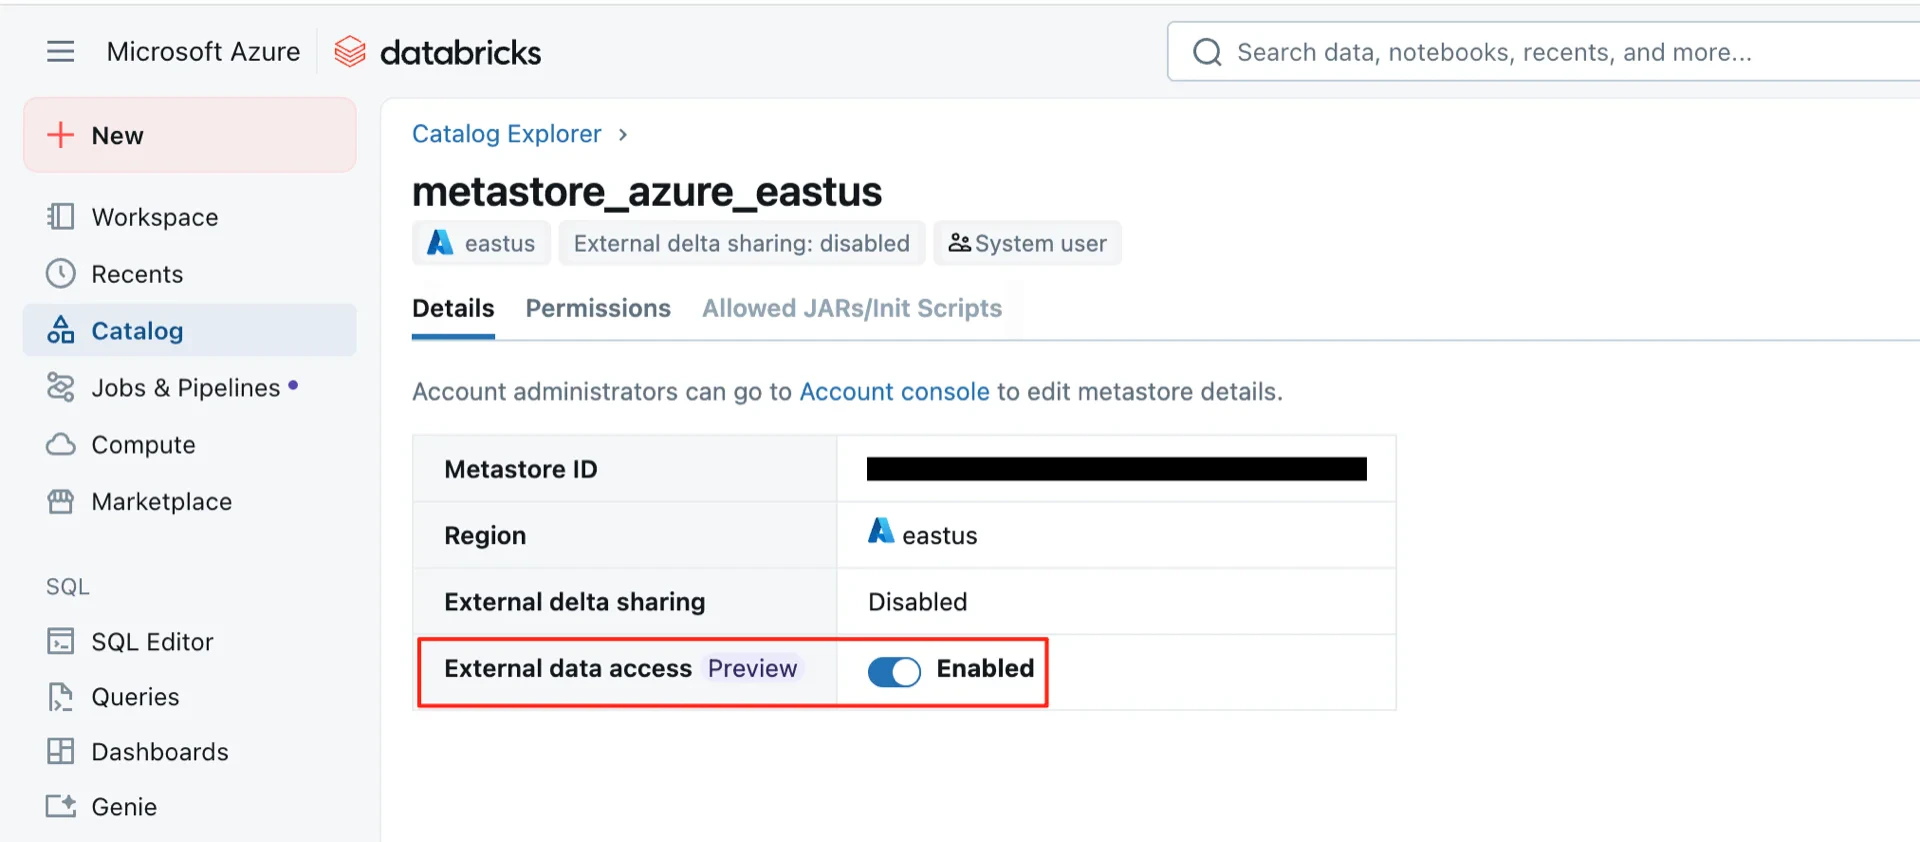
9. Enable External Data Access on the Metastore
Note: This action requires Azure Account Admin privileges; without them, the Metastore entry is not visible.Enable External data access on the metastore. This step is required for Unity Catalog Iceberg Managed Tables.
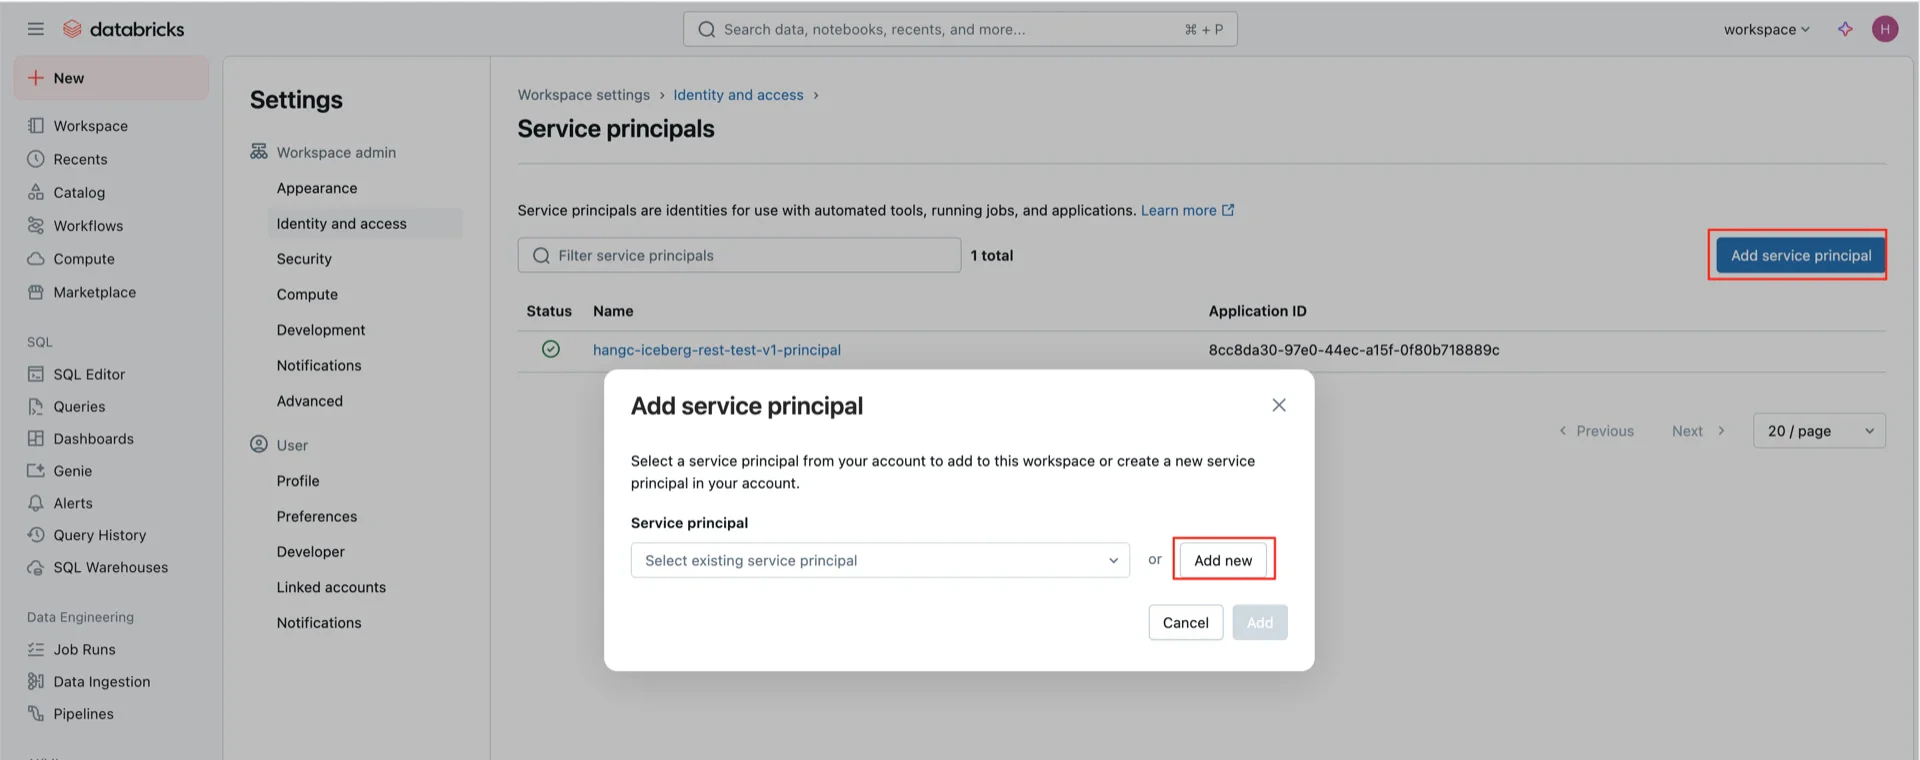
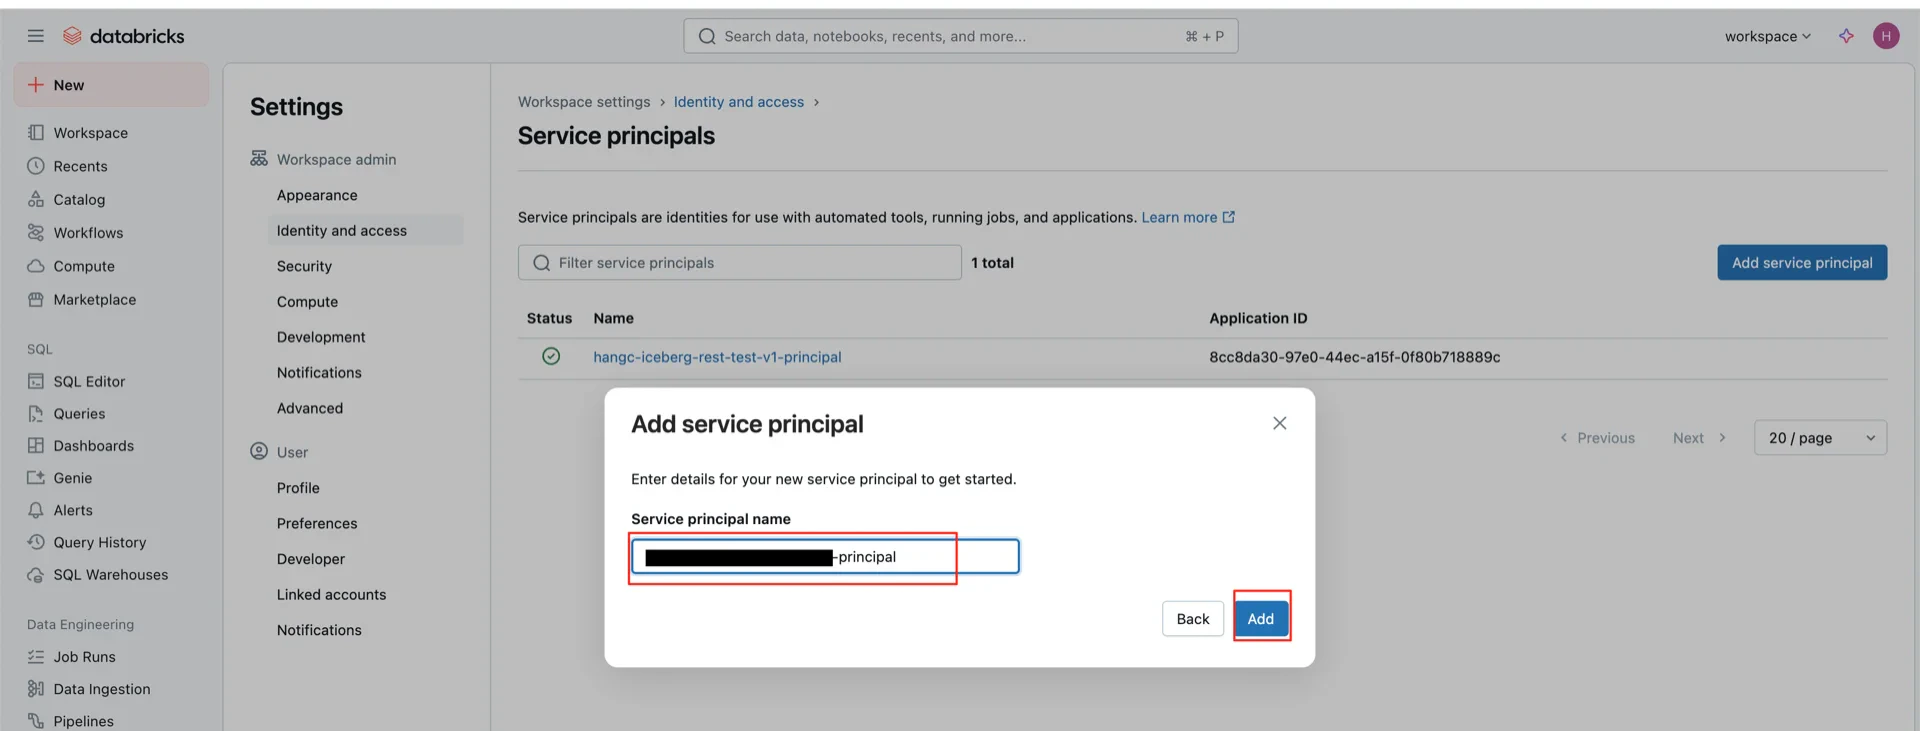
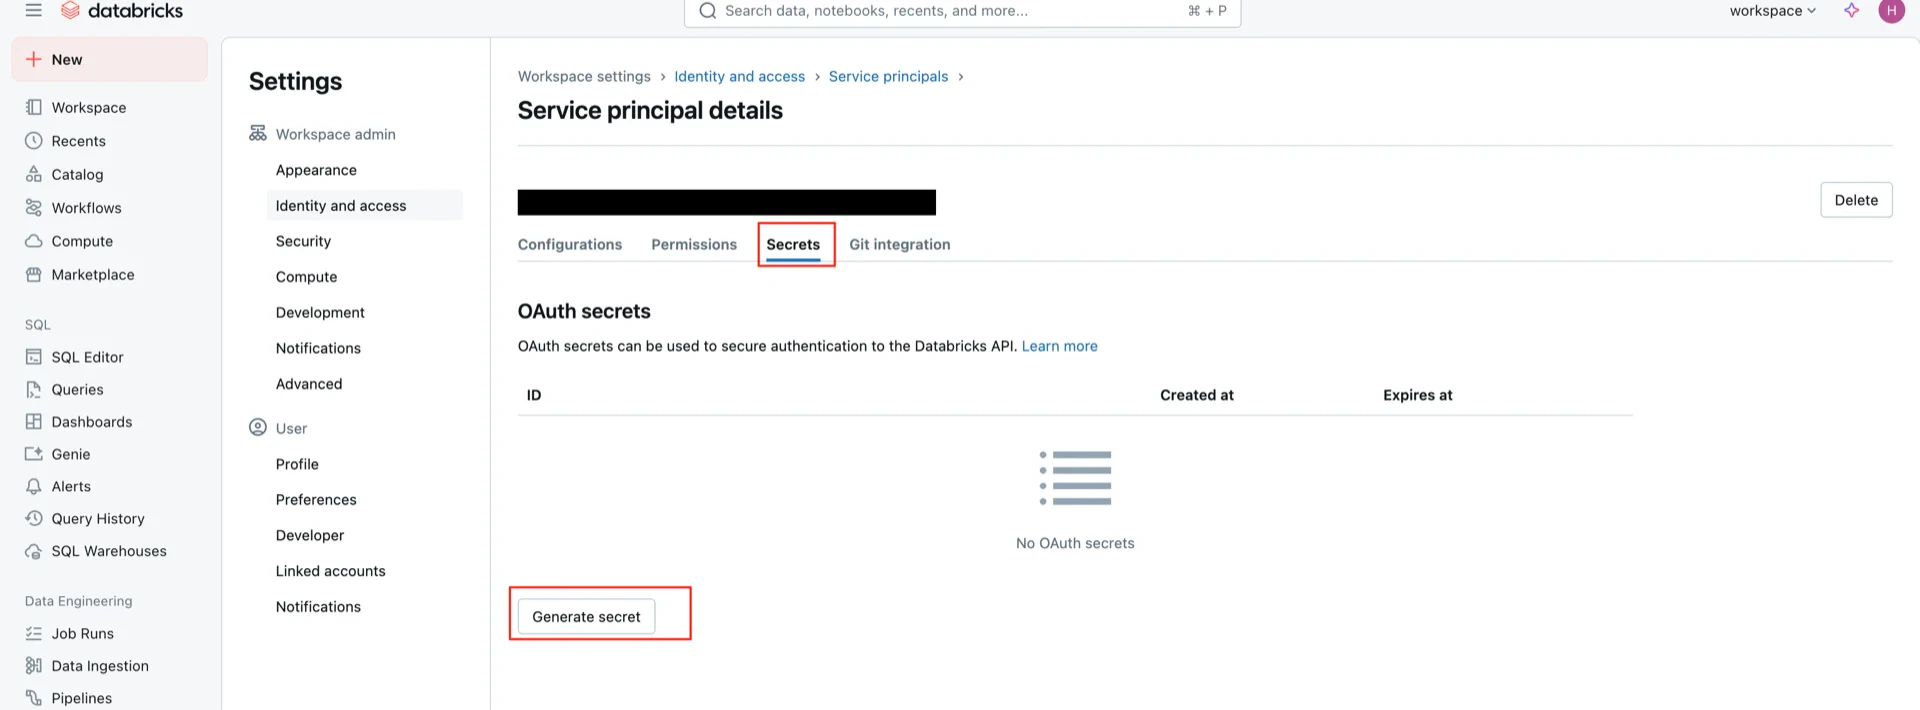
10. Create OAuth2 Credentials
Create an OAuth2 service principal that StreamNative Ursa will use to authenticate.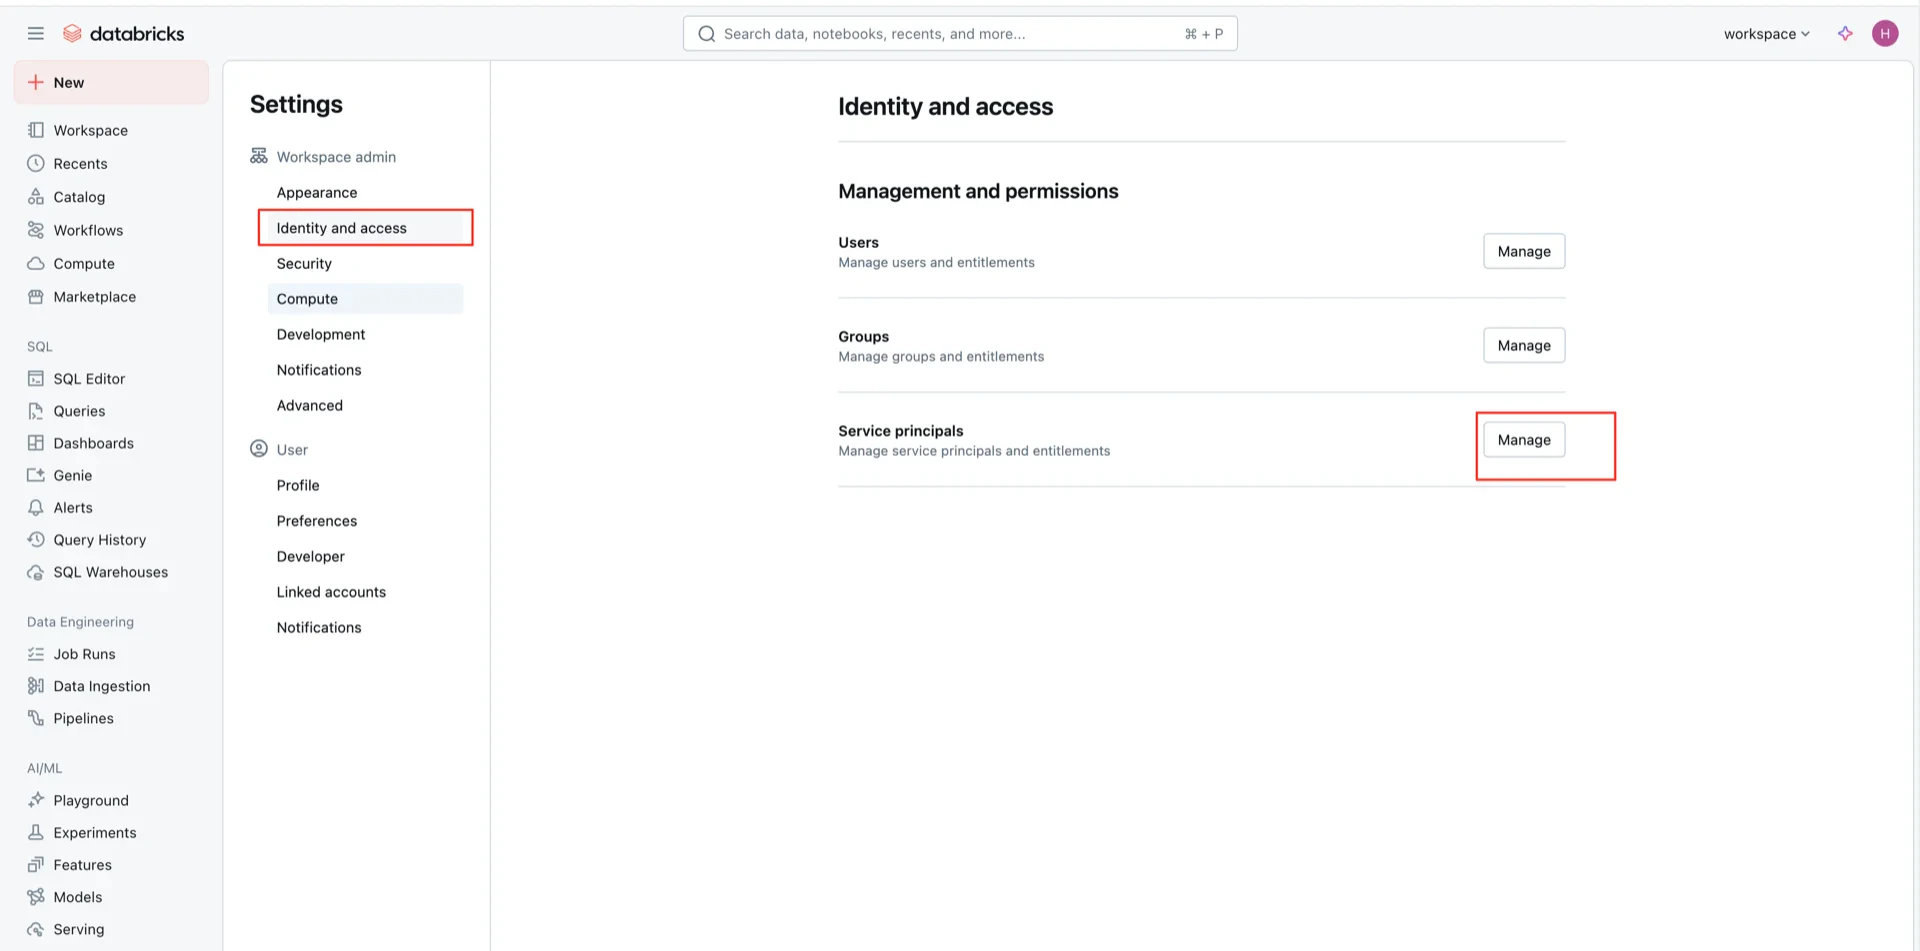
Catalog Information Summary
When the steps above are complete, collect the following values for the StreamNative Ursa compaction service:| Value | Description |
|---|---|
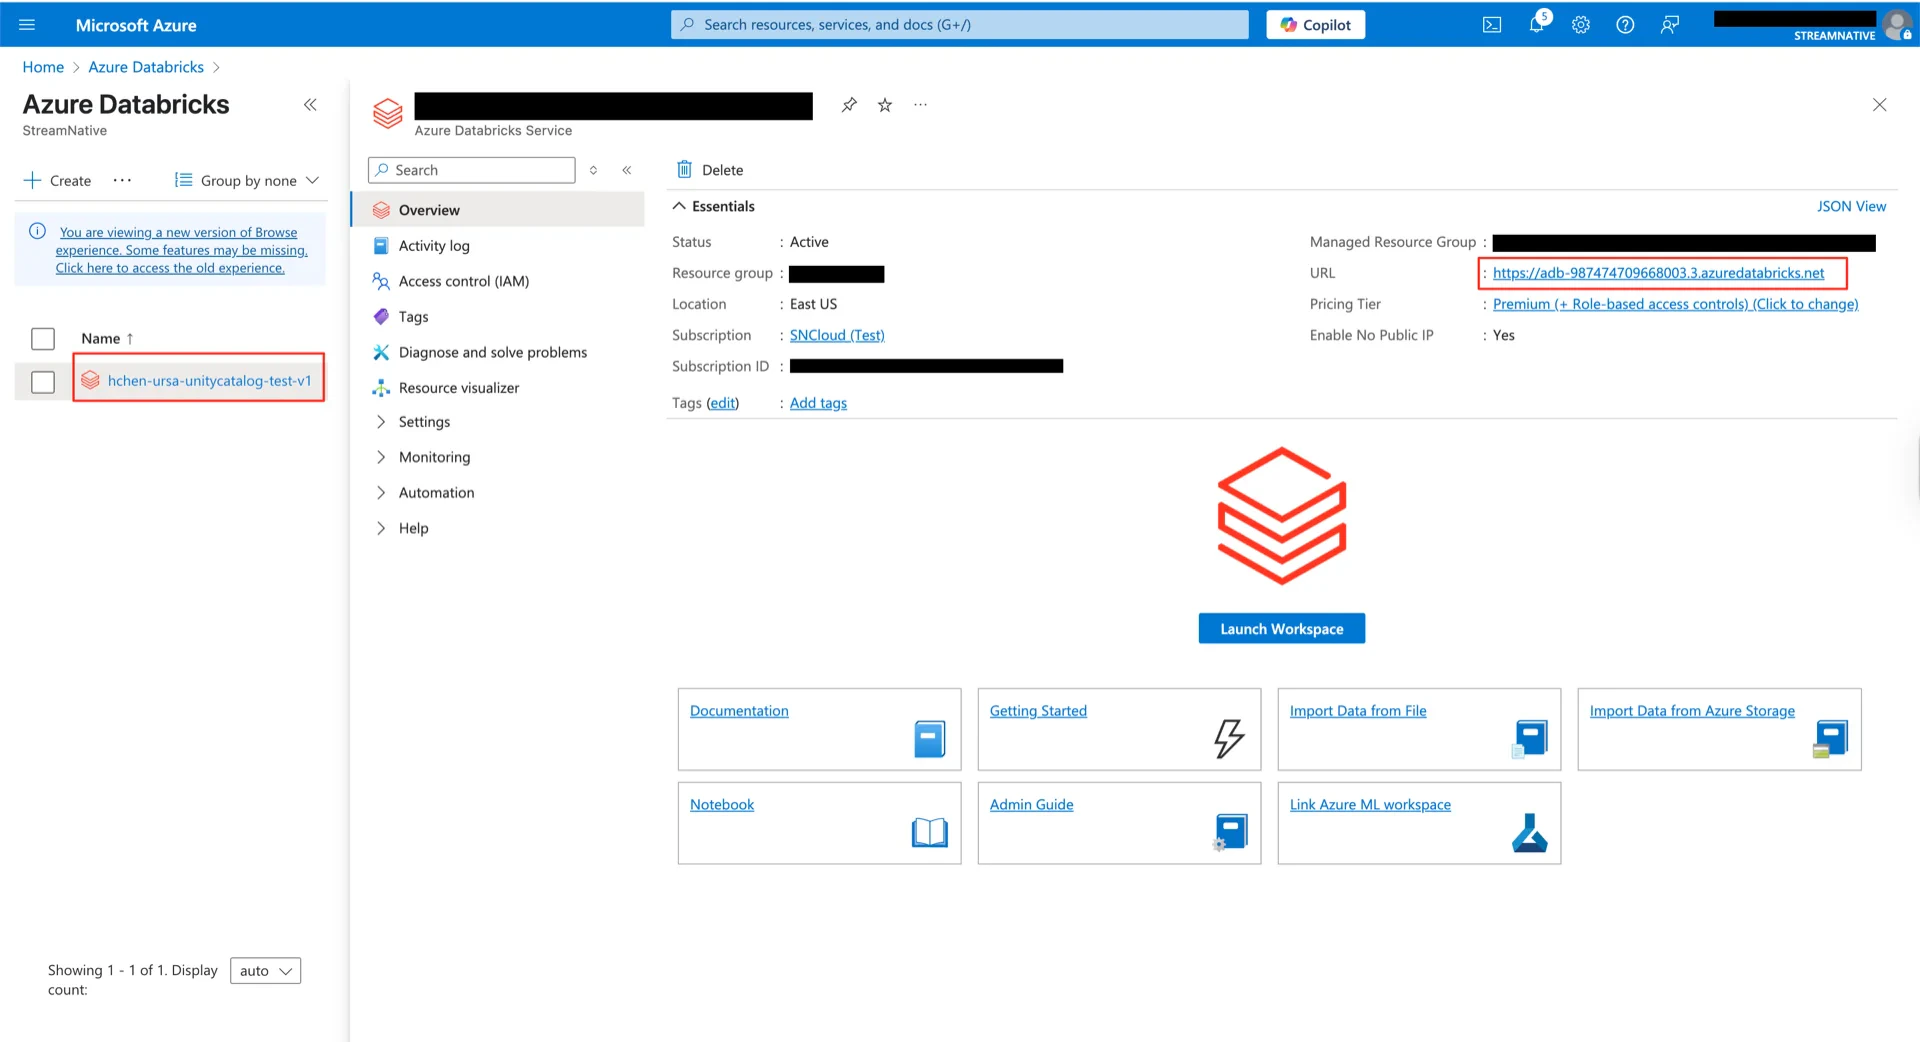
| URI | Databricks workspace URL (e.g., https://adb-<workspace-id>.azuredatabricks.net/api/2.1/unity-catalog/iceberg-rest) |
| Warehouse | The Unity Catalog name created in step 7 |
| Credential | <client-id>:<client-secret> from step 10 |