
Documentation Index

Fetch the complete documentation index at: https://docs.streamnative.io/llms.txt

Use this file to discover all available pages before exploring further.

This guide describes how to prepare a Databricks Unity Catalog for use with StreamNative Ursa as a managed Iceberg table catalog on AWS.

Prerequisites

  • A Databricks account with Unity Catalog and Iceberg Managed Table enabled
  • An AWS account with permissions to create S3 buckets and IAM roles

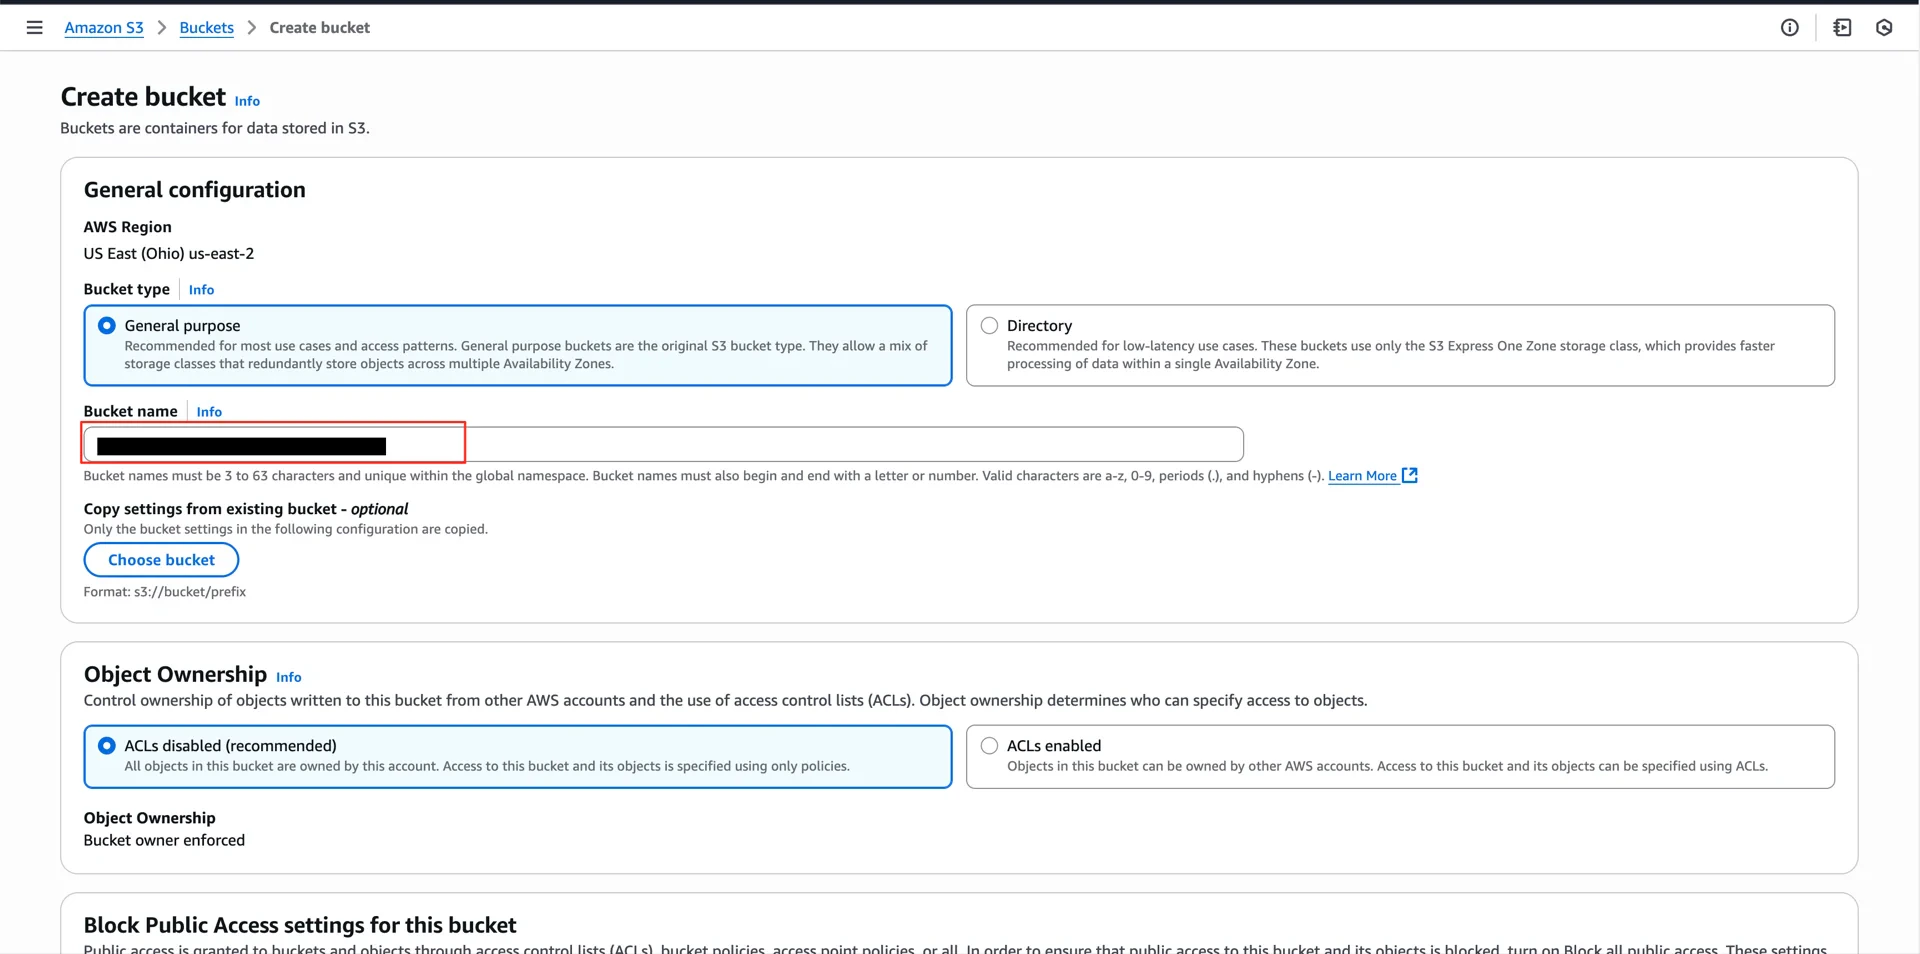
1. Create an S3 Bucket

In your AWS account, create an S3 bucket to use as the Unity Catalog storage location (for example, aws-unitycatalog-iceberg-bucket). Create S3 bucket

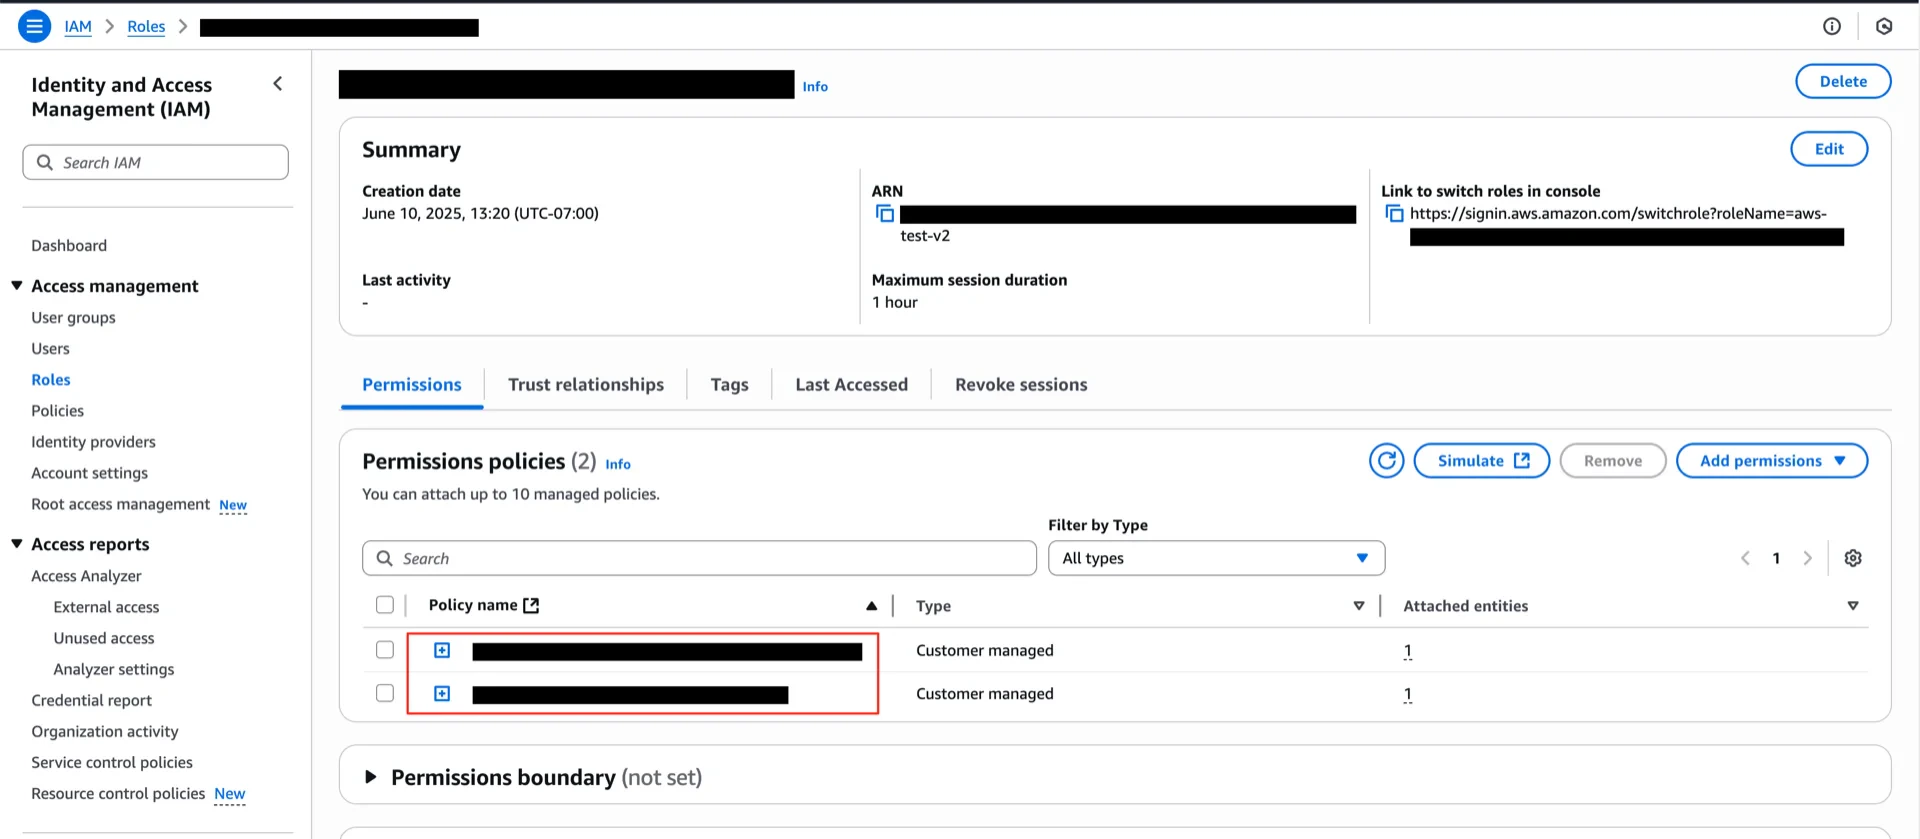
2. Create the IAM Role

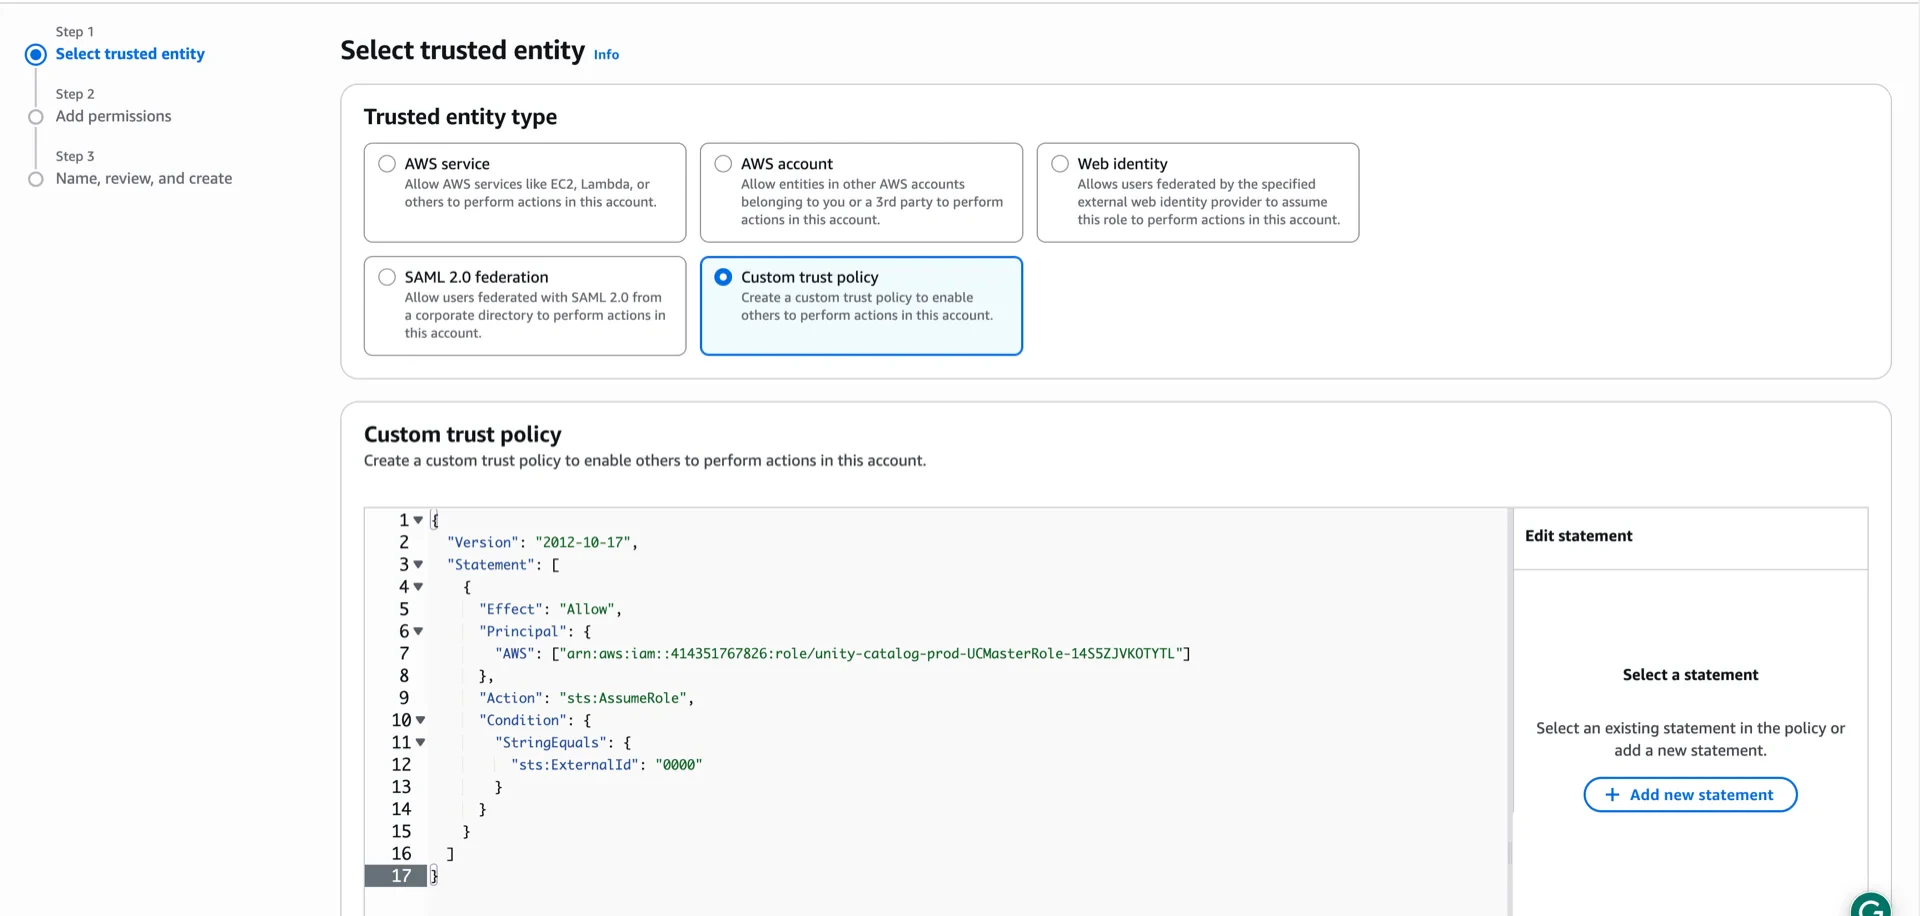
2.1 Create the Role with a Placeholder Trust Policy

Create an IAM role that allows the Unity Catalog master role to assume it. Use the following trust policy with a placeholder External ID of 0000 (you will replace it with the value generated by Databricks in step 3):
{
  "Version": "2012-10-17",
  "Statement": [
    {
      "Effect": "Allow",
      "Principal": {
        "AWS": ["arn:aws:iam::414351767826:role/unity-catalog-prod-UCMasterRole-14S5ZJVKOTYTL"]
      },
      "Action": "sts:AssumeRole",
      "Condition": {
        "StringEquals": {
          "sts:ExternalId": "0000"
        }
      }
    }
  ]
}
Skip the permissions policy on this screen — it will be added in the next steps. Create IAM role Save IAM role

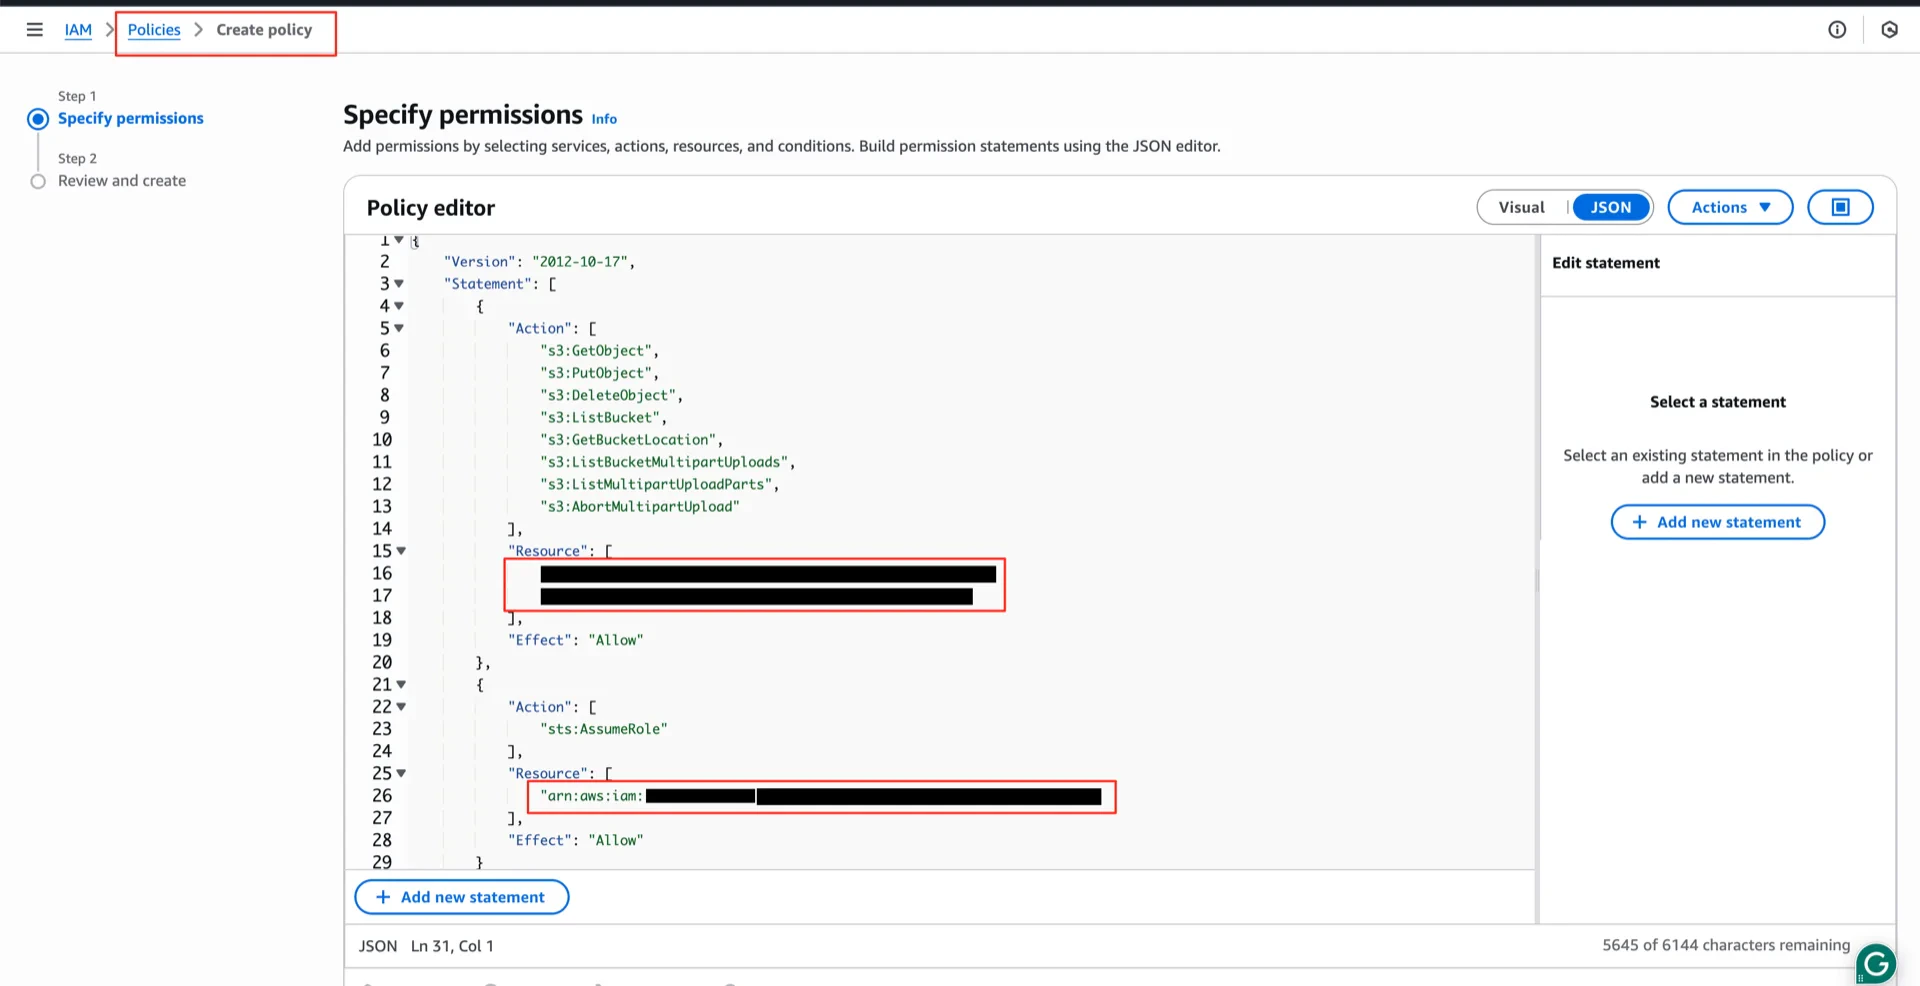
2.2 Attach the S3 Access Policy

Create the following policy and attach it to the role. Replace <your-bucket> and <your-account-id> with your values.
{
  "Version": "2012-10-17",
  "Statement": [
    {
      "Effect": "Allow",
      "Action": [
        "s3:GetObject",
        "s3:PutObject",
        "s3:DeleteObject",
        "s3:ListBucket",
        "s3:GetBucketLocation",
        "s3:ListBucketMultipartUploads",
        "s3:ListMultipartUploadParts",
        "s3:AbortMultipartUpload"
      ],
      "Resource": [
        "arn:aws:s3:::<your-bucket>/*",
        "arn:aws:s3:::<your-bucket>"
      ]
    },
    {
      "Effect": "Allow",
      "Action": ["sts:AssumeRole"],
      "Resource": ["arn:aws:iam::<your-account-id>:role/<your-role-name>"]
    }
  ]
}
S3 access policy

2.3 Attach the File Events Policy

Create a second policy for managed file events (S3 notifications, SNS, SQS) and attach it to the same role:
{
  "Version": "2012-10-17",
  "Statement": [
    {
      "Sid": "ManagedFileEventsSetupStatement",
      "Effect": "Allow",
      "Action": [
        "s3:GetBucketNotification",
        "s3:PutBucketNotification",
        "sns:ListSubscriptionsByTopic",
        "sns:GetTopicAttributes",
        "sns:SetTopicAttributes",
        "sns:CreateTopic",
        "sns:TagResource",
        "sns:Publish",
        "sns:Subscribe",
        "sqs:CreateQueue",
        "sqs:DeleteMessage",
        "sqs:ReceiveMessage",
        "sqs:SendMessage",
        "sqs:GetQueueUrl",
        "sqs:GetQueueAttributes",
        "sqs:SetQueueAttributes",
        "sqs:TagQueue",
        "sqs:ChangeMessageVisibility",
        "sqs:PurgeQueue"
      ],
      "Resource": [
        "arn:aws:s3:::<your-bucket>",
        "arn:aws:sqs:*:*:csms-*",
        "arn:aws:sns:*:*:csms-*"
      ]
    },
    {
      "Sid": "ManagedFileEventsListStatement",
      "Effect": "Allow",
      "Action": [
        "sqs:ListQueues",
        "sqs:ListQueueTags",
        "sns:ListTopics"
      ],
      "Resource": [
        "arn:aws:sqs:*:*:csms-*",
        "arn:aws:sns:*:*:csms-*"
      ]
    },
    {
      "Sid": "ManagedFileEventsTeardownStatement",
      "Effect": "Allow",
      "Action": [
        "sns:Unsubscribe",
        "sns:DeleteTopic",
        "sqs:DeleteQueue"
      ],
      "Resource": [
        "arn:aws:sqs:*:*:csms-*",
        "arn:aws:sns:*:*:csms-*"
      ]
    }
  ]
}
File events policy Verify that both policies are attached to the role. Attach policies to role

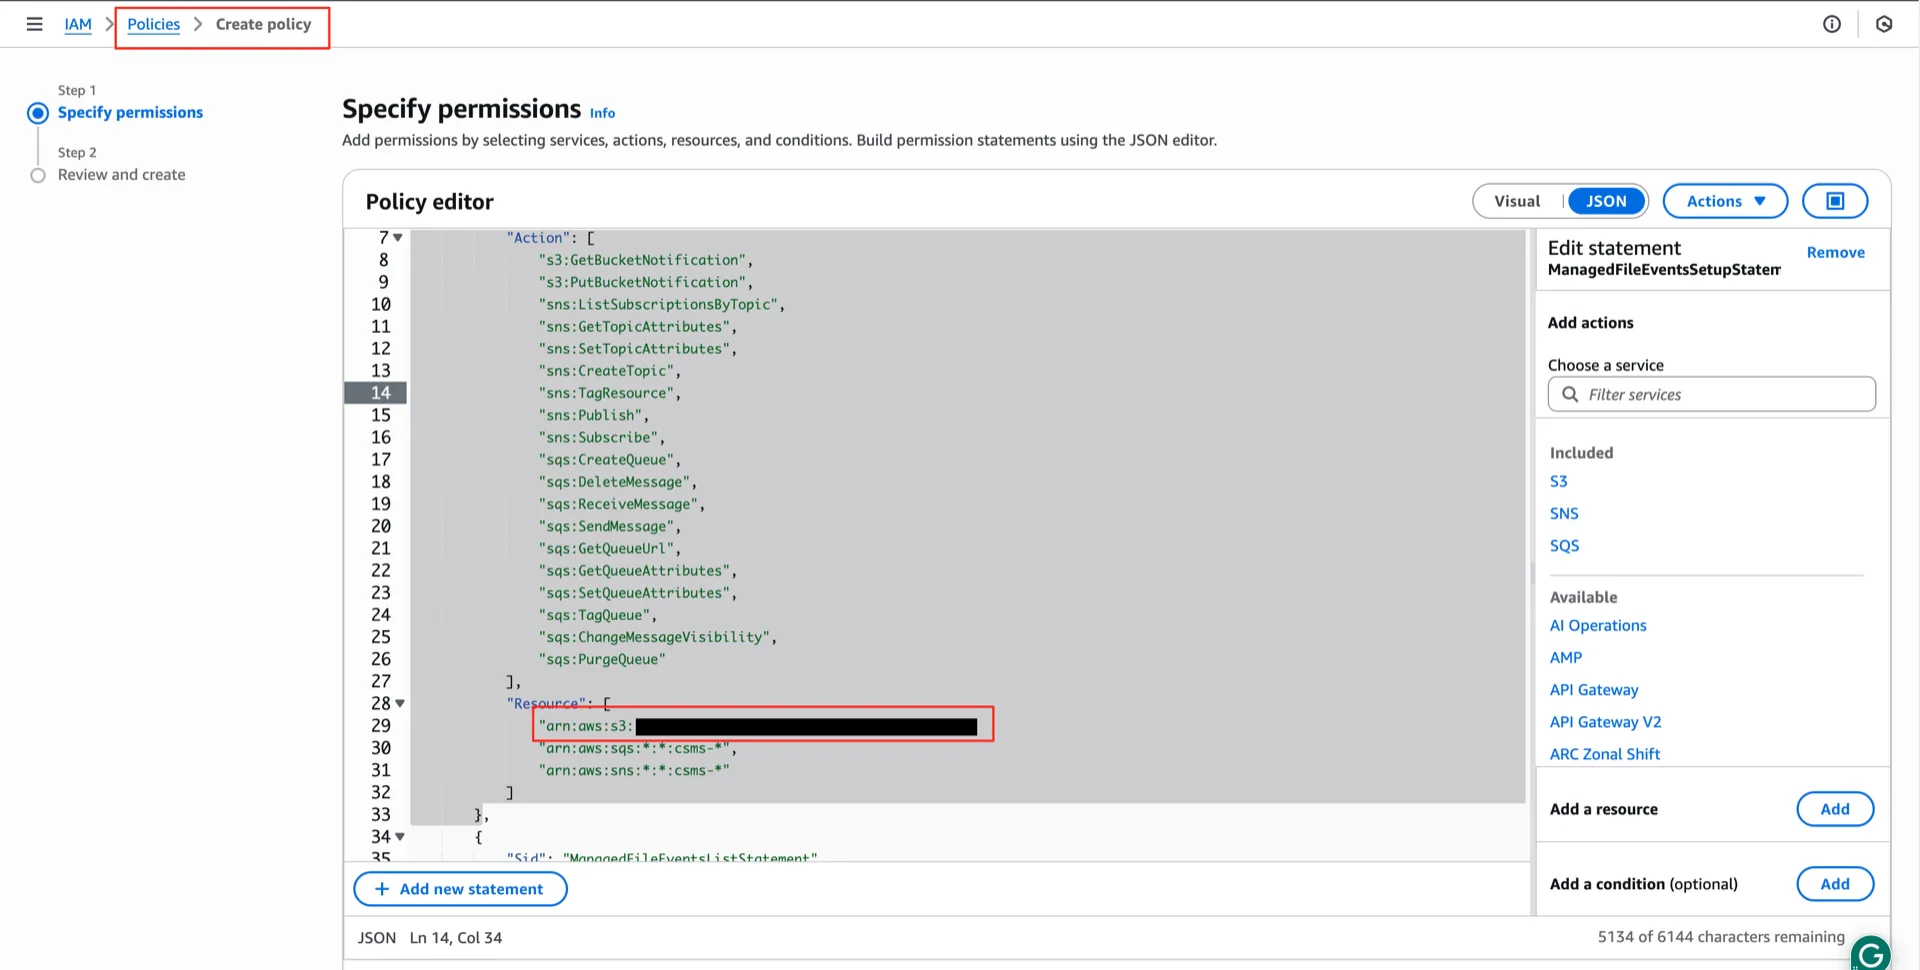
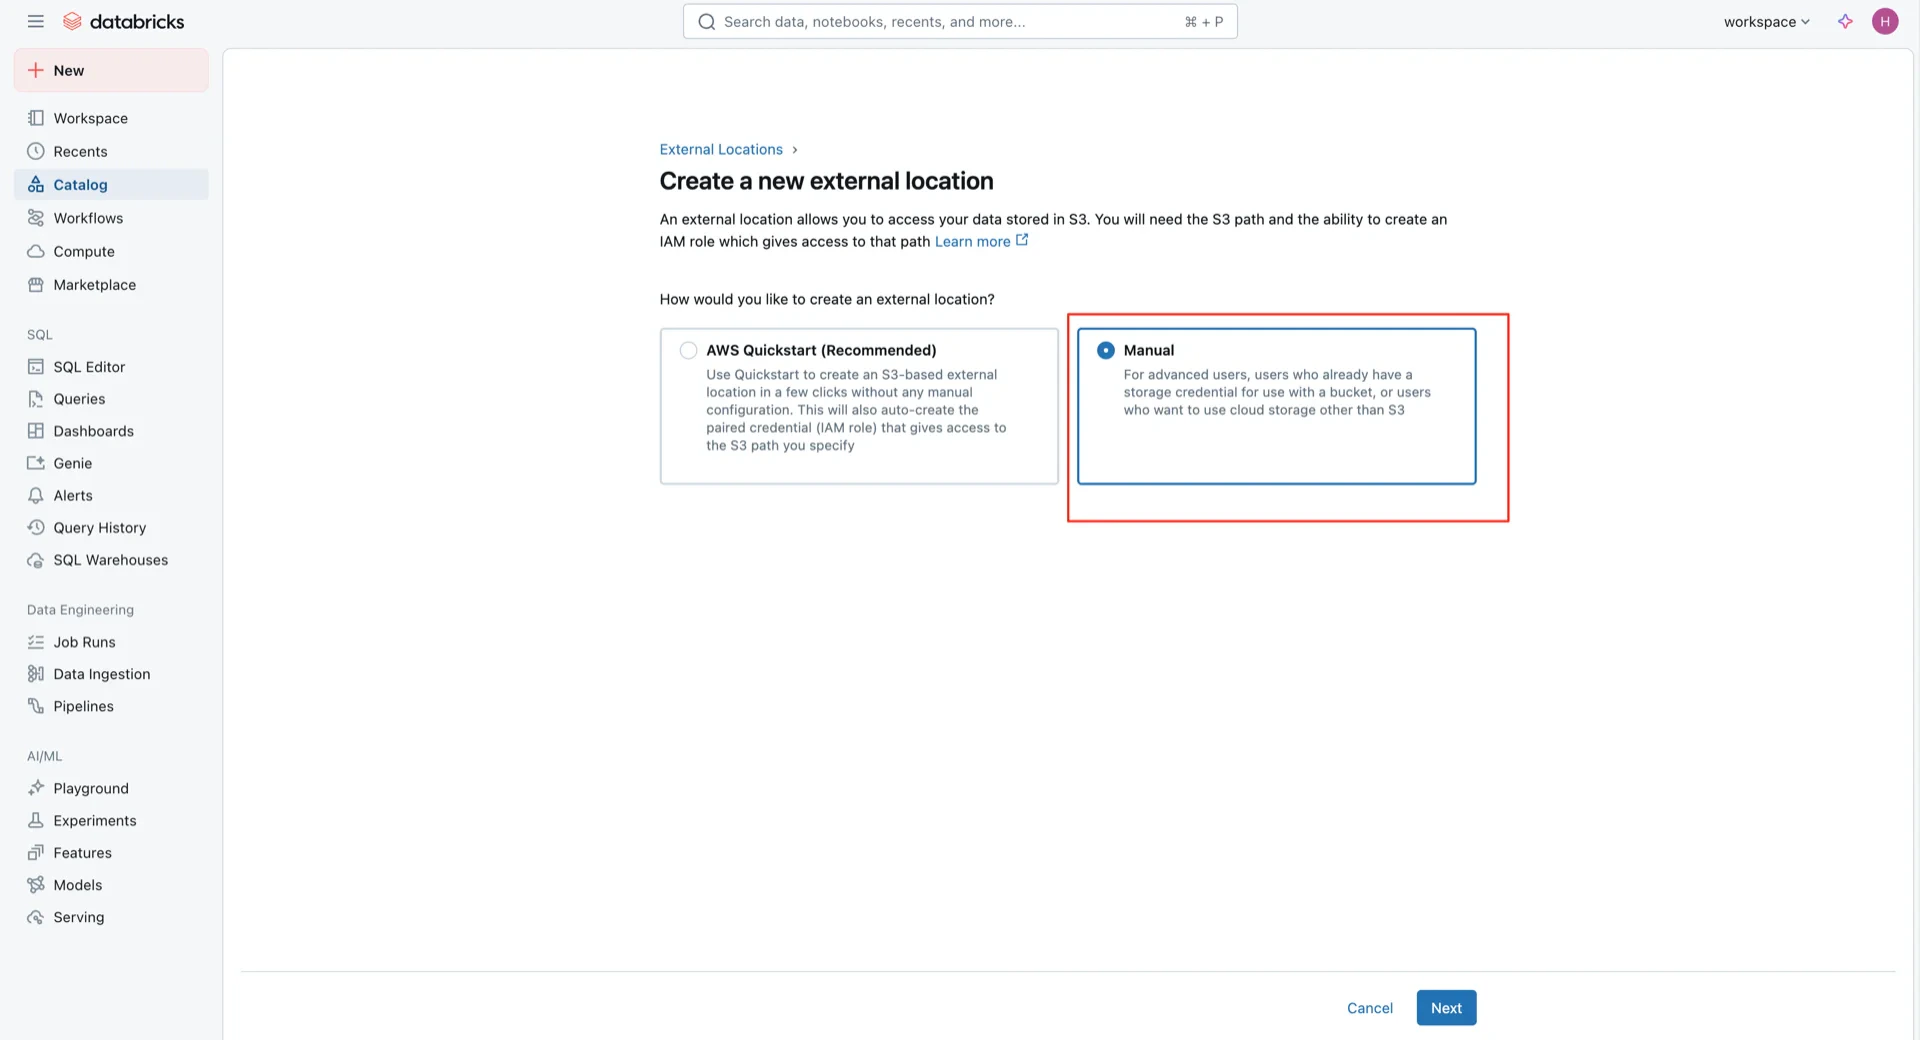
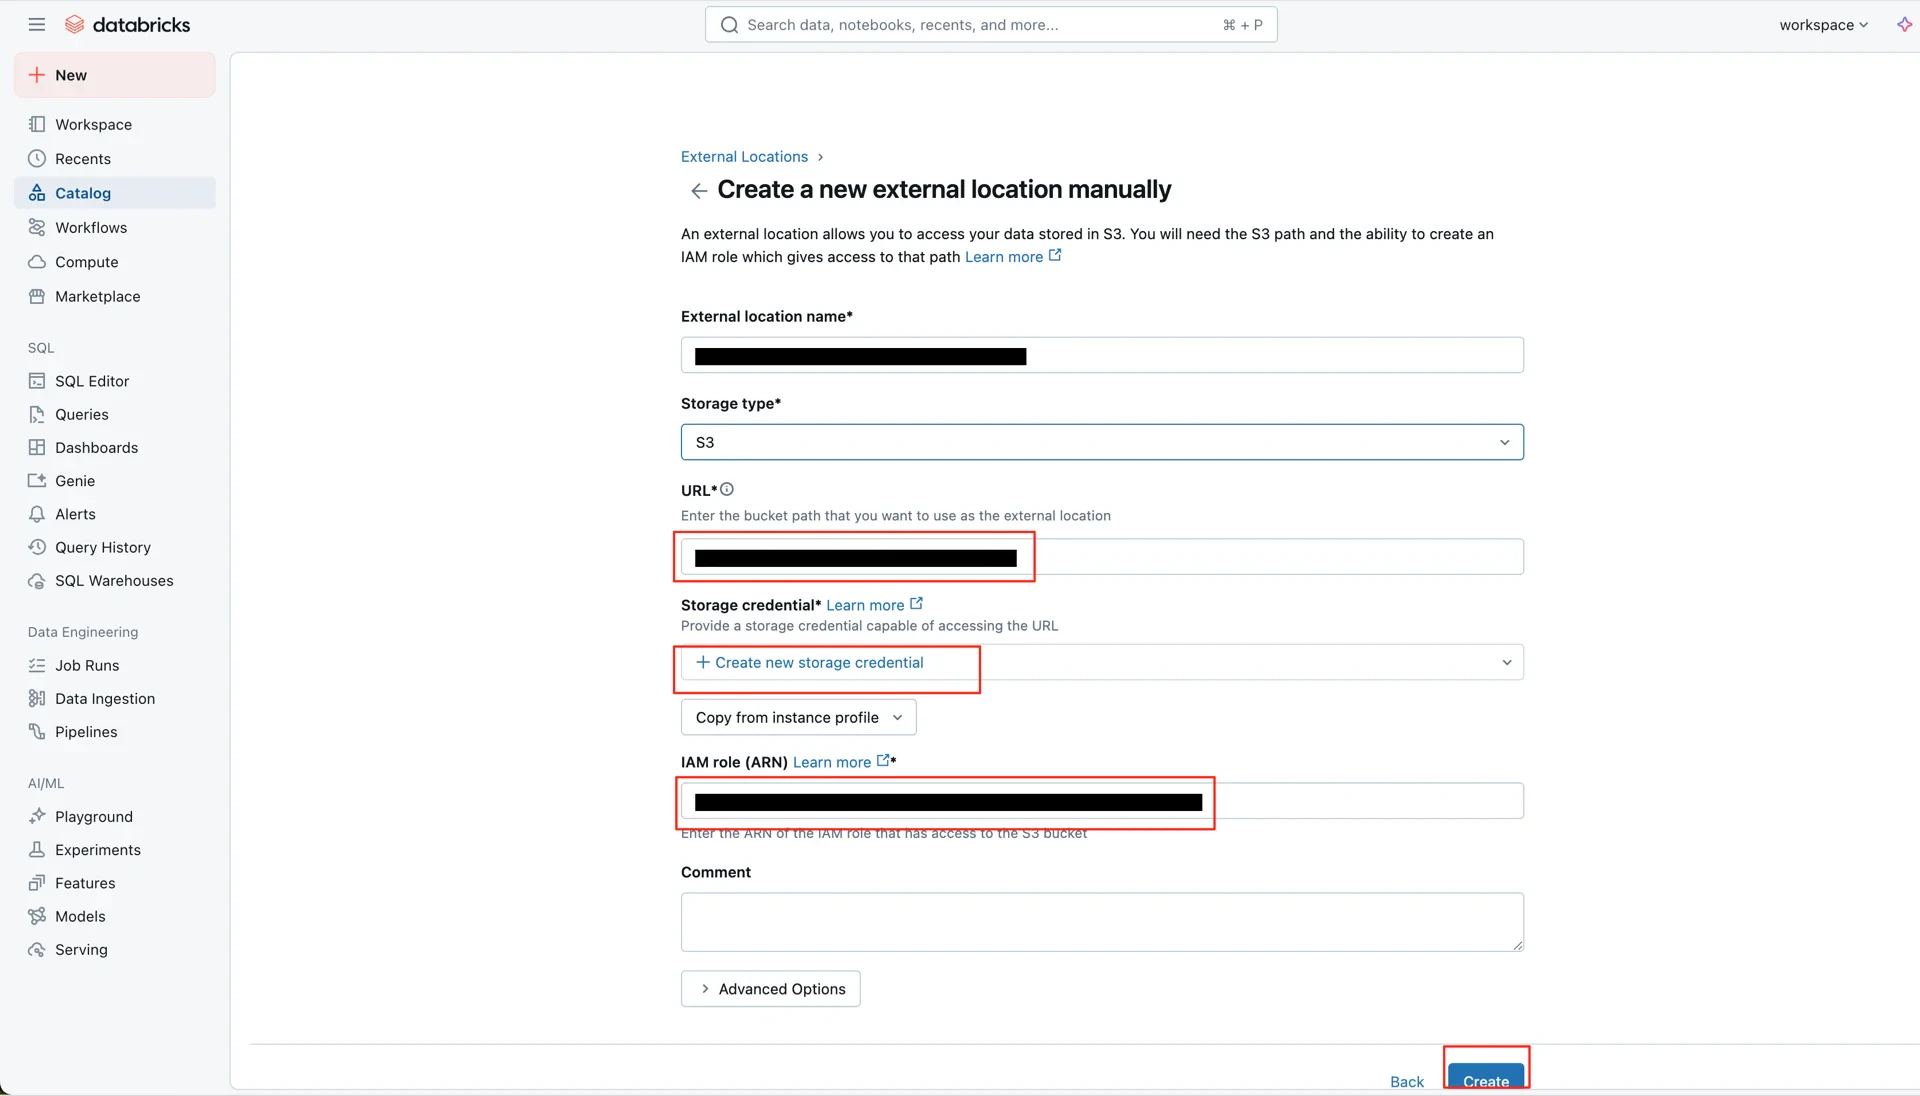
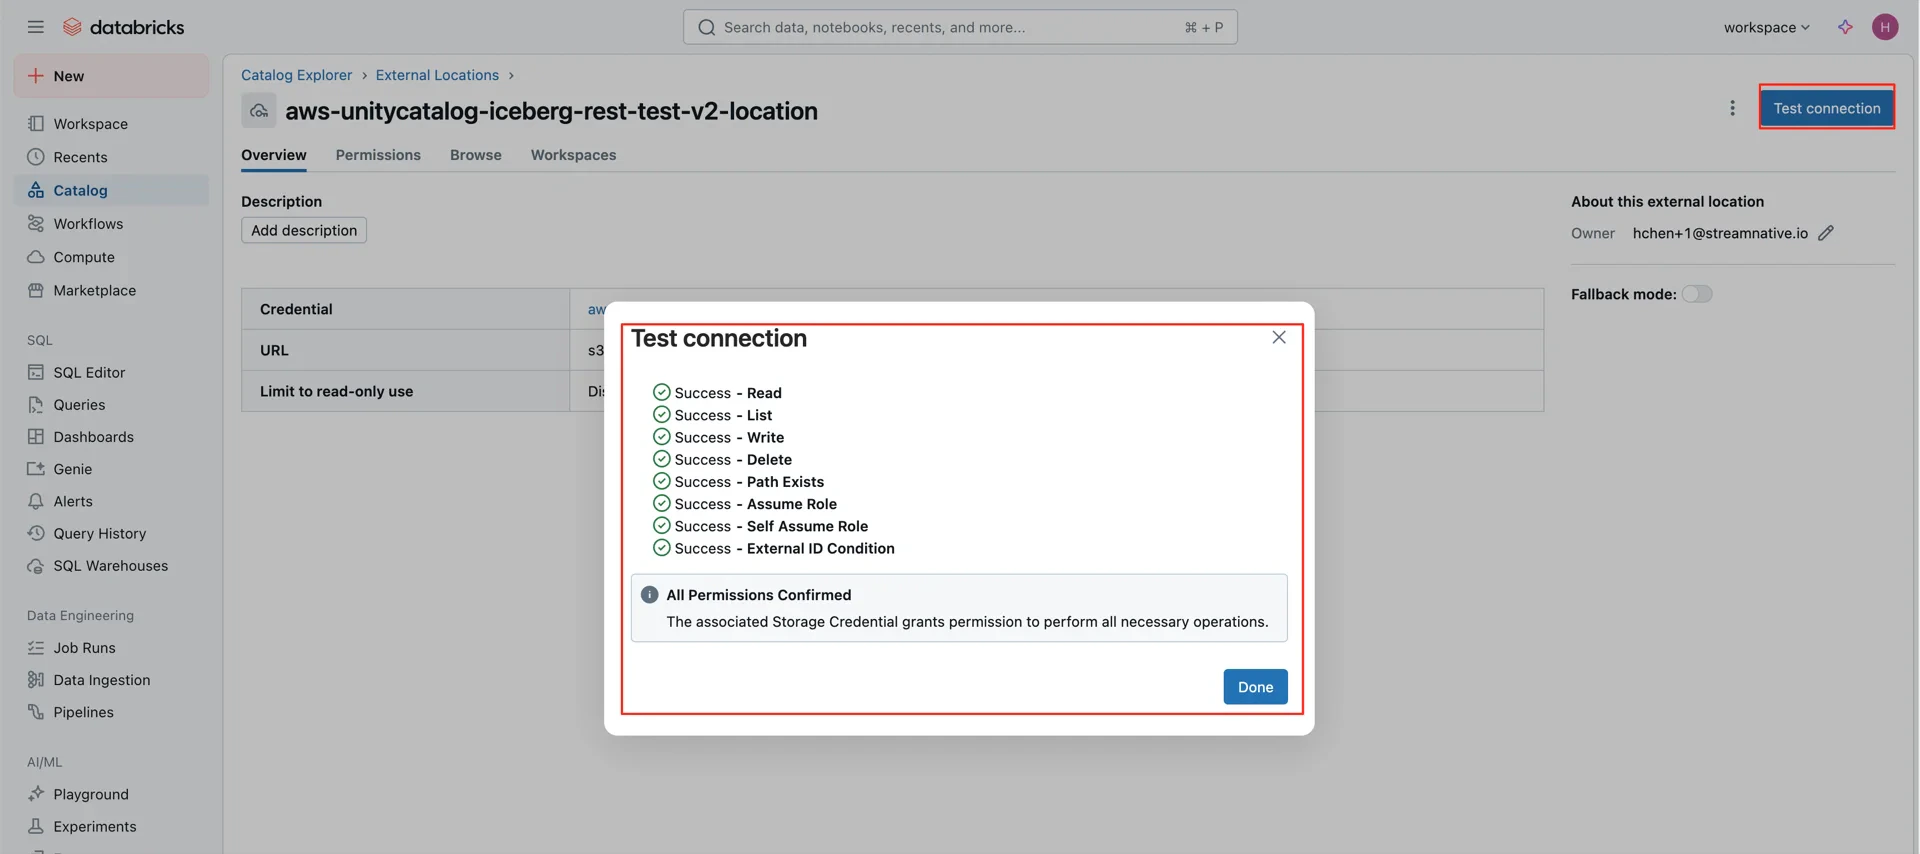
3. Create an External Location in Unity Catalog

In the Databricks Catalog console, create a new external location pointing to the S3 bucket and the IAM role created above. Create external location External location settings External location summary When you submit the form, Databricks generates an External ID and a trust policy. Copy these values. Generated External ID

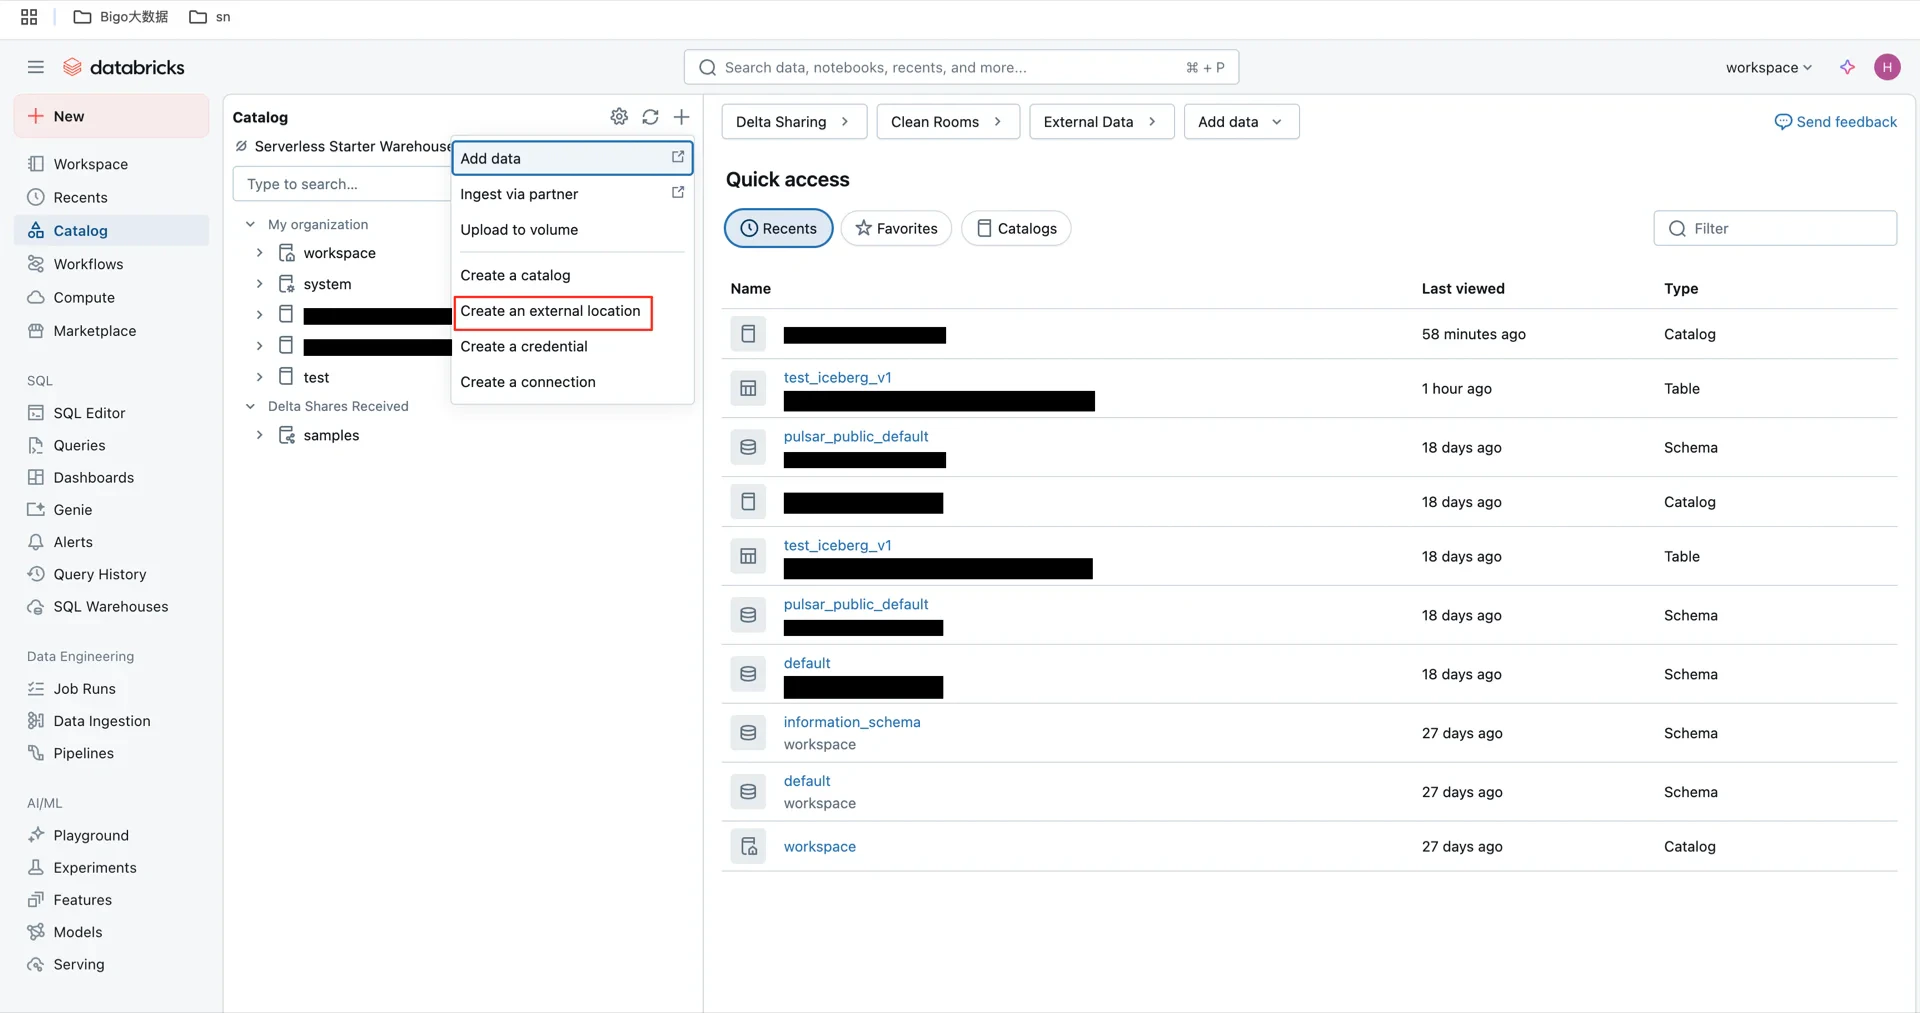
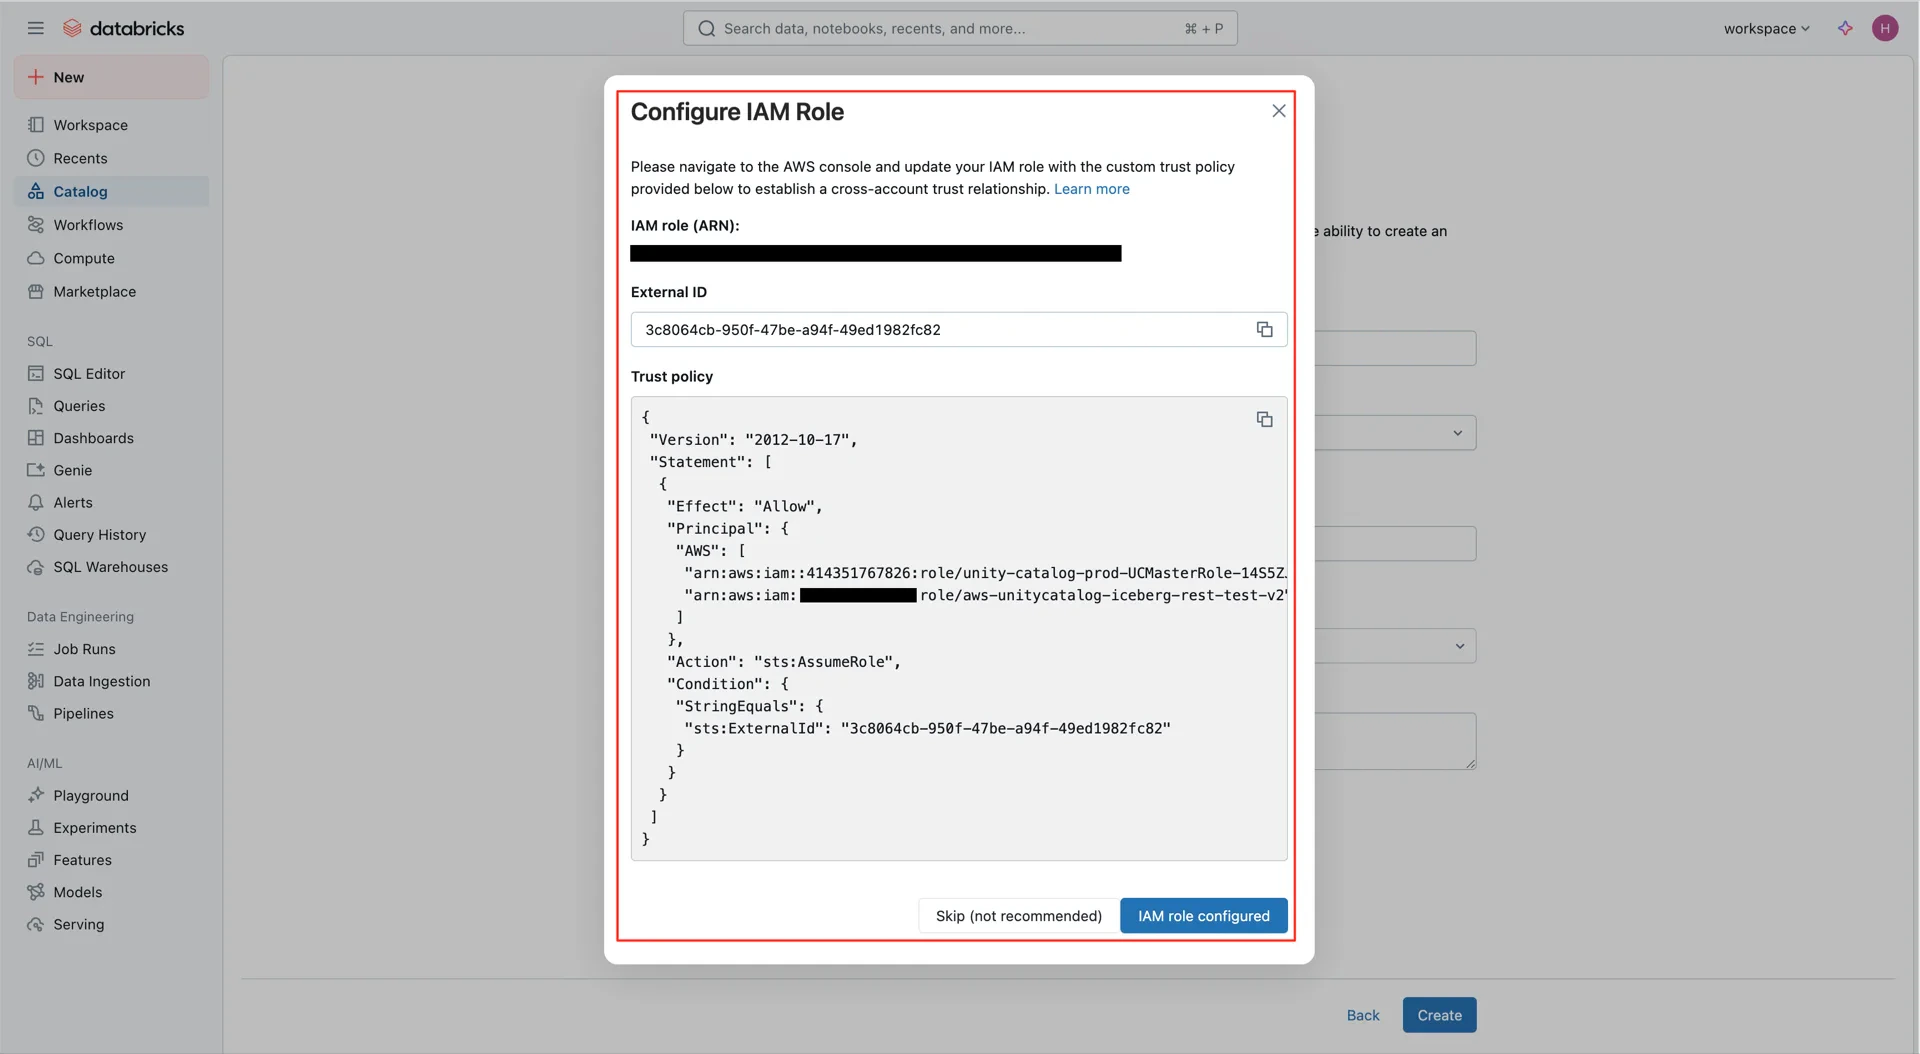
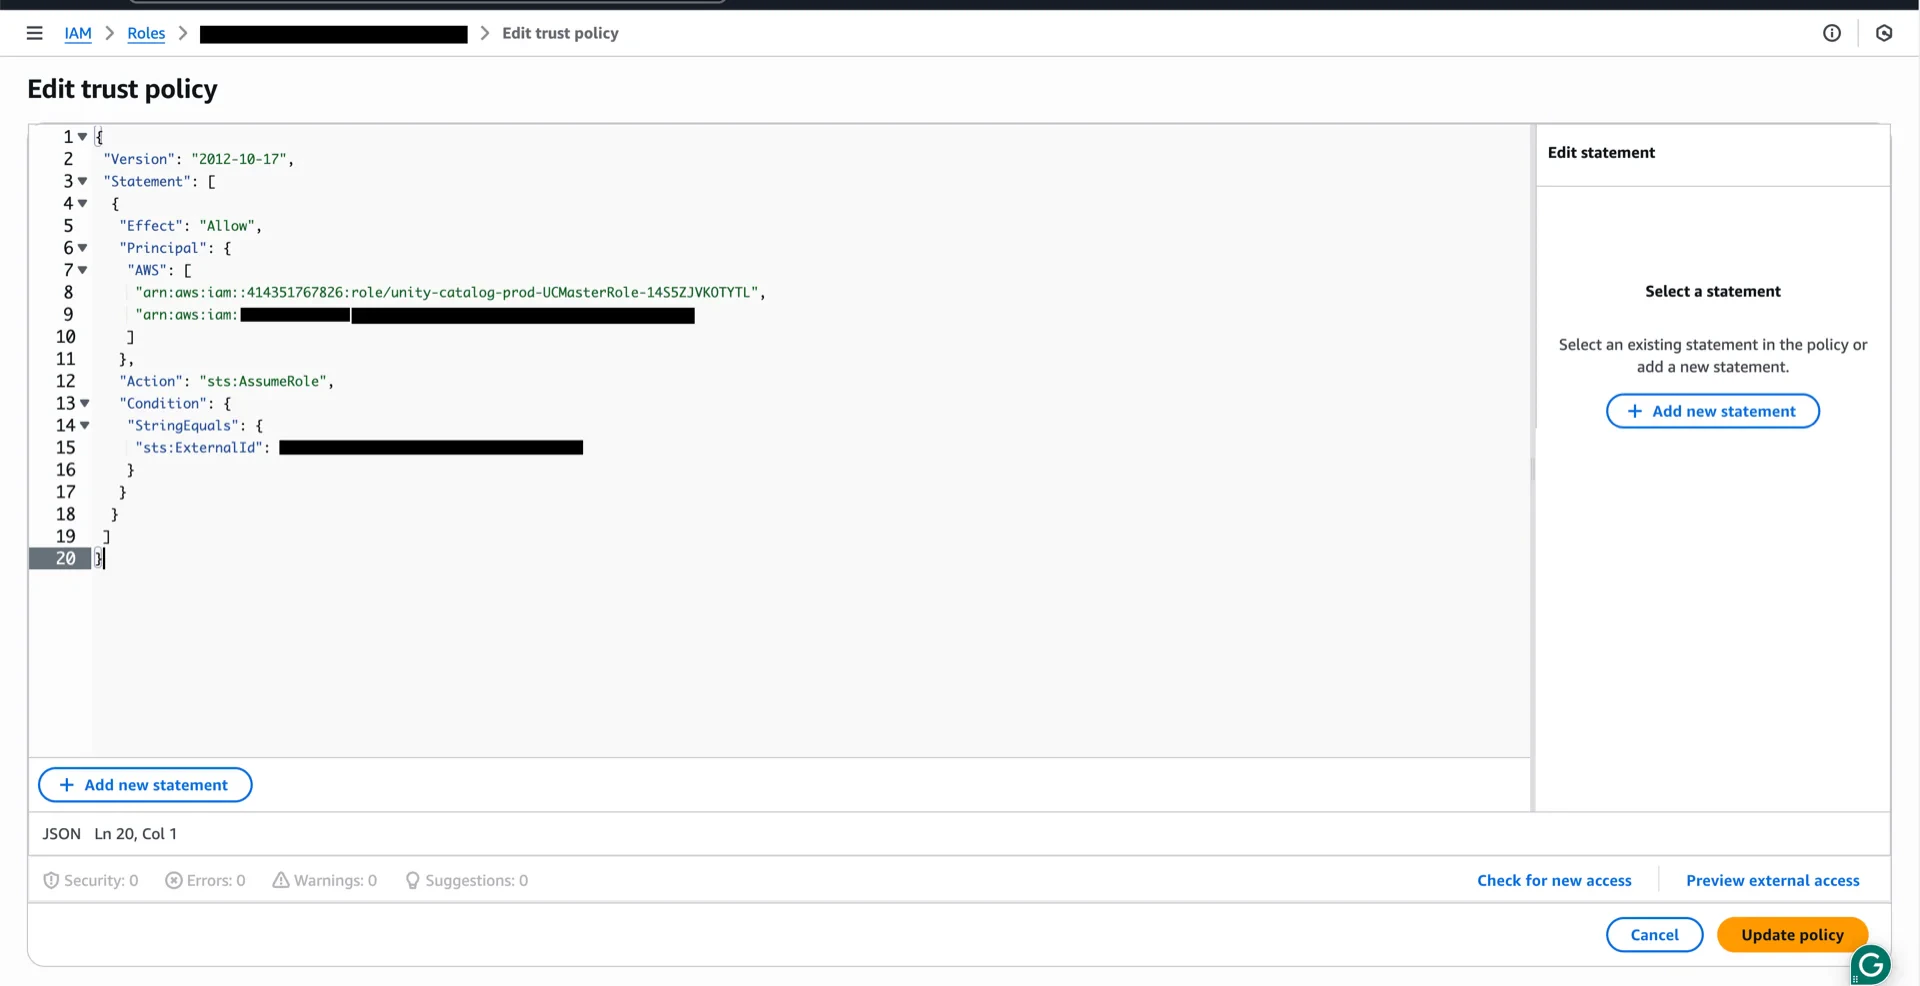
4. Update the IAM Role Trust Policy

Return to the AWS IAM console and replace the role’s trust policy with the one generated by Databricks in step 3, using the new External ID. Update trust policy Trust policy applied After saving the trust policy, click IAM role configured in the Databricks catalog console and then Test connection to verify the credential. Test connection

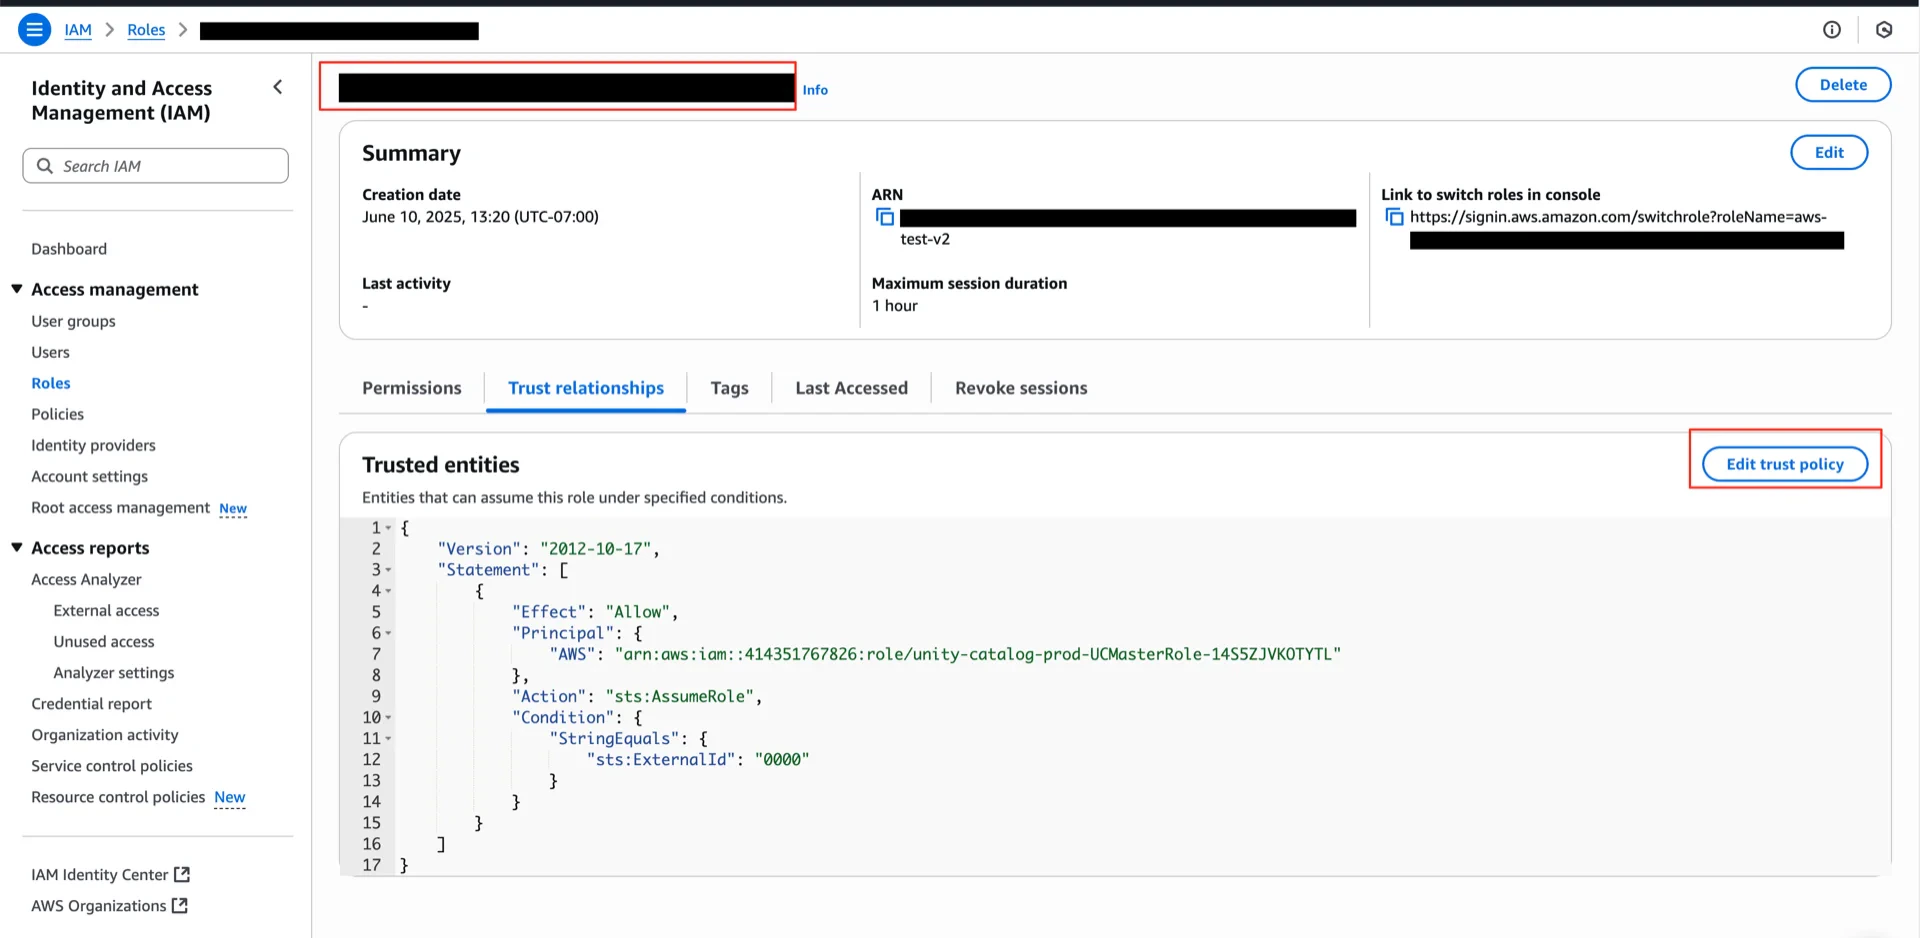
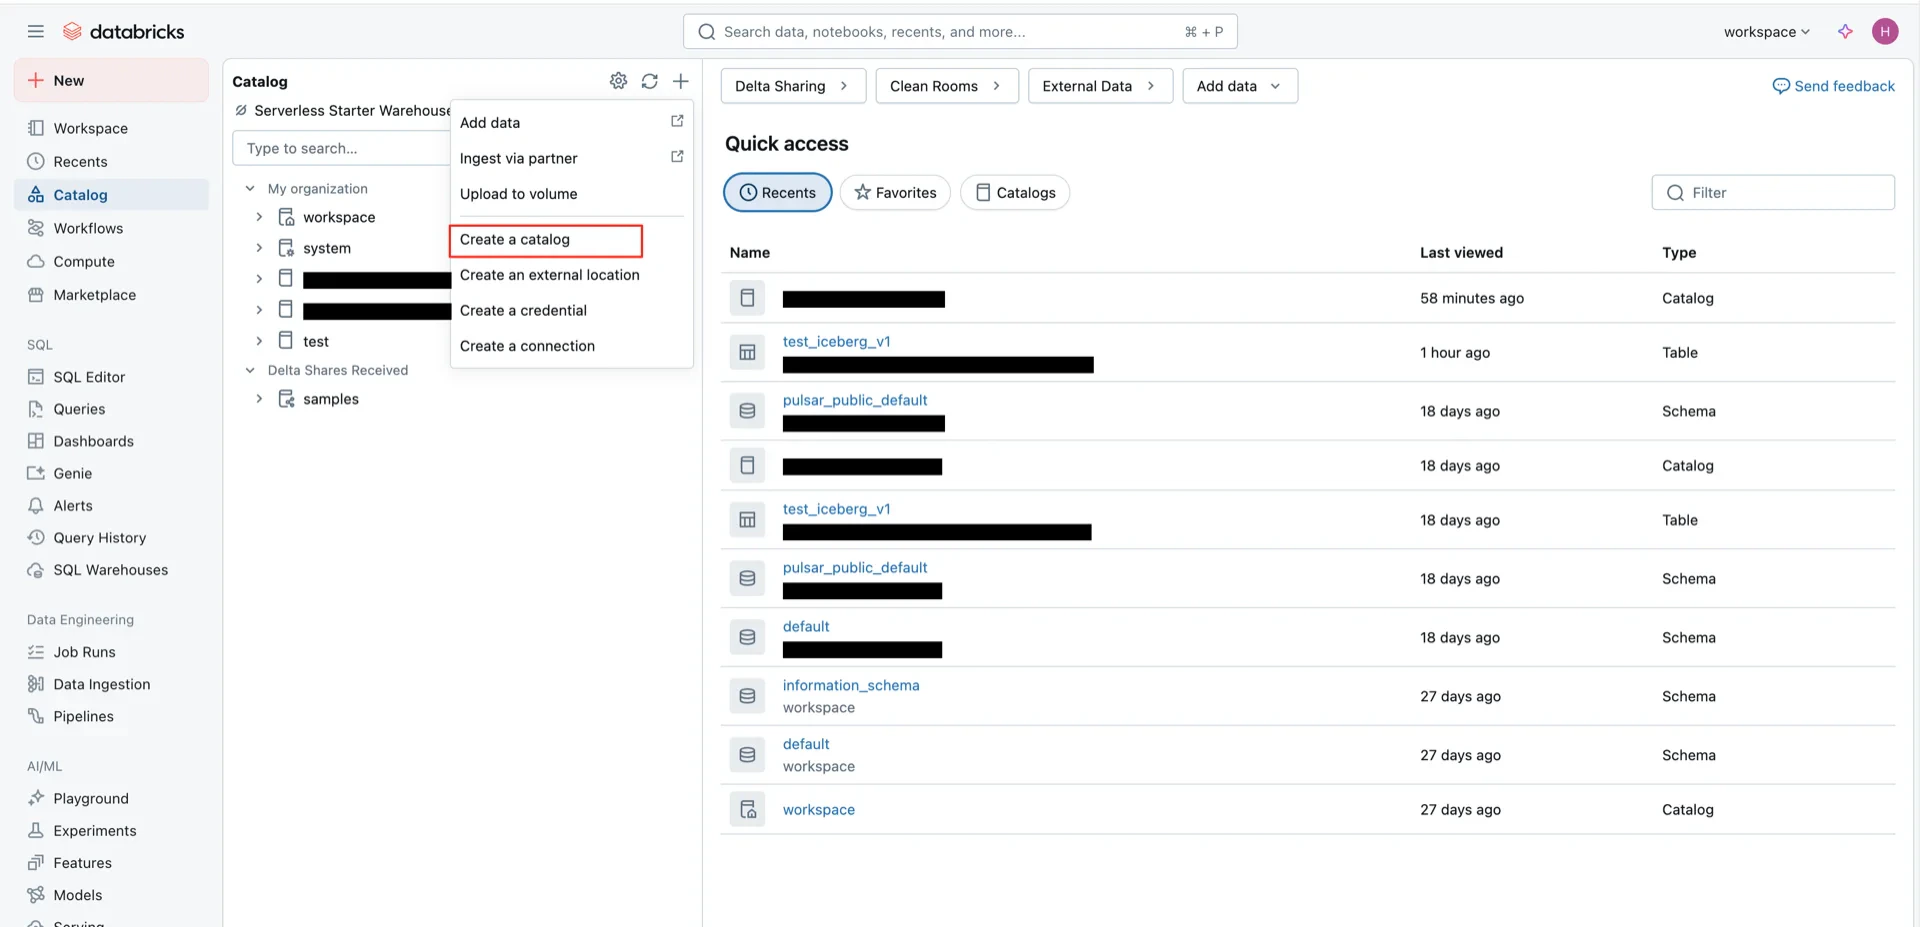
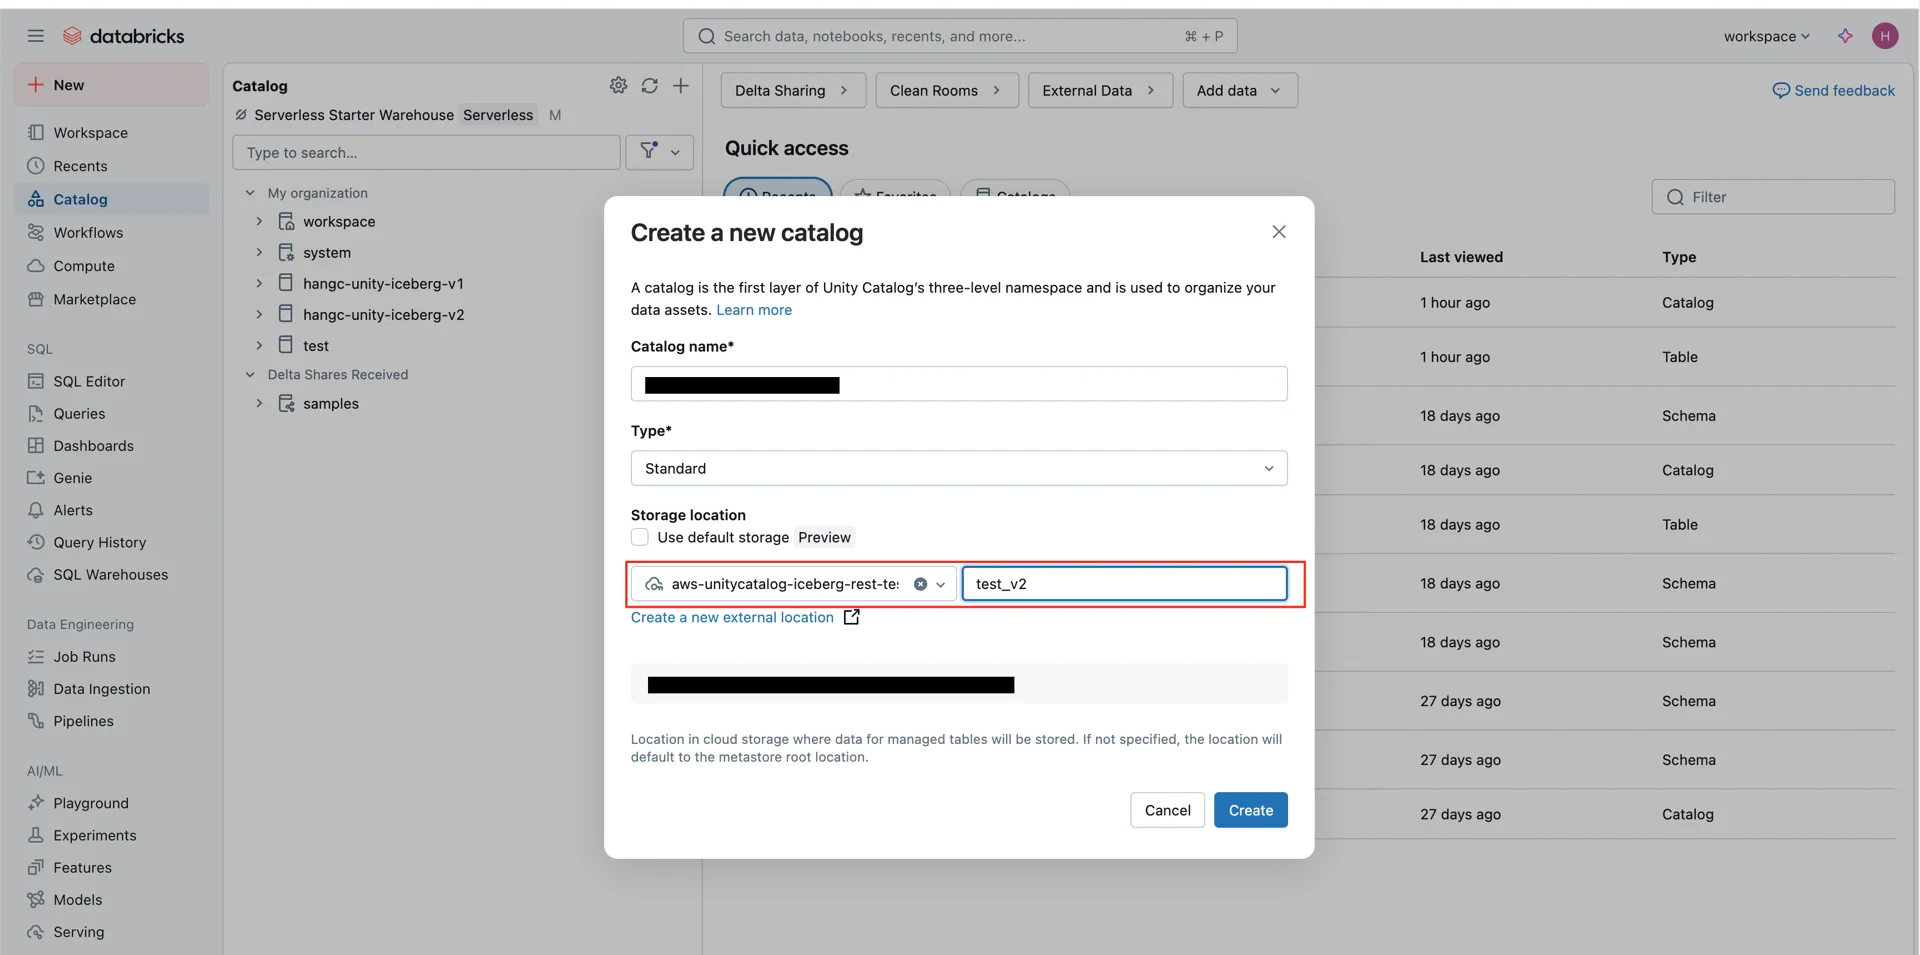
5. Create the Unity Catalog

Create a new catalog in Databricks bound to the external location created in step 3:
  • Type: Standard
  • Storage location: the external location created above
Create catalog Select Standard type Select external location

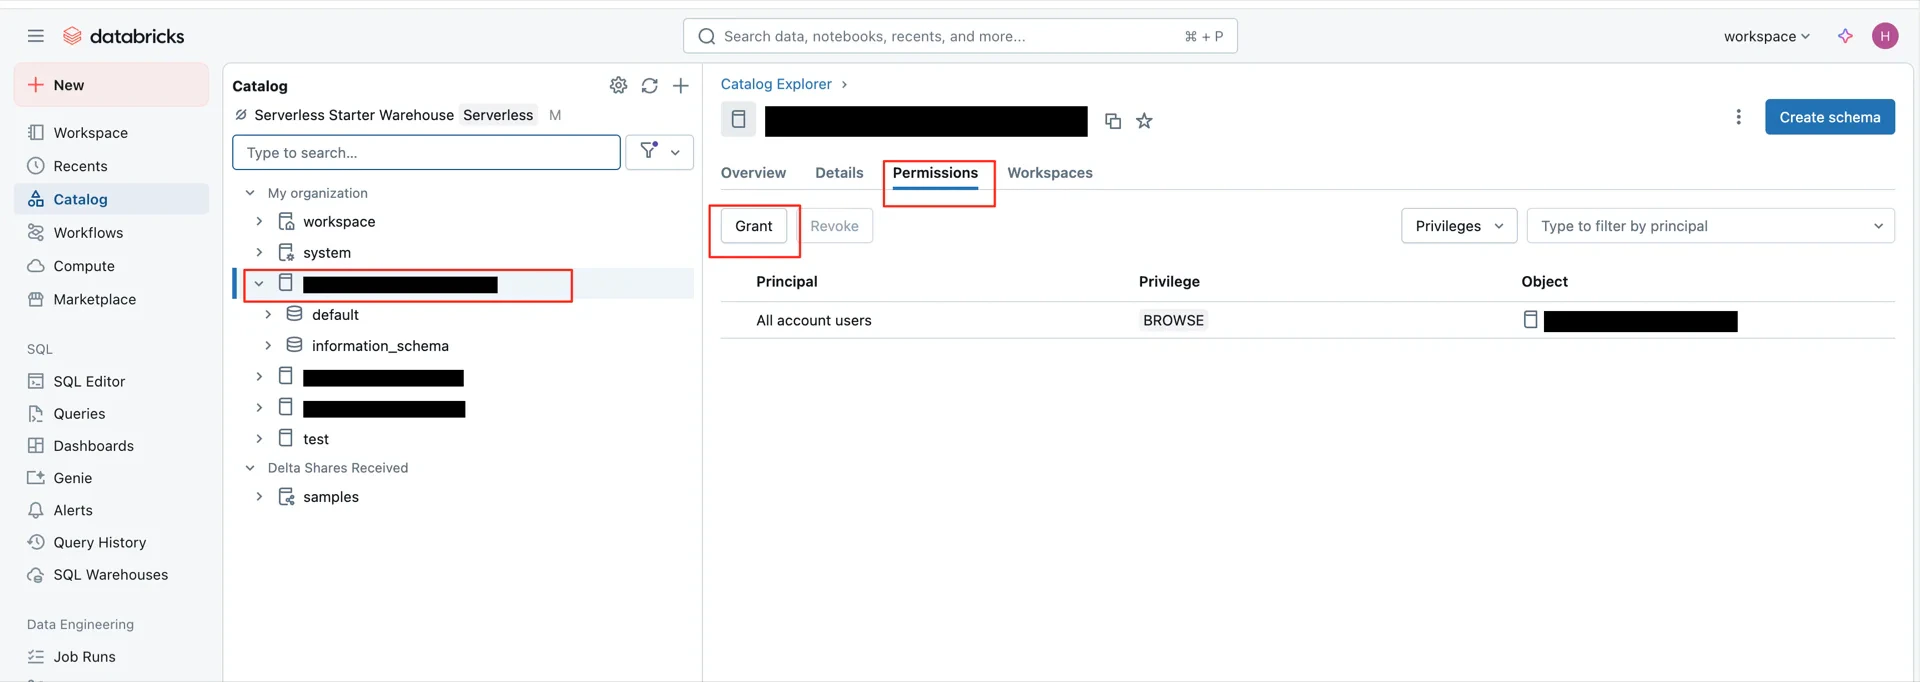
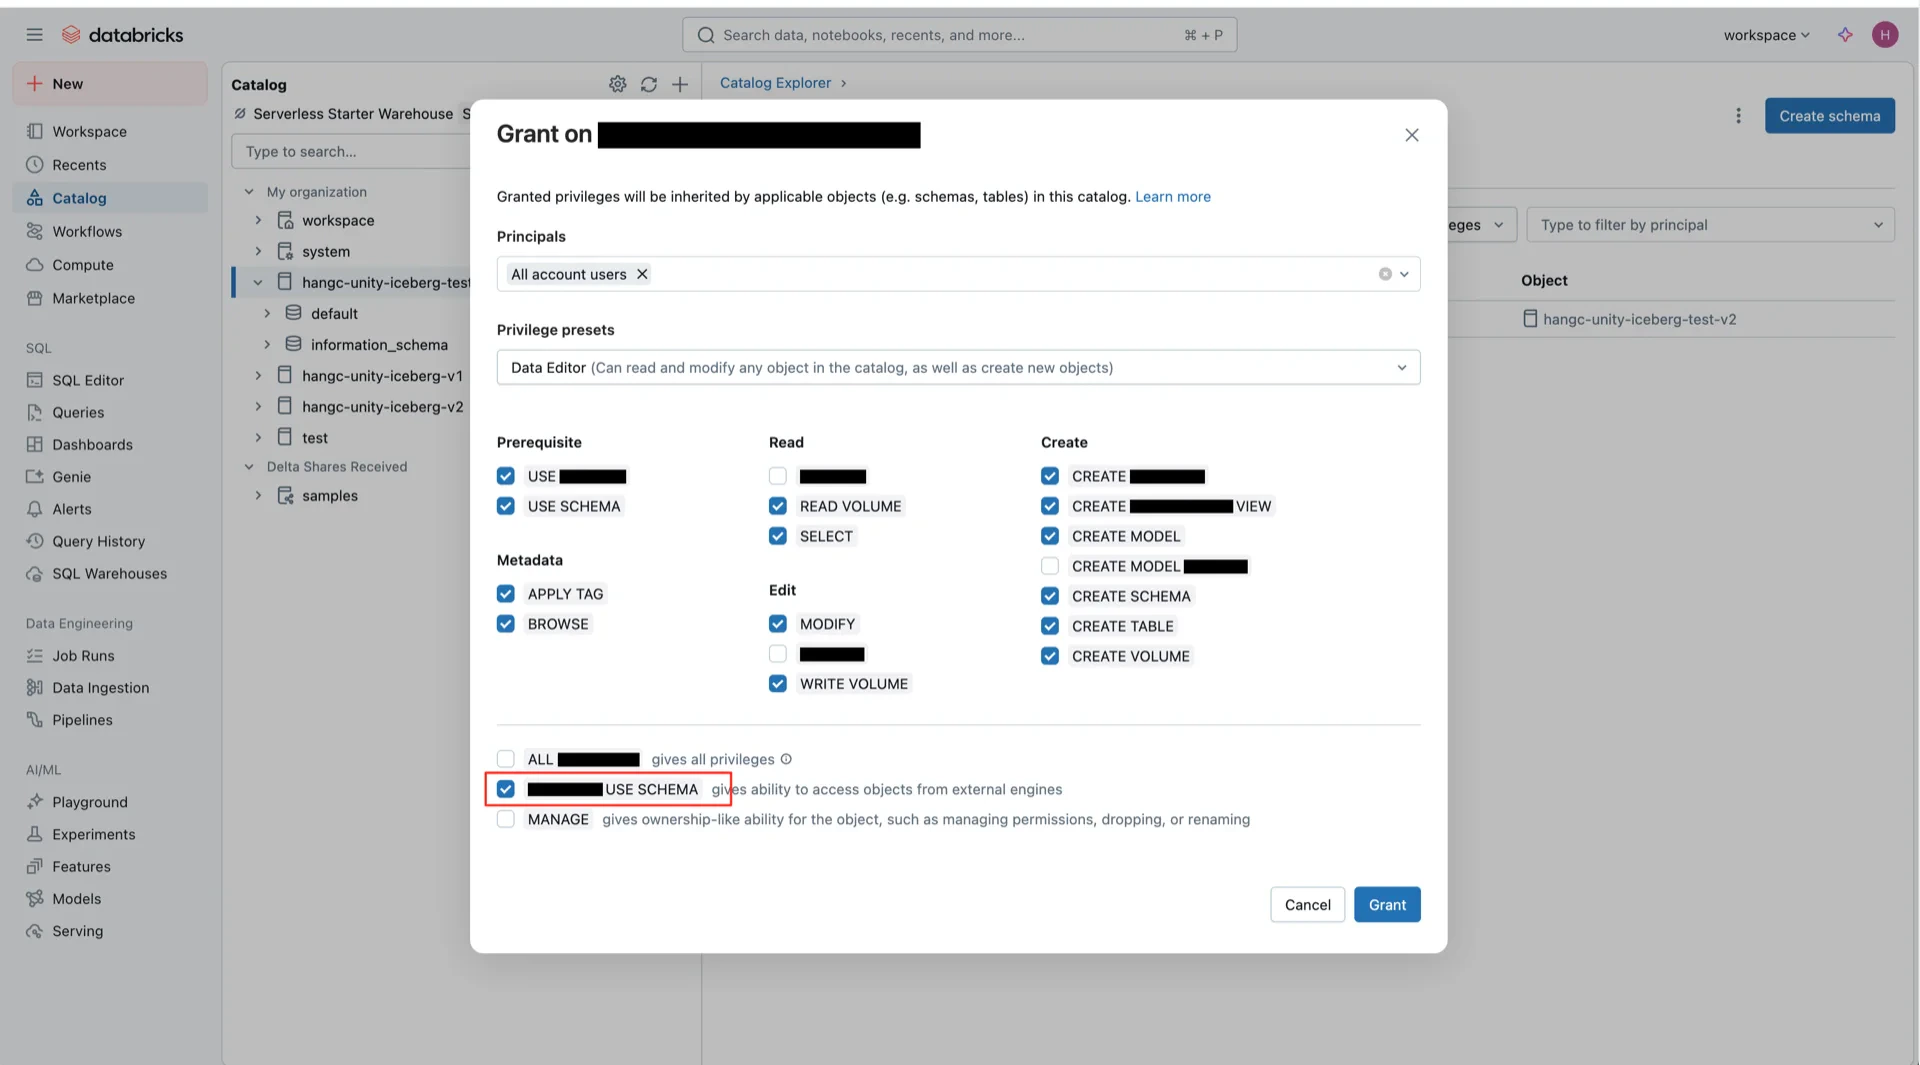
6. Grant Catalog Permissions

Grant permissions on the catalog. The EXTERNAL_USE_SCHEMA permission is required for Iceberg Managed Tables in Unity Catalog. Grant permissions EXTERNAL_USE_SCHEMA permission

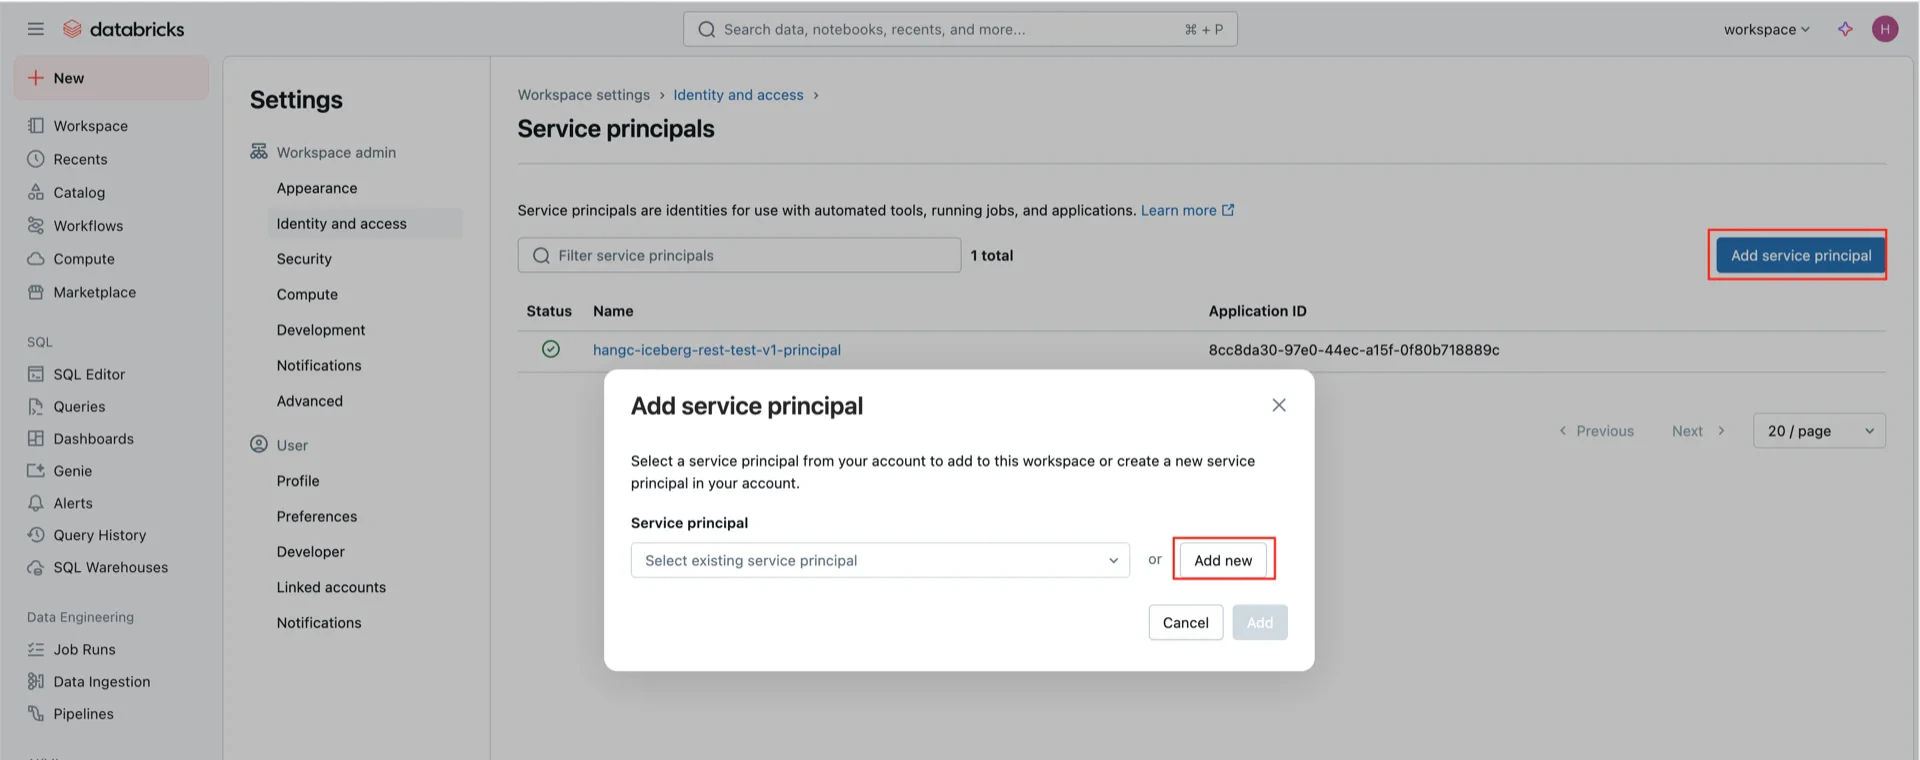
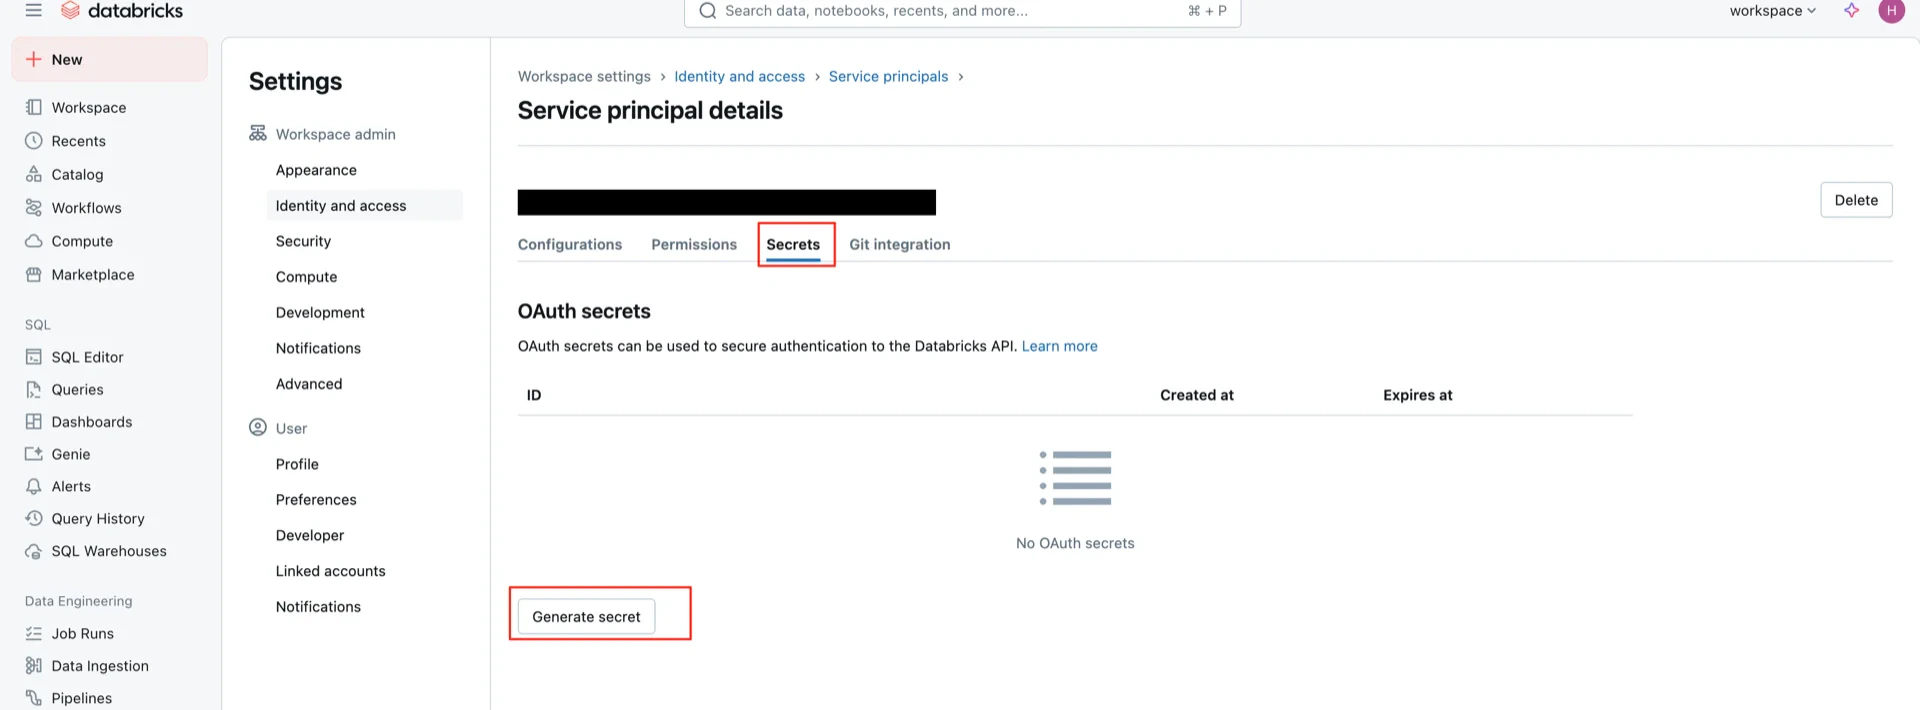
7. Create OAuth2 Credentials

Create an OAuth2 service principal that StreamNative Ursa will use to authenticate against Unity Catalog. OAuth2 setup OAuth2 setup OAuth2 setup Generate a secret for the principal and record both the Client ID and Client Secret. Generate secret

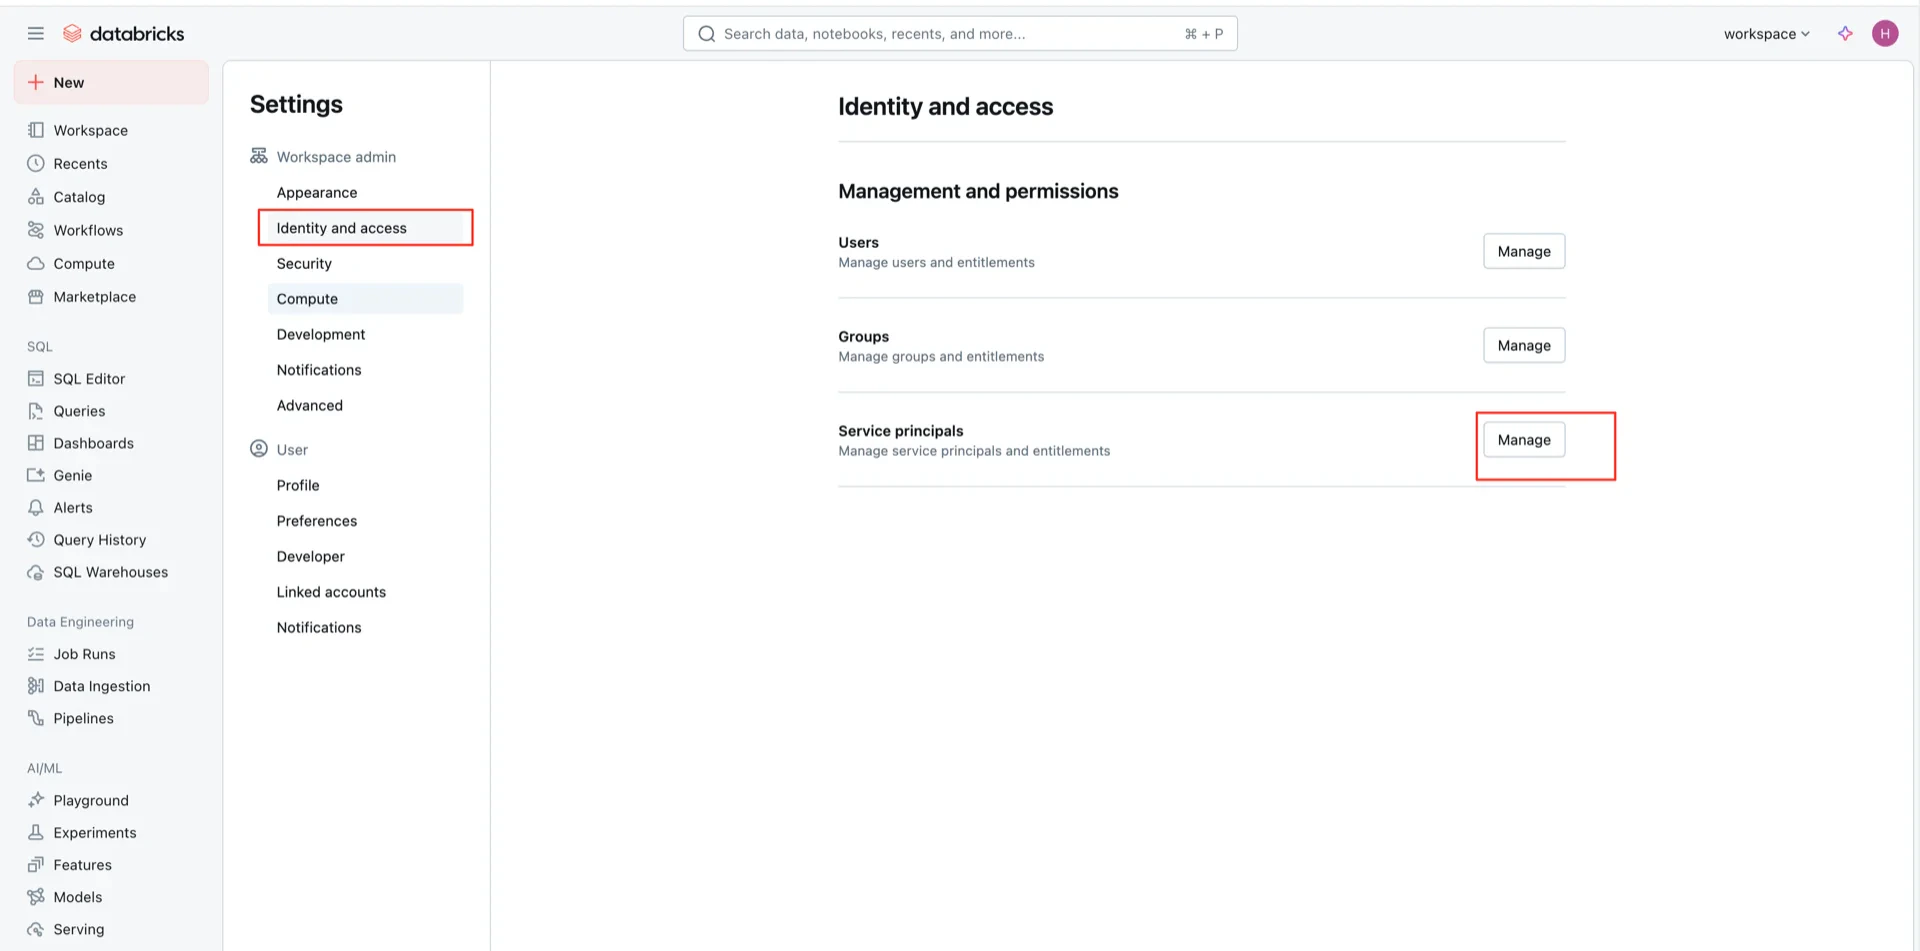
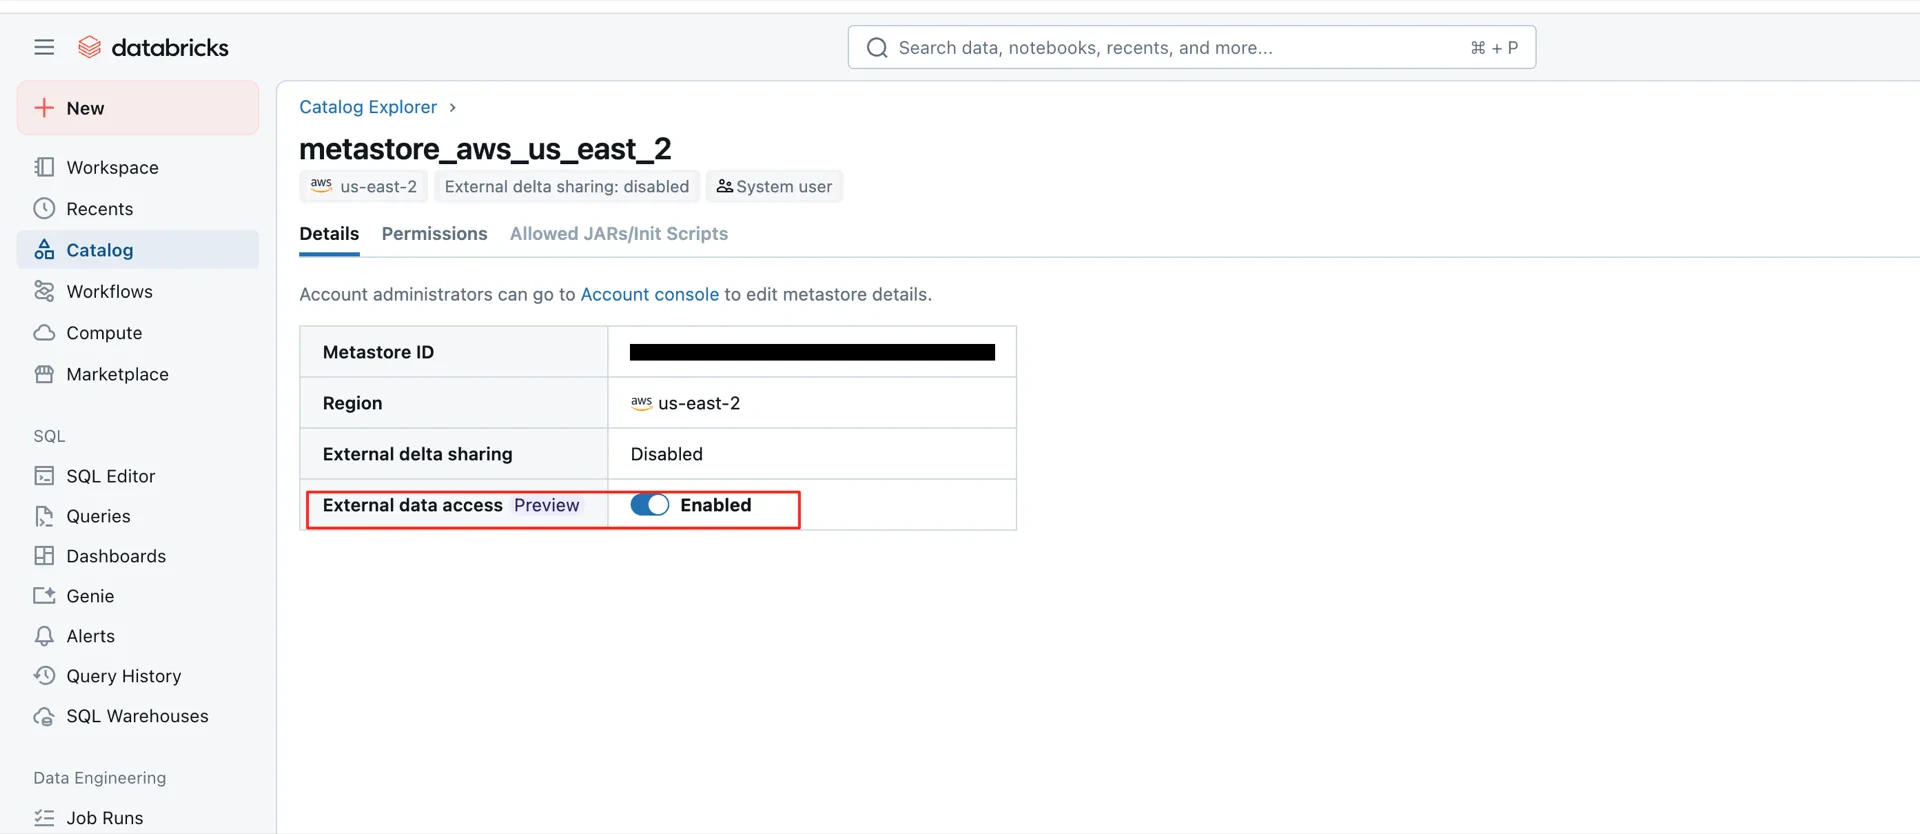
8. Enable External Data Access on the Metastore

This step is required for Unity Catalog Iceberg Managed Tables. Enable External data access on the metastore in Databricks. Enable external data access External data access enabled

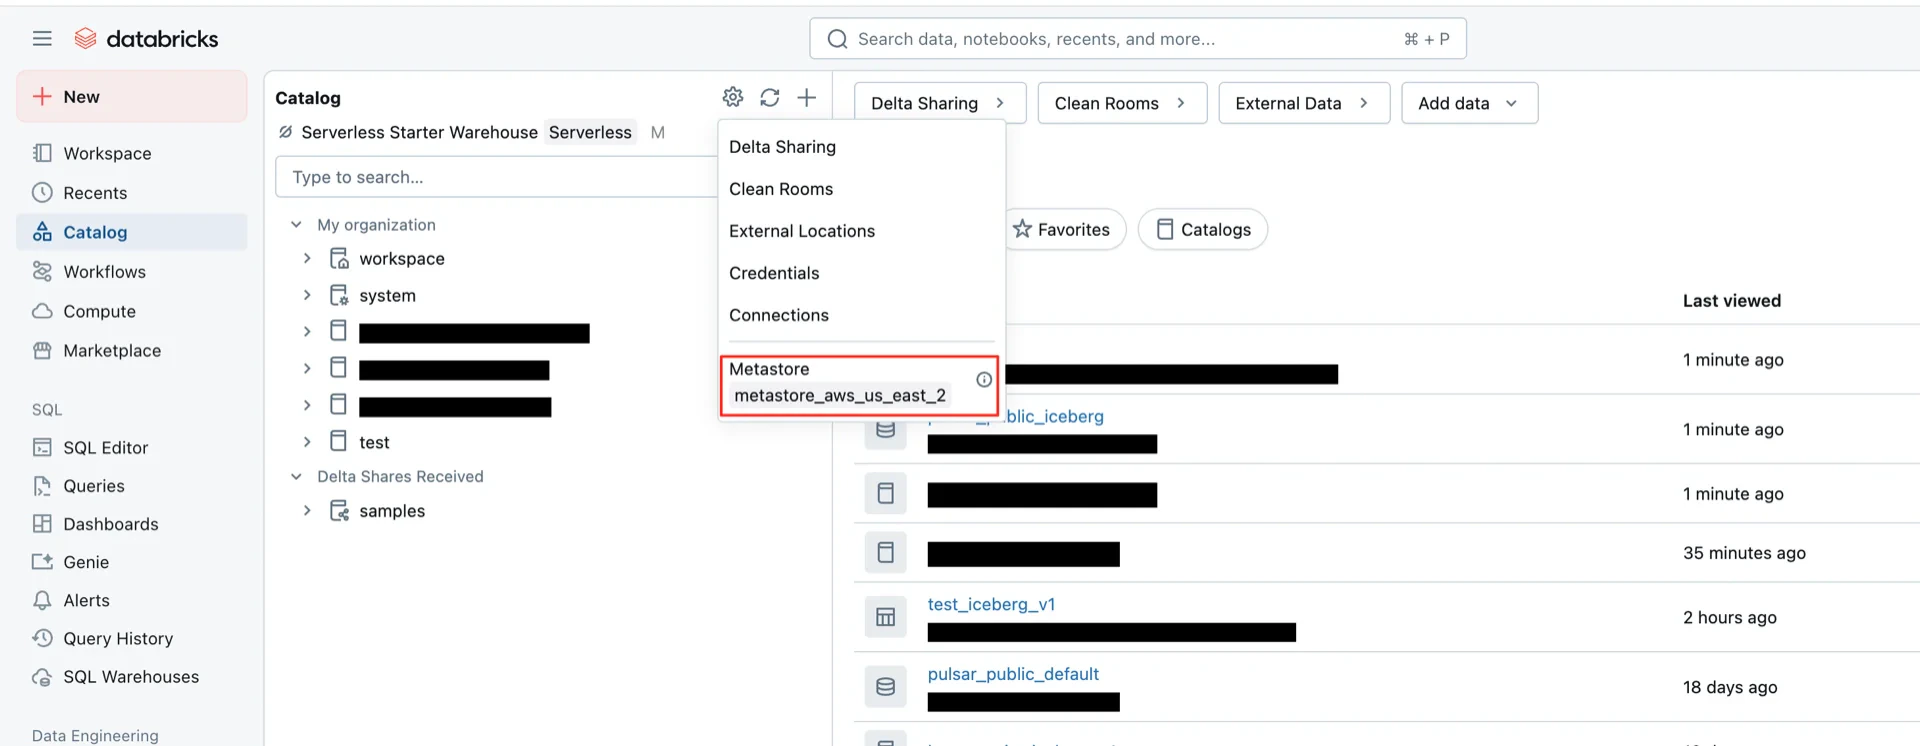
Catalog Information Summary

When the steps above are complete, collect the following values for the StreamNative Ursa compaction service:
ValueDescription
URIDatabricks workspace URL (e.g., https://dbc-xxxx.cloud.databricks.com/api/2.1/unity-catalog/iceberg-rest)
WarehouseThe Unity Catalog name created in step 5
Credential<client-id>:<client-secret> from step 7
For the next steps, see Configure Lakehouse Catalogs.