This QuickStart assumes that you have created a StreamNative cluster with the Kafka protocol enabled, created a service account, and granted the service account
produce and consume permissions to a namespace for the target topic.Before you begin
- Before using an API key, verify that the service account is authorized to access the resources, such as tenants, namespaces, and topics.
- The password for different utilities as
kcatwill be equal totoken:<API KEY>.
Steps
This section describes how to connect to your StreamNative cluster and export data from your StreamNative cluster using Lenses.-
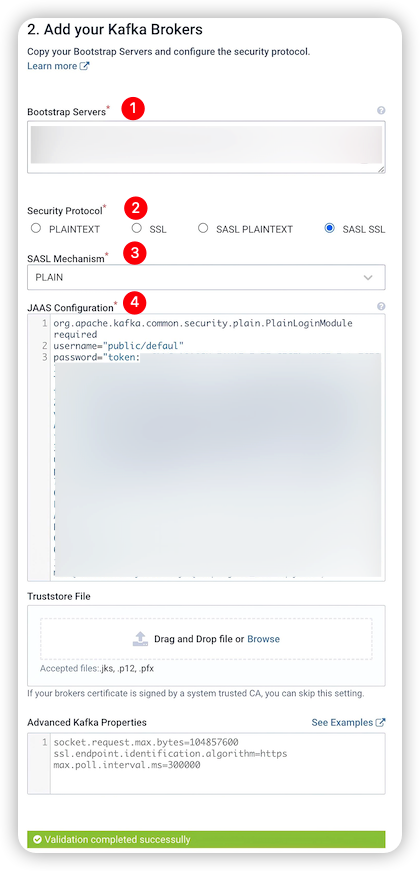
Go to the Lenses UI and configure your StreamNative cluster.
- [1] Bootstrap Servers: the Kafka service URL of your StreamNative cluster.
- [2] Security Protocol: the security protocol of your StreamNative cluster.
- [3] SASL Mechanism: the security mechanism of your StreamNative cluster.
- [4] JAAS Configuration
- username: the tenant and namespace name, in the format of
<tenant-name>/<namespace-name>. - password: the token of your service account, in the format of
token:<API key of your service account>
- username: the tenant and namespace name, in the format of
-
View data in the target topic.
a. On the left navigation pane of the Lenses UI, click Explore to navigate to the Explore page.
b. Select the target topic.

kop-topiclooks like the below: -
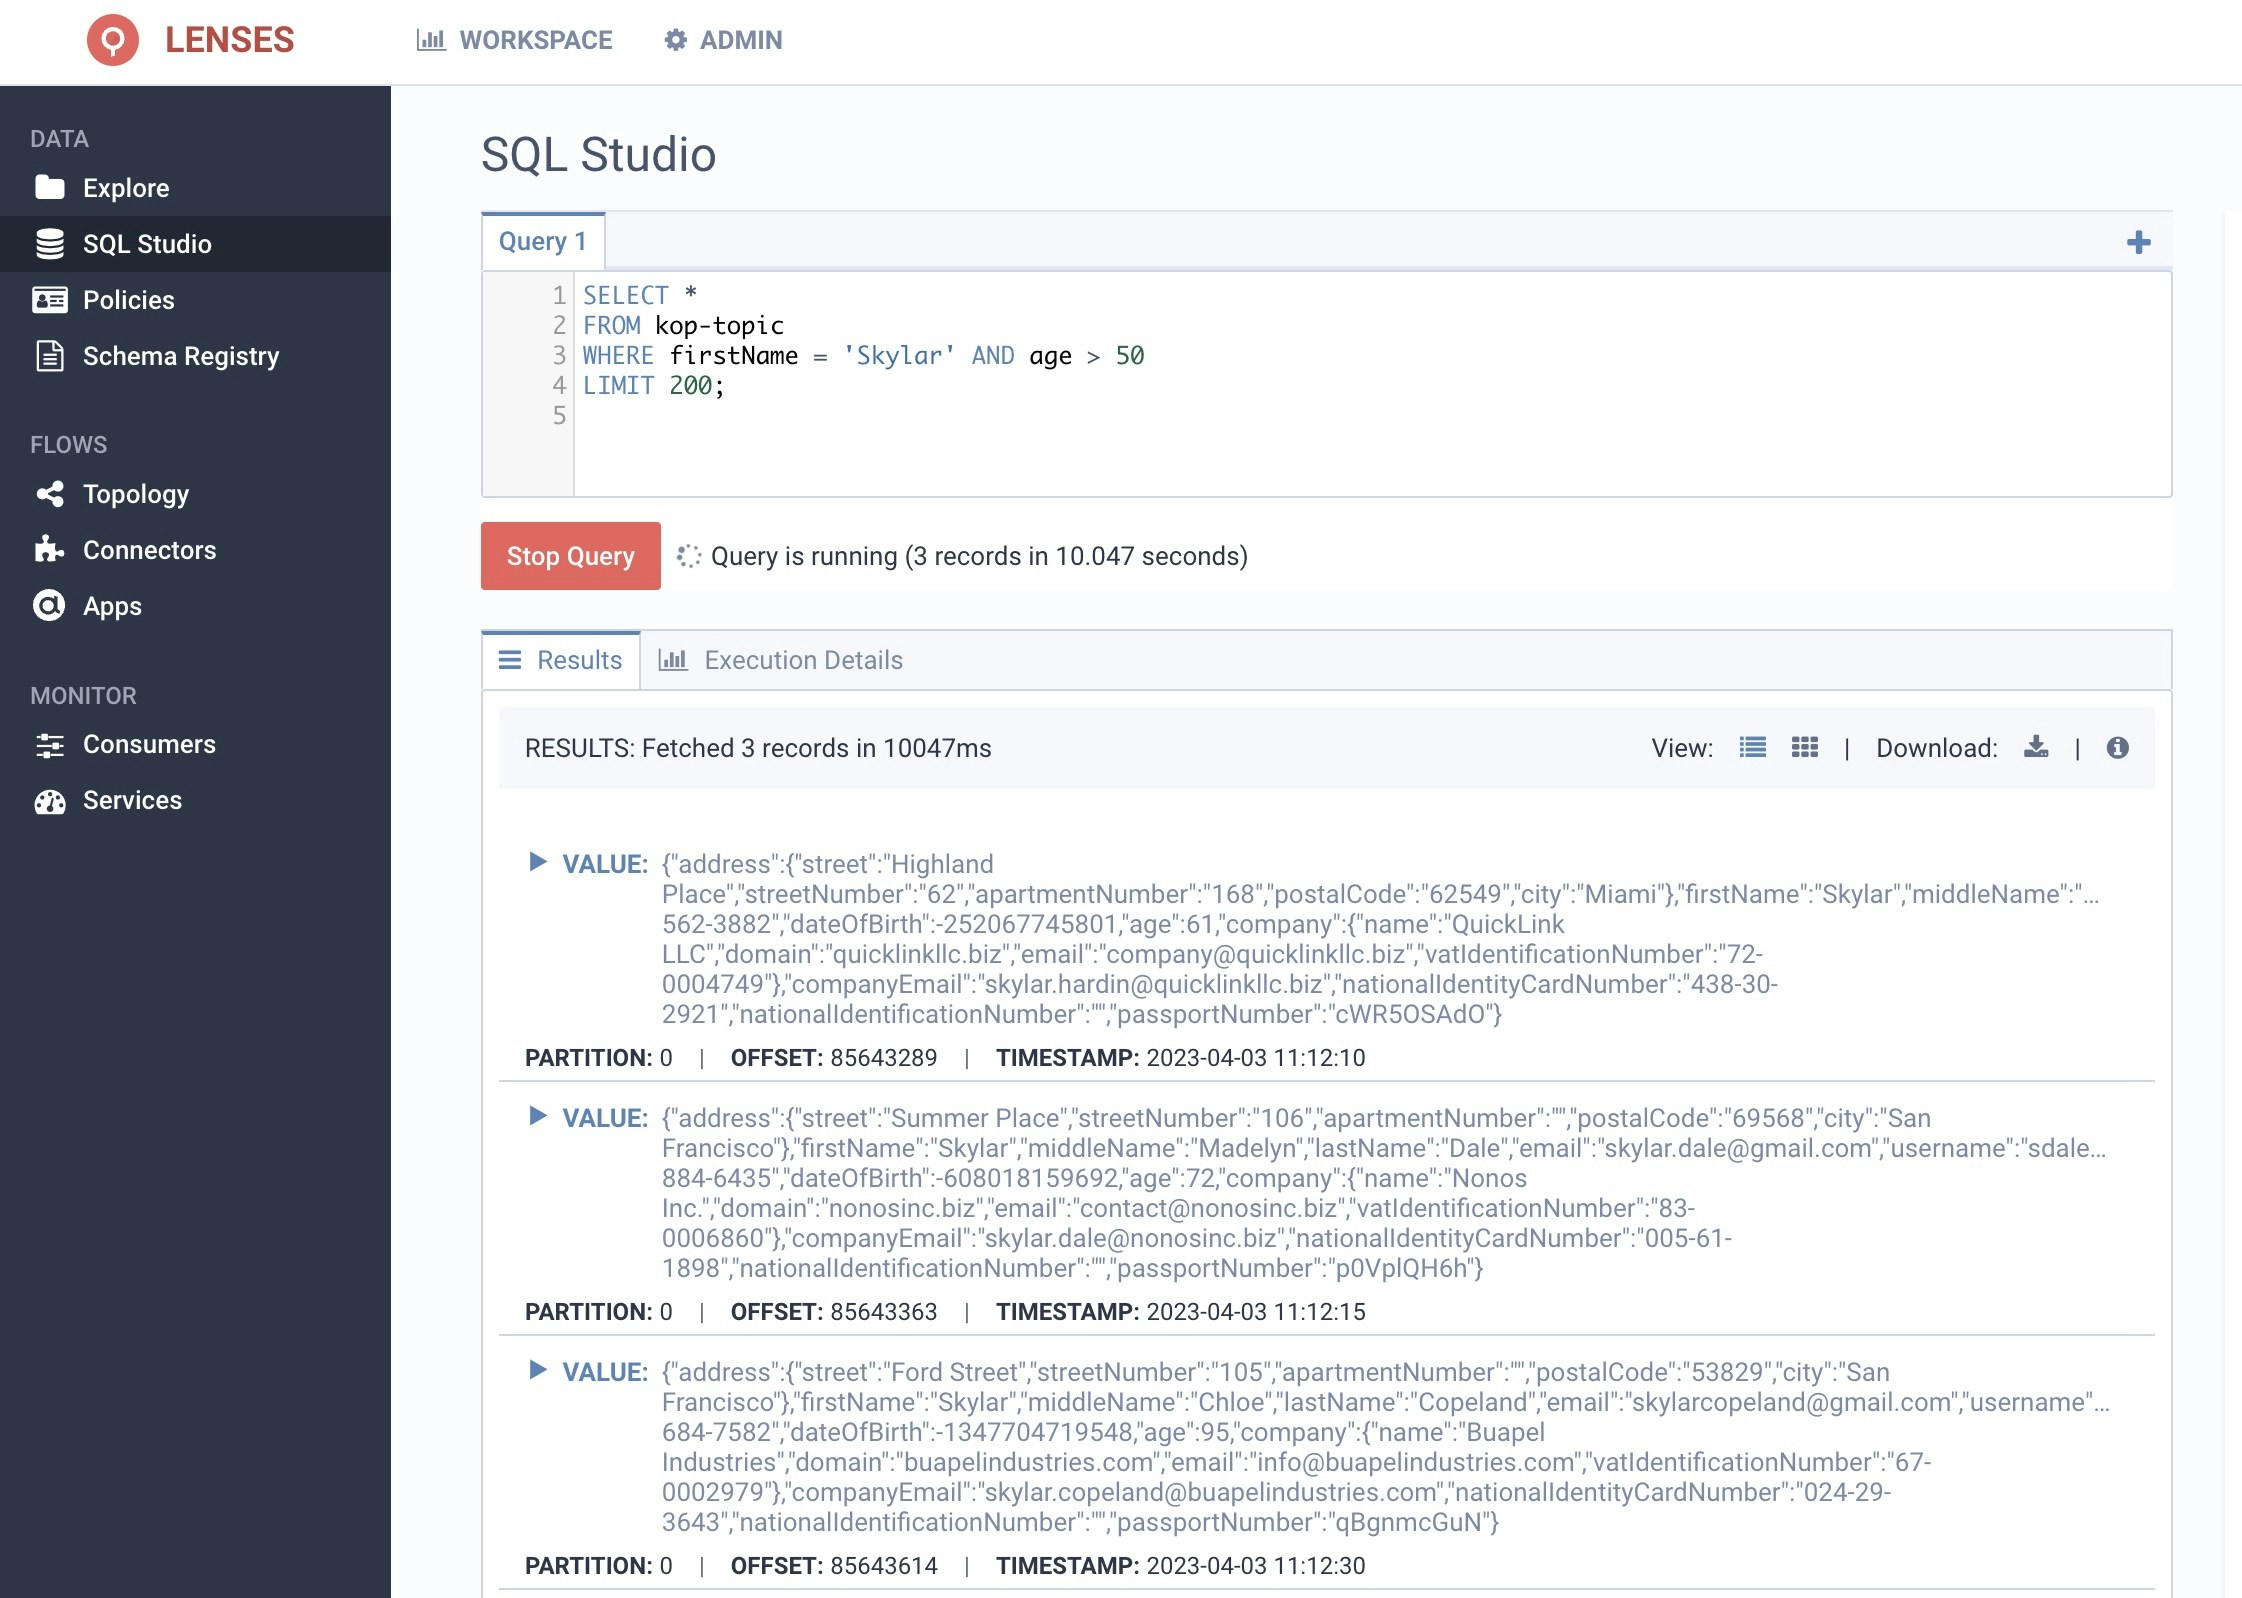
Query data in the target topic.
a. From the Header Bar menu, go to the Dashboard panel.
b. On the side navigation, select SQL Studio under the Data section.