> ## Documentation Index
> Fetch the complete documentation index at: https://docs.streamnative.io/llms.txt
> Use this file to discover all available pages before exploring further.
# Unity Catalog Managed Iceberg Table on GCP
This guide describes how to prepare a Databricks Unity Catalog for use with StreamNative Ursa as a managed Iceberg table catalog on Google Cloud Platform (GCP).
## Prerequisites
* A Databricks workspace on GCP with Unity Catalog and Iceberg Managed Table enabled
* A GCP project with permissions to create GCS buckets
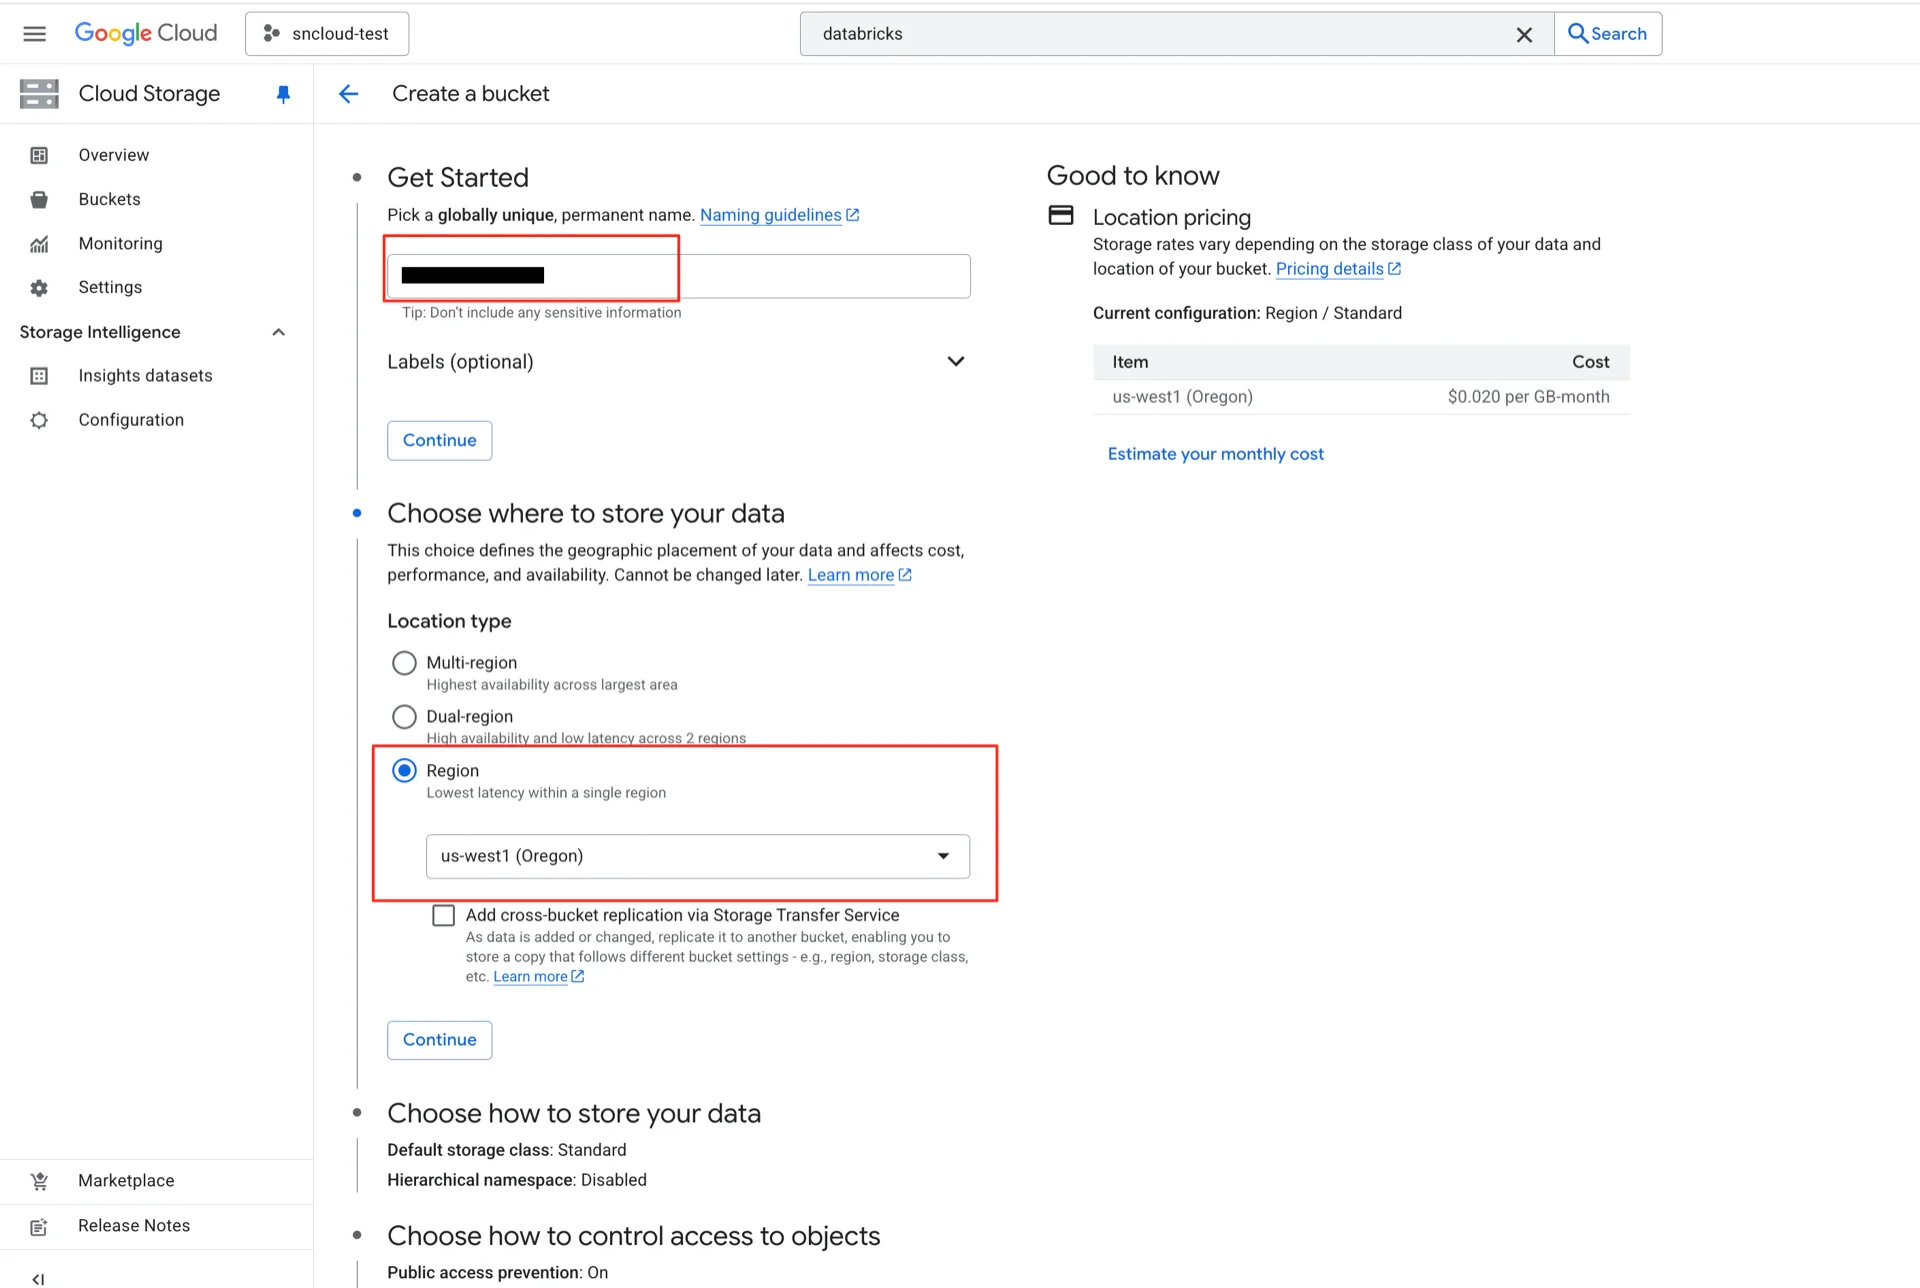
## 1. Create a GCS Bucket
Create a GCS bucket to use as the Unity Catalog storage location (for example, `unity-catalog-iceberg-bucket`).
> **Important:** The bucket must be located in the **same region** as your Databricks workspace and your StreamNative Ursa cluster. Cross-region access introduces additional network traffic and latency.
 For additional details, see the [Databricks GCP Unity Catalog documentation](https://docs.databricks.com/gcp/en/data-governance/unity-catalog/create-metastore).
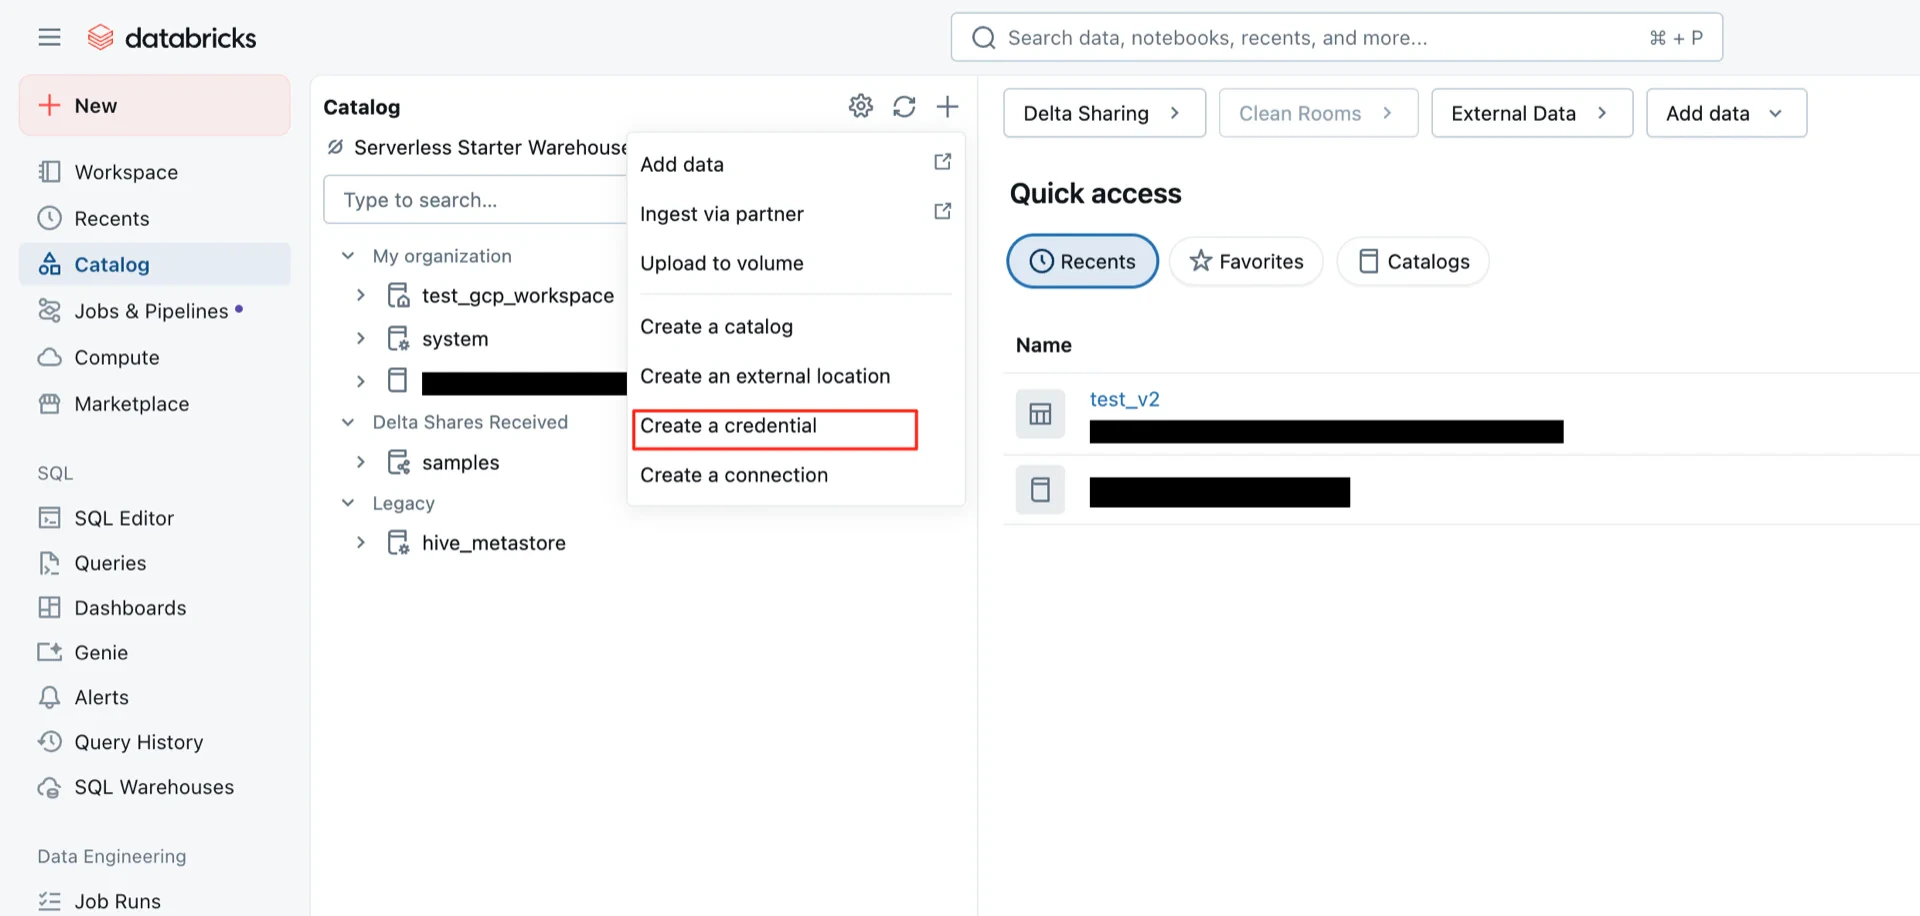
## 2. Create a Storage Credential in Unity Catalog
In the Databricks Catalog console, create a new storage credential. Databricks generates a service account that needs permissions on the bucket.
For additional details, see the [Databricks GCP Unity Catalog documentation](https://docs.databricks.com/gcp/en/data-governance/unity-catalog/create-metastore).
## 2. Create a Storage Credential in Unity Catalog
In the Databricks Catalog console, create a new storage credential. Databricks generates a service account that needs permissions on the bucket.
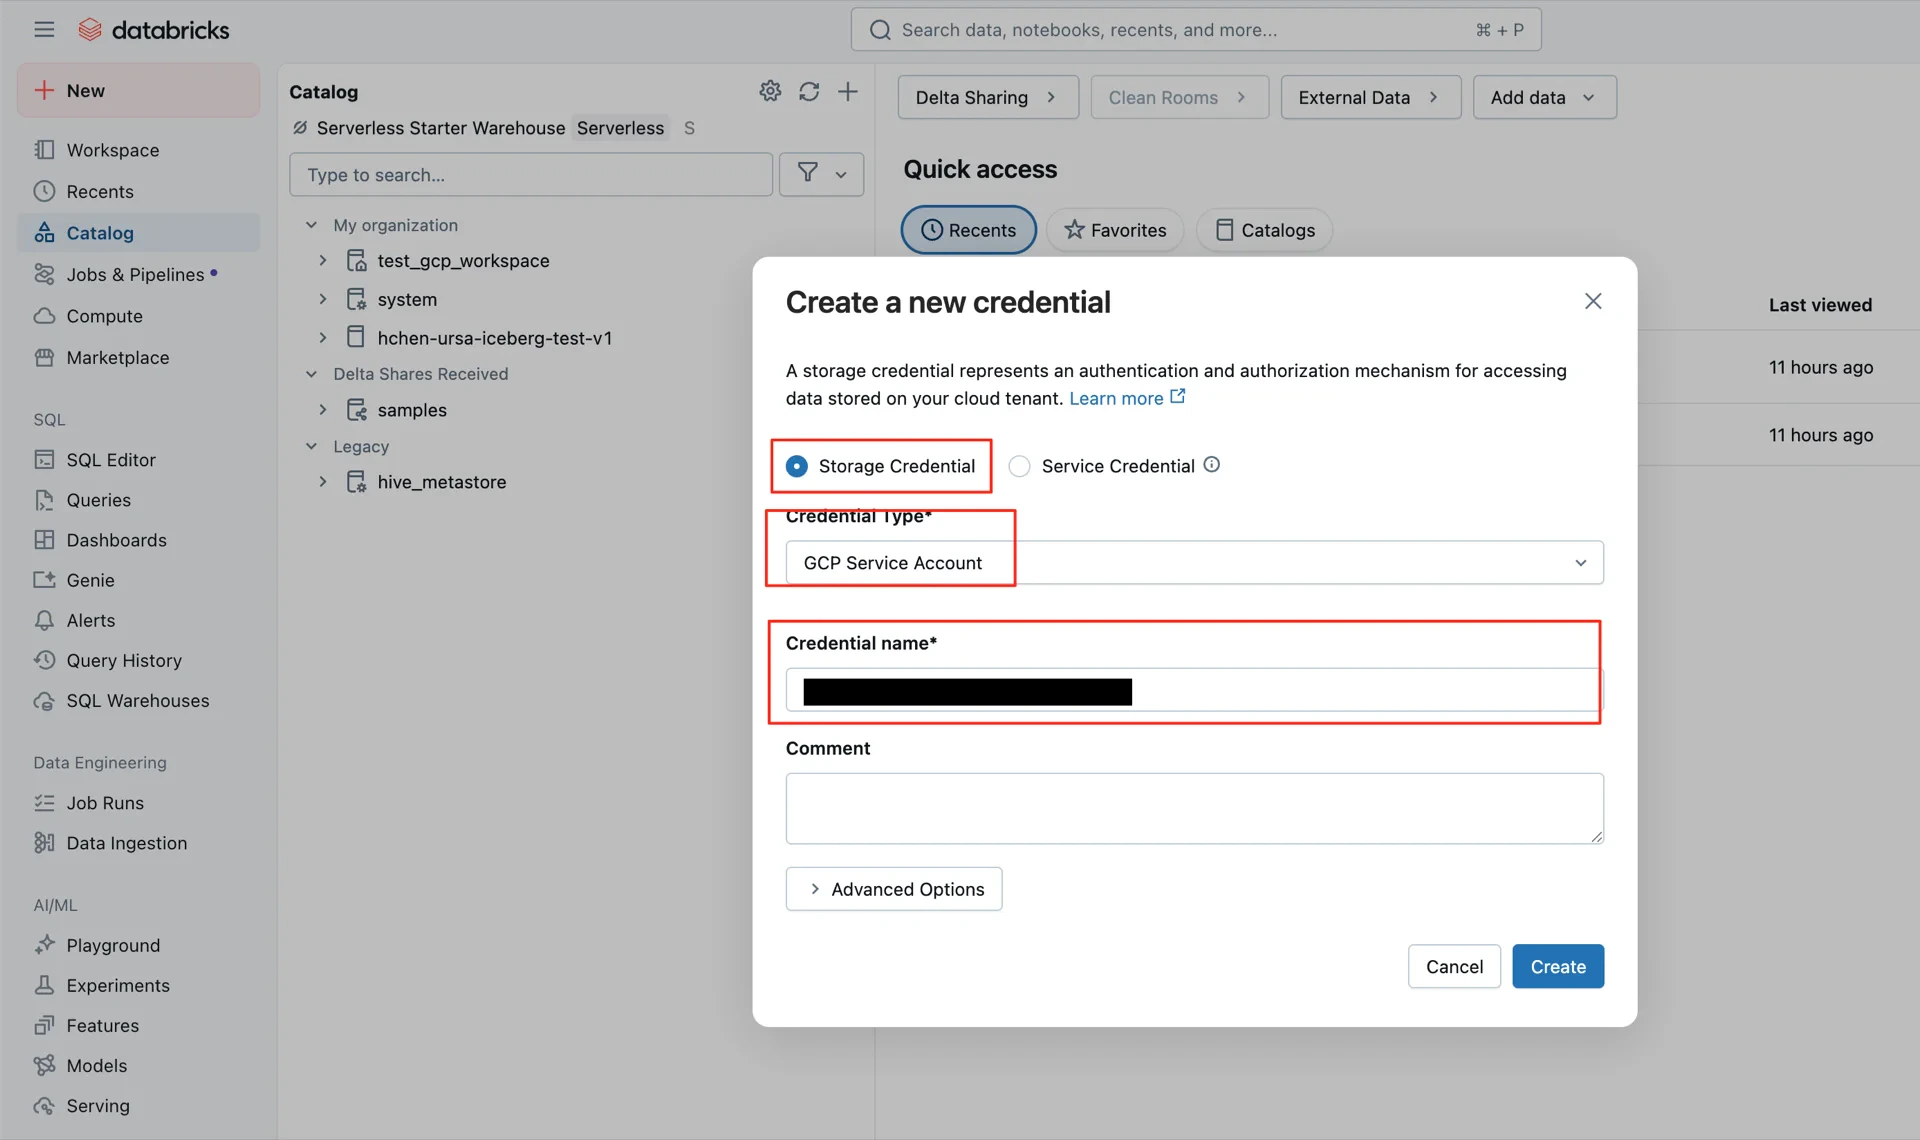 After creation, record the generated service account name. Example:
```
db-uc-credential-@uc-uswest1.iam.gserviceaccount.com
```
After creation, record the generated service account name. Example:
```
db-uc-credential-@uc-uswest1.iam.gserviceaccount.com
```
 ## 3. Grant GCS Permissions to the Service Account
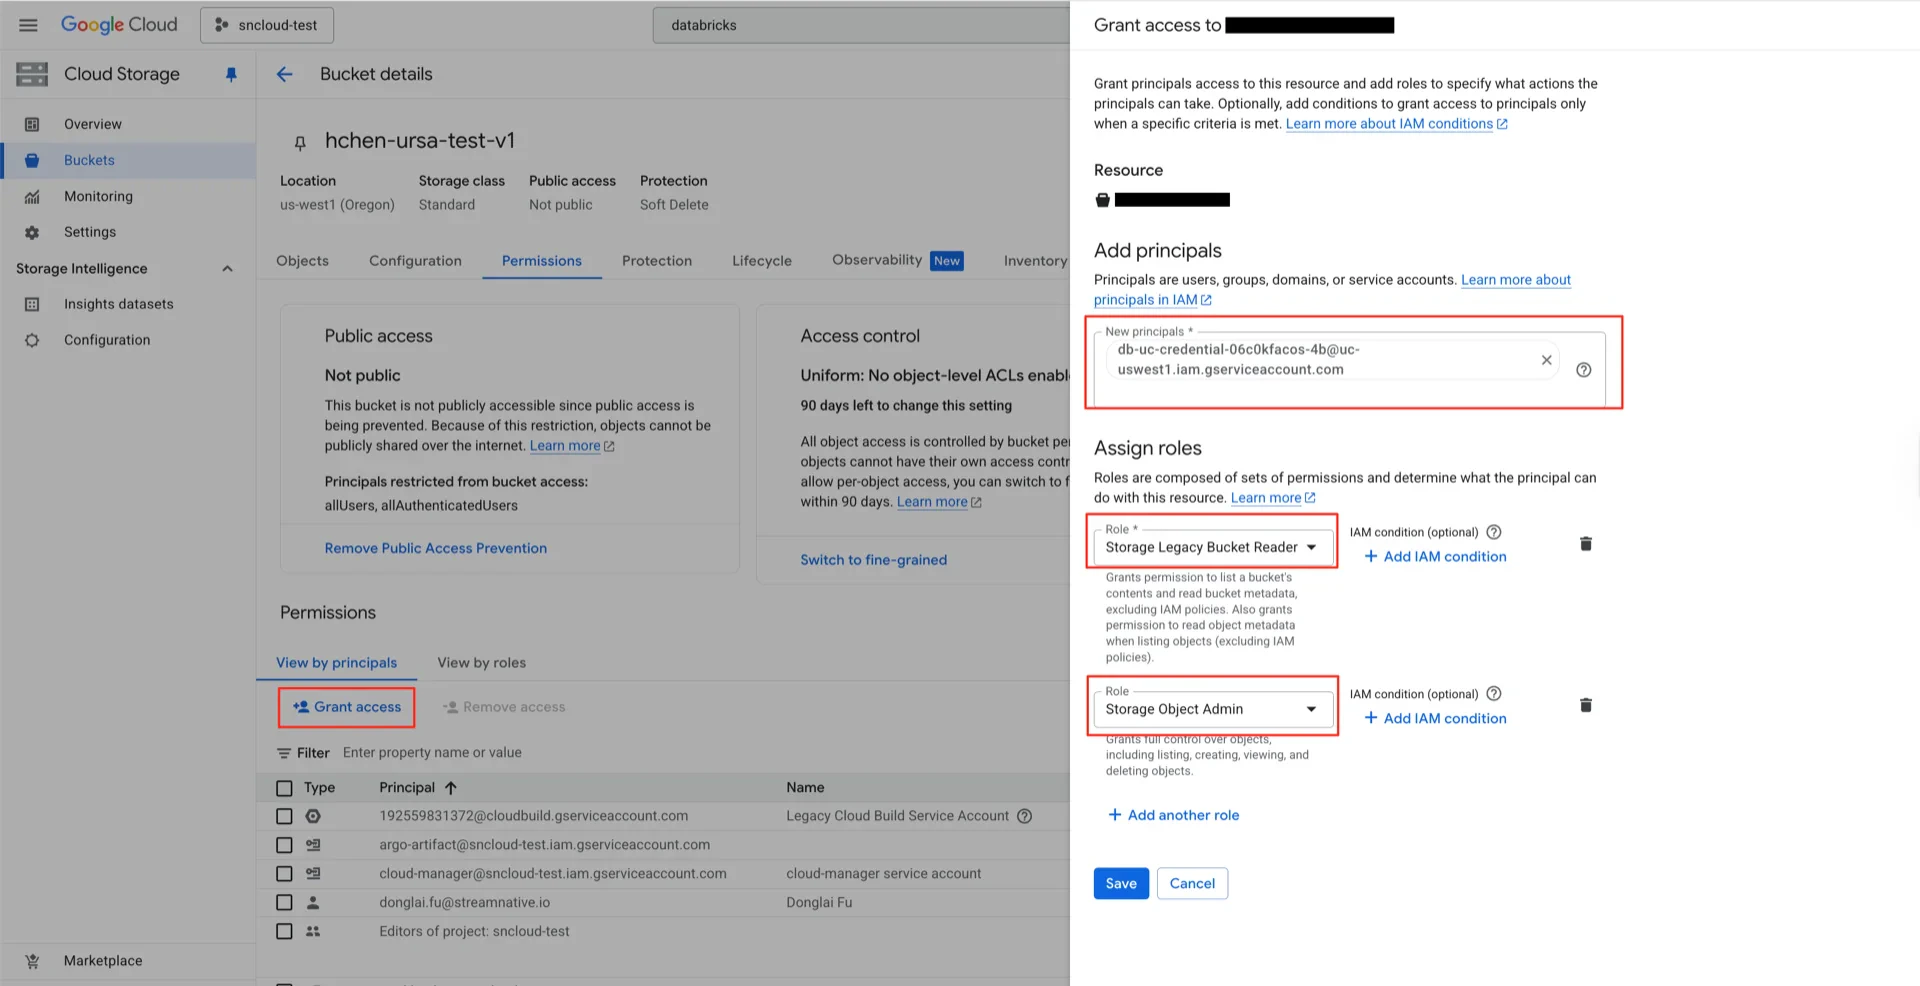
In the GCP console, navigate to the bucket's **Permissions** tab and click **Grant access**.
## 3. Grant GCS Permissions to the Service Account
In the GCP console, navigate to the bucket's **Permissions** tab and click **Grant access**.
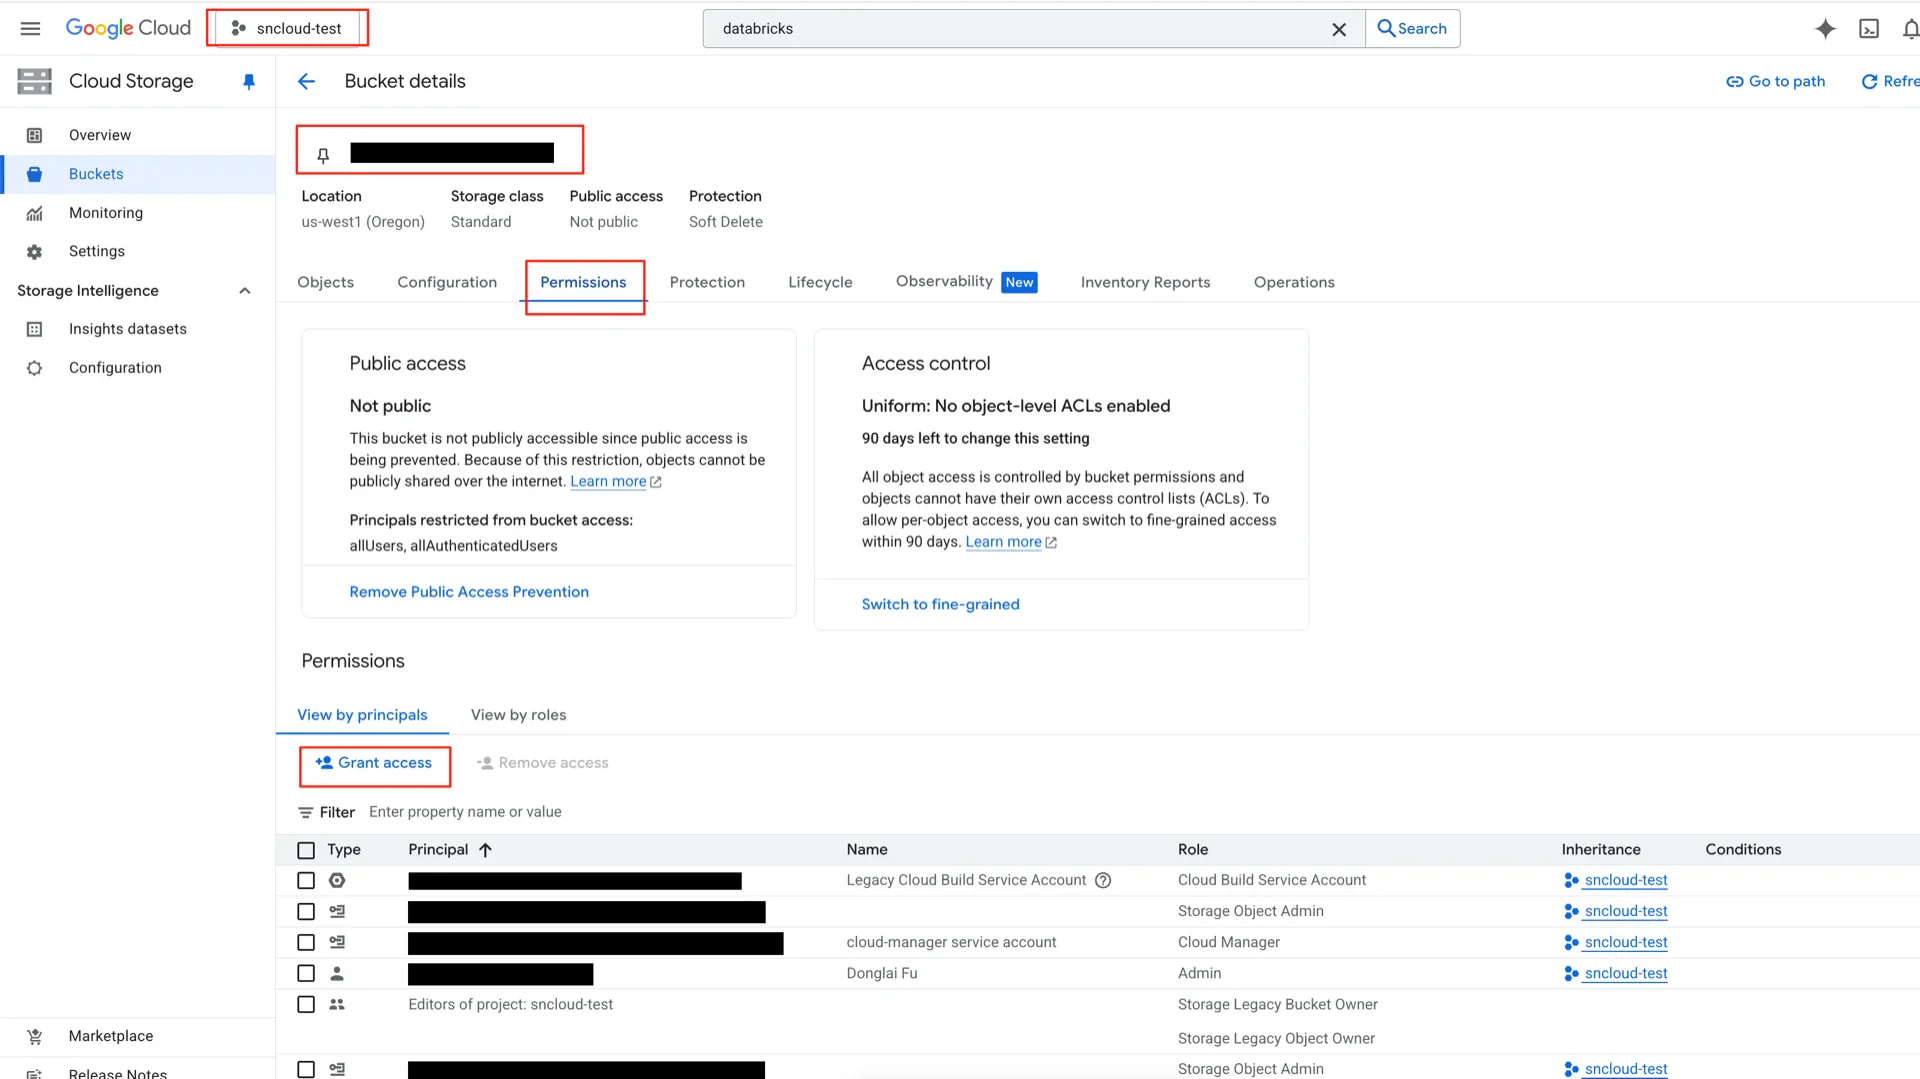 Grant the following roles to the service account from step 2:
* **Storage Legacy Bucket Reader**
* **Storage Object Admin**
Grant the following roles to the service account from step 2:
* **Storage Legacy Bucket Reader**
* **Storage Object Admin**
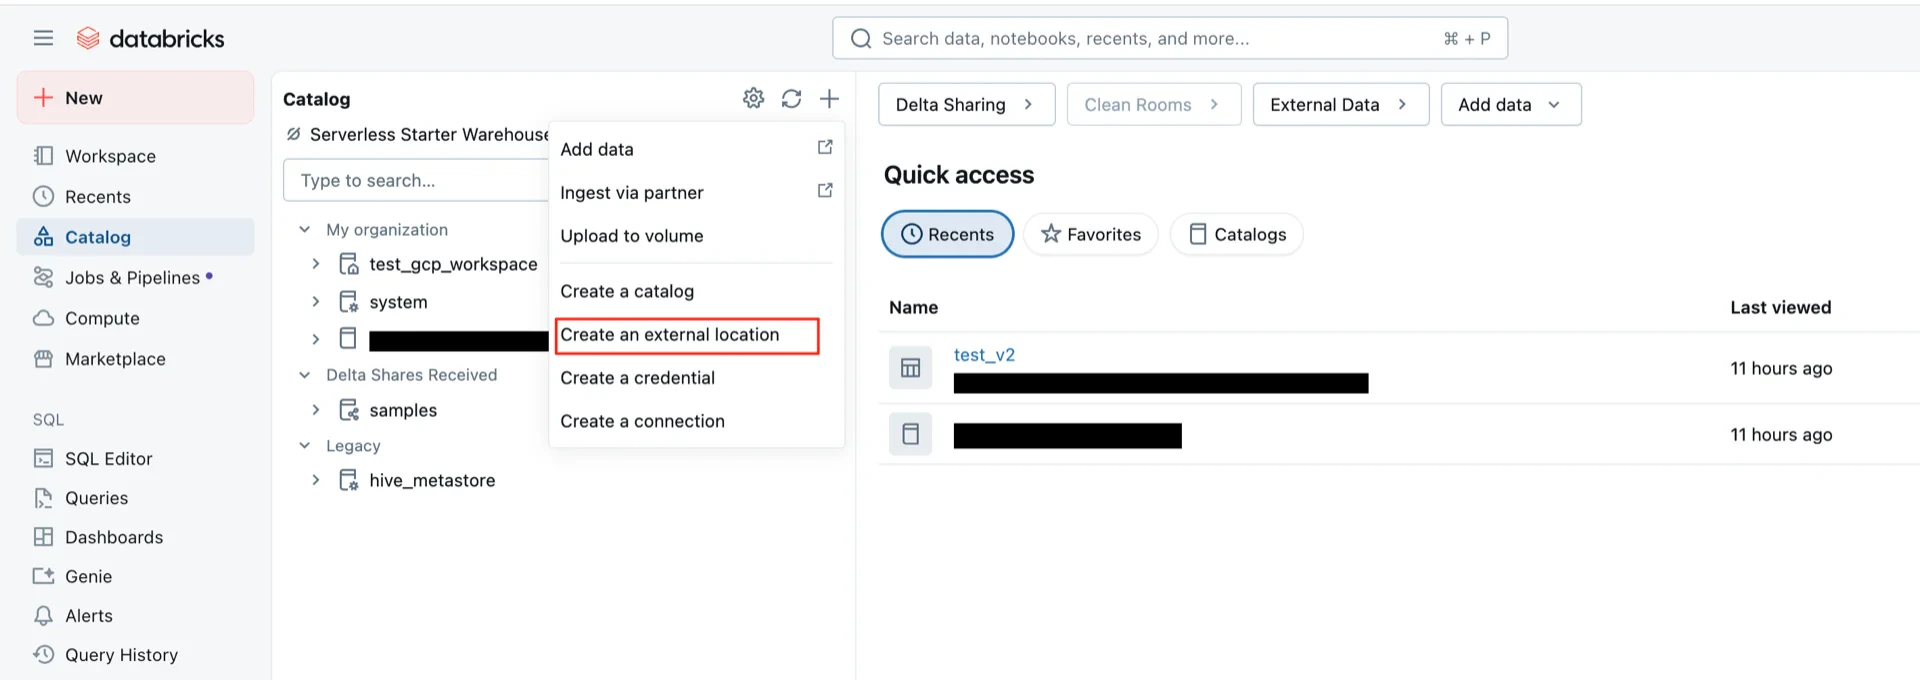
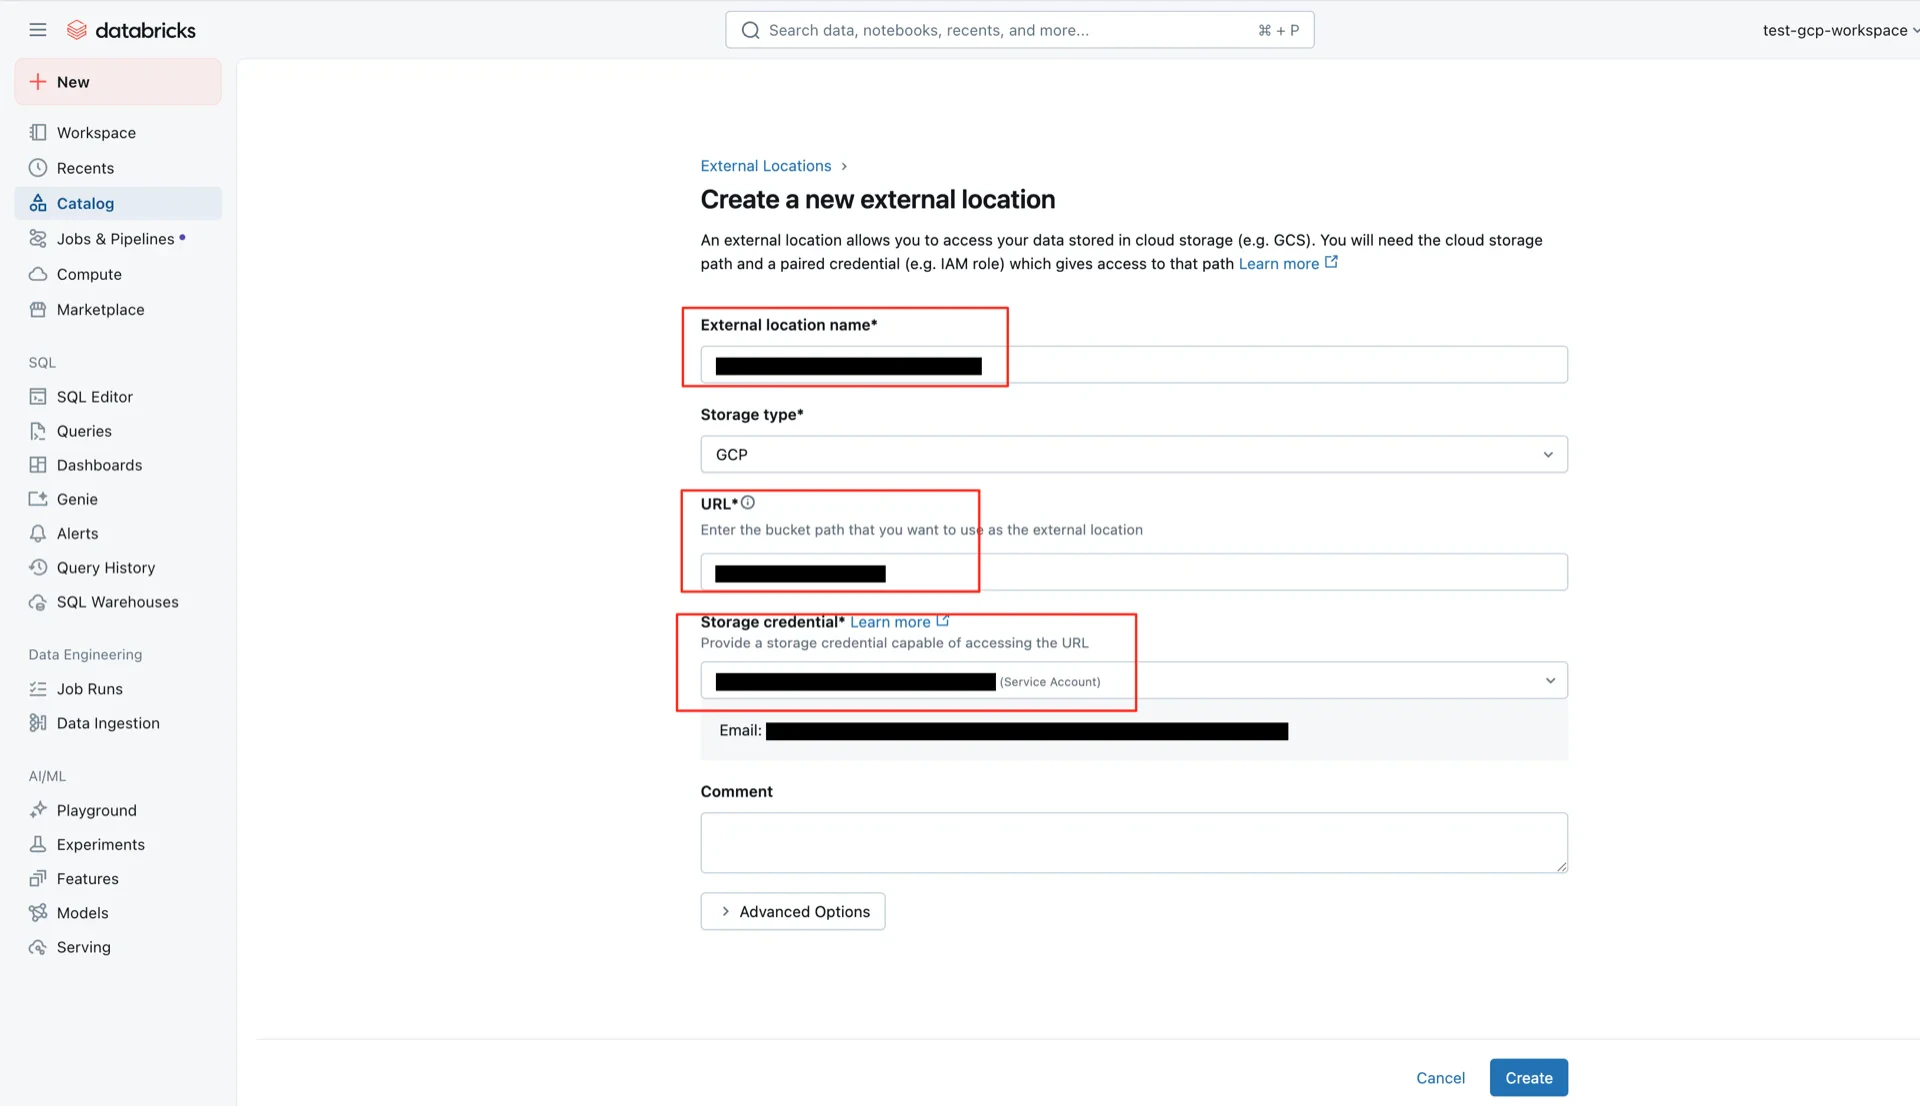
 ## 4. Create the External Location
In the Databricks Catalog console, create an external location with the following settings:
* **External location name:** any name
* **URL:** the GCS bucket path created in step 1
* **Storage credential:** the credential created in step 2
## 4. Create the External Location
In the Databricks Catalog console, create an external location with the following settings:
* **External location name:** any name
* **URL:** the GCS bucket path created in step 1
* **Storage credential:** the credential created in step 2
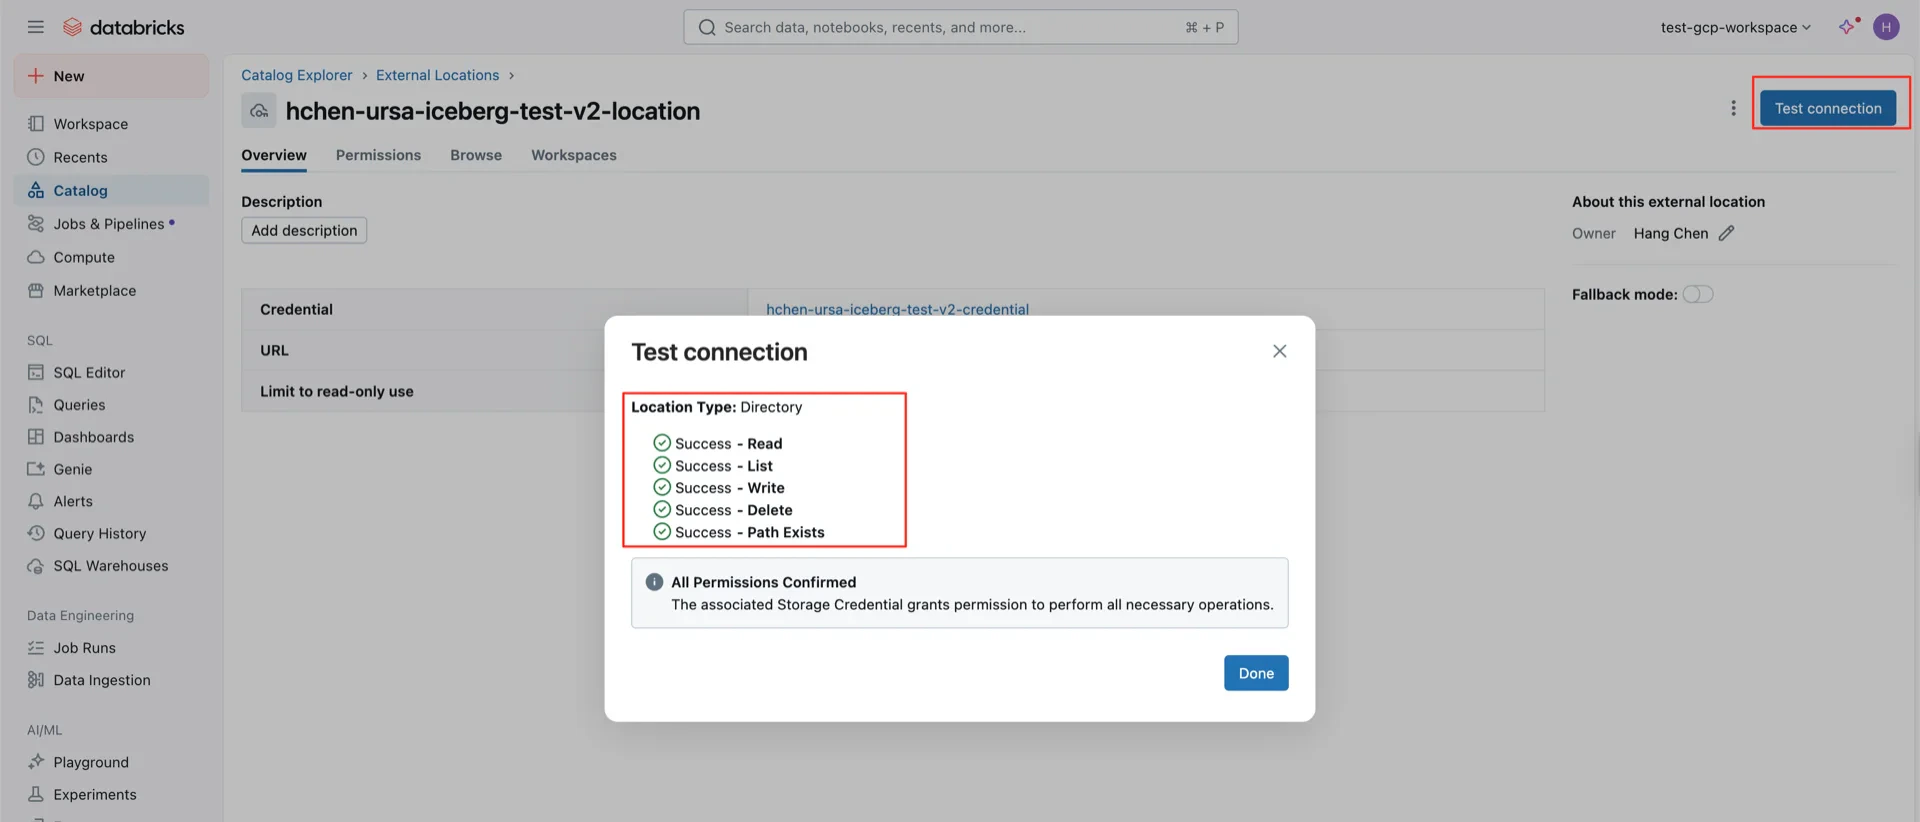
 Use **Test connection** to verify the credential has sufficient permissions.
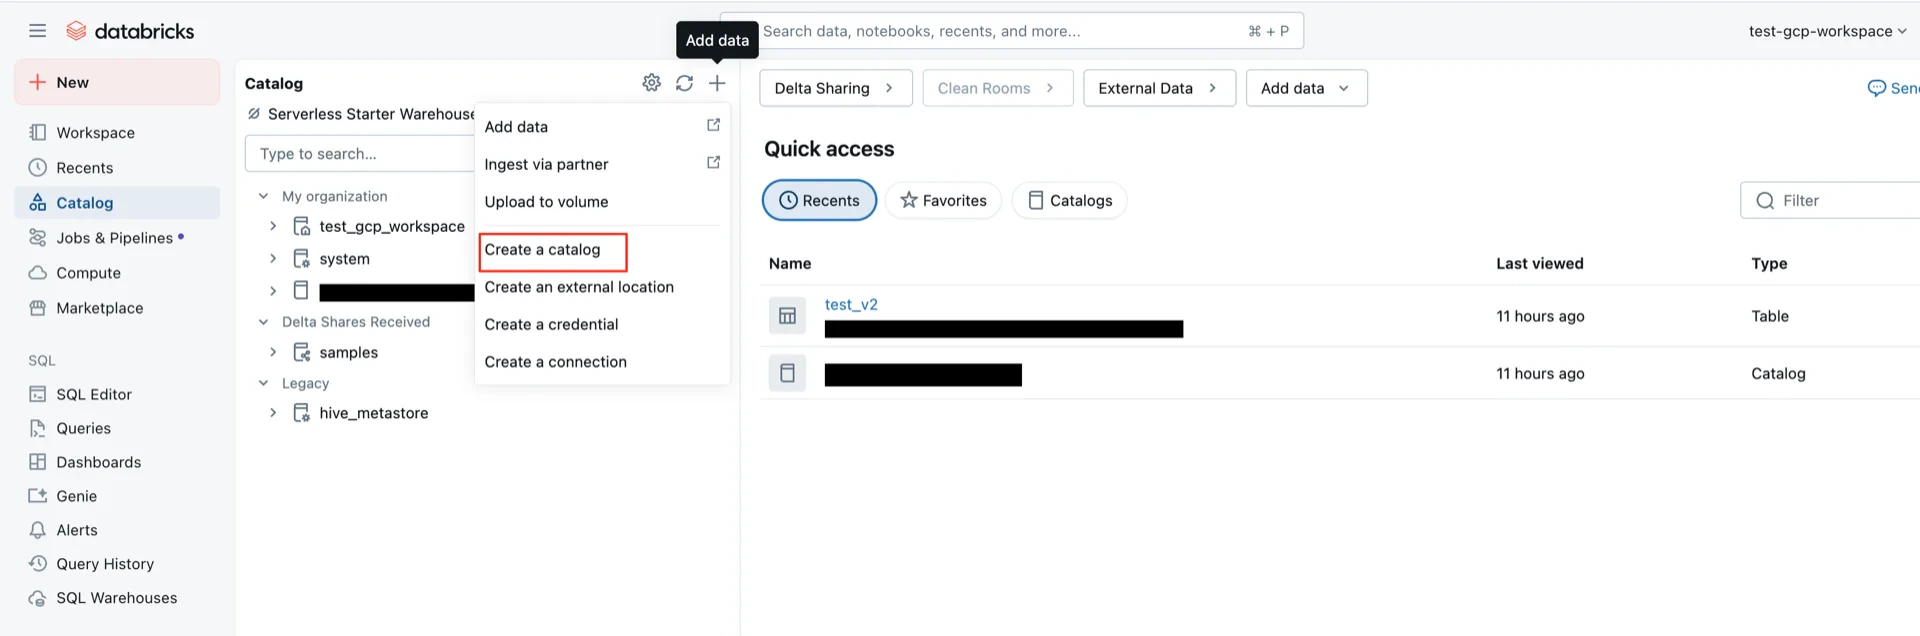
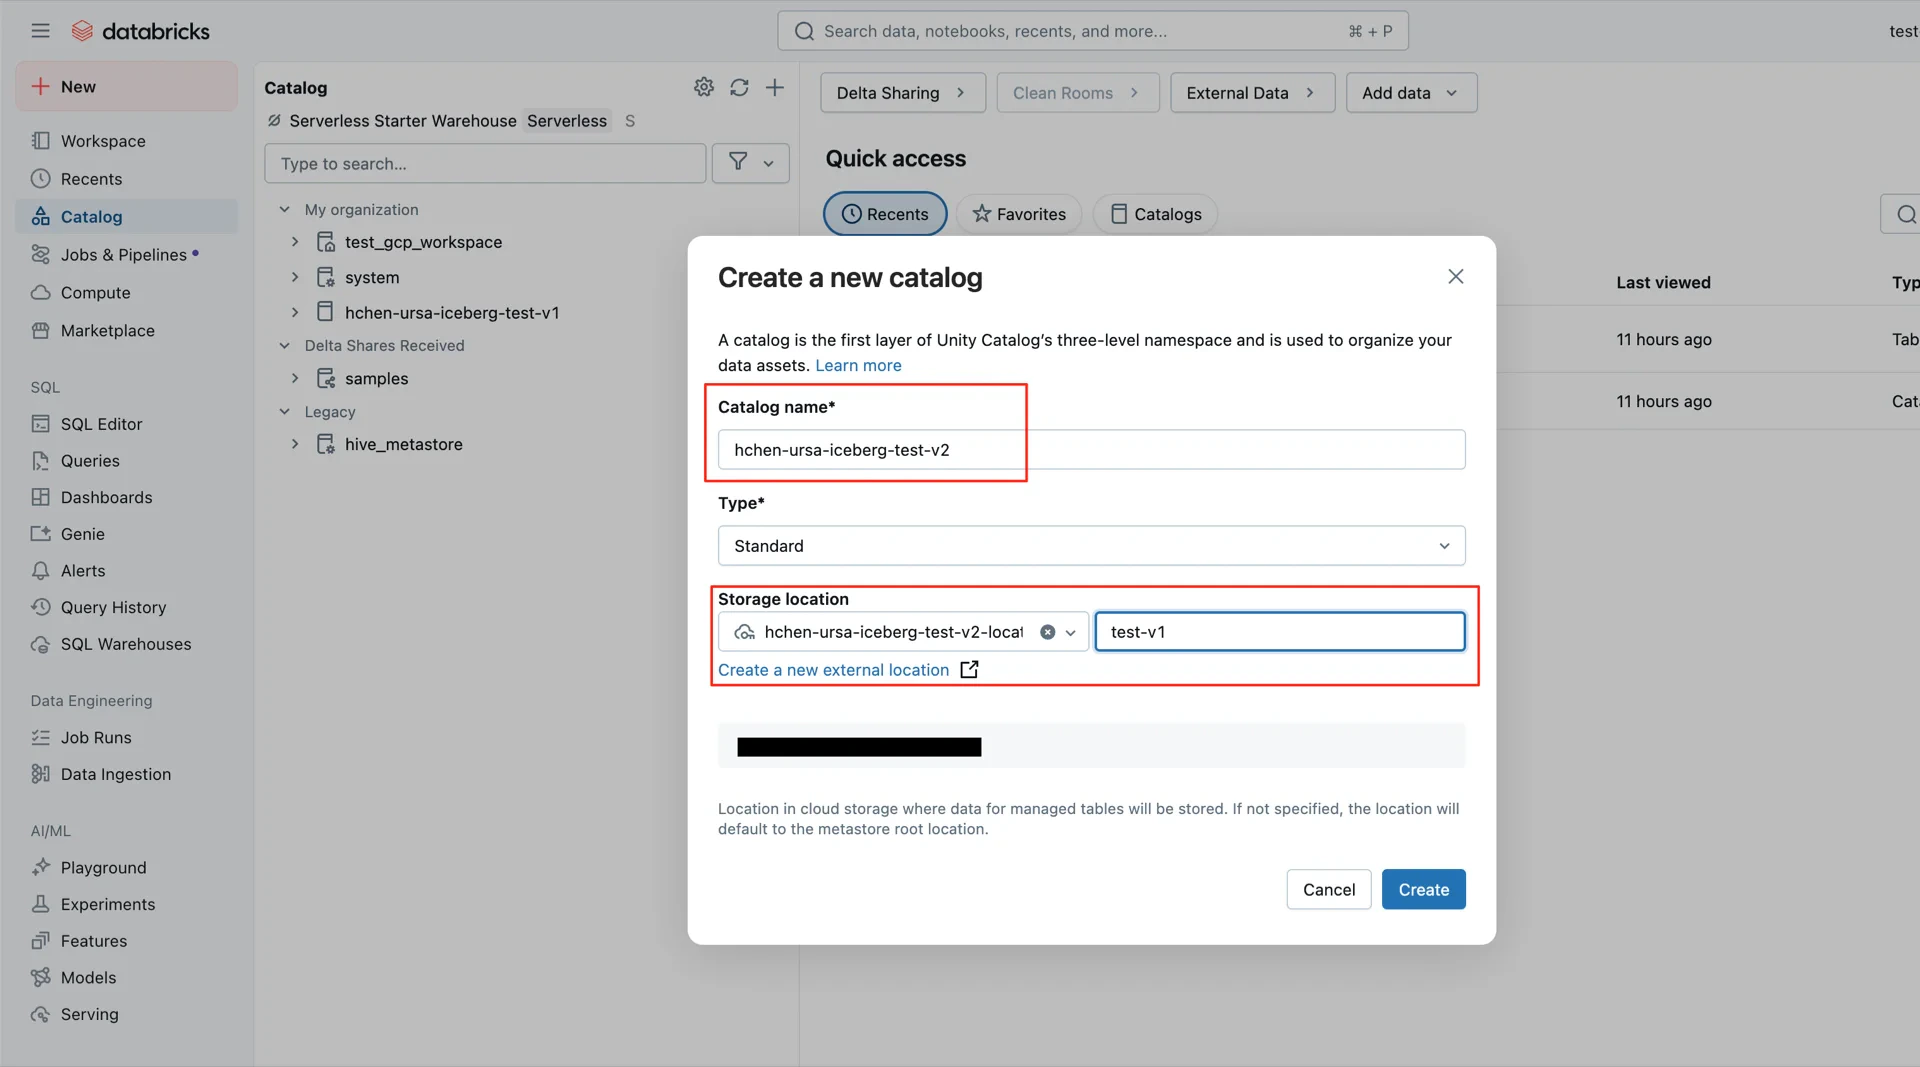
 ## 5. Create the Unity Catalog
Create a new Catalog with:
* **Type:** Standard
* **Storage location:** the external location created in step 4 (a sub-path within this location may be specified)
## 5. Create the Unity Catalog
Create a new Catalog with:
* **Type:** Standard
* **Storage location:** the external location created in step 4 (a sub-path within this location may be specified)
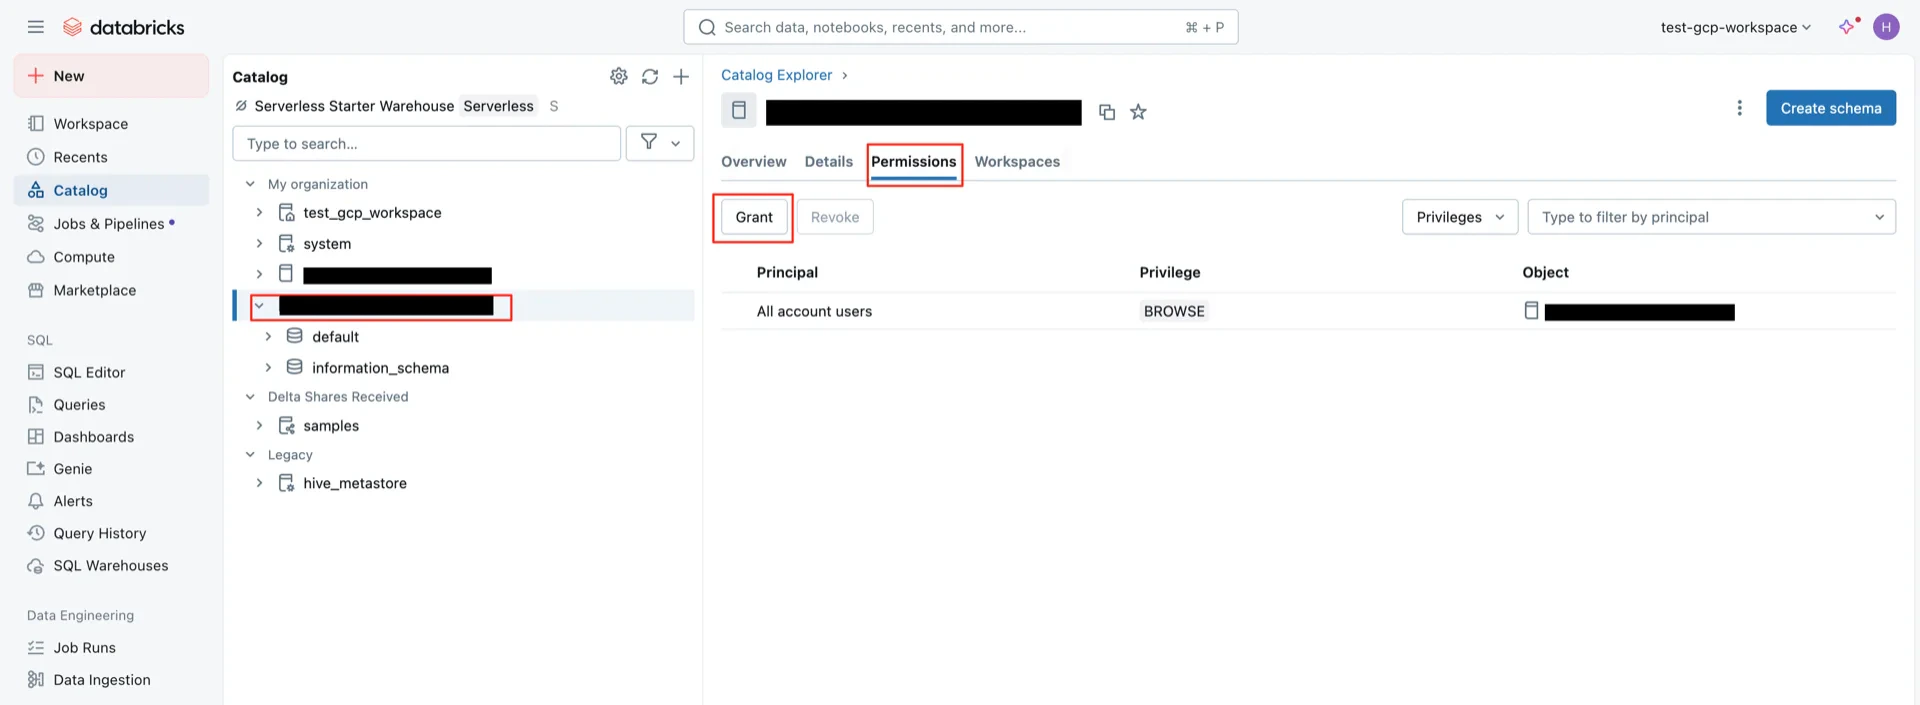
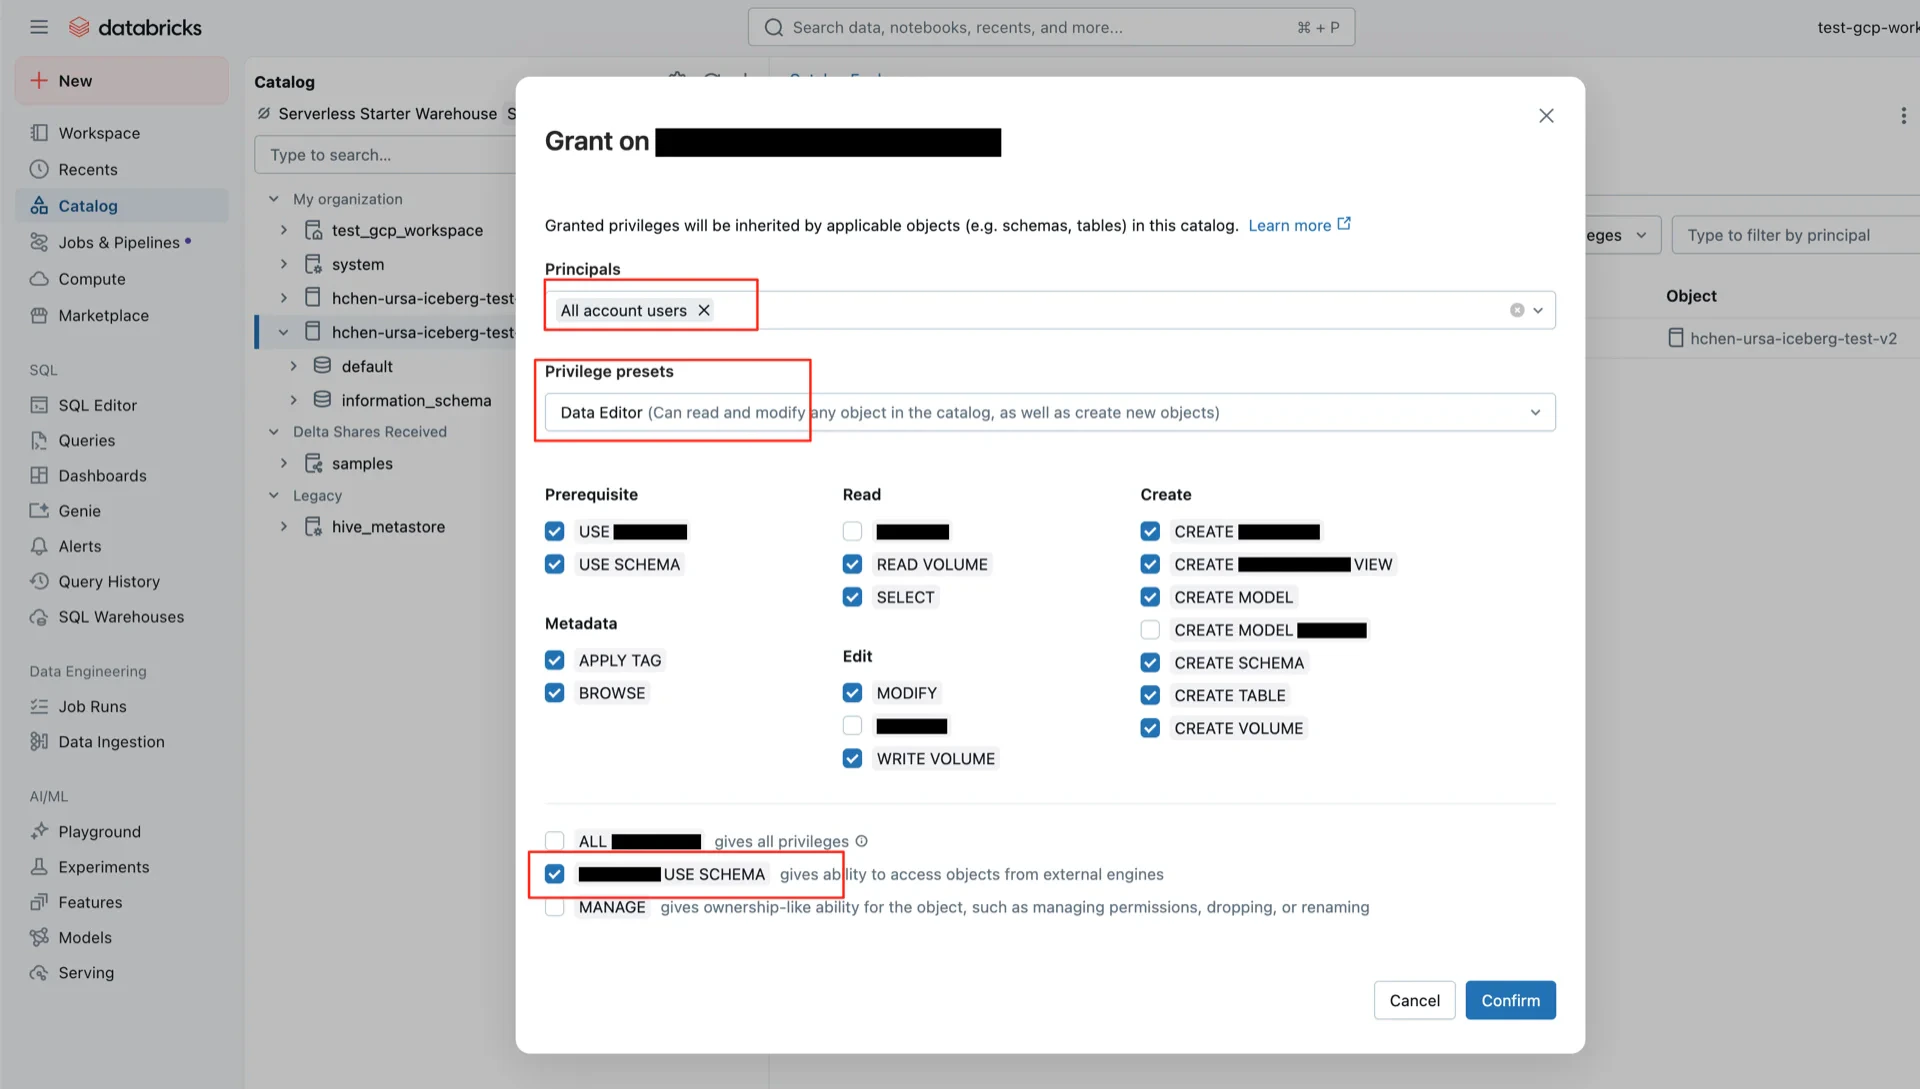
 ## 6. Grant Catalog Permissions
Grant permissions on the catalog. The `EXTERNAL_USE_SCHEMA` permission is **required** for Iceberg Managed Tables in Unity Catalog.
## 6. Grant Catalog Permissions
Grant permissions on the catalog. The `EXTERNAL_USE_SCHEMA` permission is **required** for Iceberg Managed Tables in Unity Catalog.
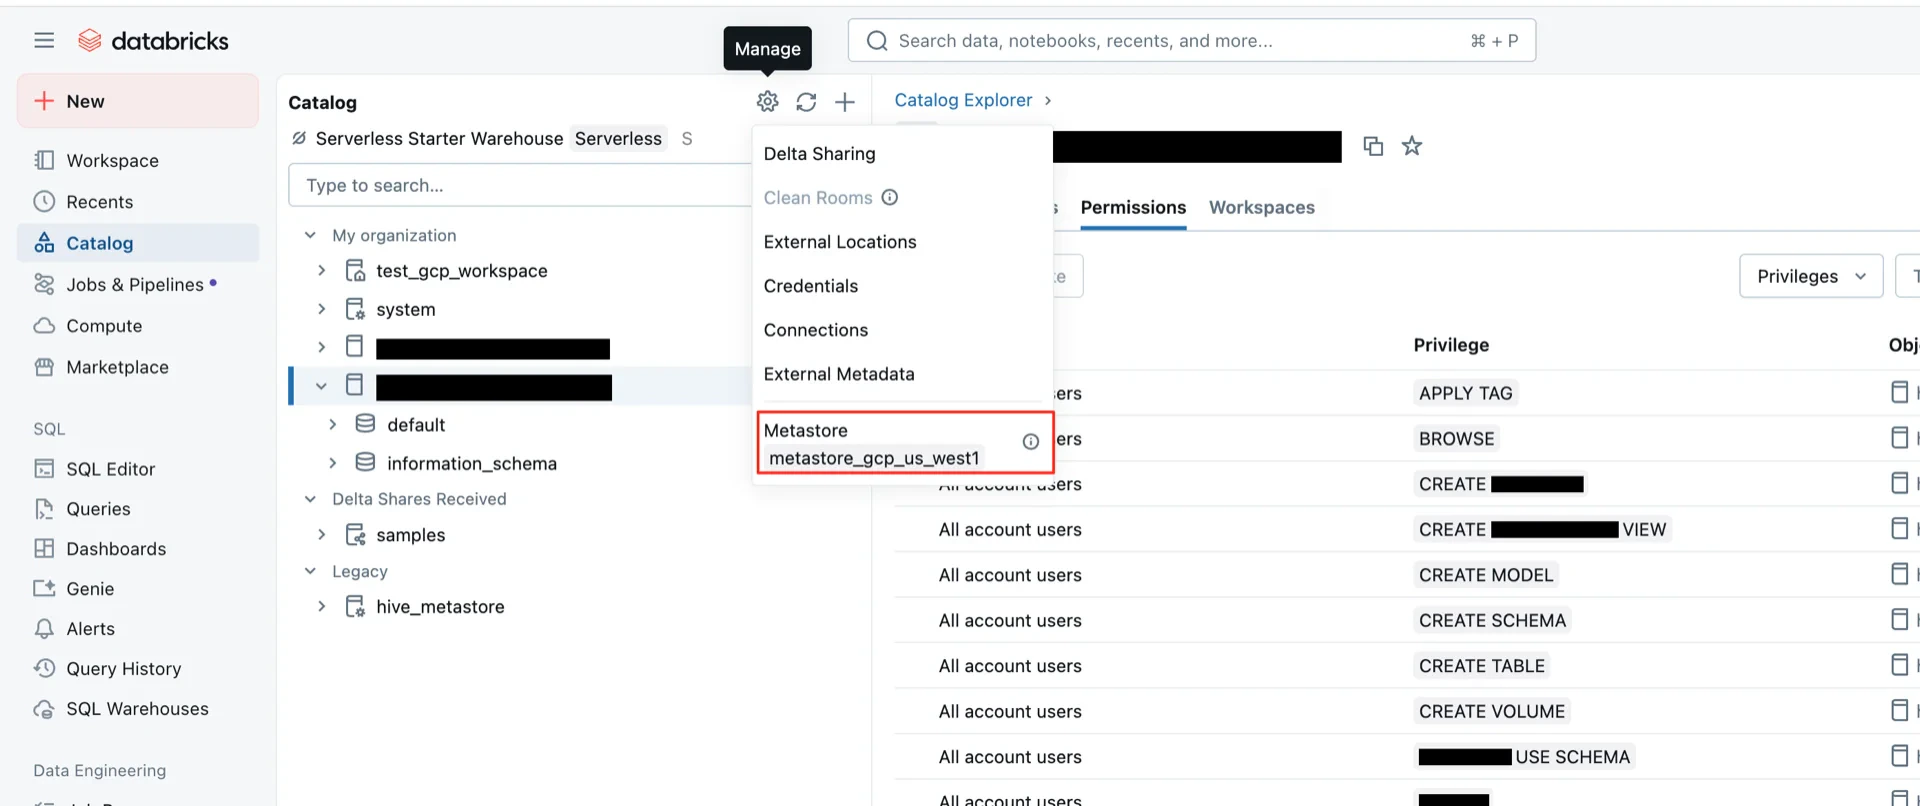
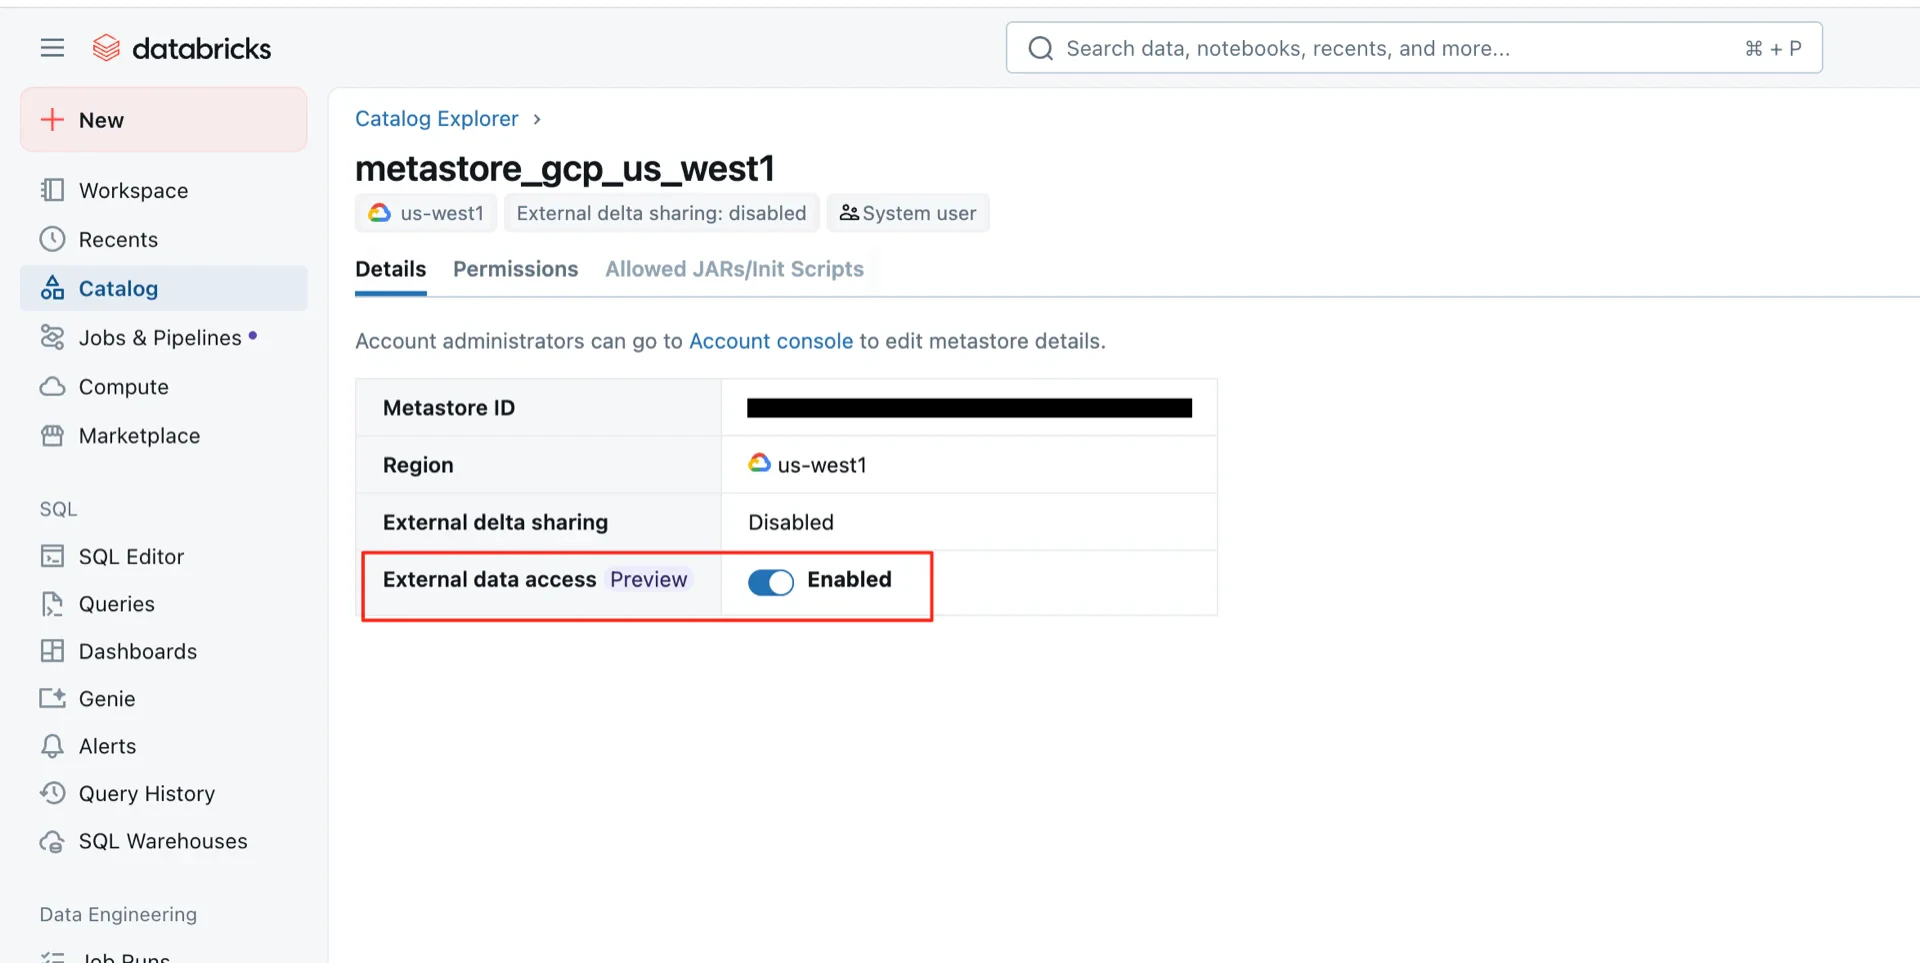
 ## 7. Enable External Data Access on the Metastore
> **Note:** This action requires **Databricks Account Admin** privileges; without them, the **Metastore** entry is not visible.
Enable **External data access** on the metastore. This step is **required** for Unity Catalog Iceberg Managed Tables.
## 7. Enable External Data Access on the Metastore
> **Note:** This action requires **Databricks Account Admin** privileges; without them, the **Metastore** entry is not visible.
Enable **External data access** on the metastore. This step is **required** for Unity Catalog Iceberg Managed Tables.
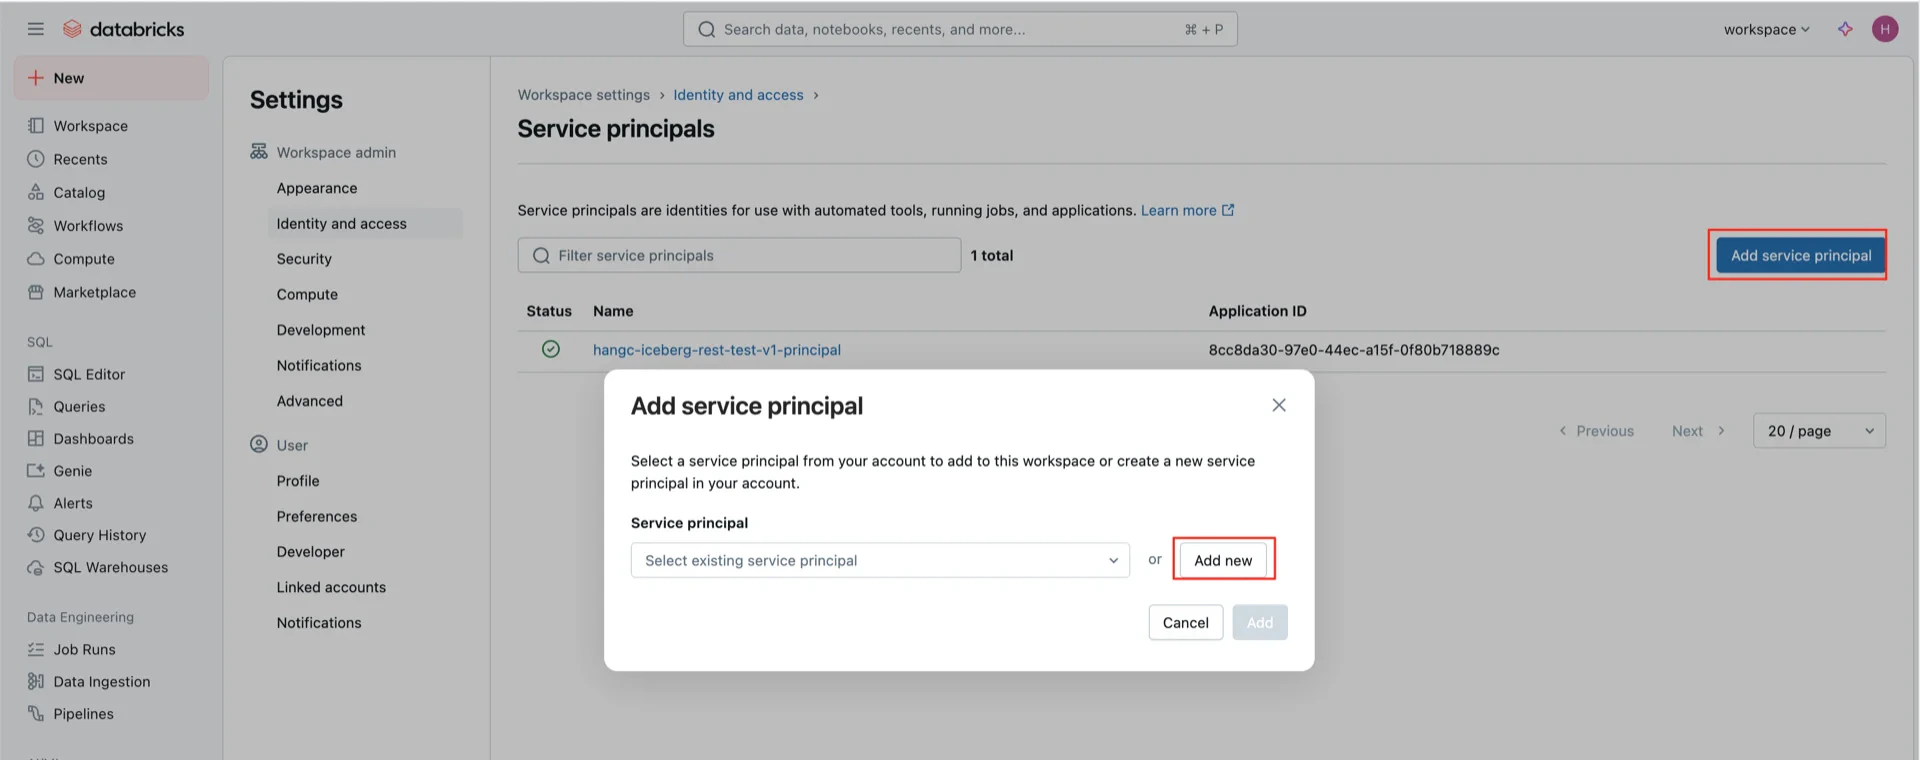
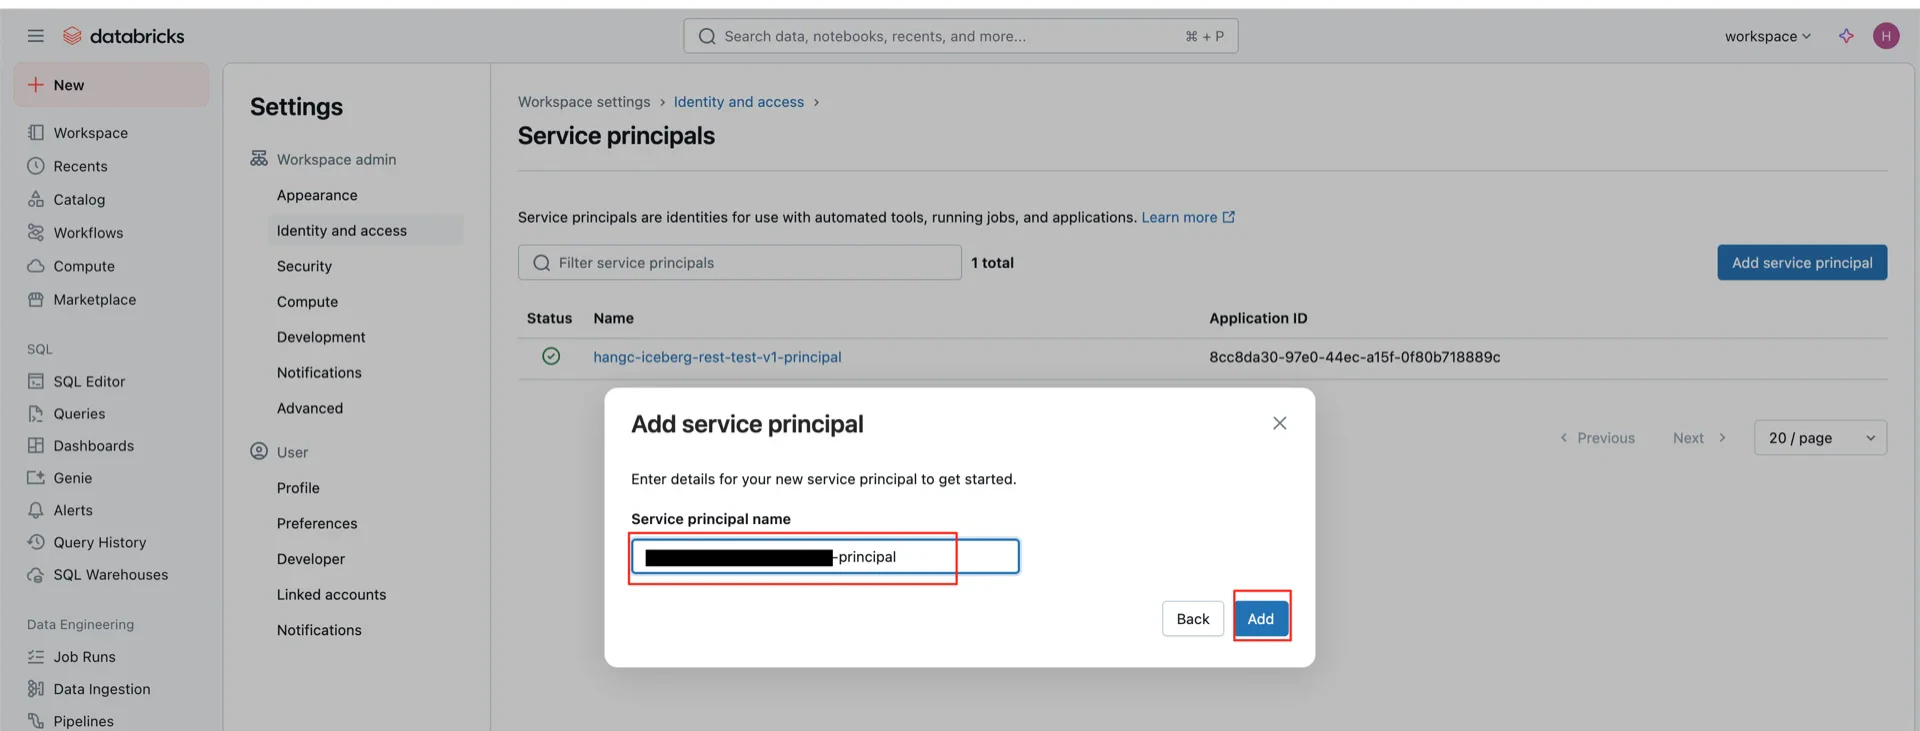
 ## 8. Create OAuth2 Credentials
Create an OAuth2 service principal that StreamNative Ursa will use to authenticate.
## 8. Create OAuth2 Credentials
Create an OAuth2 service principal that StreamNative Ursa will use to authenticate.
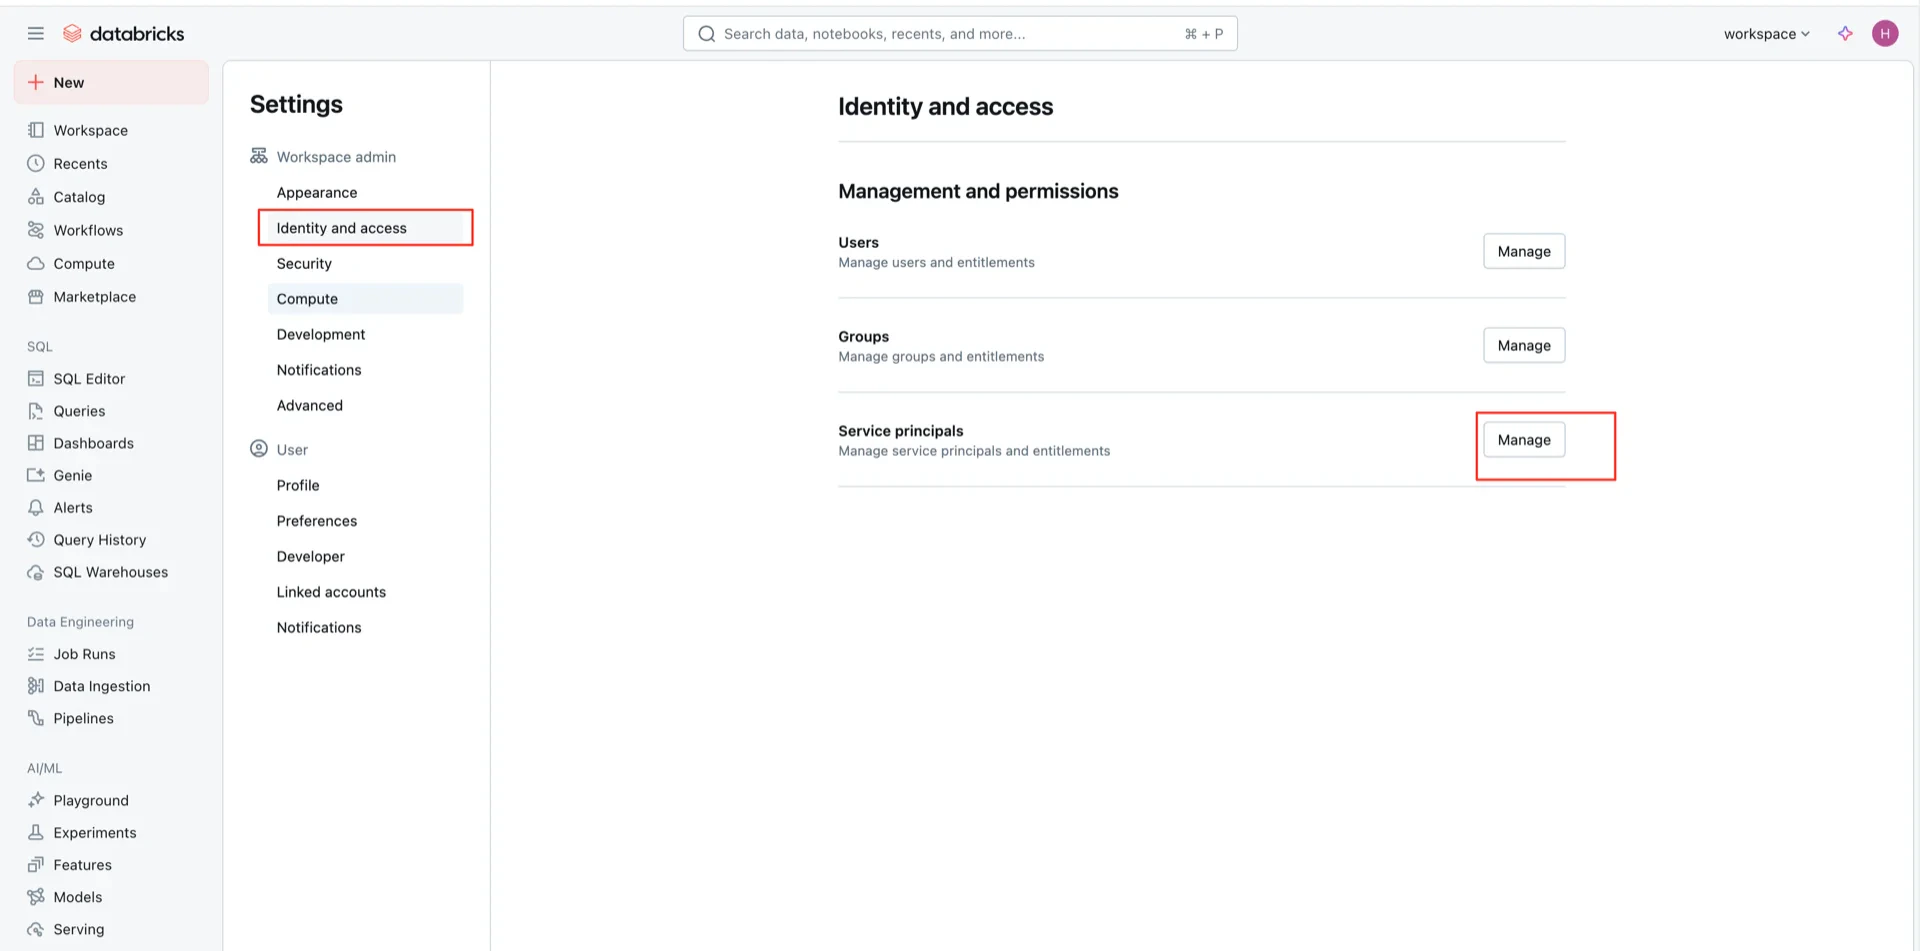
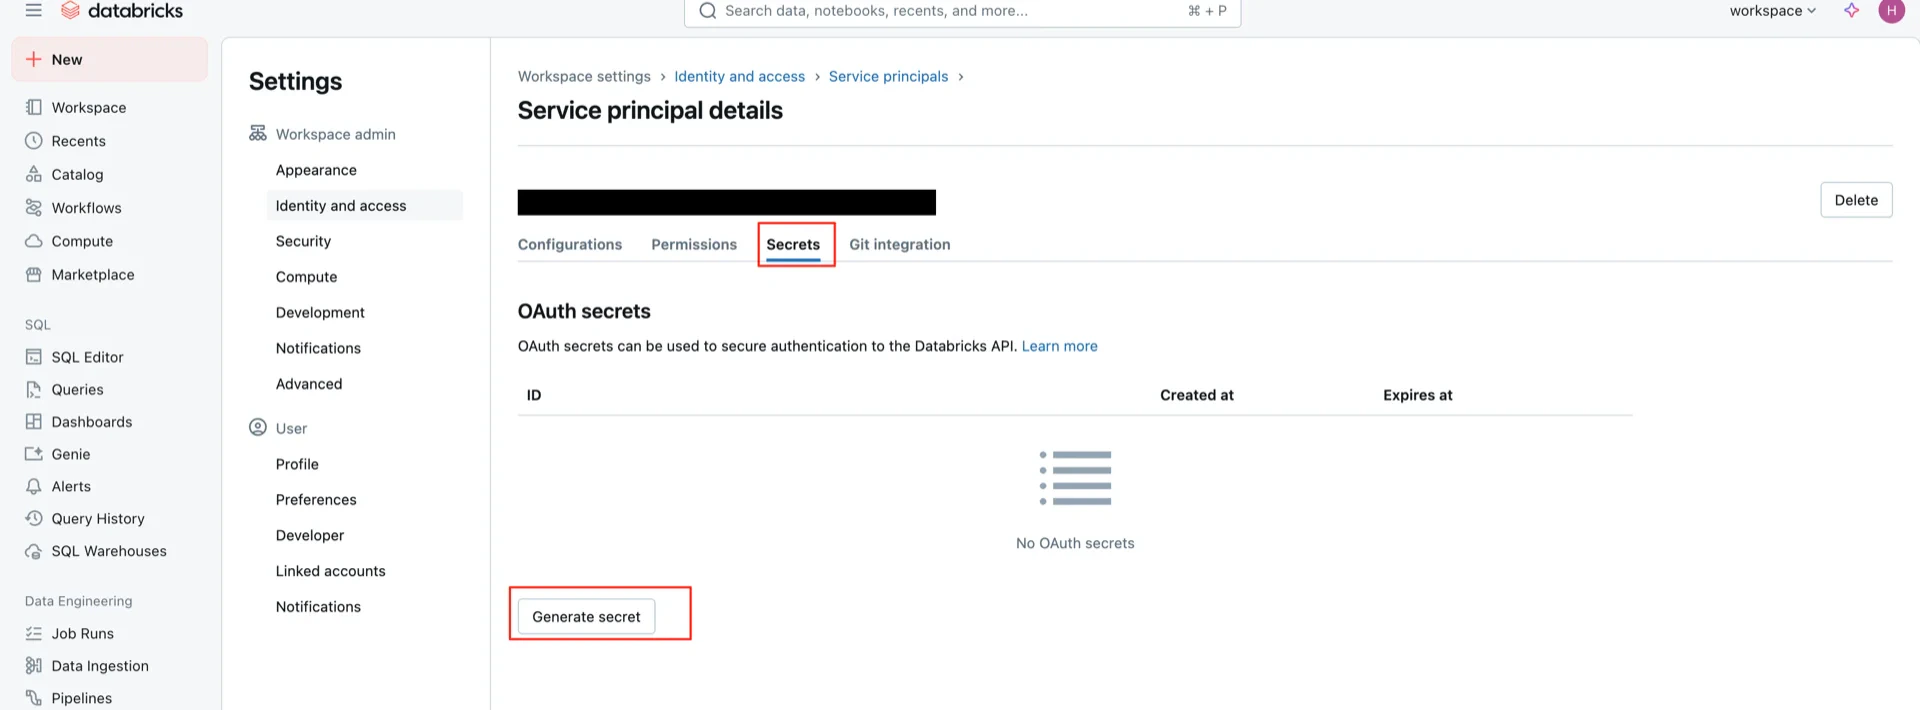
 Generate a secret for the principal and record both the **Client ID** and **Client Secret**.
 ## Catalog Information Summary
When the steps above are complete, collect the following values for the StreamNative Ursa compaction service:
| Value | Description |
| ---------- | ------------------------------------------------------------------------------------------------------------ |
| URI | Databricks workspace URL (e.g., `https://.gcp.databricks.com/api/2.1/unity-catalog/iceberg-rest`) |
| Warehouse | The Unity Catalog name created in step 5 |
| Credential | `:` from step 8 |
For the next steps, see [Configure Lakehouse Catalogs](../../../configure-lakehouse-catalogs).
## Catalog Information Summary
When the steps above are complete, collect the following values for the StreamNative Ursa compaction service:
| Value | Description |
| ---------- | ------------------------------------------------------------------------------------------------------------ |
| URI | Databricks workspace URL (e.g., `https://.gcp.databricks.com/api/2.1/unity-catalog/iceberg-rest`) |
| Warehouse | The Unity Catalog name created in step 5 |
| Credential | `:` from step 8 |
For the next steps, see [Configure Lakehouse Catalogs](../../../configure-lakehouse-catalogs).