> ## Documentation Index
> Fetch the complete documentation index at: https://docs.streamnative.io/llms.txt
> Use this file to discover all available pages before exploring further.
# Manage Service Accounts for StreamNative Cloud
The sections below provide detailed instructions on managing service accounts (SAs) in StreamNative Cloud, including creating and managing service accounts using StreamNative Cloud Console, `snctl`, and StreamNative Terraform Provider.
## Create a service account
When creating a service account, you can optionally enable **Super Admin** access. A service account with **Super Admin** privileges has full management capabilities over all resources within the organization. By default, service accounts are created without **Super Admin** access.
Service accounts cannot be edited after creation. If you need a service account to have Super Admin access, make sure to enable it during the initial creation.
You can create a service account using the following methods:
1. In the upper-right corner of the StreamNative Cloud Console, click your Profile and select **Accounts & Accesses**.
2. On the left navigation pane, click **Service Accounts**.
3. On the **Service Account** page, click **+ New Service Account**.
4. On the **Create Service Account** dialog, enter a name for the service account.
5. Click **Create**.
6. Click the `Access` button to grant roles to the service account. For details on available roles, see [Predefined Role](/cloud/security/access/rbac/manage-rbac-roles)
After you have created a service account, you can check the details of the service account.
The **Service Accounts** page displays all the created service accounts.
The table below describes the details that you can view about the service account.
| Item | Description |
| ----------------------- | ------------------------------------------------------------------------------------------------ |
| Name | The name of the service account. |
| Principal Name | The principal name of the service account used for identification during authentication. |
| Active API tokens | The number of active API keys for the service account. |
| Create Time | The time when the service account was created. |
| ServiceAccount Bindings | The list of service account bindings. |
| Status | The status of the service account. |
| Admin | Whether the service account has **Super Admin** enabled or not. |
| Access | Click to manage the roles bound to this service account (add new roles or remove existing ones). |
You can create a service account using the [`snctl` CLI](/tools/cli/snctl/snctl-overview). Please make sure that you have installed and configured the `snctl` CLI.
Create the service account.
```bash theme={null}
snctl create serviceaccount ${service_account_name}
```
After creating a service account, you must bind a role to it to grant permissions. For use all predefined roles, see [Predefined Role](/cloud/security/access/rbac/manage-rbac-roles). The following example shows how to bind the `admin` role.
Make sure that the `${service_account_name}` is the one you created in the previous step. The `${rolebinding_name}` should be a unique identifier for the role binding within your organization. For ease of reference, it is recommended to use the format `${service_account_name}_${role}` as the identifier.
```
snctl create rolebinding ${rolebinding_name} \
--clusterrole admin \
--serviceaccount ${service_account_name}
```
After you have created a service account, you need to:
1. Grant your service account with necessary permissions. See [Control Access to StreamNative Cloud](/cloud/security/access/access-control-overview).
2. Configure your applications to use the service account to authenticate to StreamNative Cloud:
* [Use OAuth to Authenticate to StreamNative Cloud](/cloud/security/authentication/service-accounts/use-oauth/oauth-overview)
* [Use API Keys to Authenticate to StreamNative Cloud](/cloud/security/authentication/service-accounts/use-api-keys/api-keys-overview)
## Delete a service account
To delete a service account, follow these steps.
1. On the left navigation pane, click **Service Accounts**.
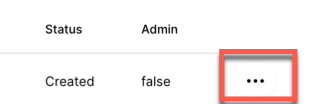
2. Click the ellipsis at the end of the row of the service account you want to delete, and then select **Delete**.
 3. On the dialog box asking, *Are you sure you want to delete this service account?*, click **Confirm**.