> ## Documentation Index
> Fetch the complete documentation index at: https://docs.streamnative.io/llms.txt
> Use this file to discover all available pages before exploring further.
# Unity Catalog for Delta Lake on GCP
This guide describes how to prepare a Databricks Unity Catalog for use with StreamNative Ursa as a Delta Lake catalog on Google Cloud Platform (GCP).
## Prerequisites
* A GCP project with permissions to create GCS buckets and IAM roles
* A Databricks account with permissions to create workspaces
## 1. Create a Databricks Workspace
> Skip this step if you already have the Databricks Workspace in GCP
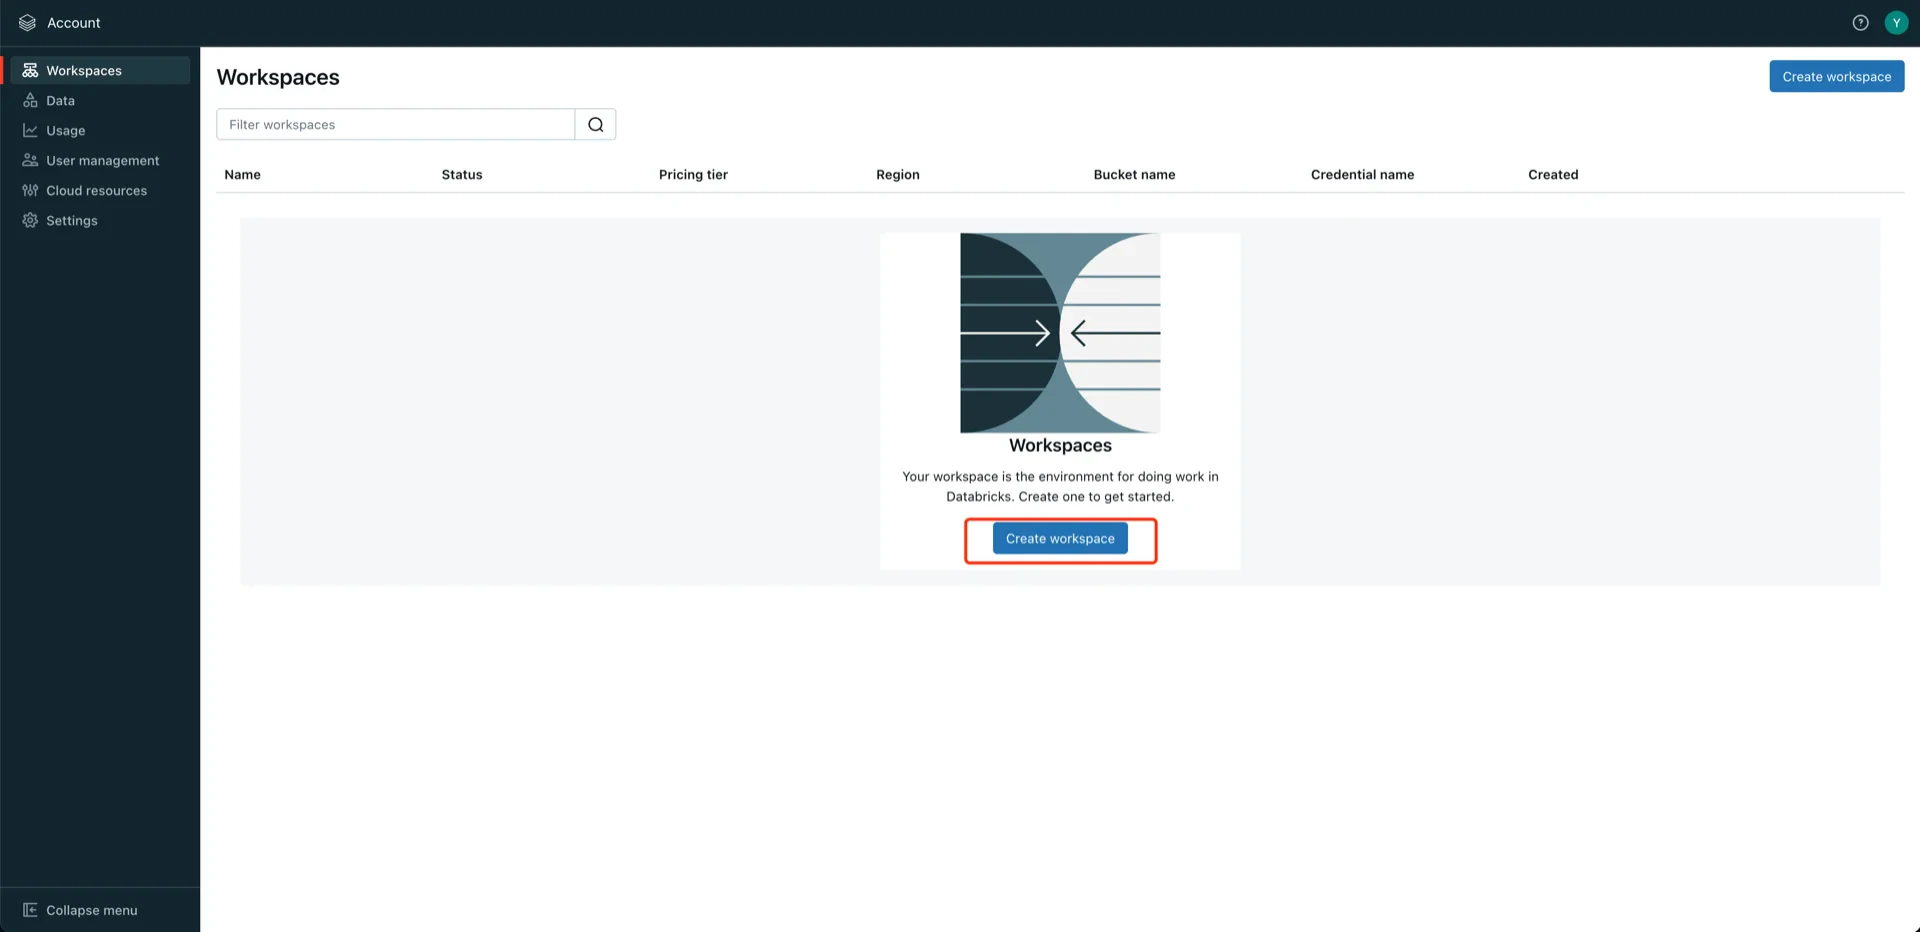
In the GCP Databricks account console, click **Create workspace**.
 Enter the workspace name, choose the region, and provide your GCP project ID.
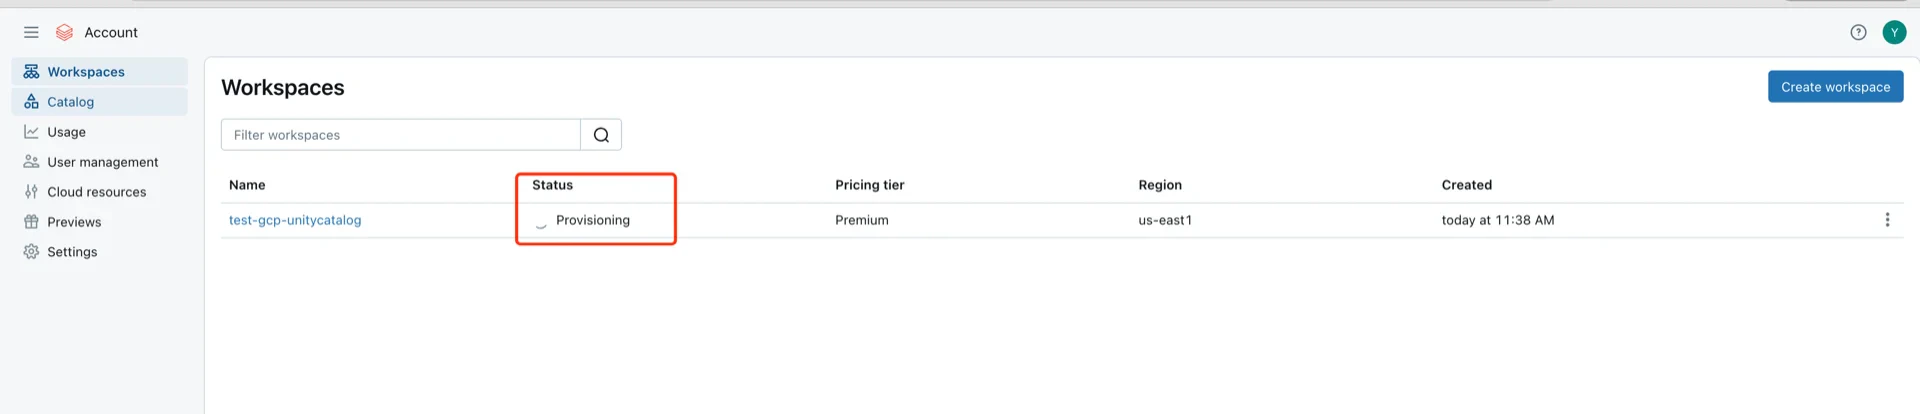
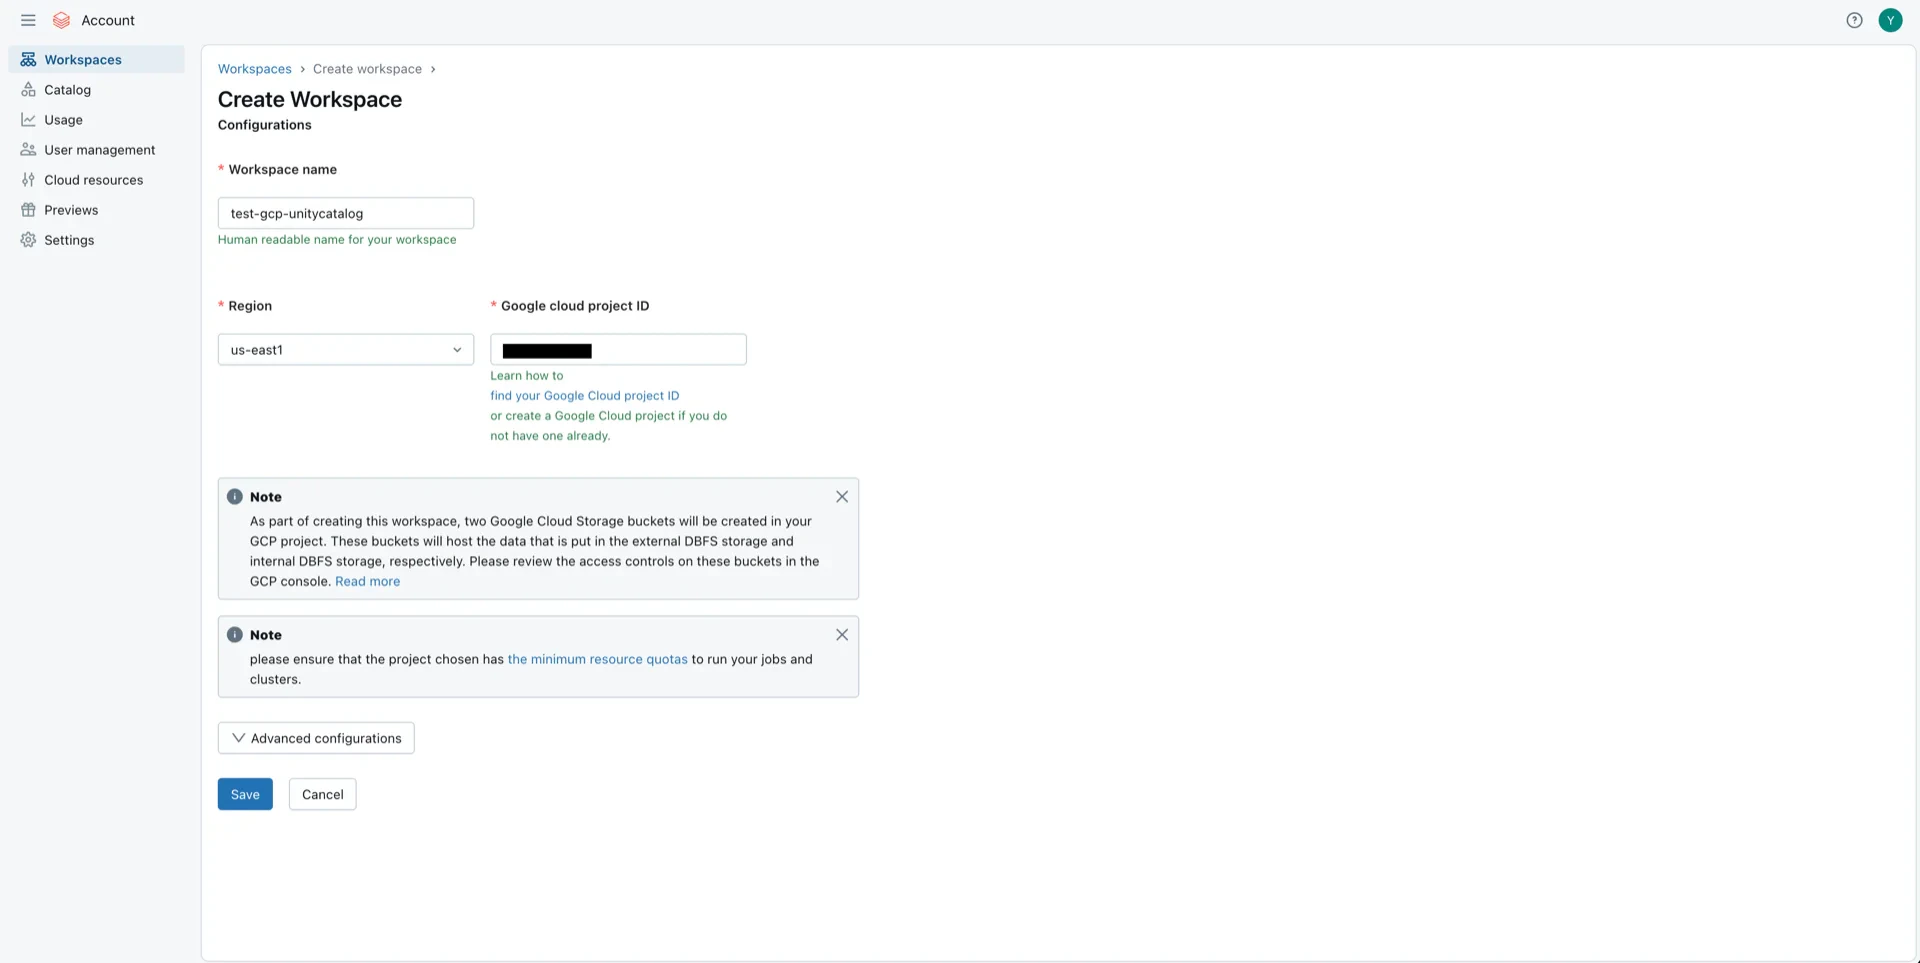 Click **Save**. The workspace status shows **Provisioning** while initialization is in progress.
 When the status changes to **Running**, the workspace is ready.
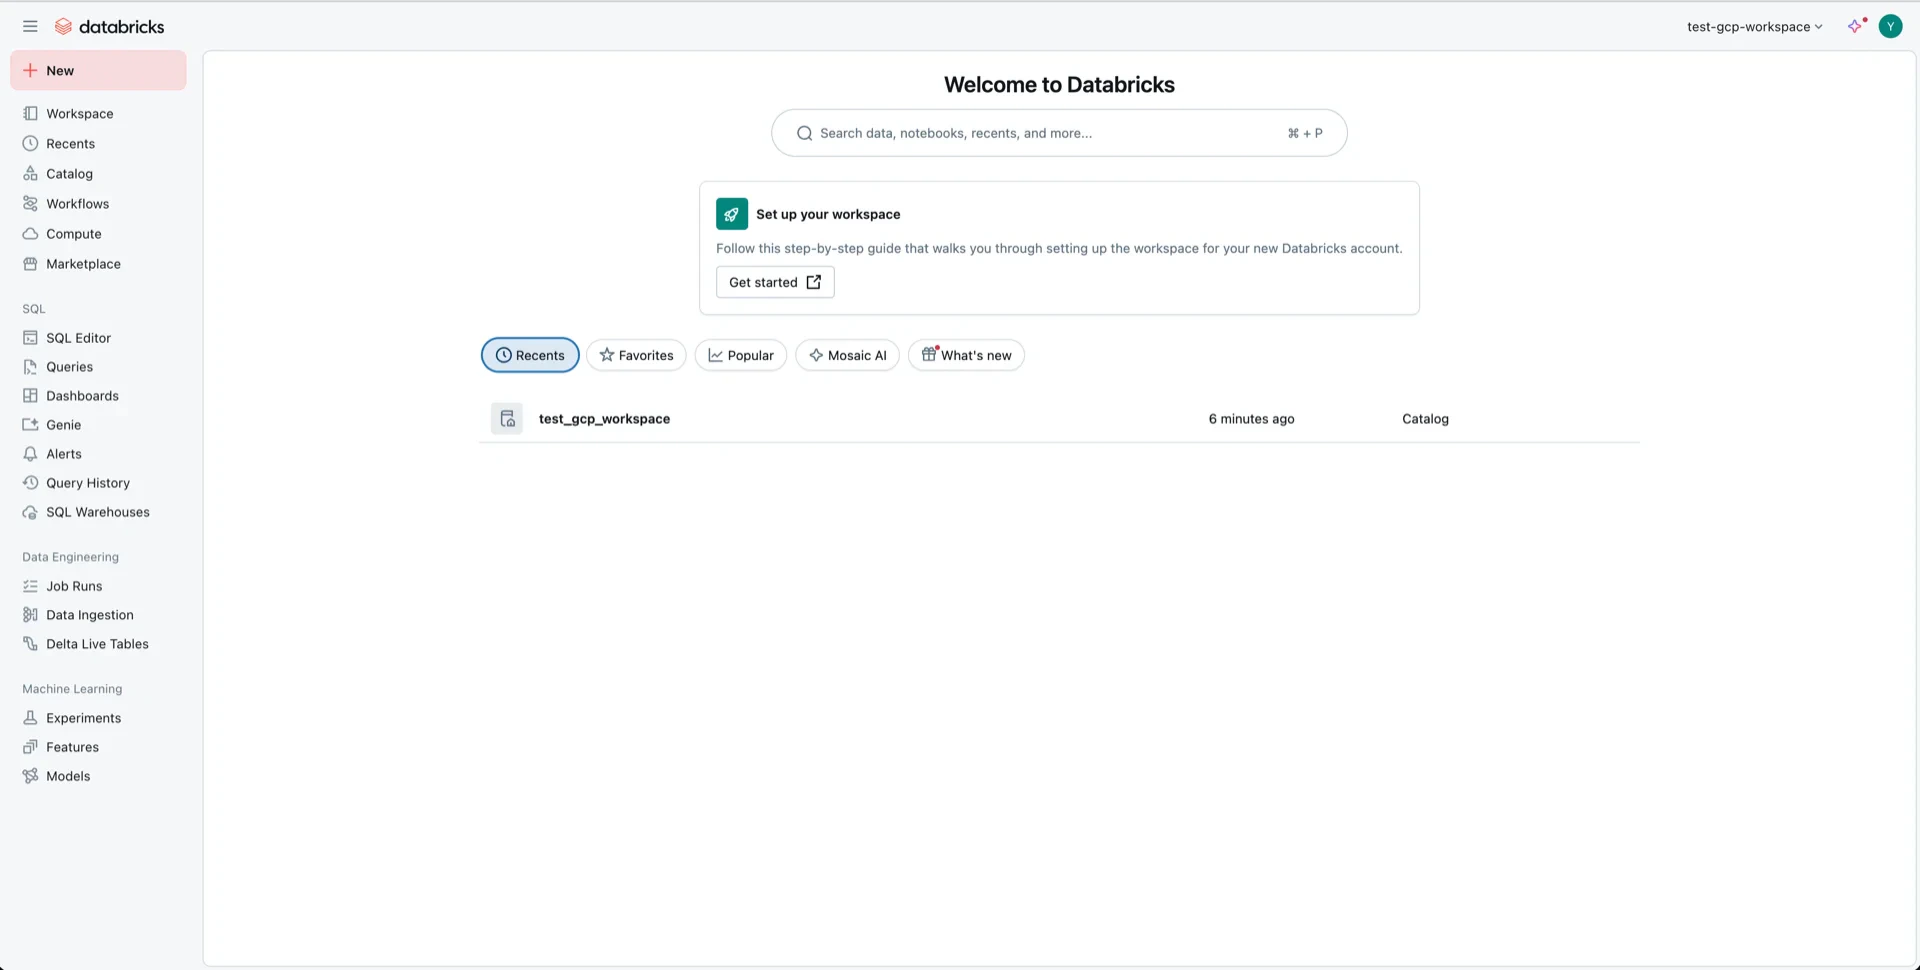
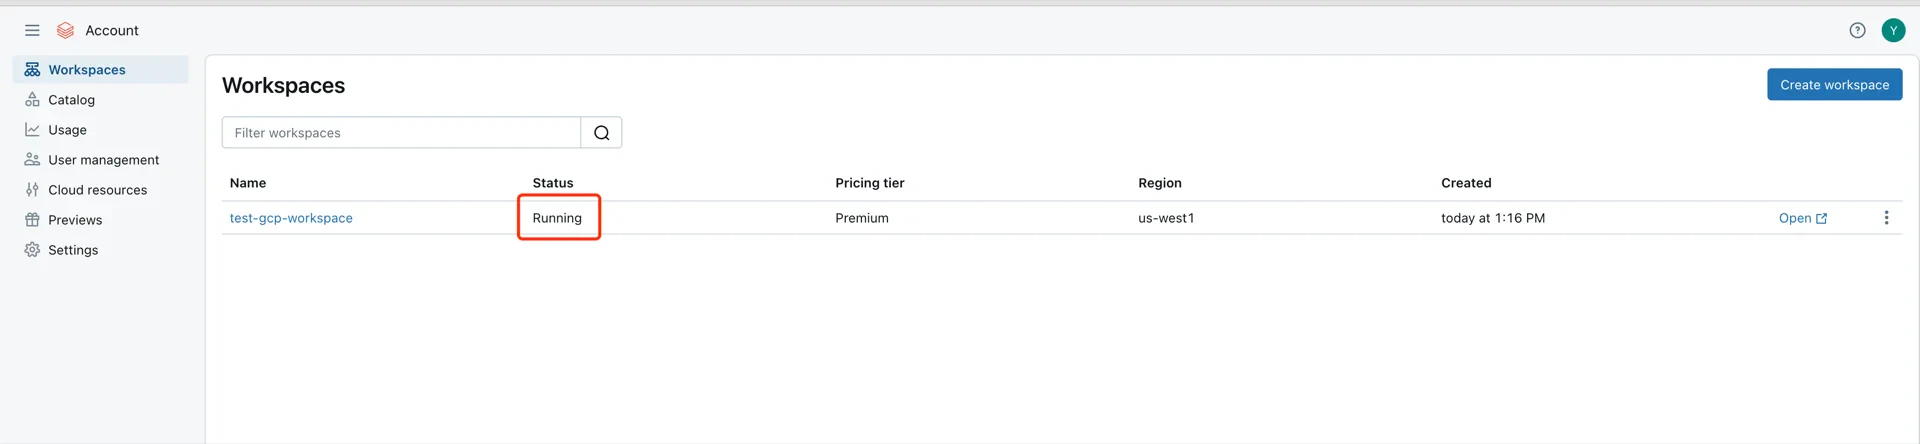 Open the workspace to enter the Unity Catalog console.
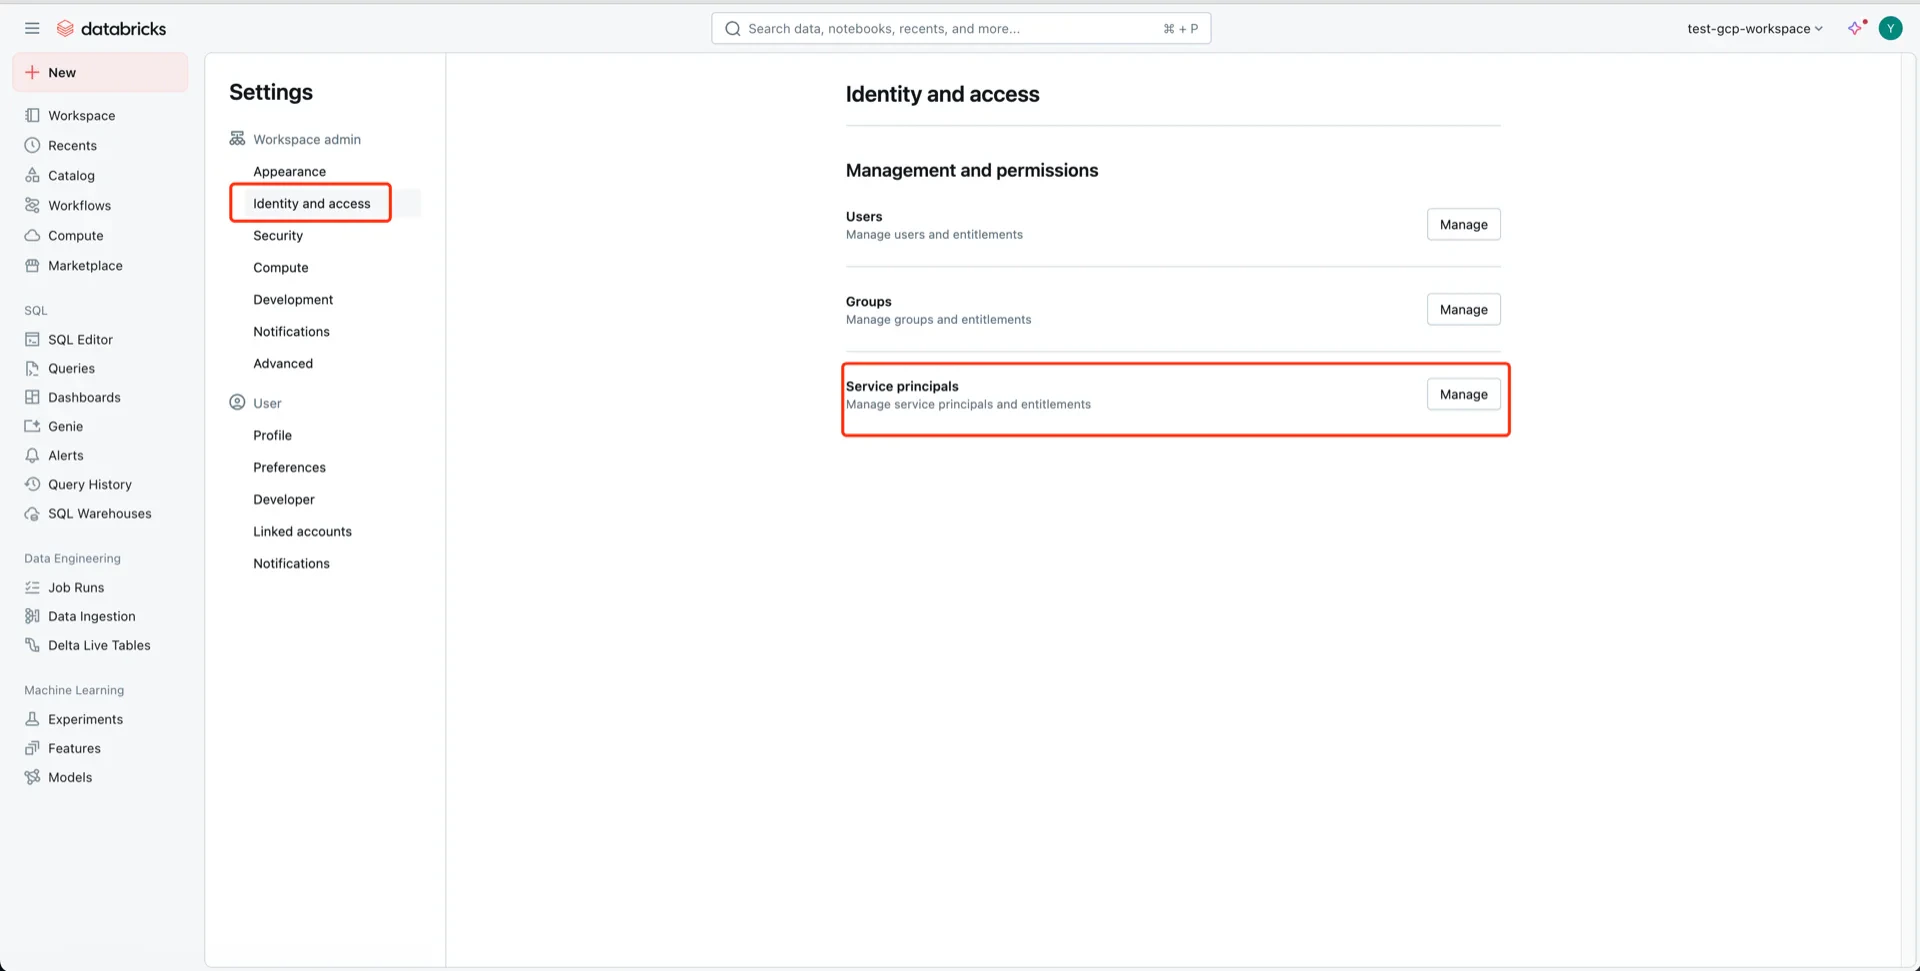
 ## 2. (Recommend) Generate an OAuth2 Service Principal
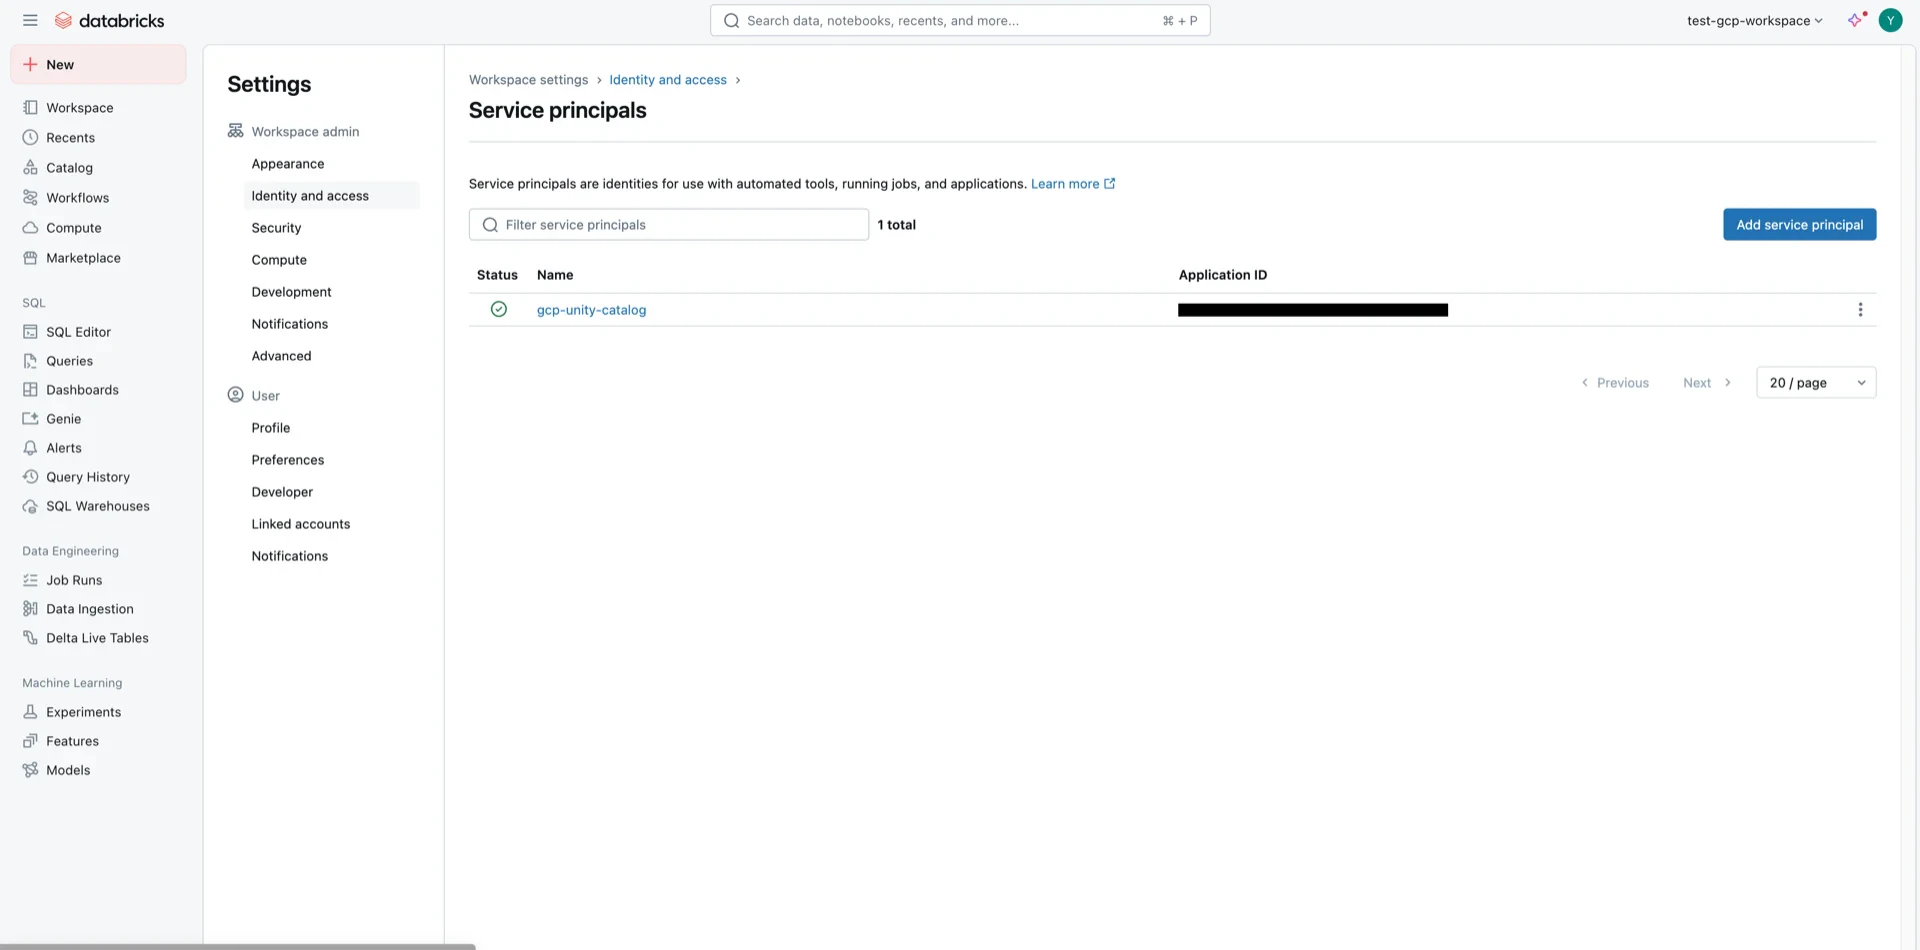
For OAuth2 authentication, navigate to **Identity and access -> Service principals -> Manage**.
## 2. (Recommend) Generate an OAuth2 Service Principal
For OAuth2 authentication, navigate to **Identity and access -> Service principals -> Manage**.
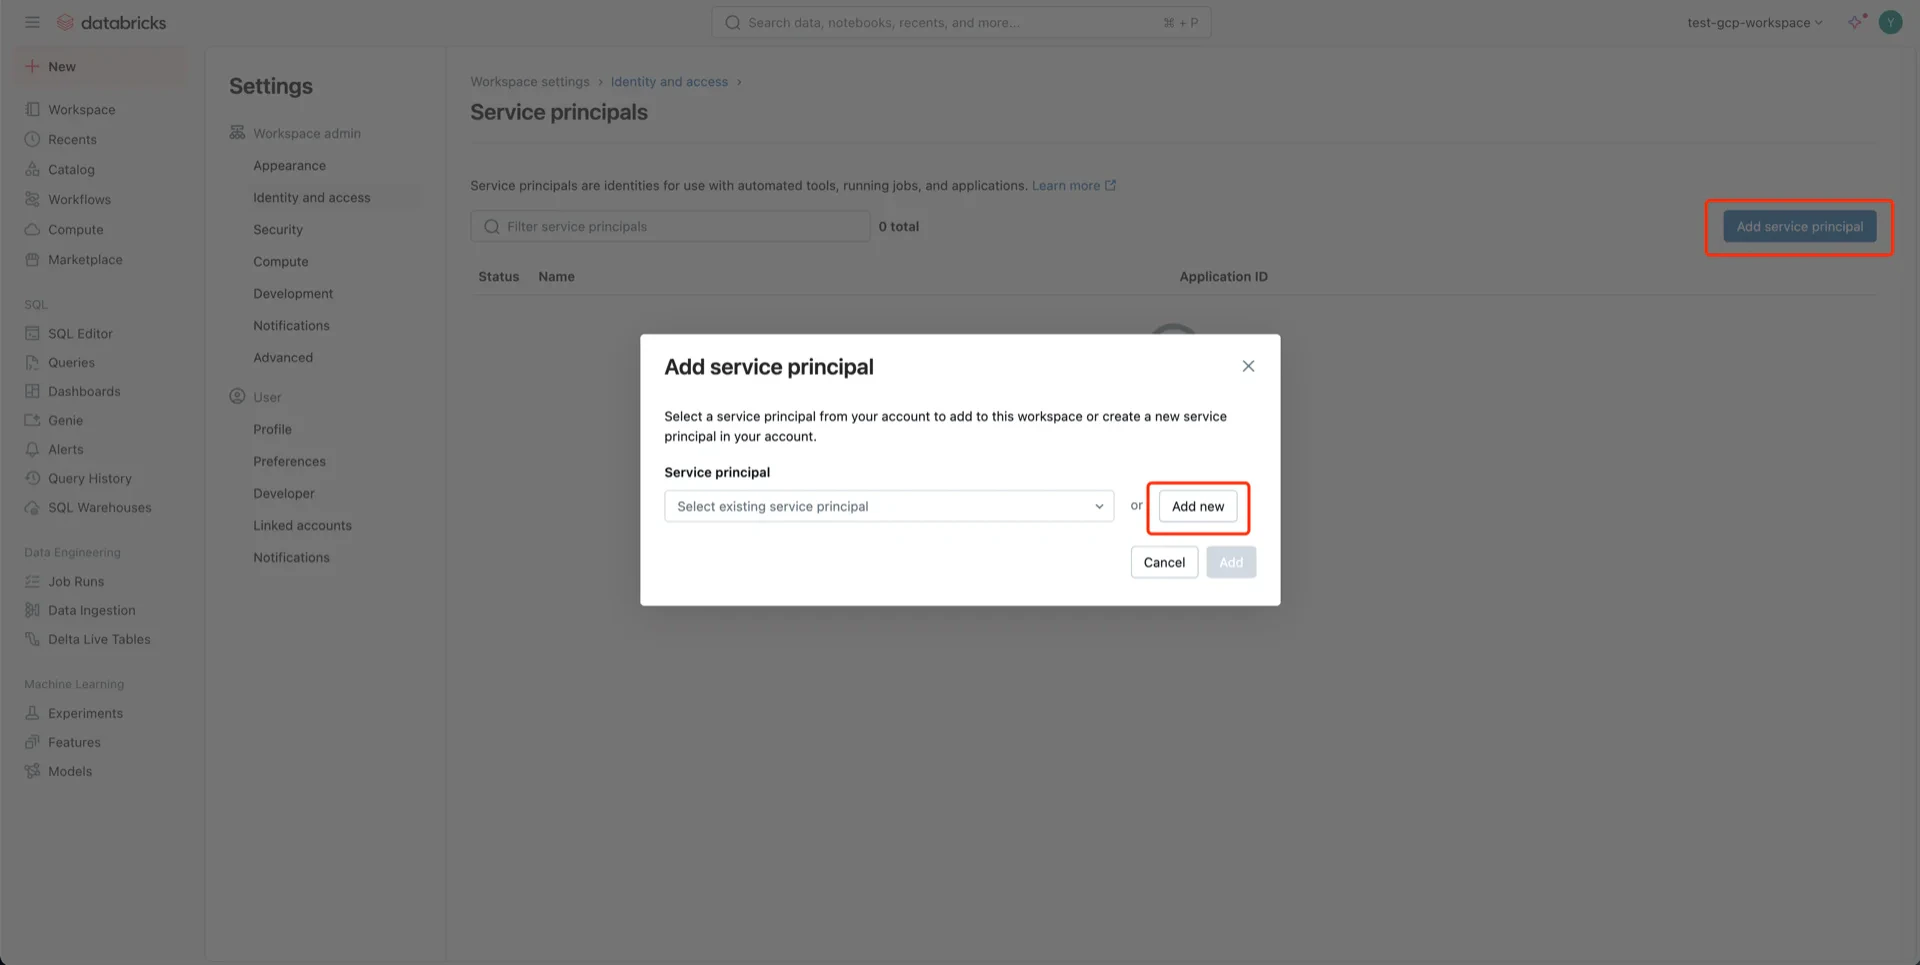
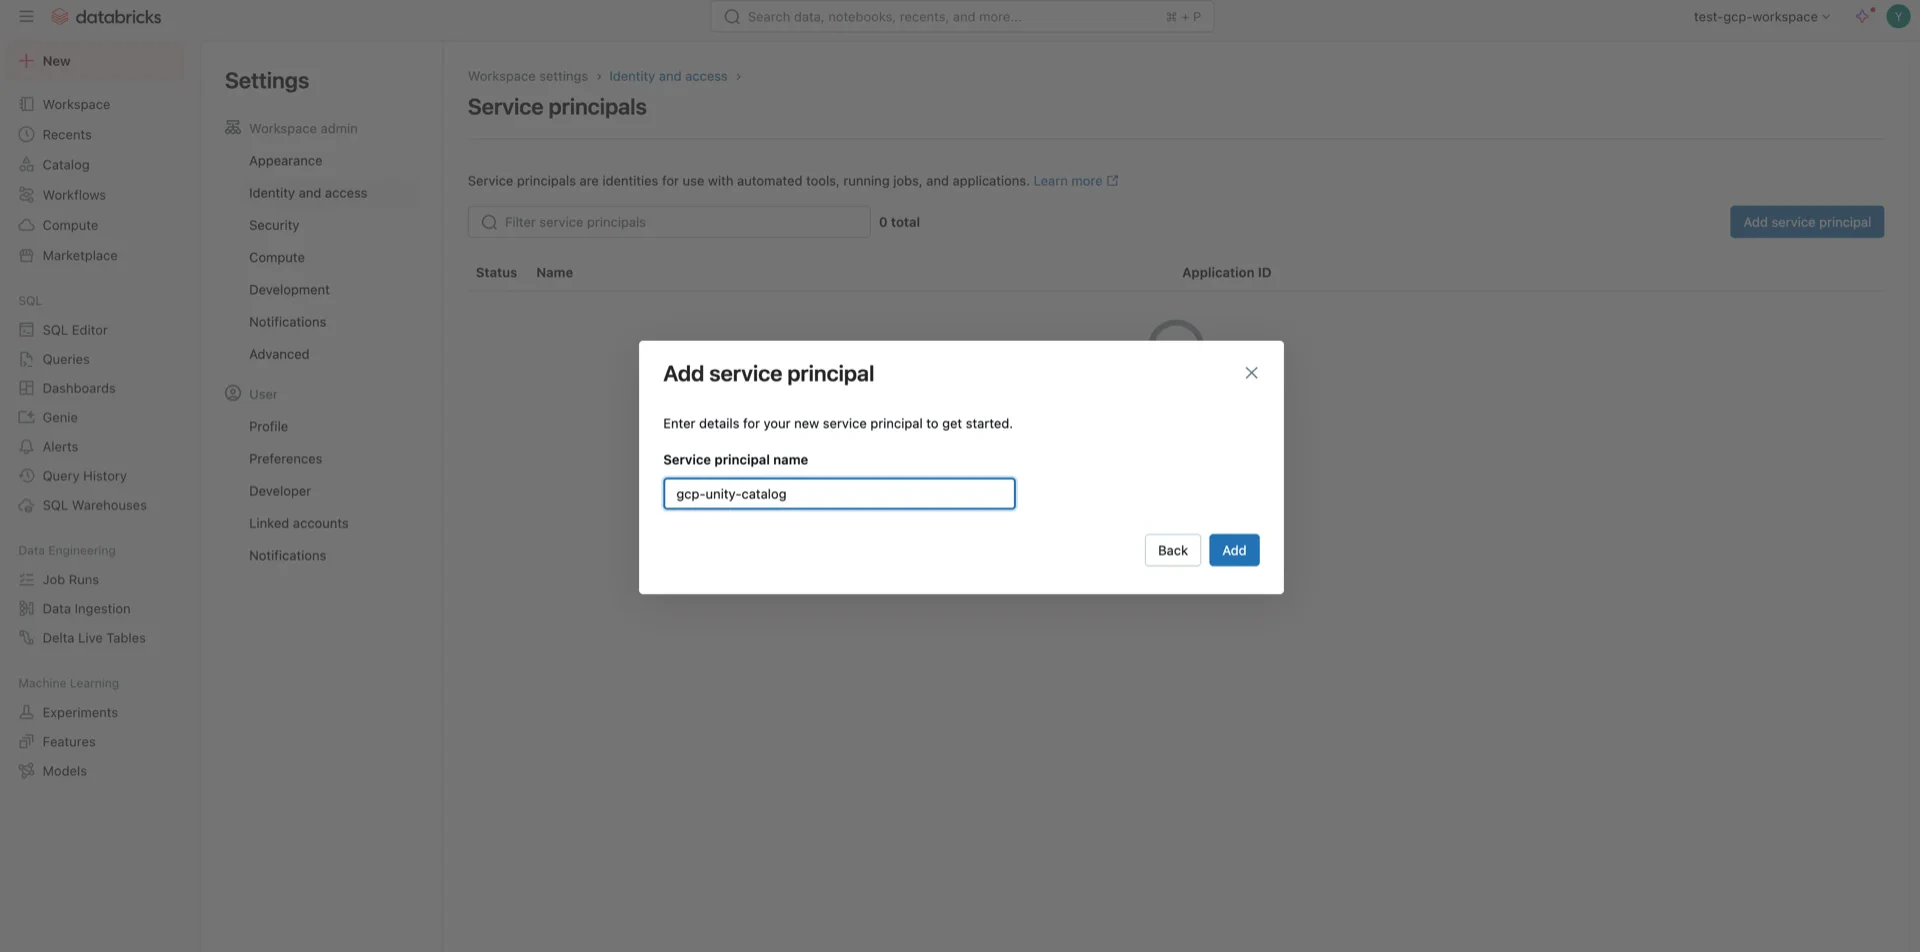
 Click **Add service principal -> Add new** and provide a name.
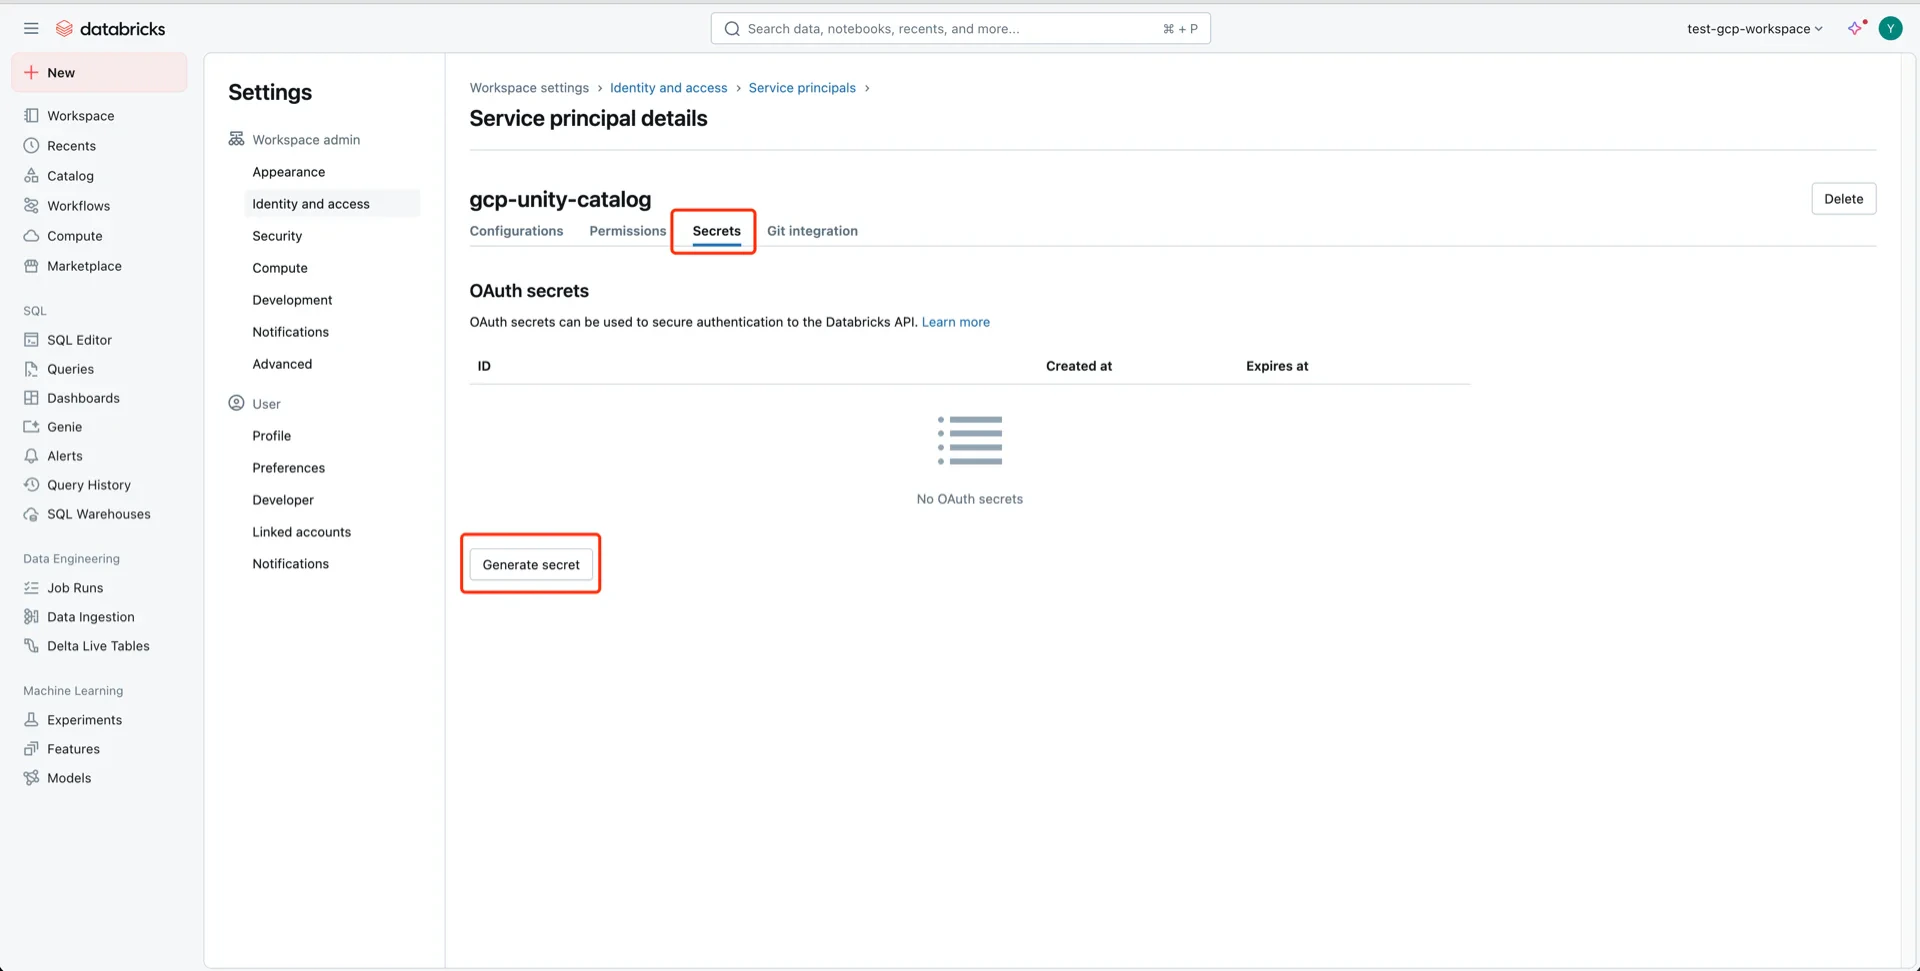
 Open the service principal, click **Secrets -> Generate secret**, choose an expiration period, and **Generate**.
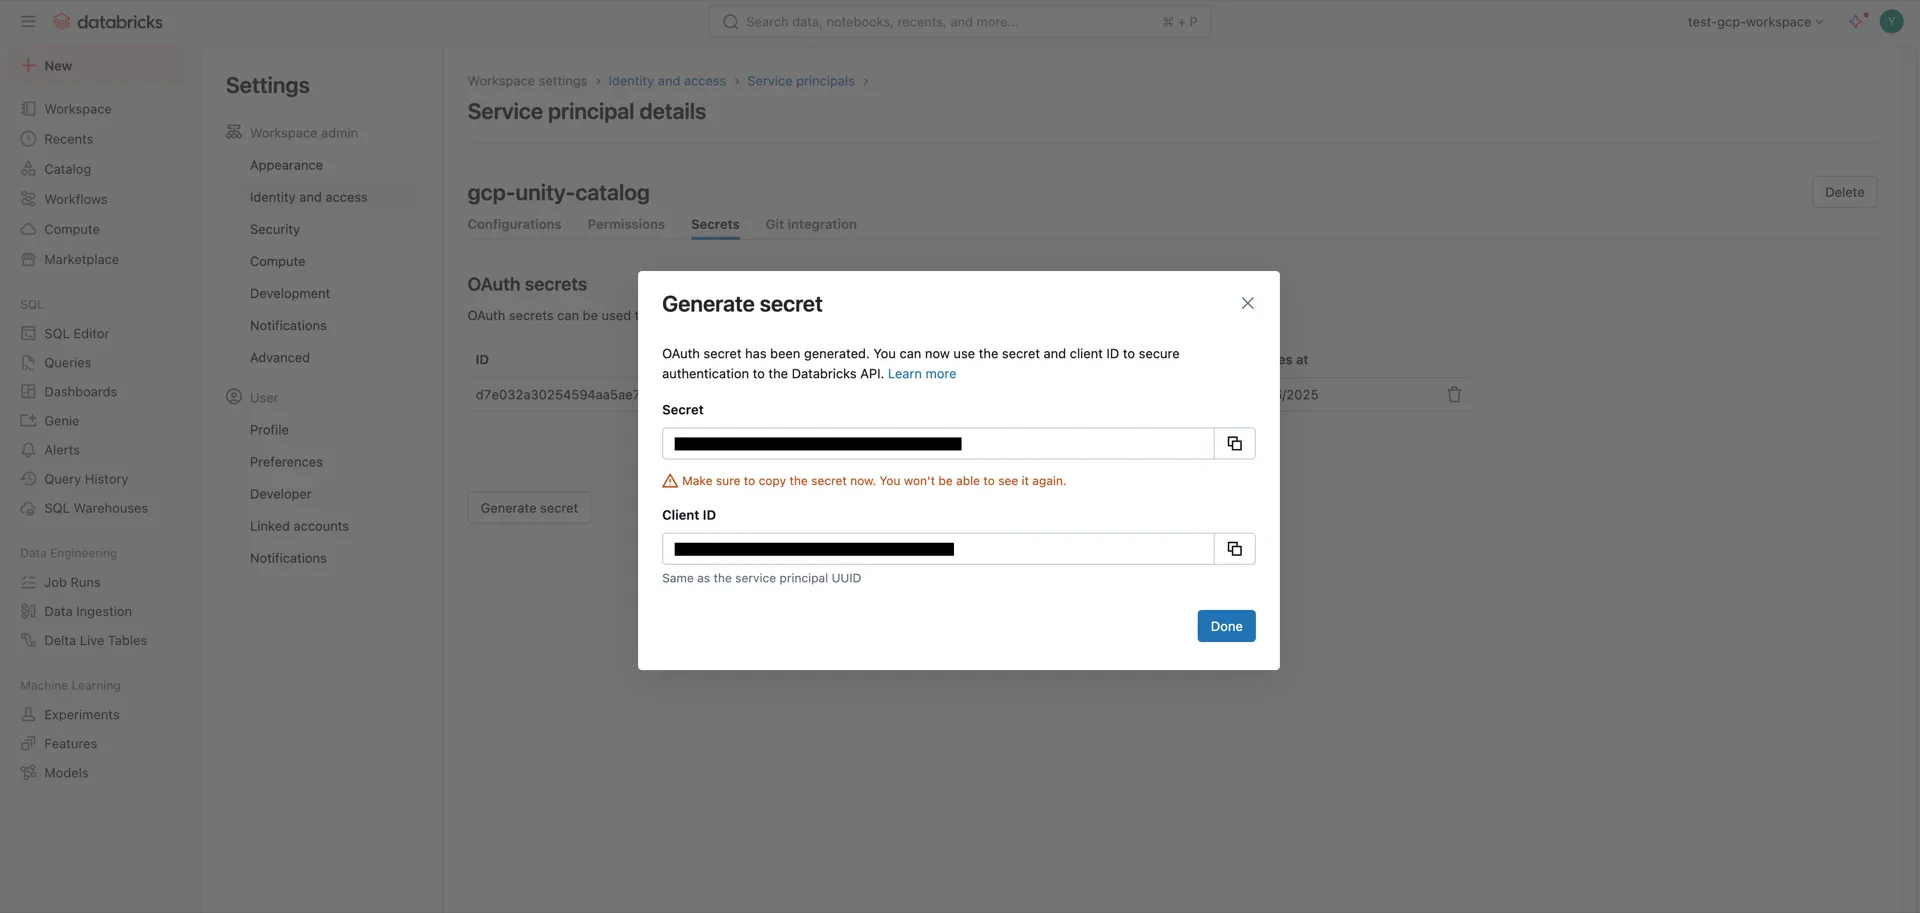
 Record both the **Client ID** and **Client Secret** -- the secret cannot be retrieved later.
 ## 3. (Alternative) Generate a User Token
A Databricks user token can be used by StreamNative Ursa to authenticate against Unity Catalog.
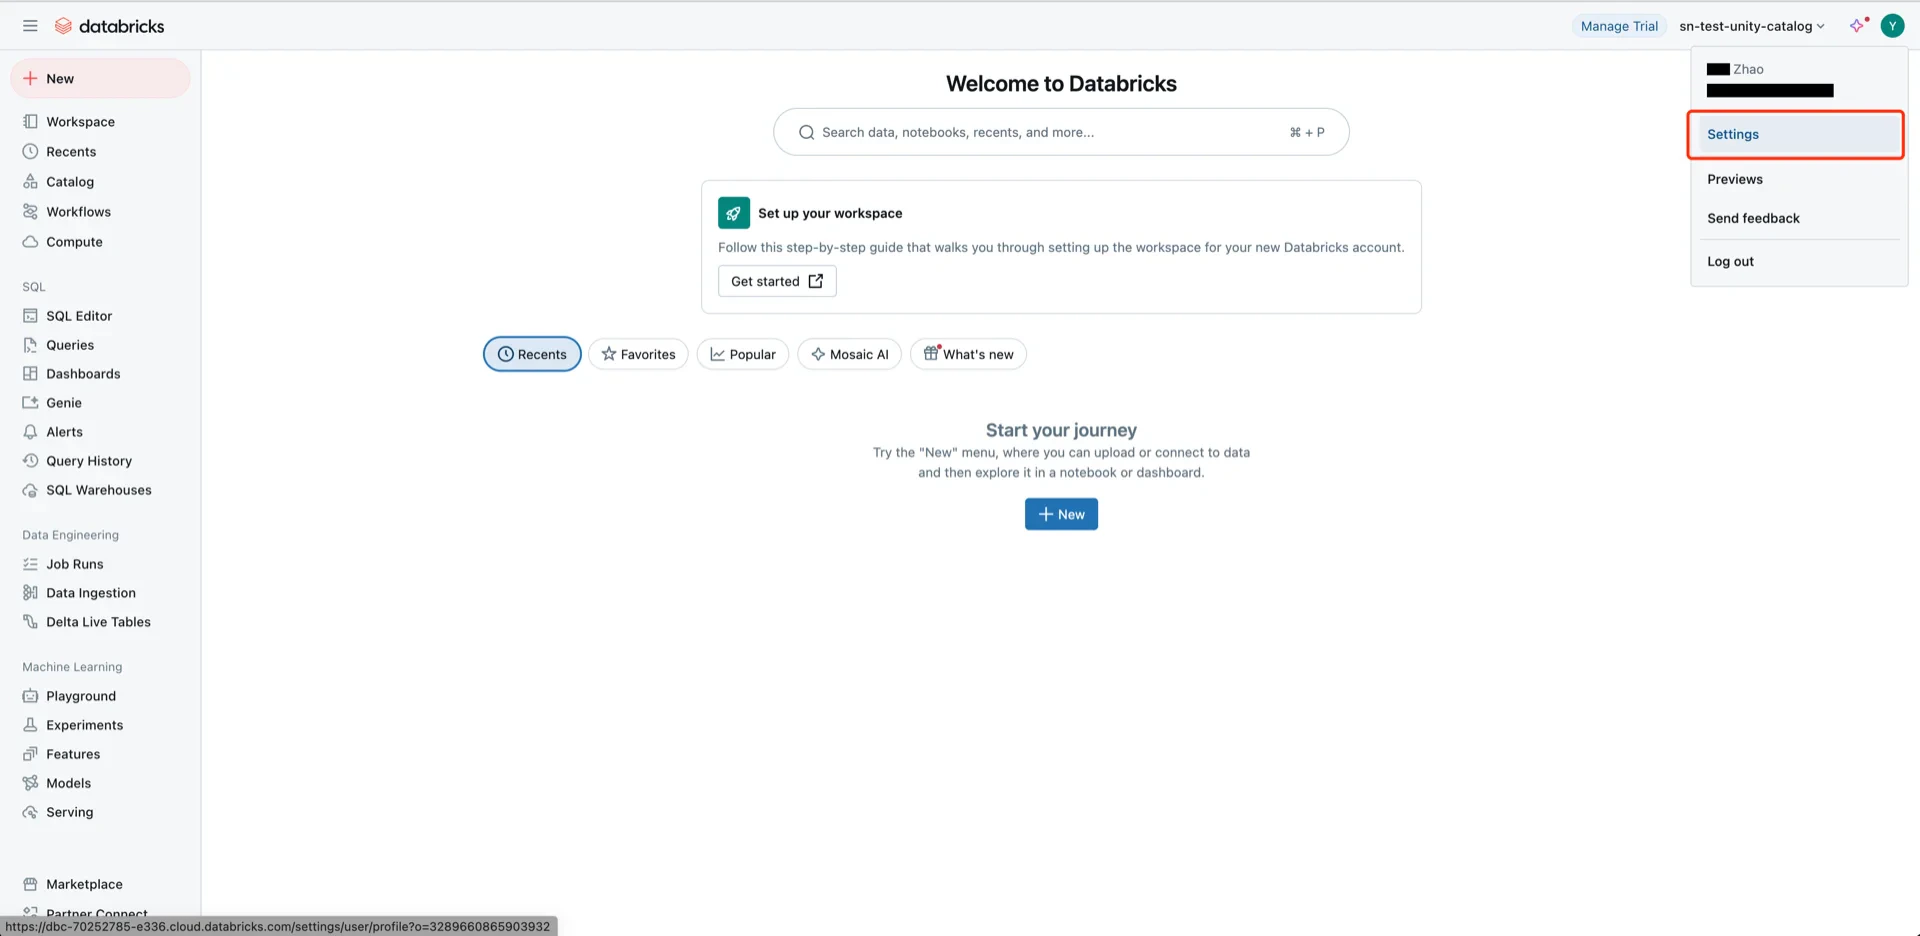
Open **User Settings**.
## 3. (Alternative) Generate a User Token
A Databricks user token can be used by StreamNative Ursa to authenticate against Unity Catalog.
Open **User Settings**.
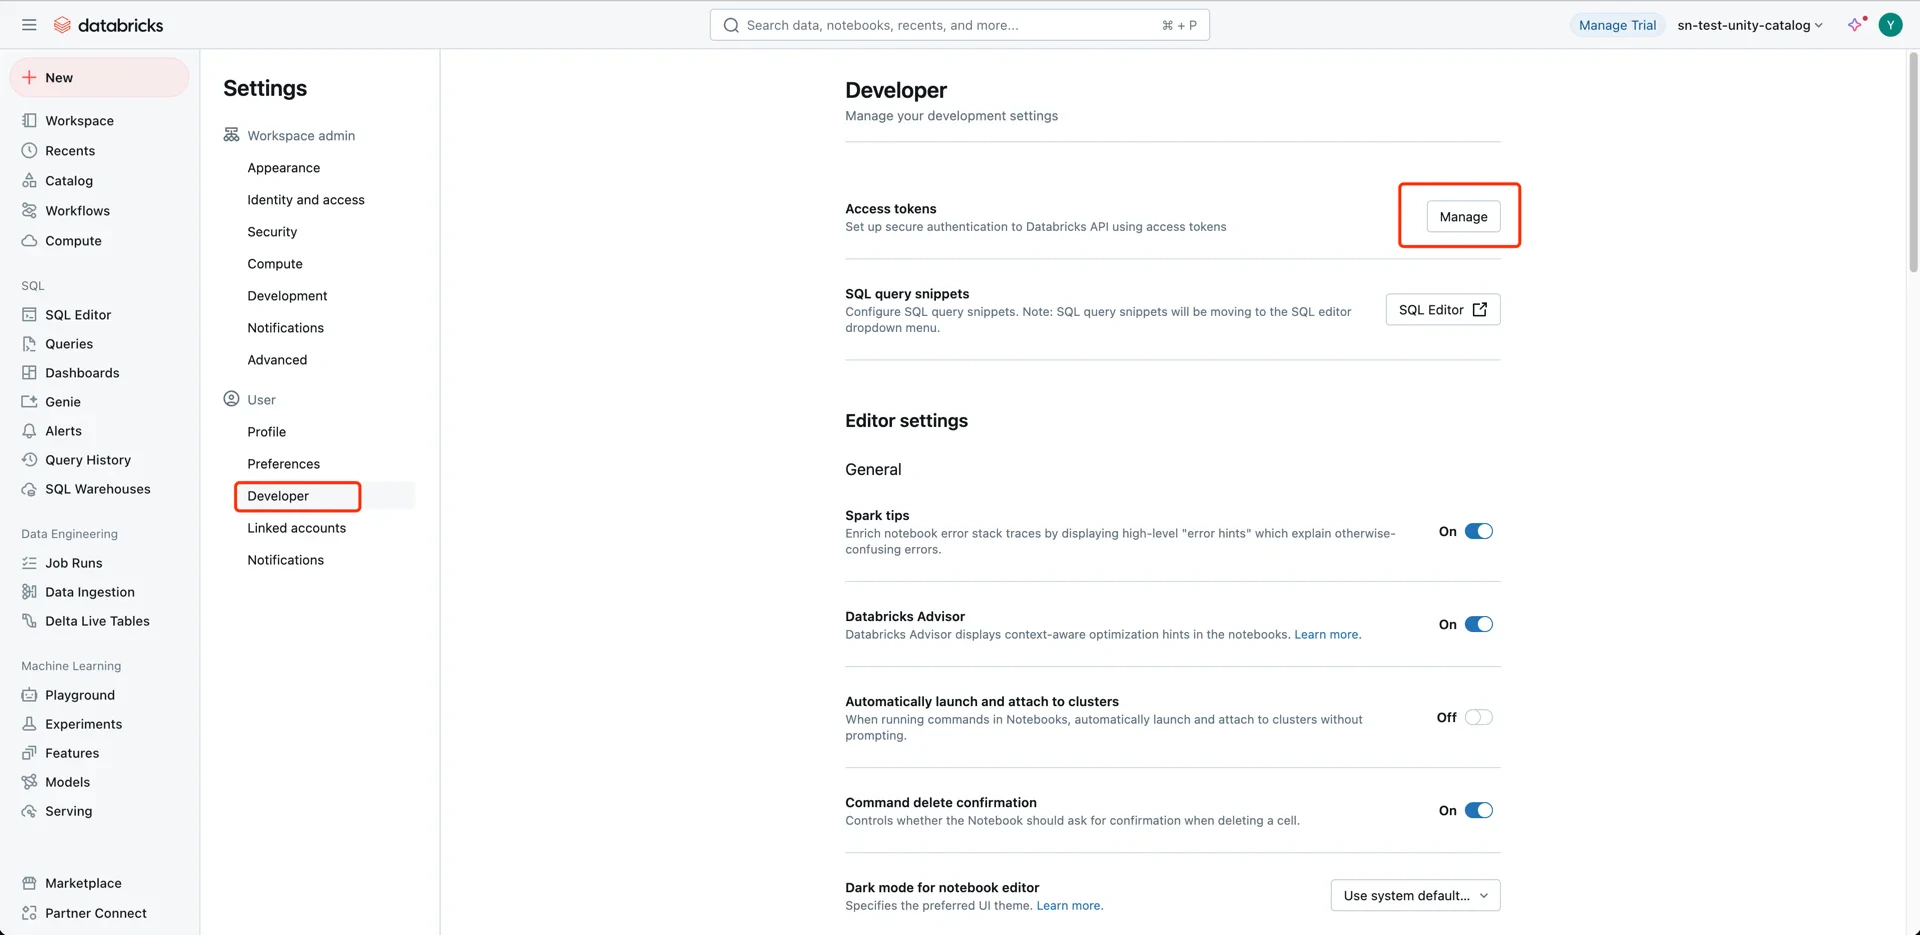
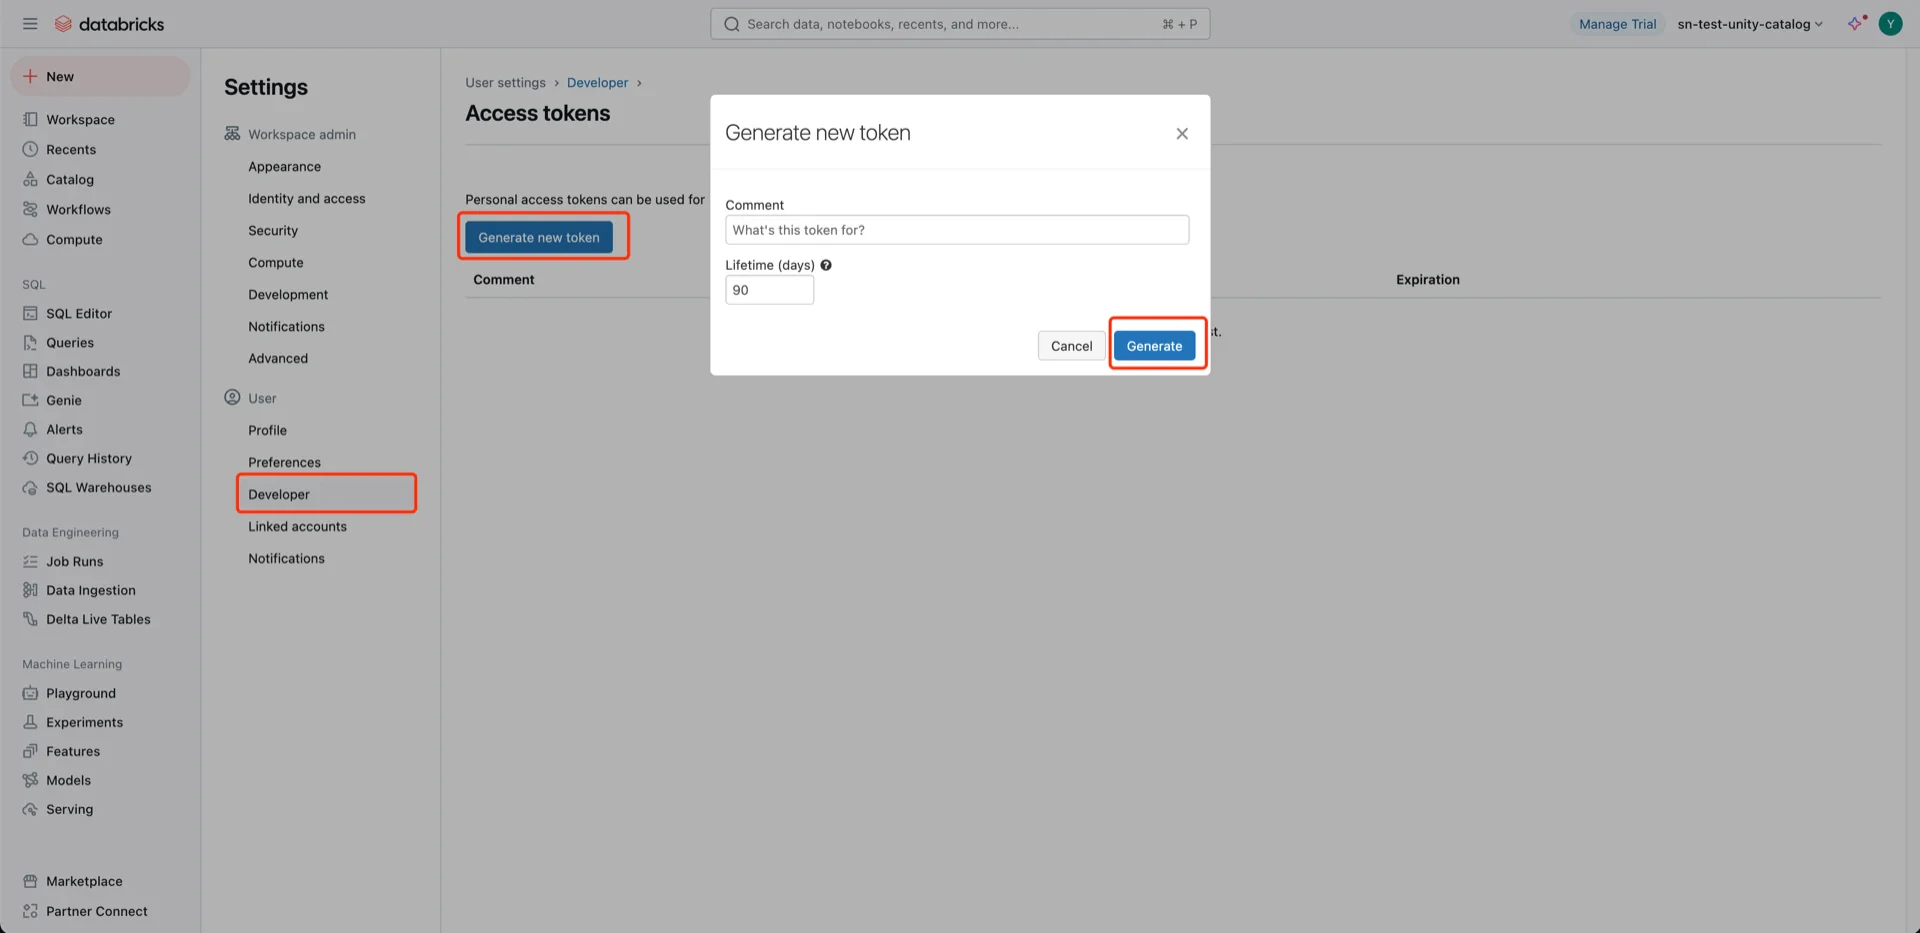
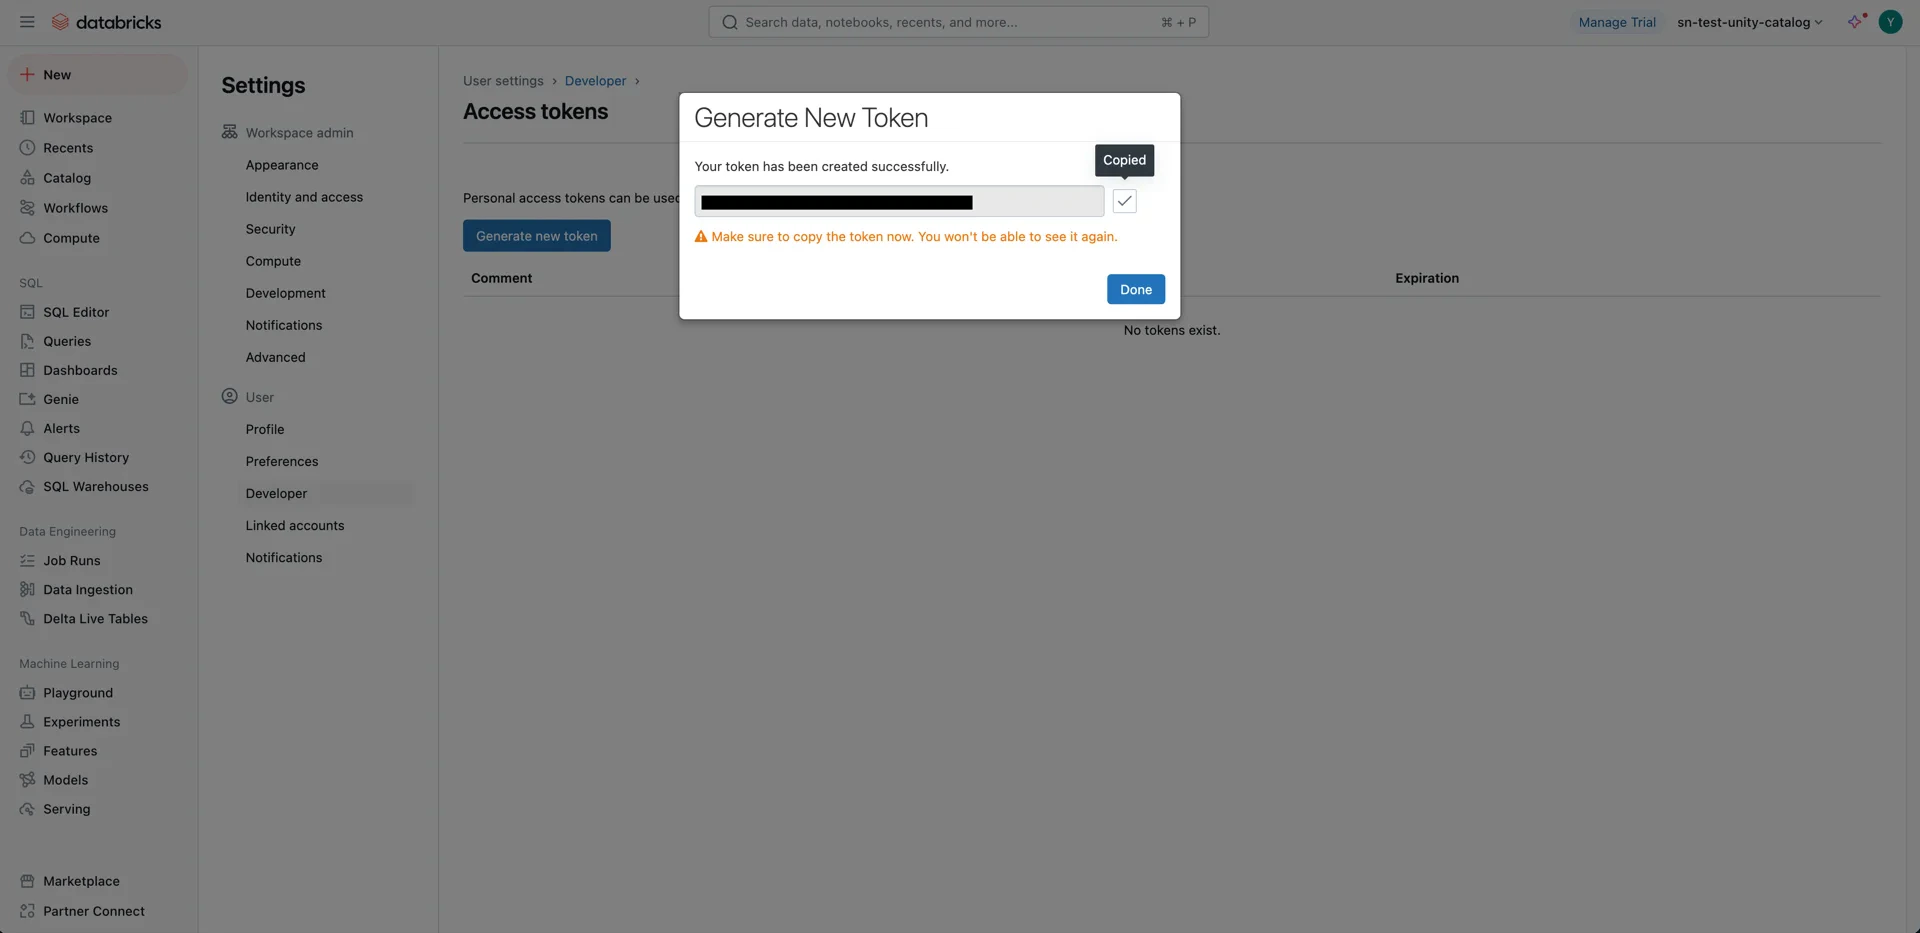
 Navigate to **Developer -> Access tokens -> Manage** and generate a new token. Record the token value -- it cannot be retrieved later.
 ## 4. Configure Unity Catalog Access
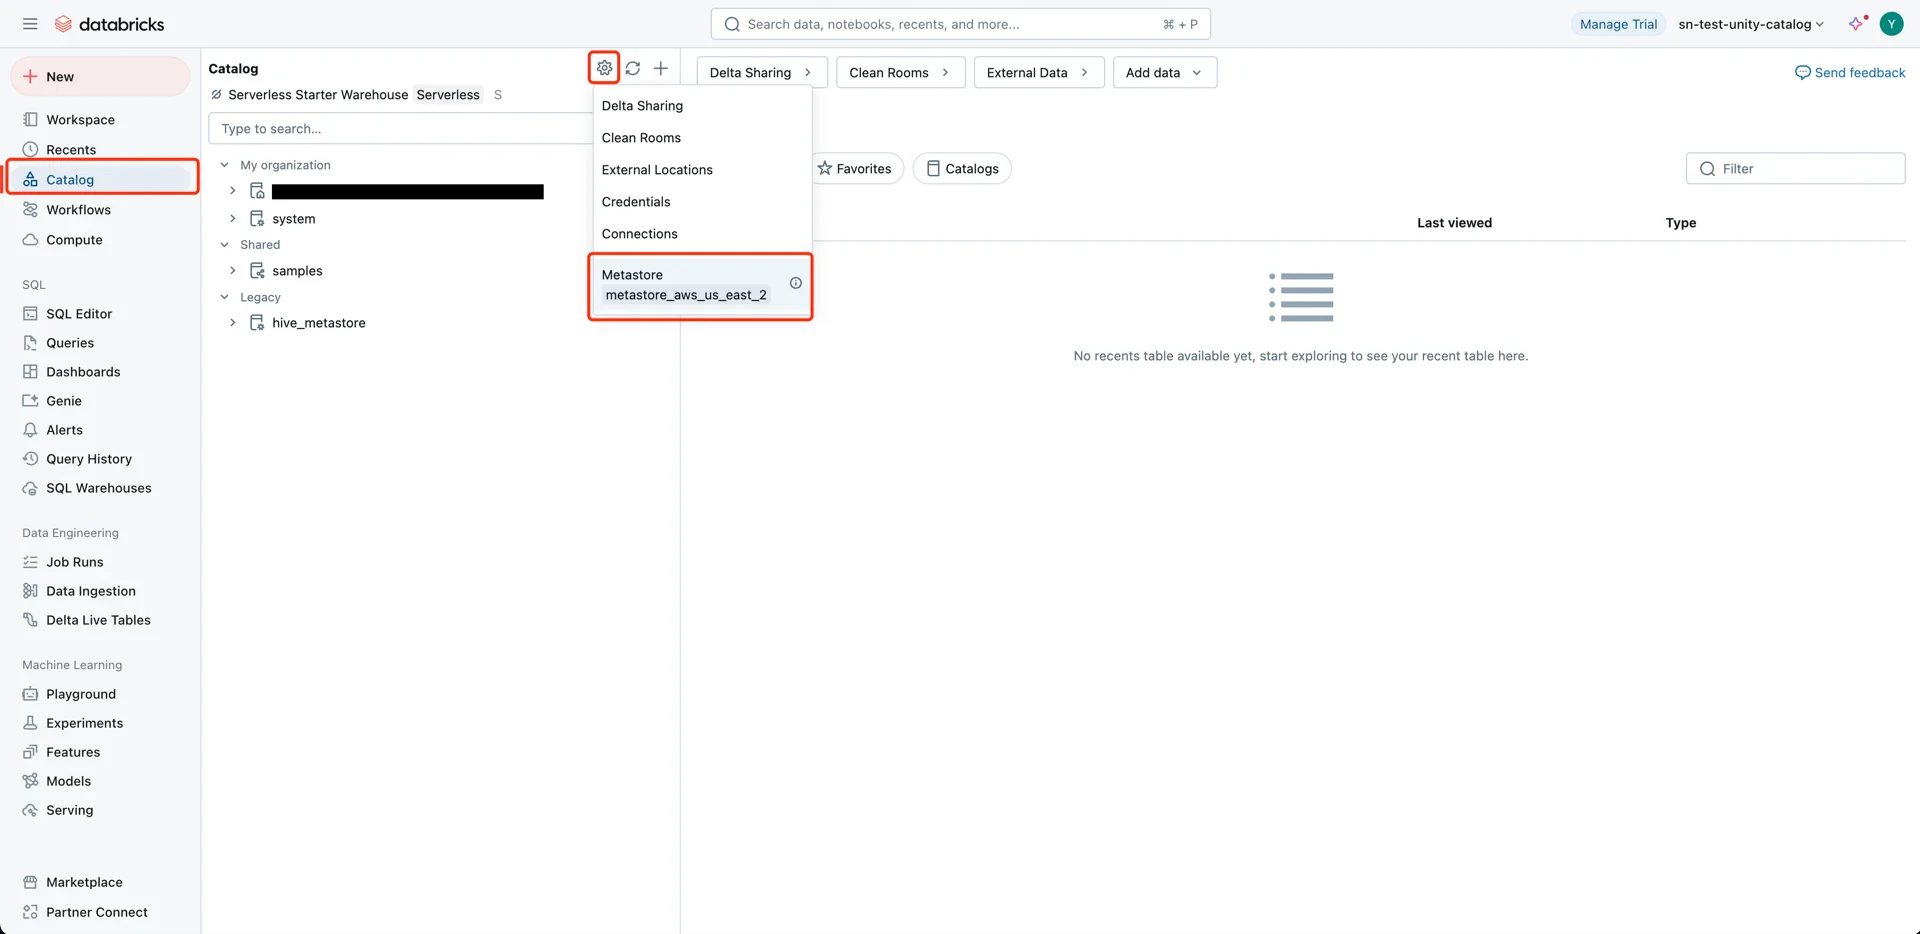
Navigate to **Catalog -> Settings -> Metastore**.
## 4. Configure Unity Catalog Access
Navigate to **Catalog -> Settings -> Metastore**.
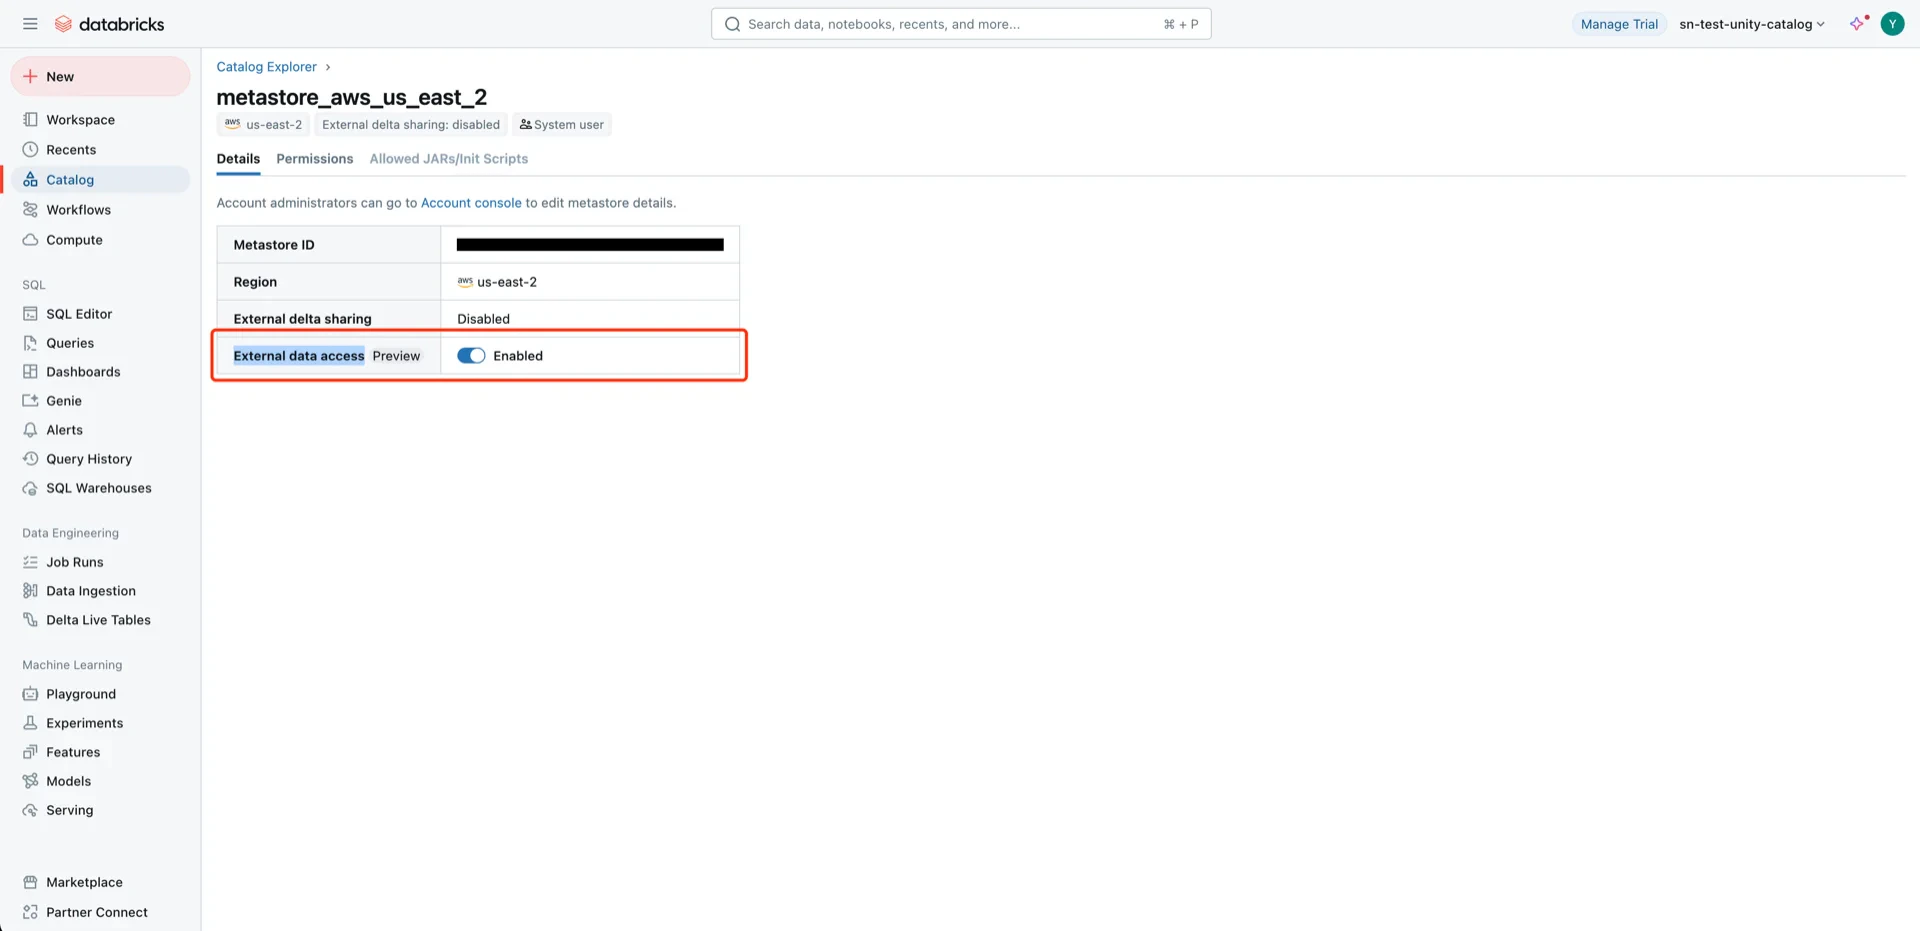
 Enable **External data access** on the metastore.
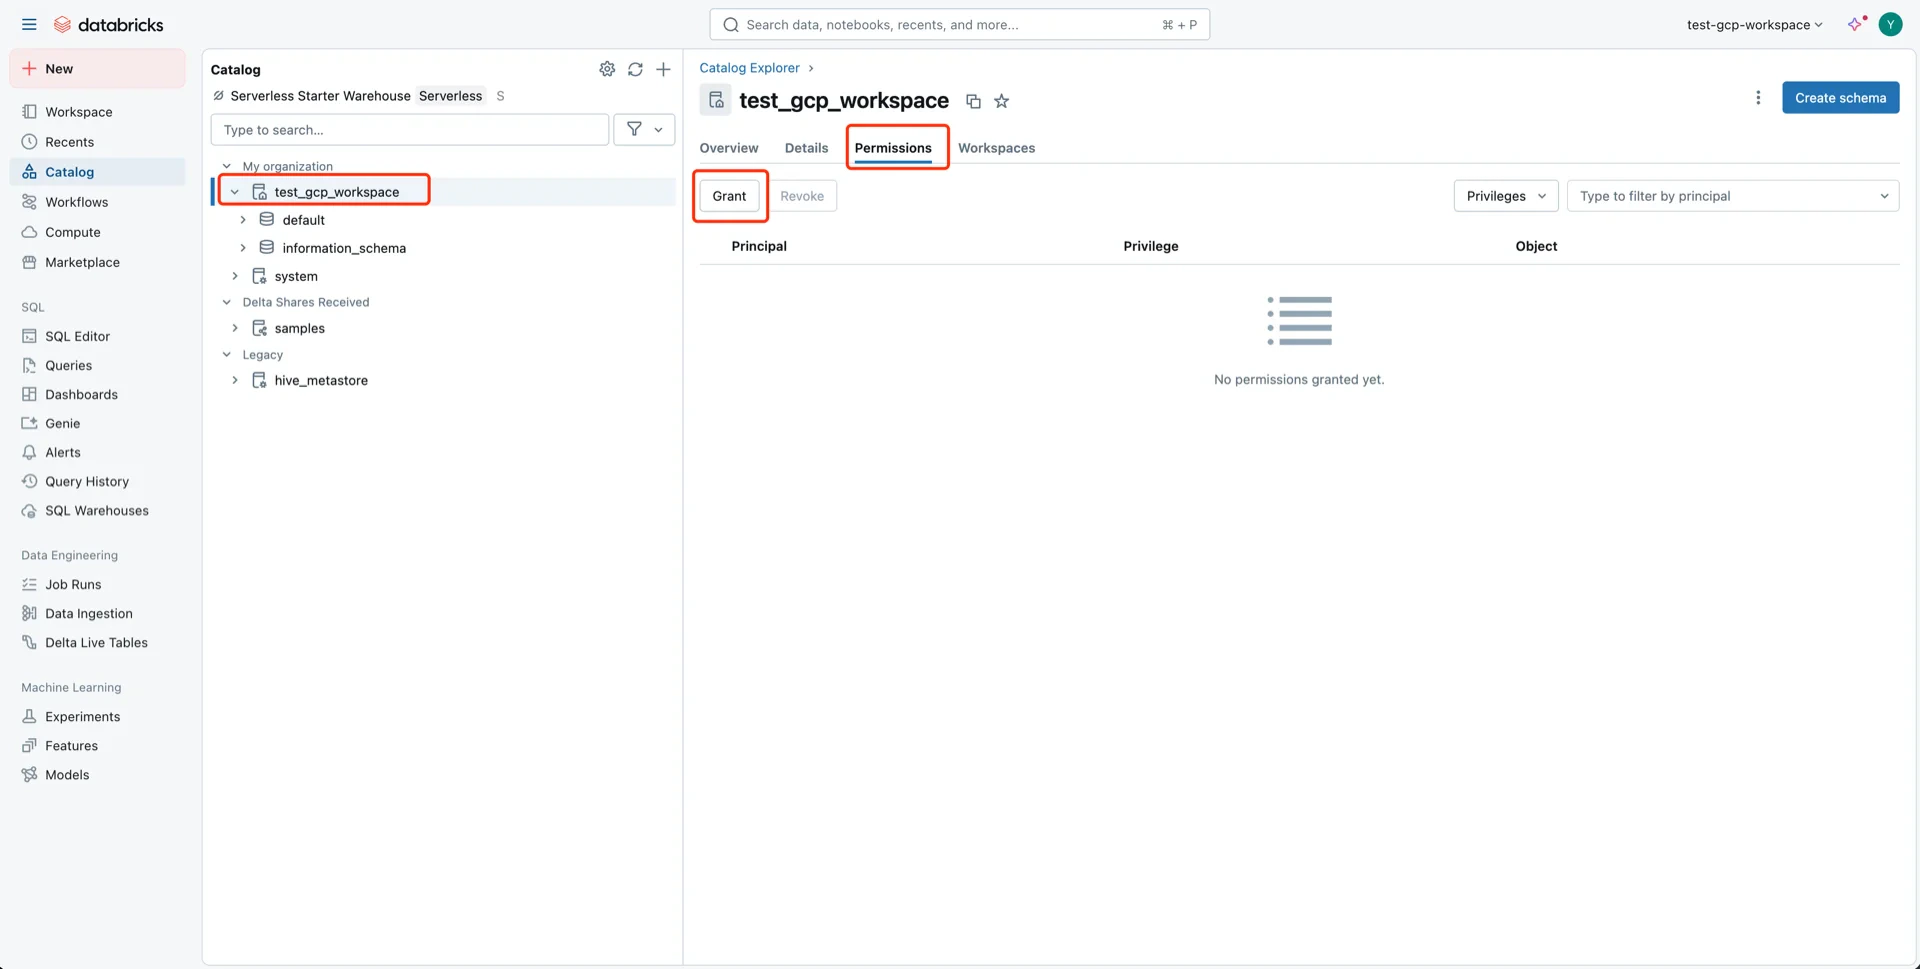
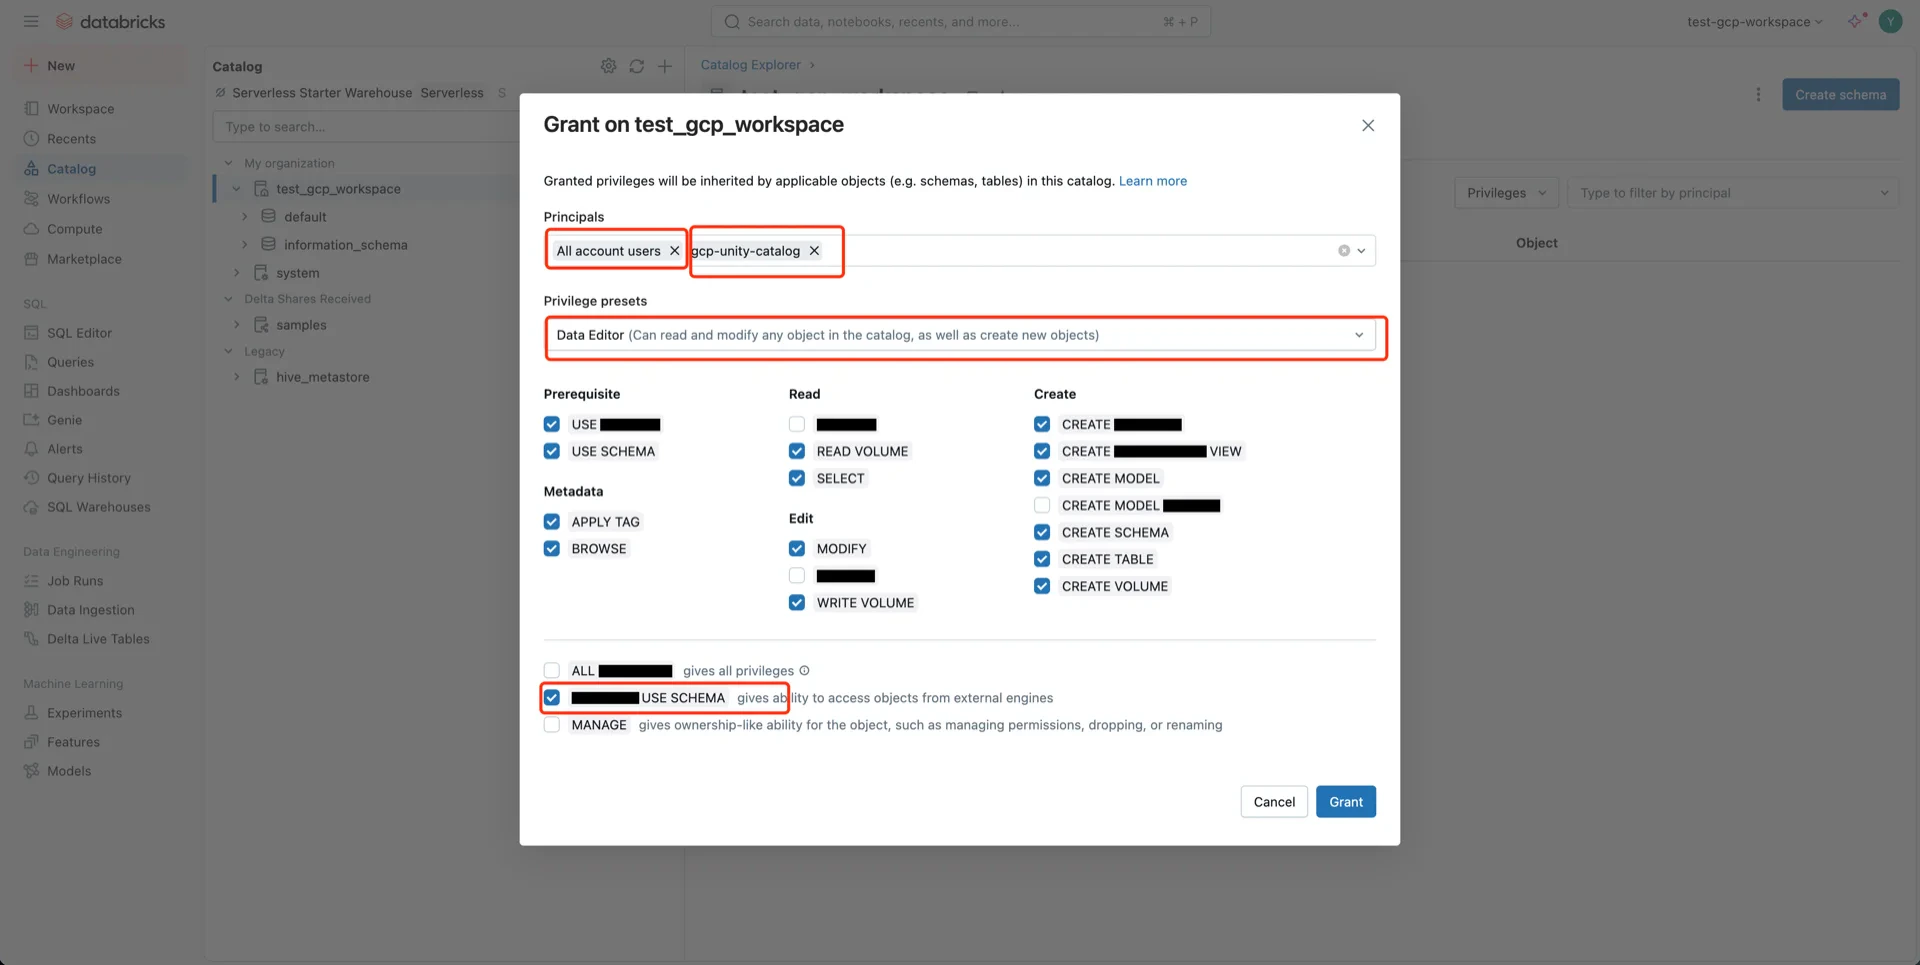
 Grant catalog privileges with the following settings:
* **Principal:** All accounts (or the specific user/service principal)
* **Privilege presets:** Data Editor (selects related privileges automatically)
* **EXTERNAL USE SCHEMA:** Enabled
Grant catalog privileges with the following settings:
* **Principal:** All accounts (or the specific user/service principal)
* **Privilege presets:** Data Editor (selects related privileges automatically)
* **EXTERNAL USE SCHEMA:** Enabled
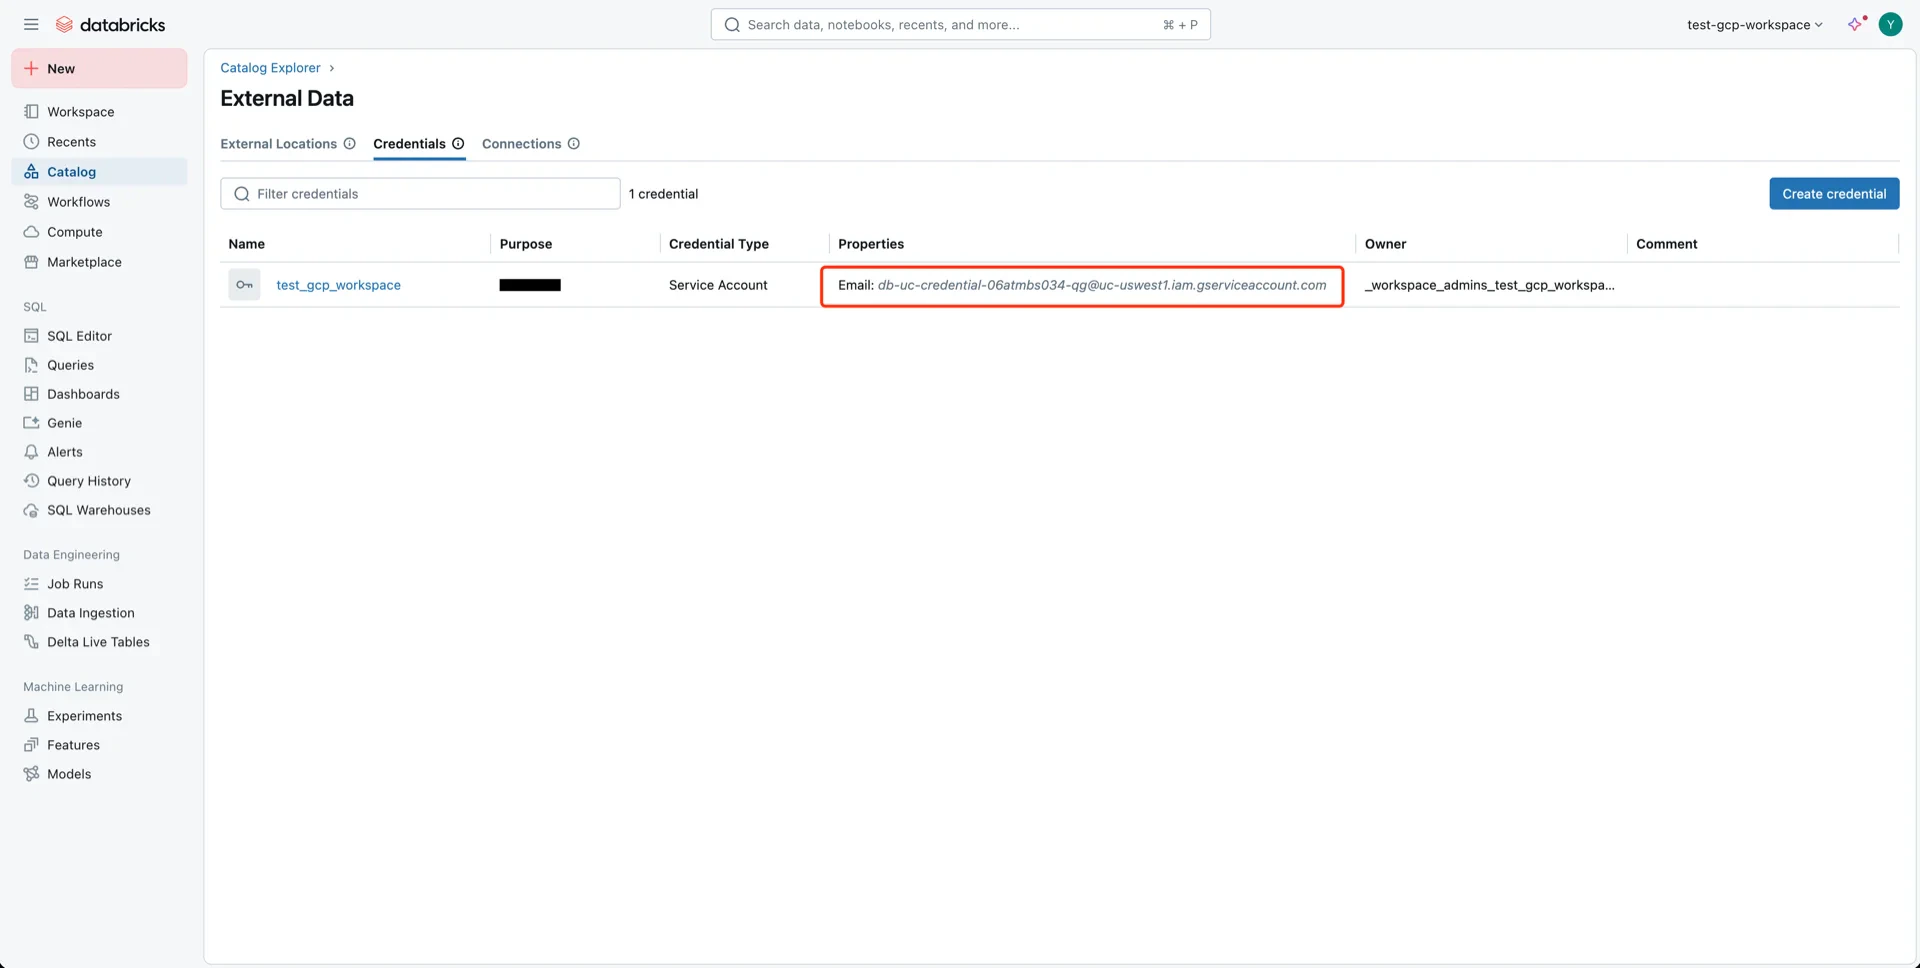
 ## 5. Grant Bucket Permissions to the Databricks Service Account
When the Databricks workspace is initialized, a service account is created for Unity Catalog.
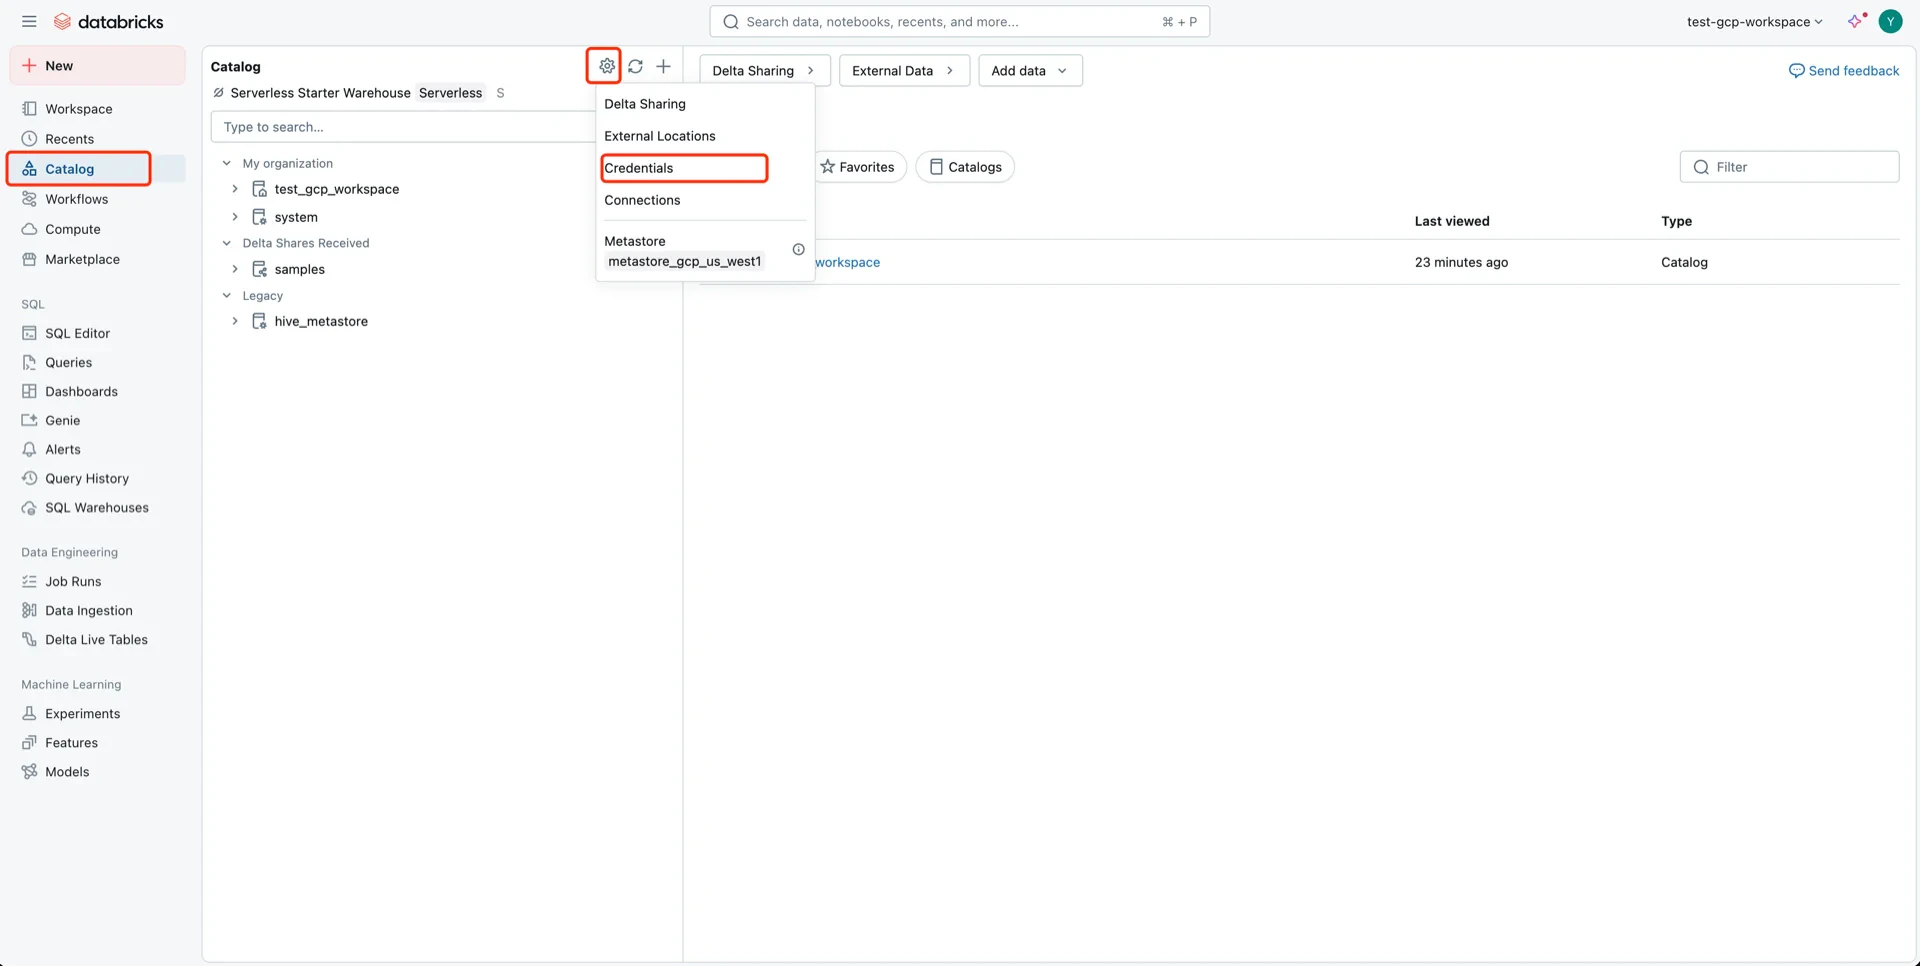
Navigate to **Catalog -> Settings -> Credentials** to find the service account.
## 5. Grant Bucket Permissions to the Databricks Service Account
When the Databricks workspace is initialized, a service account is created for Unity Catalog.
Navigate to **Catalog -> Settings -> Credentials** to find the service account.
 Example service account name:
```
db-uc-credential-@uc-uswest1.iam.gserviceaccount.com
```
Example service account name:
```
db-uc-credential-@uc-uswest1.iam.gserviceaccount.com
```
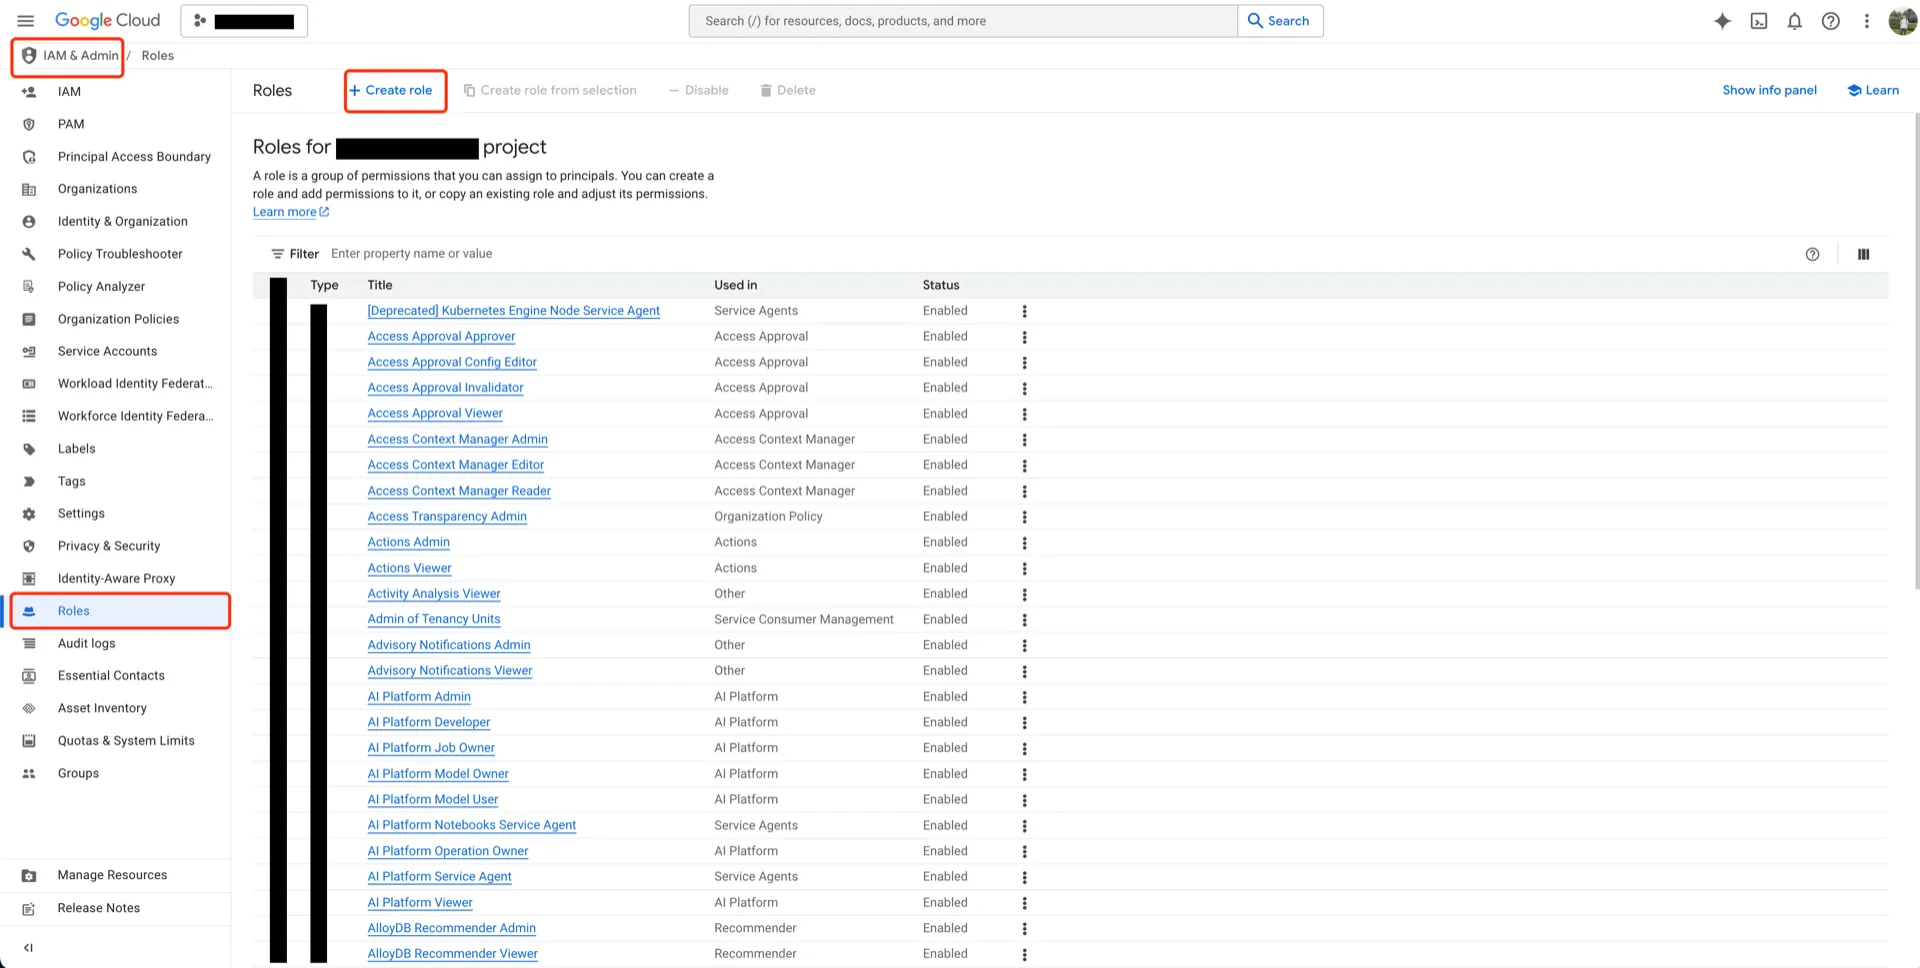
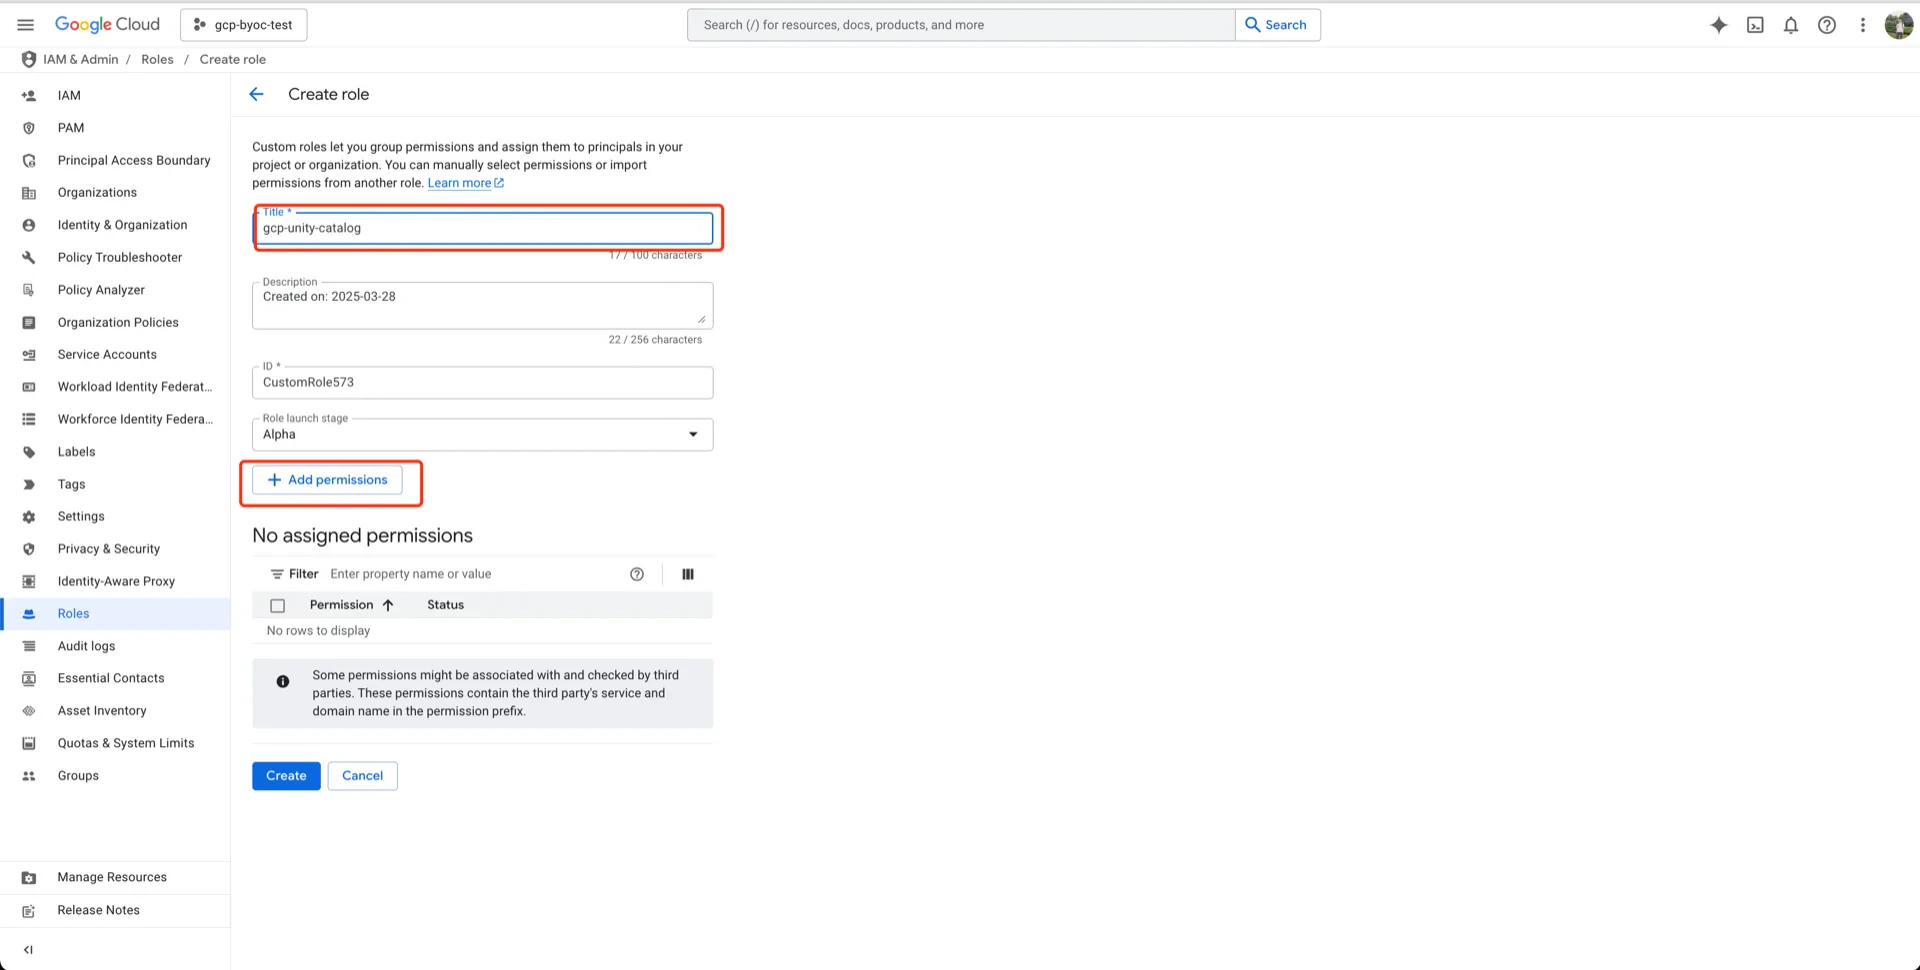
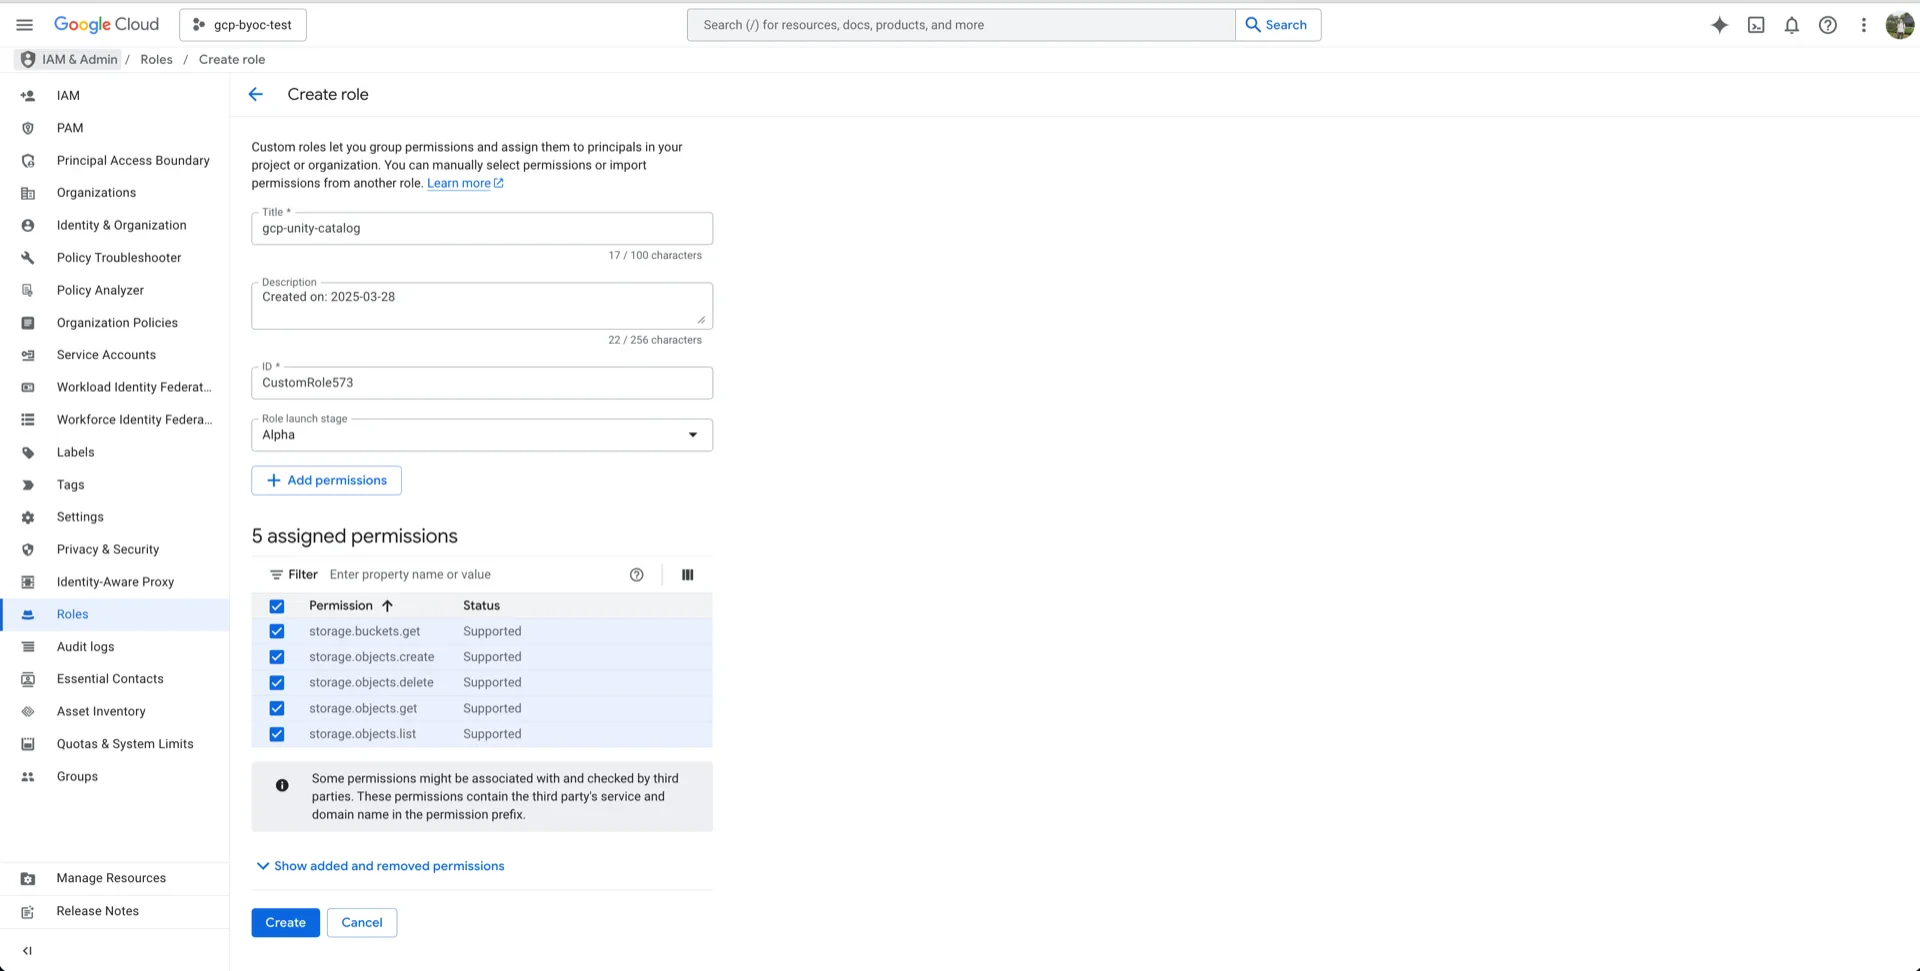
 ### 5.1 Create a Custom IAM Role
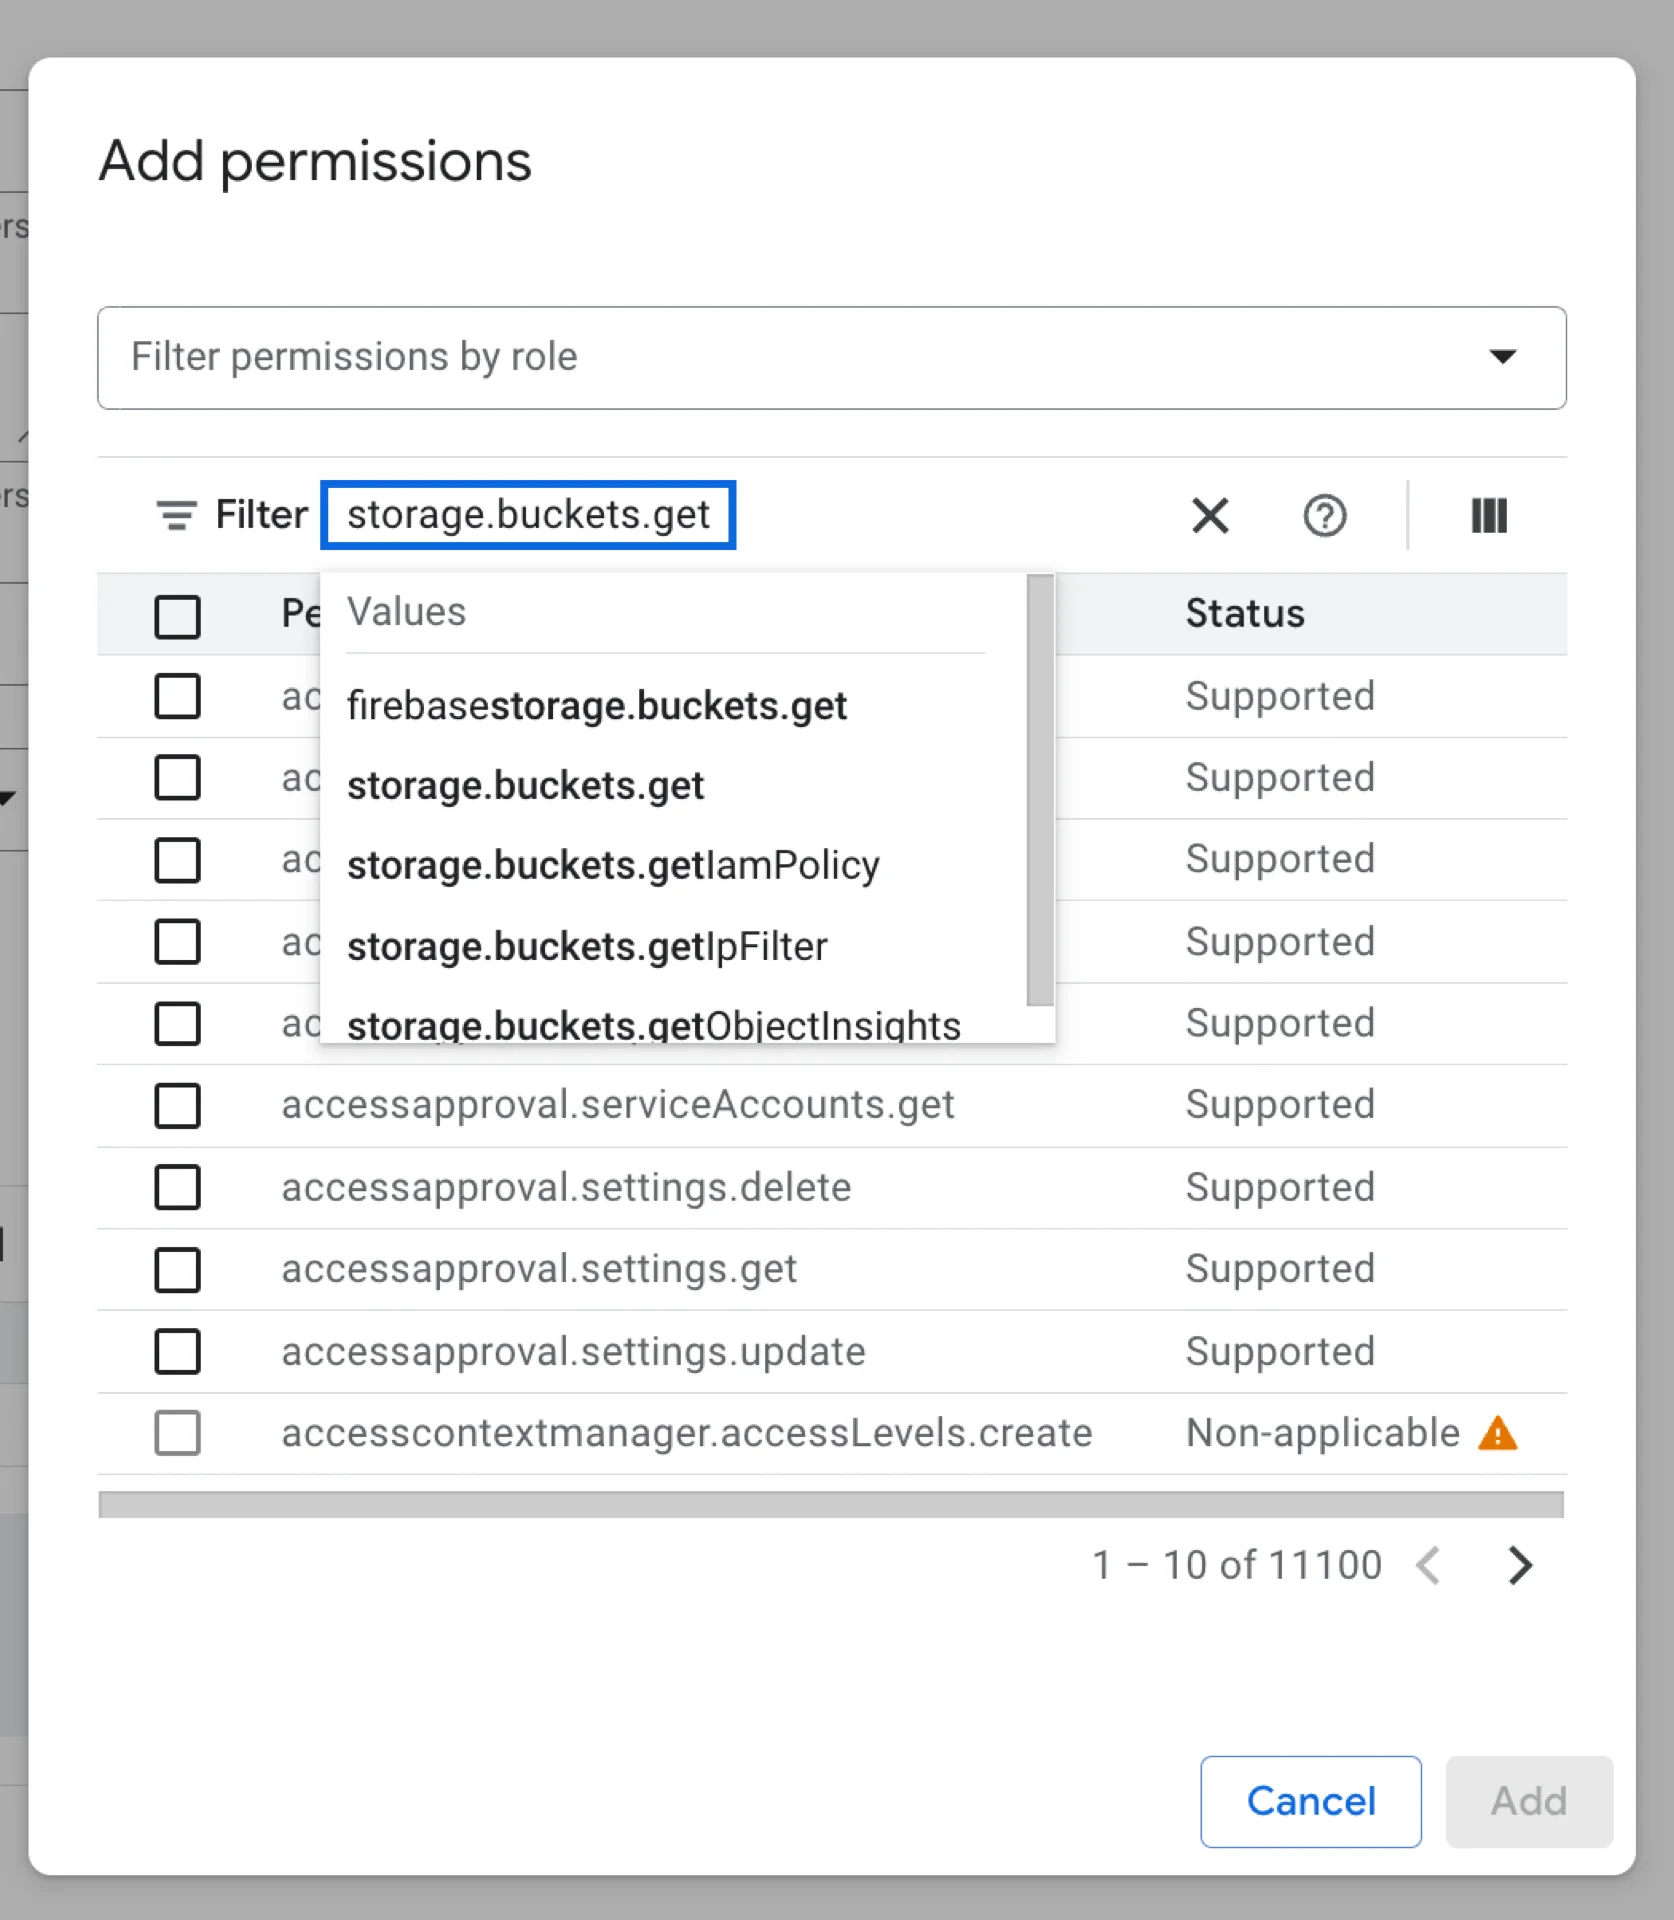
In the GCP console, navigate to **IAM & Admin -> Roles -> Create role** and add the following permissions:
* `storage.buckets.get`
* `storage.objects.create`
* `storage.objects.delete`
* `storage.objects.get`
* `storage.objects.list`
### 5.1 Create a Custom IAM Role
In the GCP console, navigate to **IAM & Admin -> Roles -> Create role** and add the following permissions:
* `storage.buckets.get`
* `storage.objects.create`
* `storage.objects.delete`
* `storage.objects.get`
* `storage.objects.list`
 ### 5.2 Assign the Role to the Databricks Service Account
Open your bucket, click **PERMISSIONS -> View BY PRINCIPALS -> GRANT ACCESS**.
### 5.2 Assign the Role to the Databricks Service Account
Open your bucket, click **PERMISSIONS -> View BY PRINCIPALS -> GRANT ACCESS**.
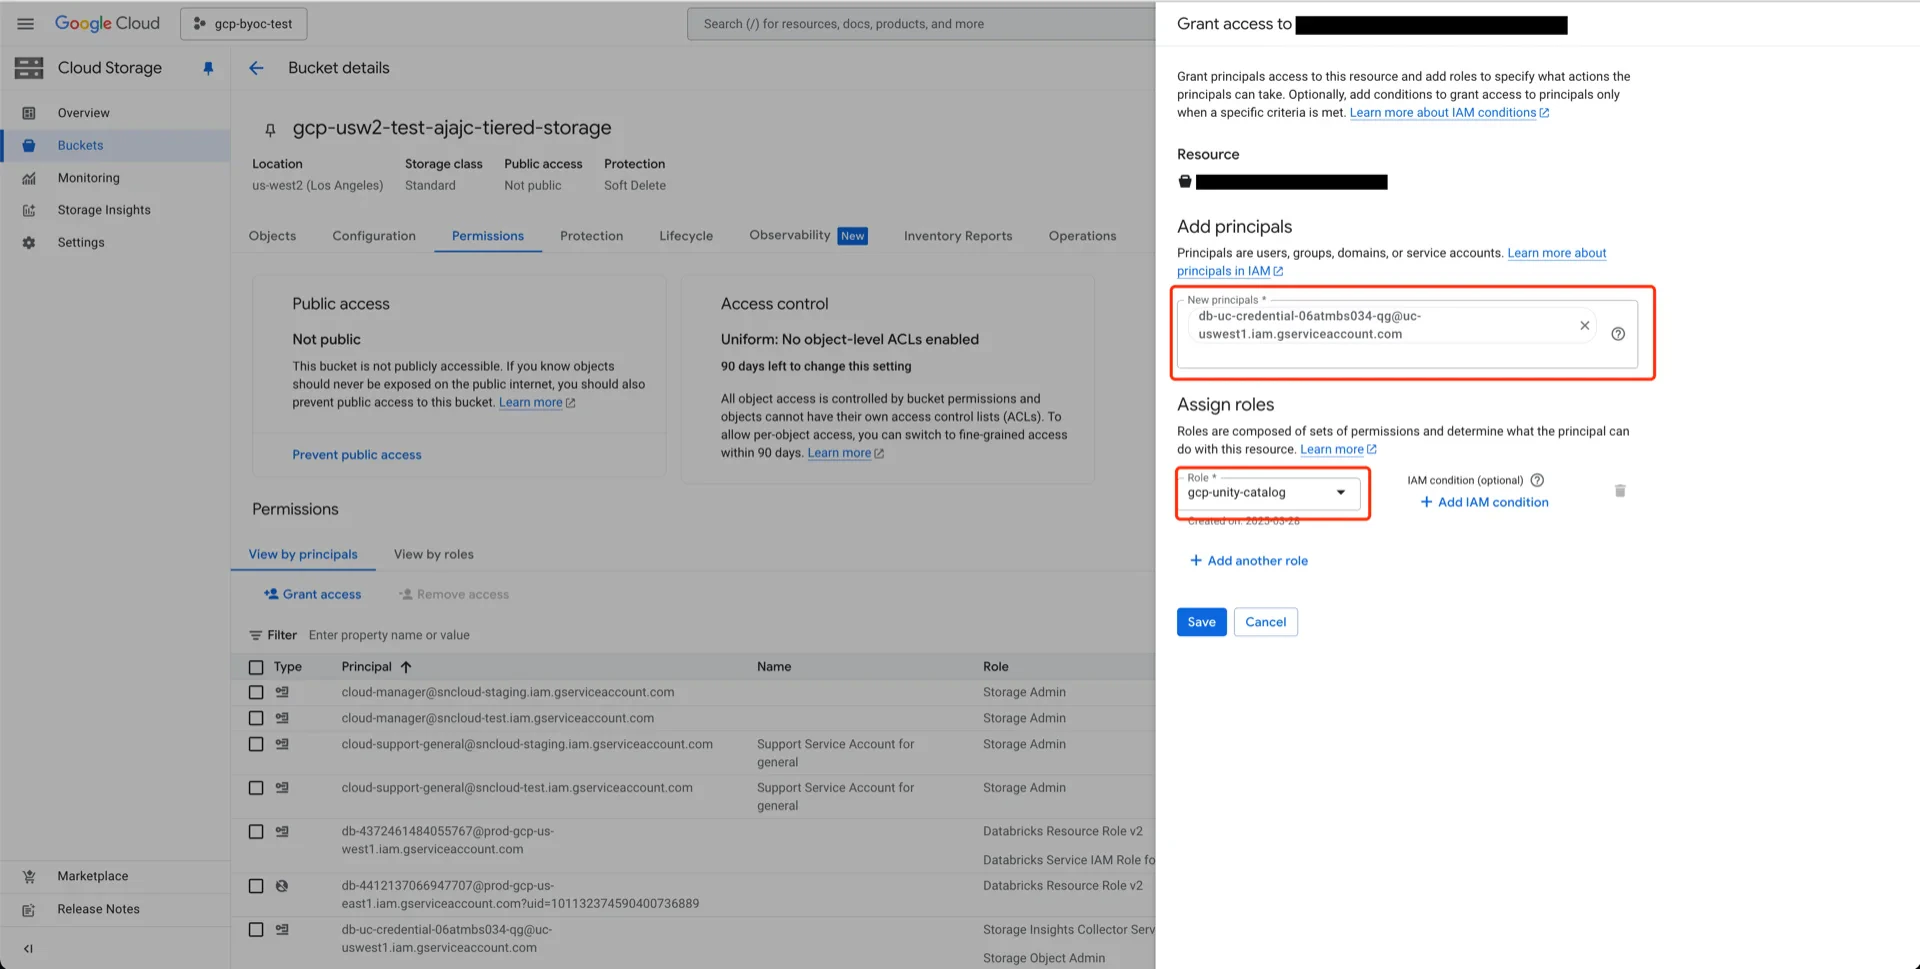
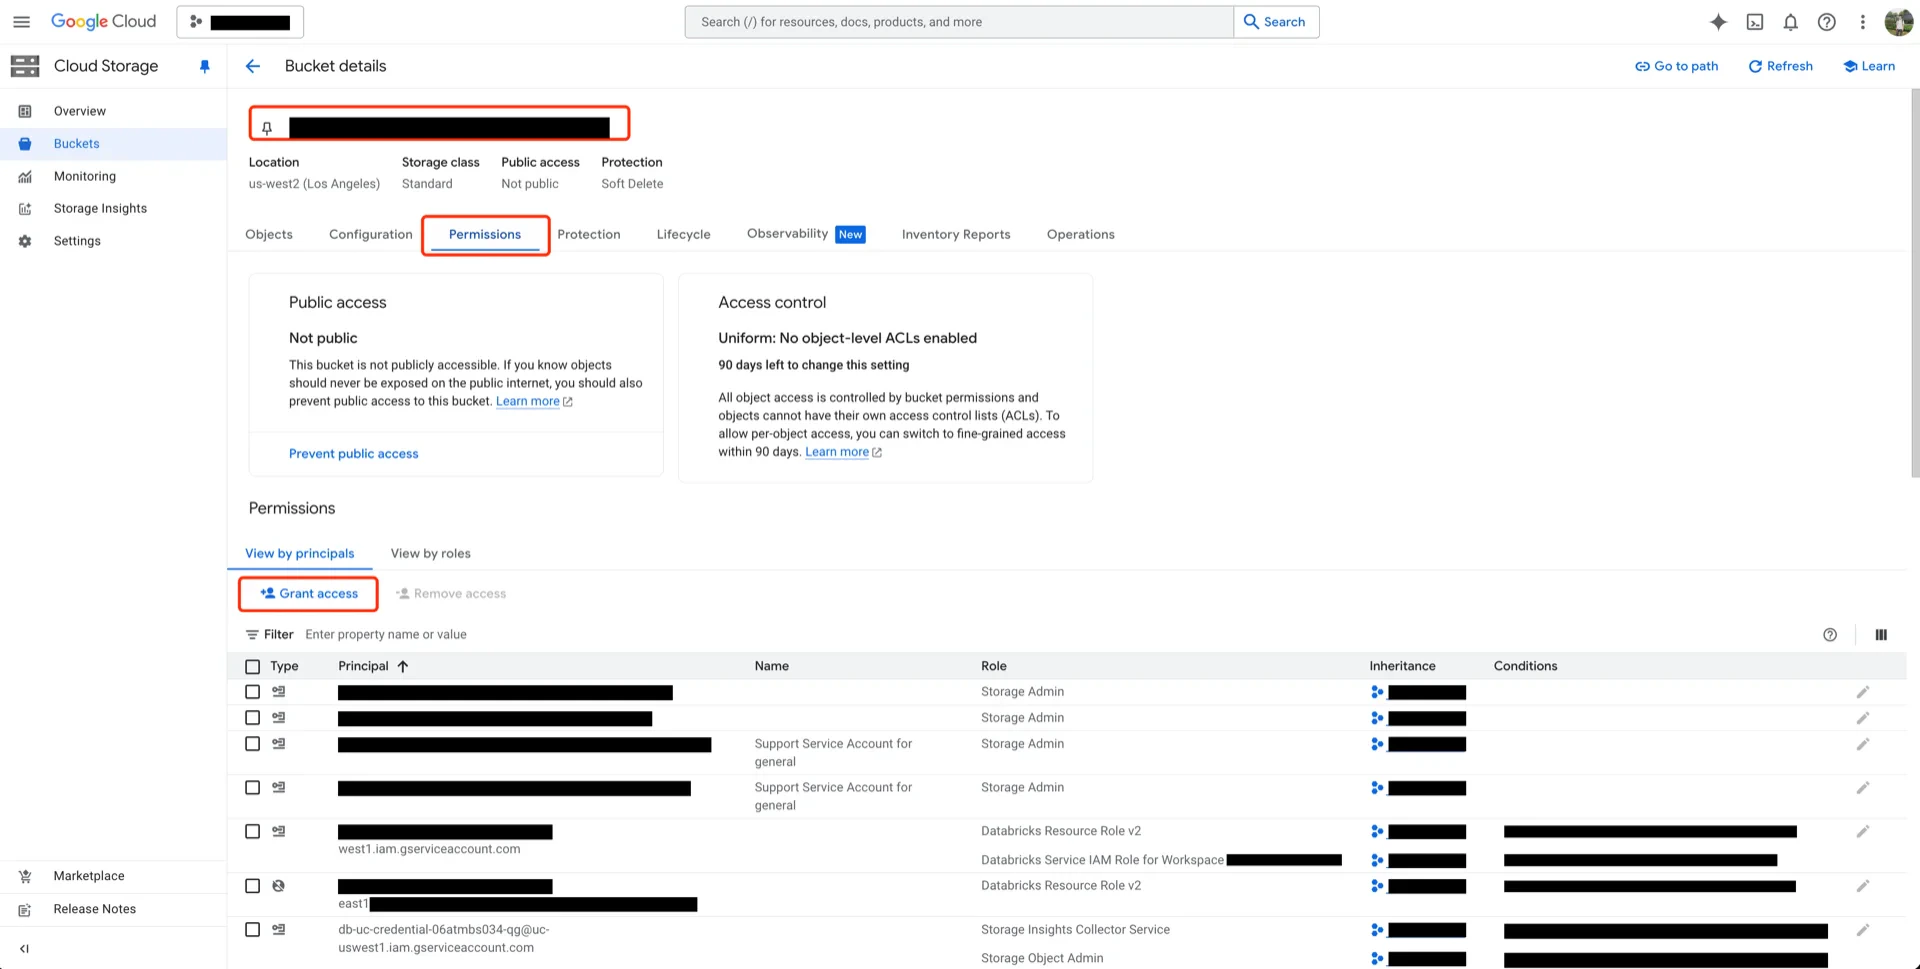 Add the Databricks service account, select the role created in step 6.1, and click **SAVE**.
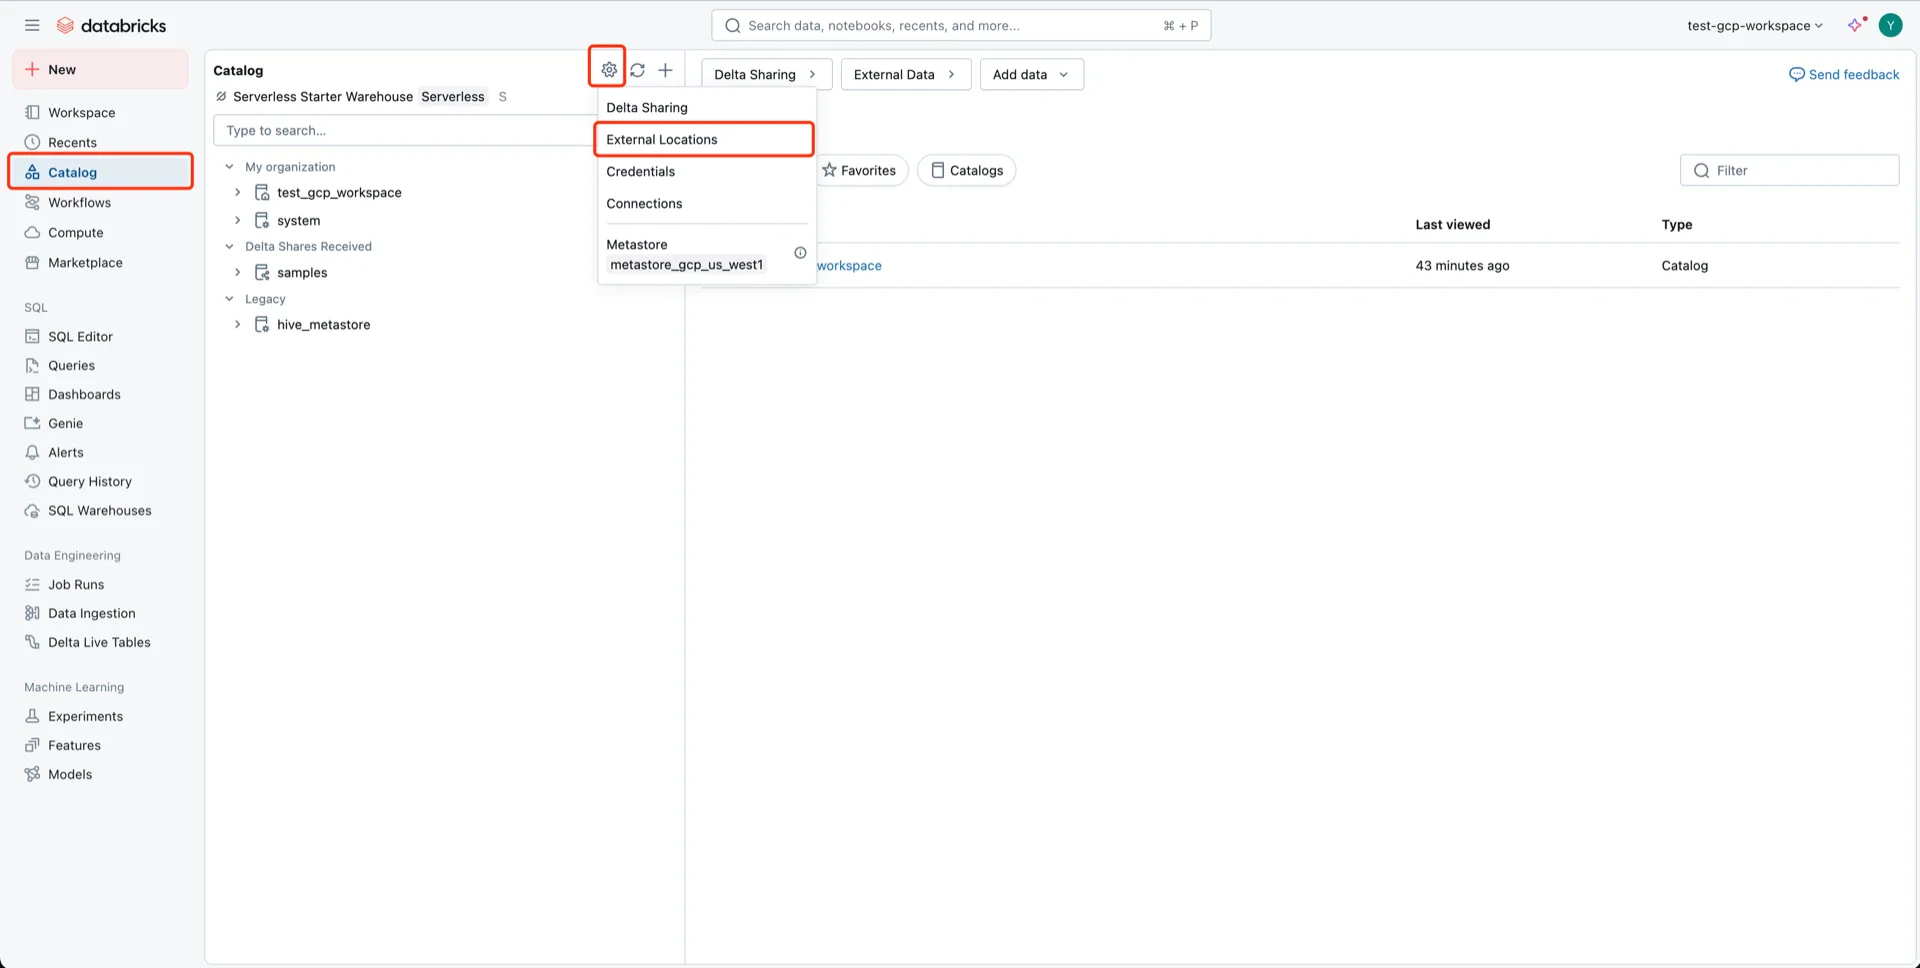
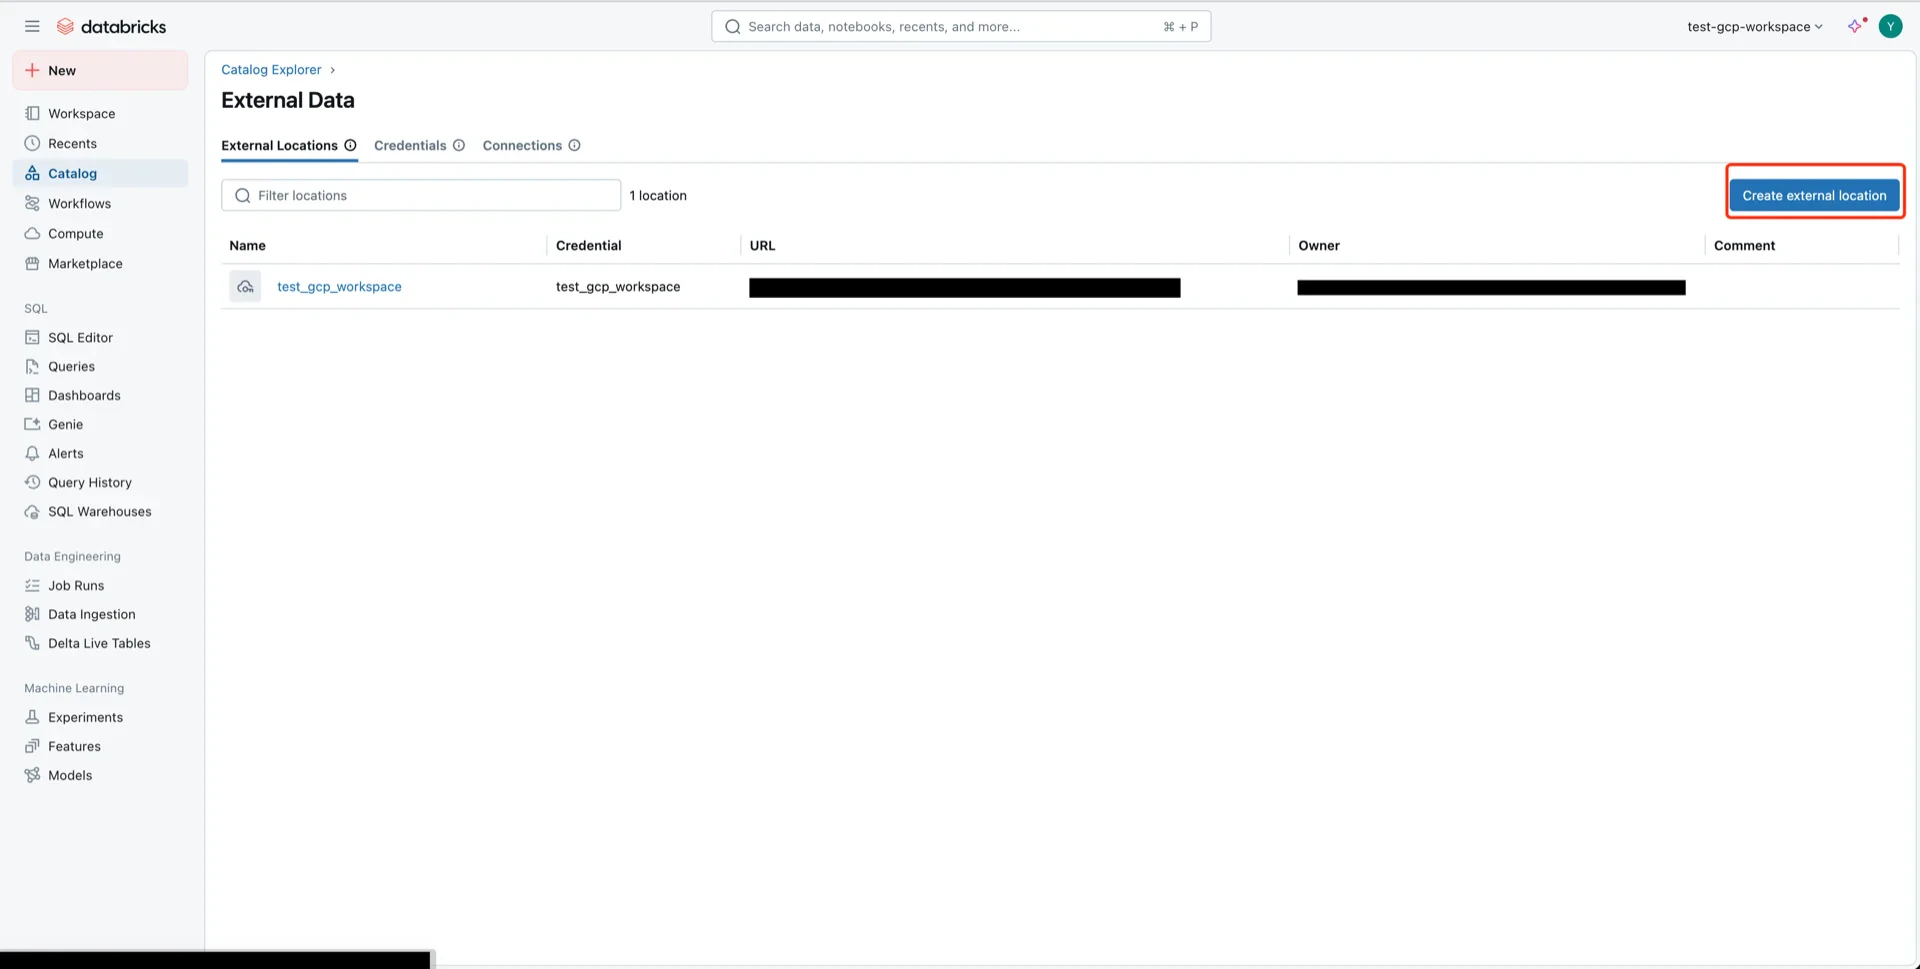
 ## 6. Create an External Location in Unity Catalog
Navigate to **Catalog -> Settings -> External Locations** and create a new external location.
## 6. Create an External Location in Unity Catalog
Navigate to **Catalog -> Settings -> External Locations** and create a new external location.
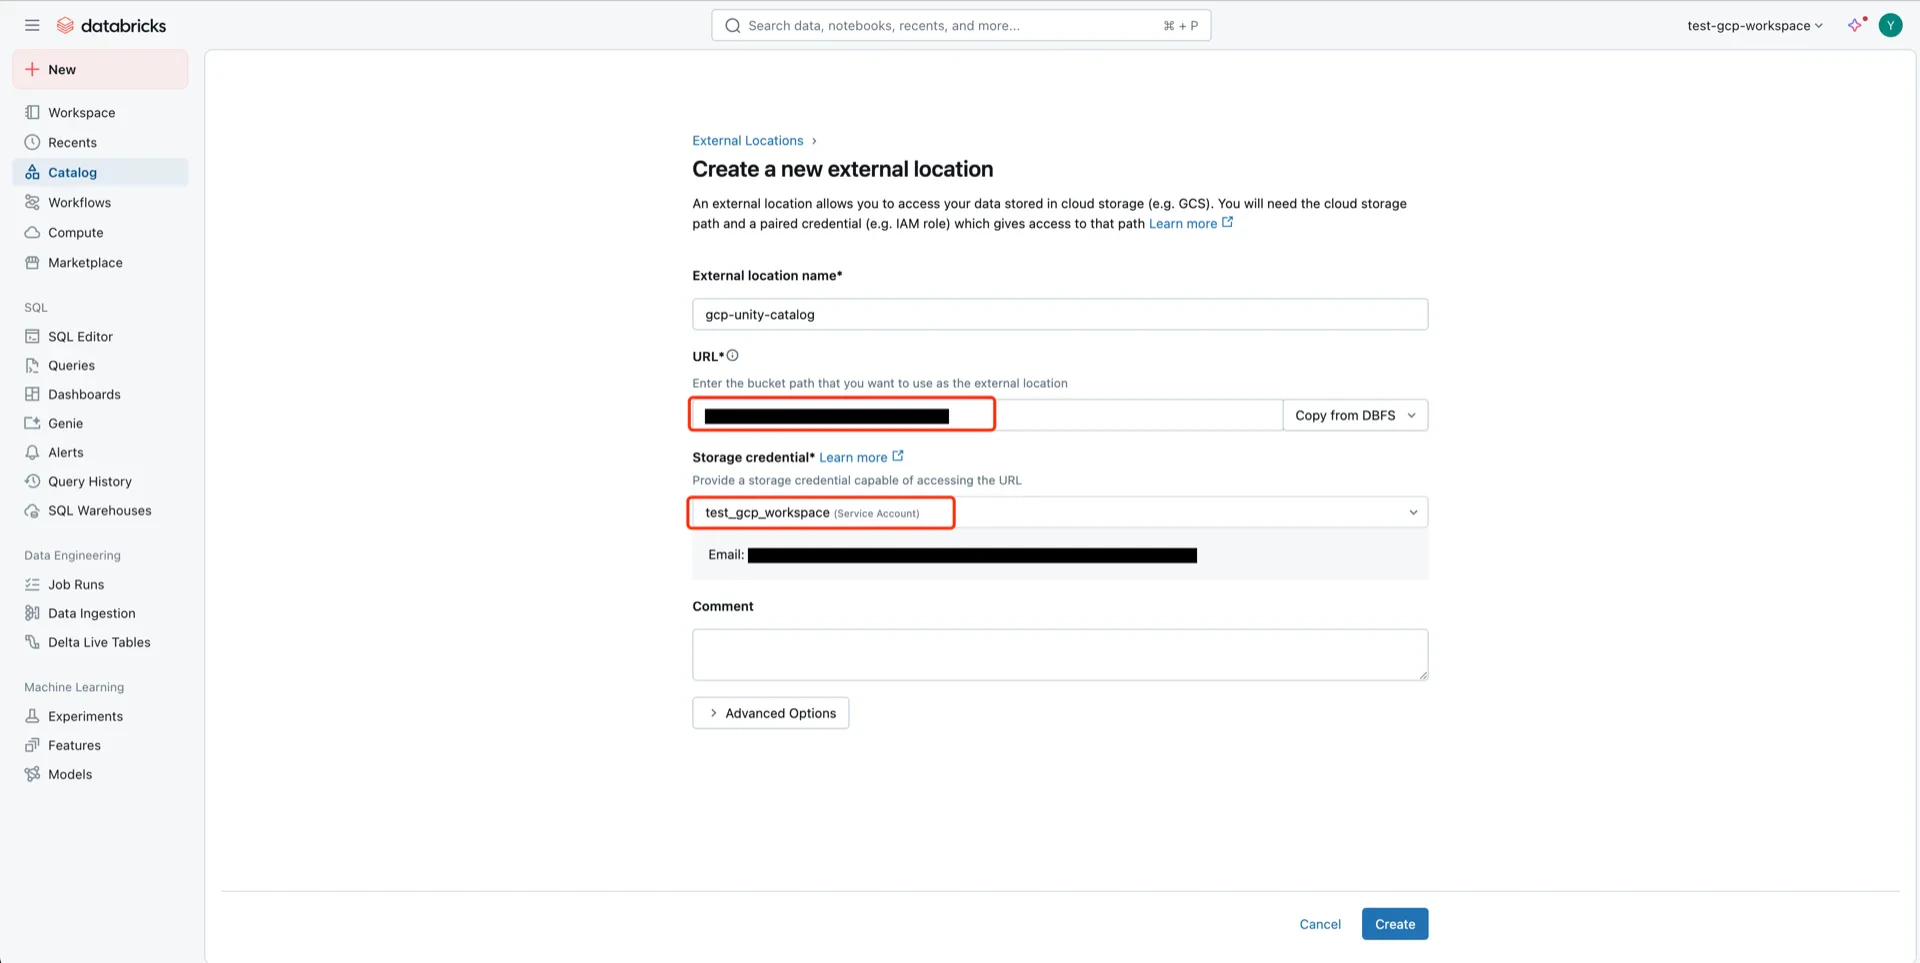
 Configure with:
* **External location name:** any name
* **URL:** the GCS bucket path
* **Storage credential:** the Unity Catalog credential
Configure with:
* **External location name:** any name
* **URL:** the GCS bucket path
* **Storage credential:** the Unity Catalog credential
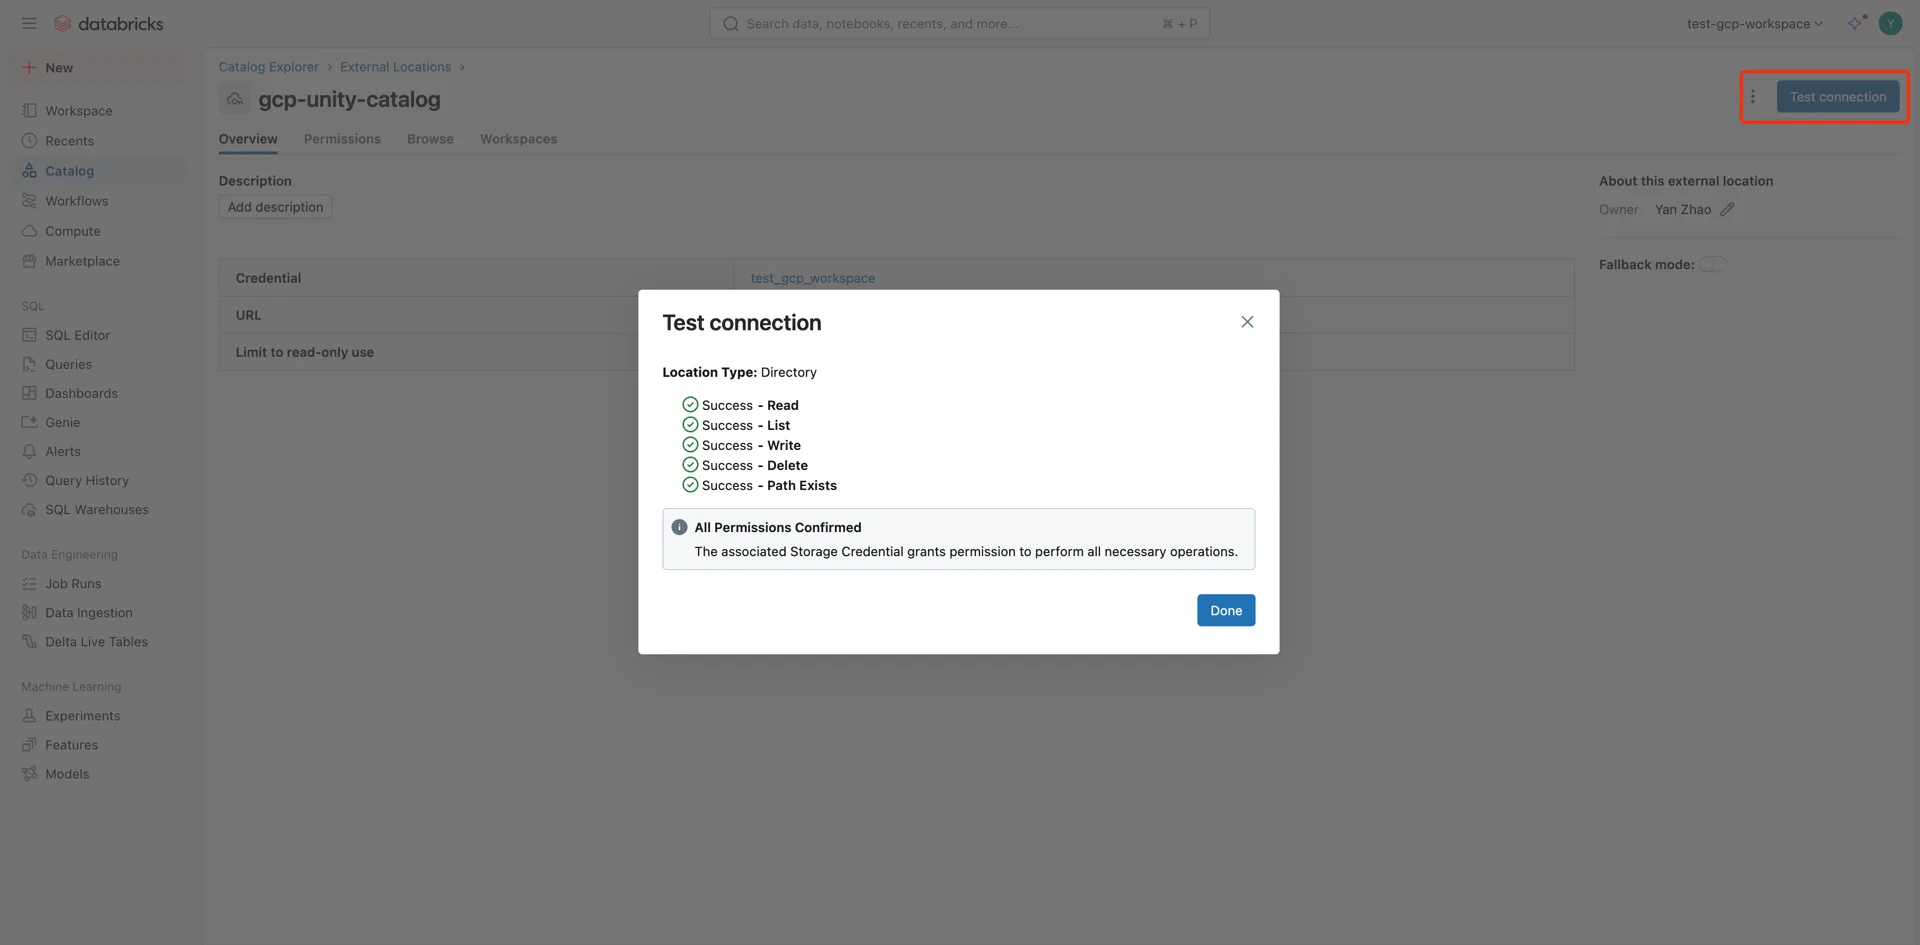
 Click **Test connection** to verify access.
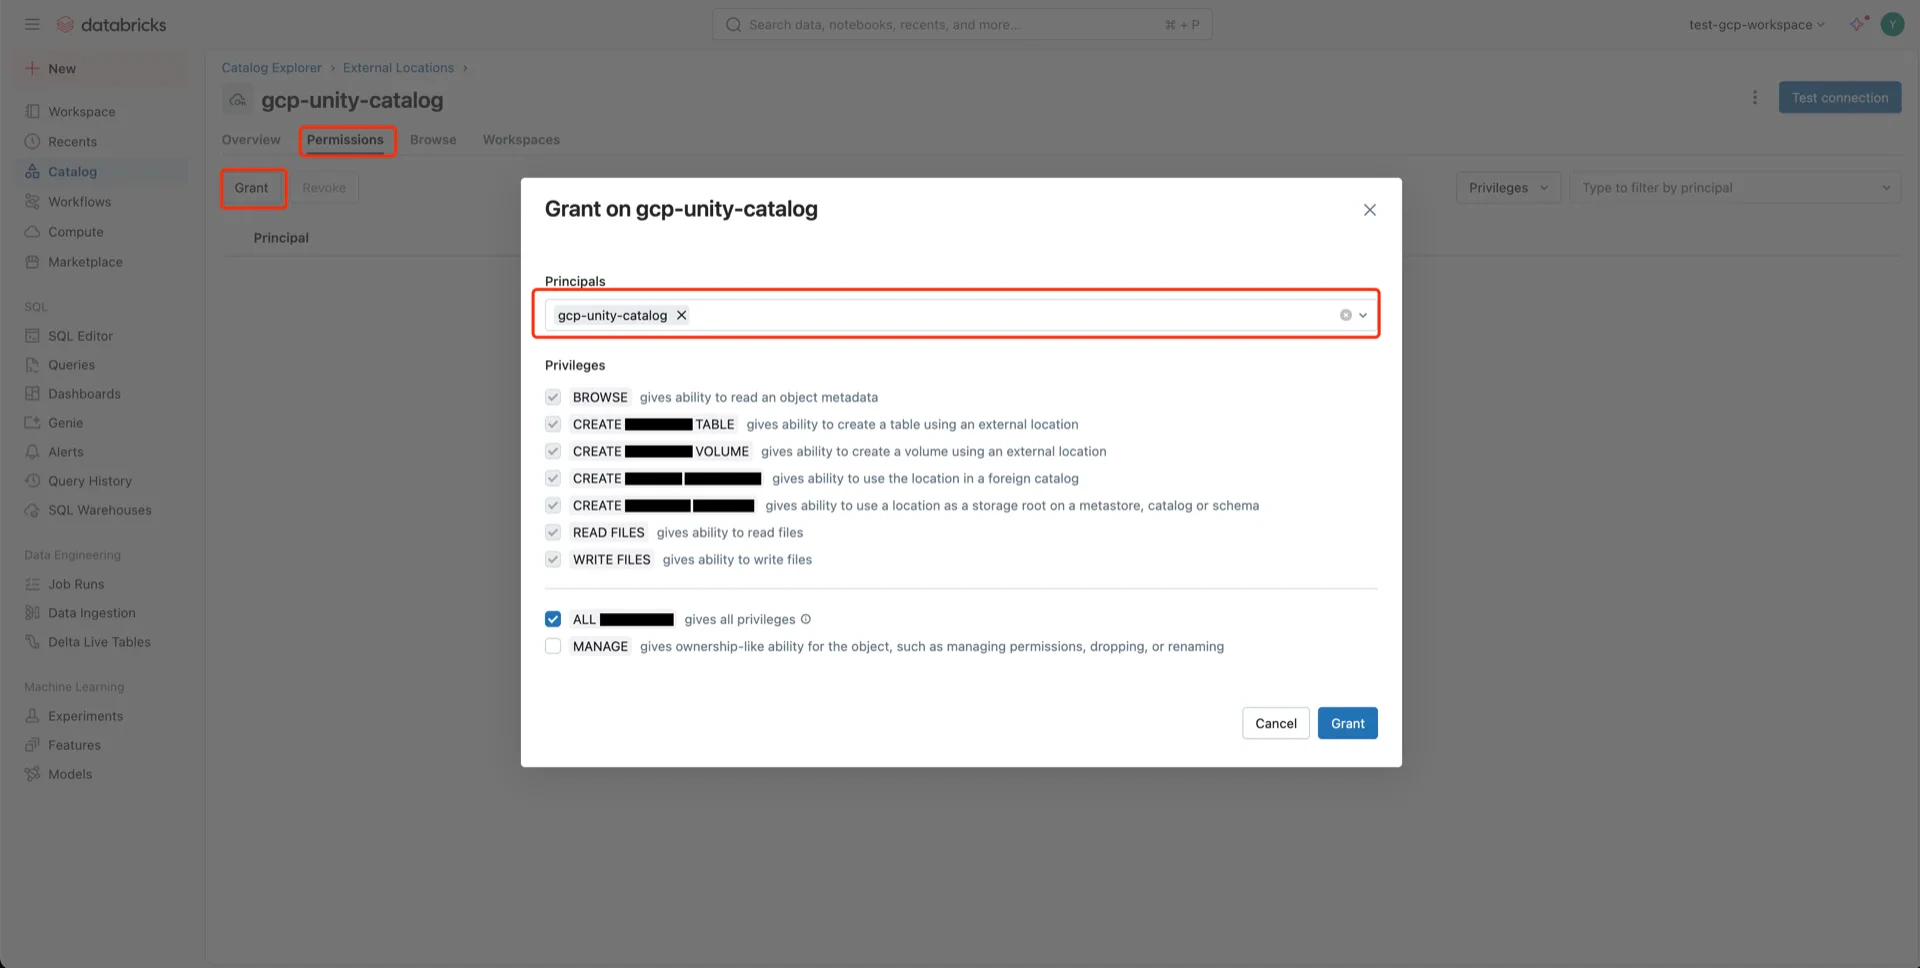
 Grant **ALL PRIVILEGES** on the external location to the service principal.
 ## Catalog Information Summary
When the steps above are complete, collect the following values for the StreamNative Ursa compaction service:
| Value | Description |
| --------------------------------------------------- | ------------------------------------------------------------------------- |
| `unityCatalogUri` | Databricks workspace URL (e.g., `https://.gcp.databricks.com`) |
| `unityCatalogName` | The Unity Catalog name |
| `unityCatalogToken` | Personal access token from step 2, **or** |
| `unityCatalogClientId` / `unityCatalogClientSecret` | OAuth2 credentials from step 3 |
For the next steps, see [Register Lakehouse Catalogs](/cloud/lakehouse/catalogs/register-catalog).
## Catalog Information Summary
When the steps above are complete, collect the following values for the StreamNative Ursa compaction service:
| Value | Description |
| --------------------------------------------------- | ------------------------------------------------------------------------- |
| `unityCatalogUri` | Databricks workspace URL (e.g., `https://.gcp.databricks.com`) |
| `unityCatalogName` | The Unity Catalog name |
| `unityCatalogToken` | Personal access token from step 2, **or** |
| `unityCatalogClientId` / `unityCatalogClientSecret` | OAuth2 credentials from step 3 |
For the next steps, see [Register Lakehouse Catalogs](/cloud/lakehouse/catalogs/register-catalog).