> ## Documentation Index
> Fetch the complete documentation index at: https://docs.streamnative.io/llms.txt
> Use this file to discover all available pages before exploring further.
# Open Catalog for Iceberg on AWS
This guide describes how to prepare a Snowflake Open Catalog (Polaris) for use with StreamNative Ursa as an Iceberg catalog on AWS.
> **Important:** Polaris does not support reading buckets from a different region. The StreamNative Ursa cluster, the storage bucket, and the Polaris catalog must all reside in the **same AWS region**.
## Prerequisites
* A Snowflake standard account
* An AWS account with permissions to create S3 buckets and IAM roles
* Access to the Snowflake Open Catalog feature (request via your Snowflake account team if not yet enabled)
## 1. Create a Snowflake Open Catalog Account
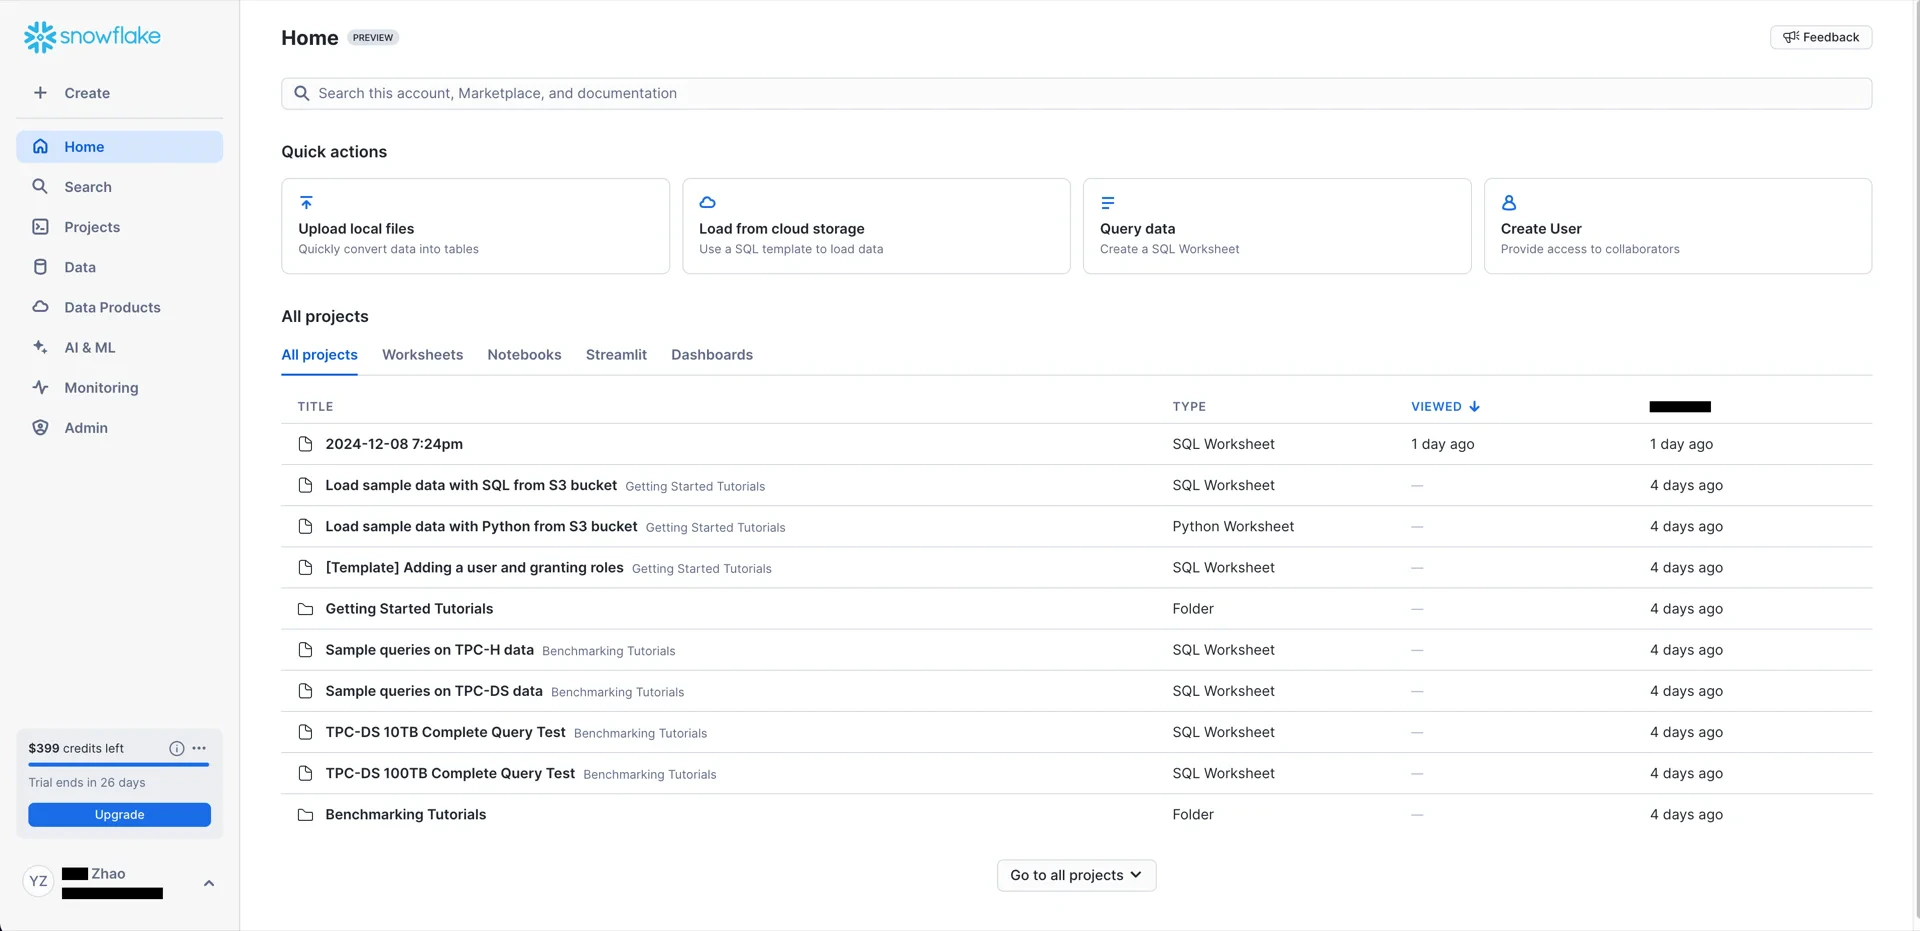
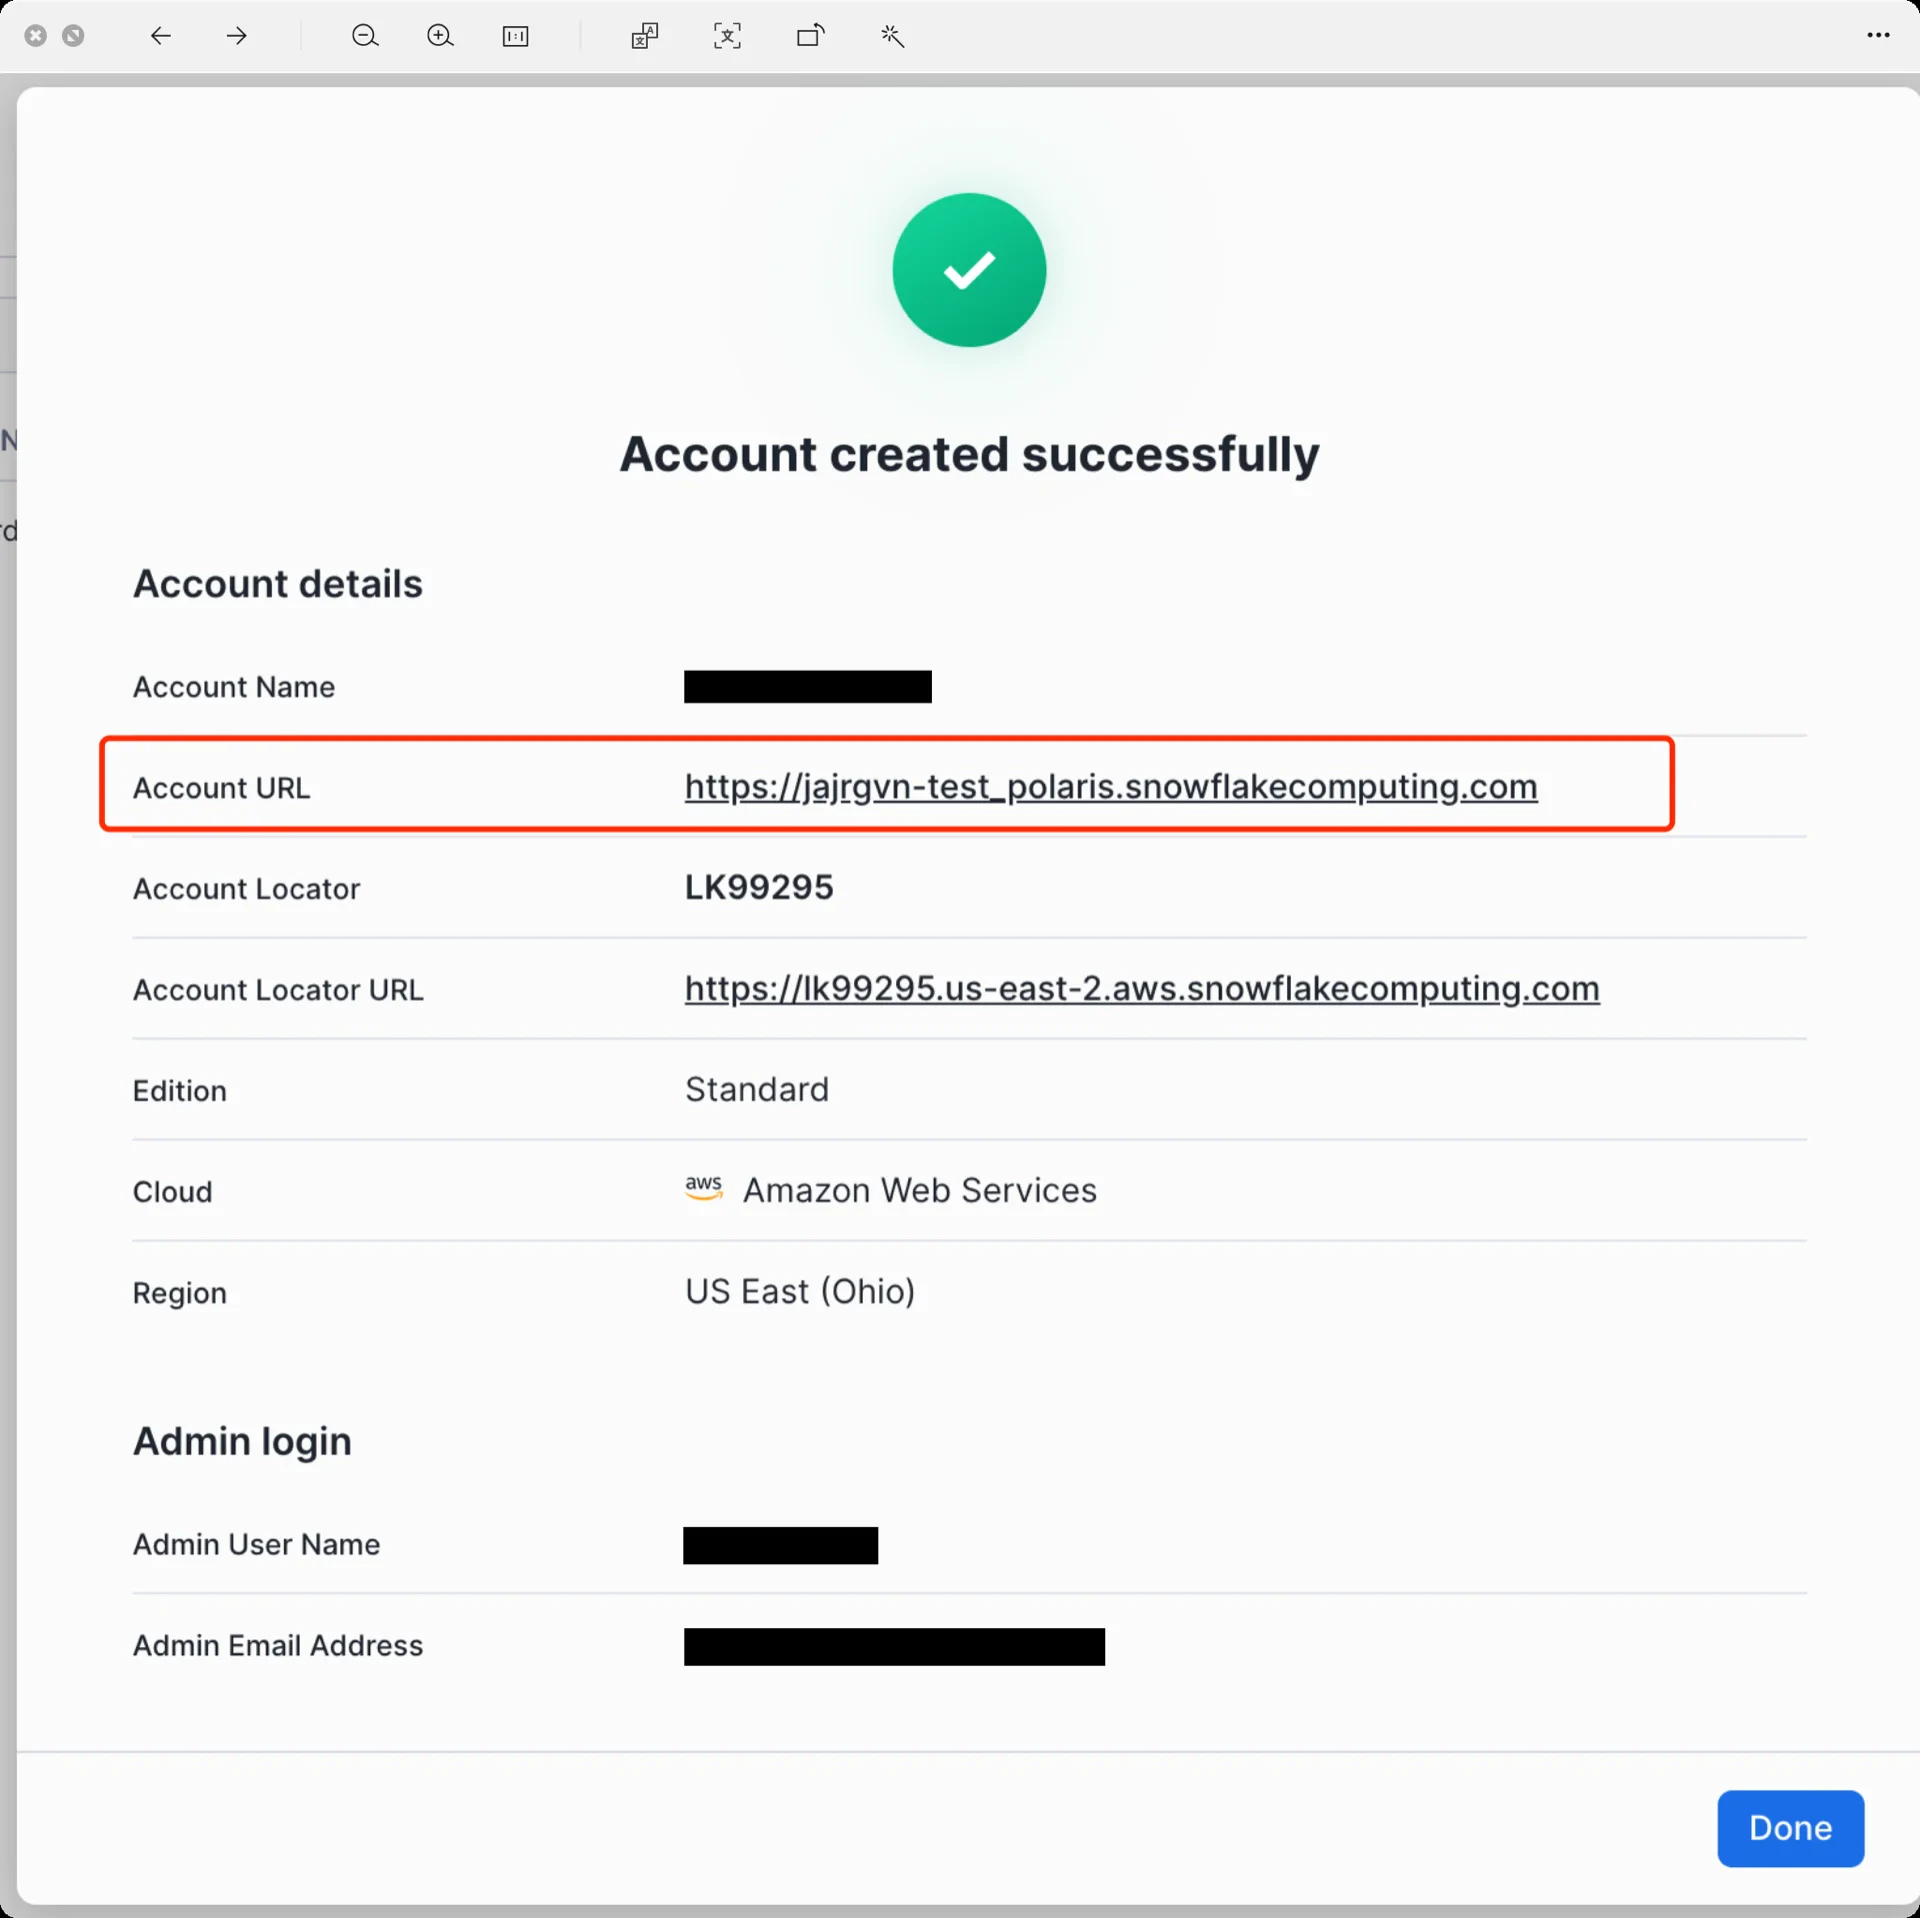
The Snowflake Open Catalog console requires a dedicated **Open Catalog** account. From the standard Snowflake console, navigate to **Admin -> Accounts** and use the toggle to **Create Snowflake Open Catalog Account**.
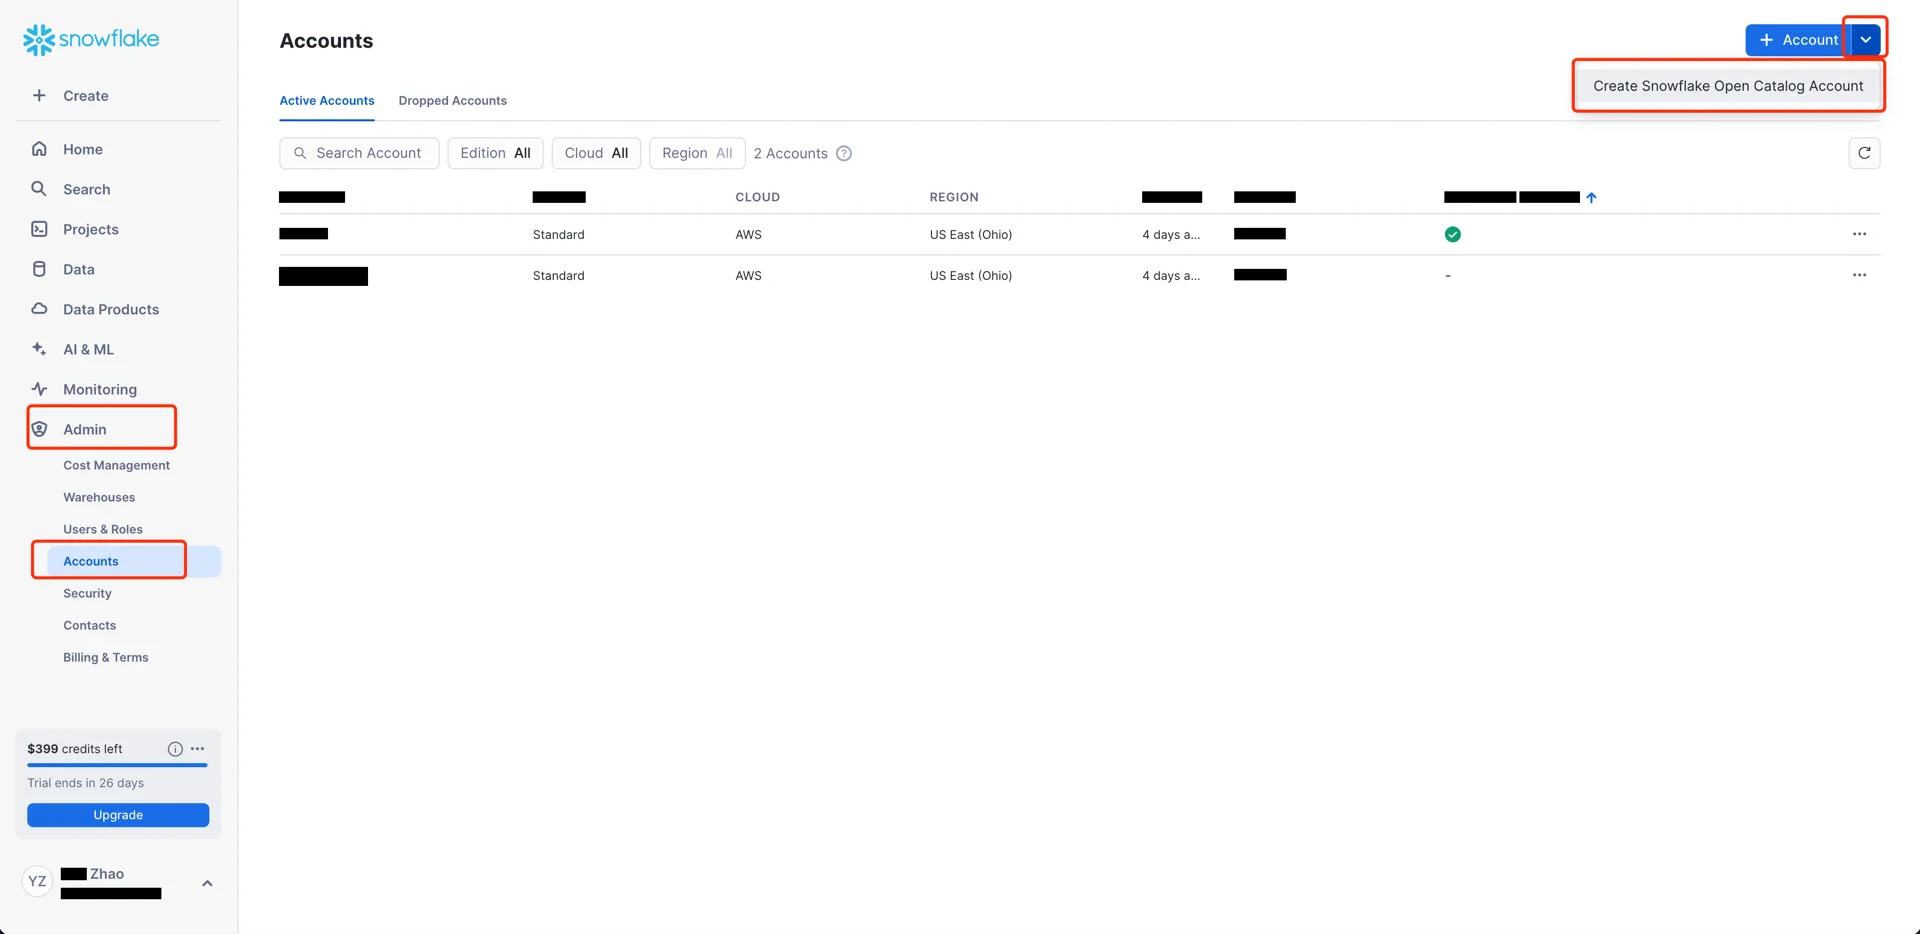 Configure the account with:
* **Cloud:** AWS
* **Region:** the region in which your S3 bucket resides (for example, `US East (Ohio)`)
* **Edition:** any
Configure the account with:
* **Cloud:** AWS
* **Region:** the region in which your S3 bucket resides (for example, `US East (Ohio)`)
* **Edition:** any
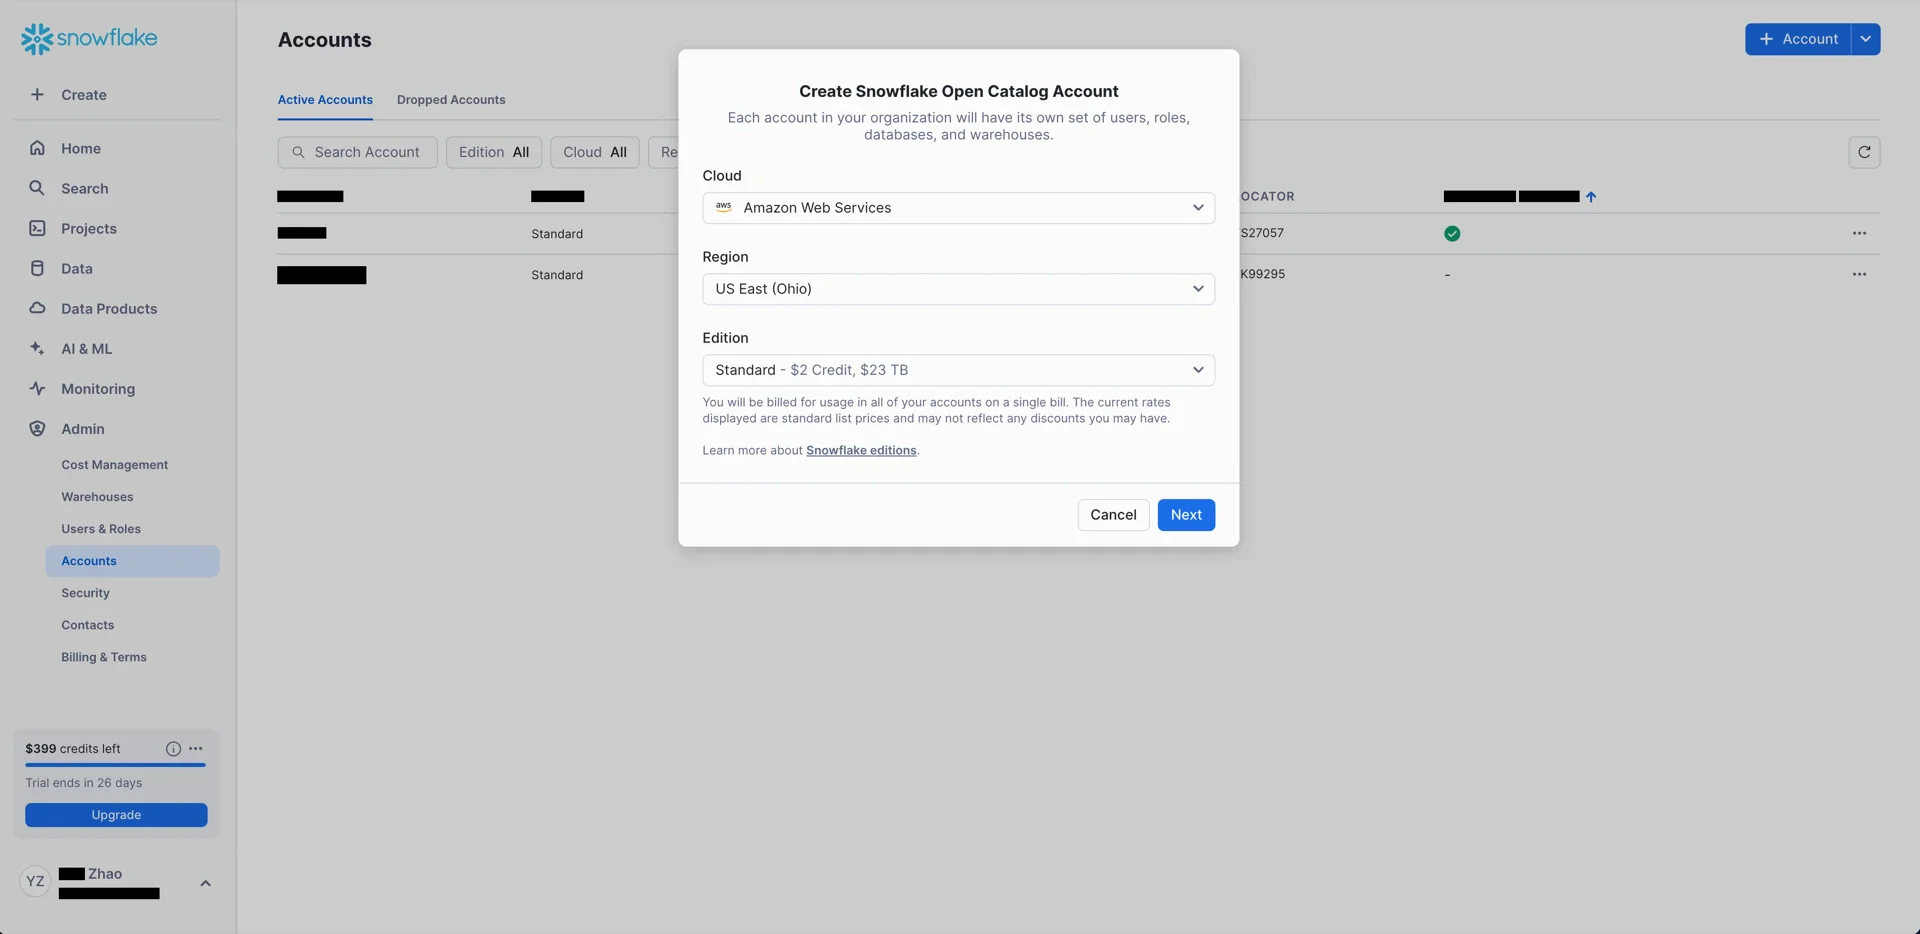 Provide an admin username and password.
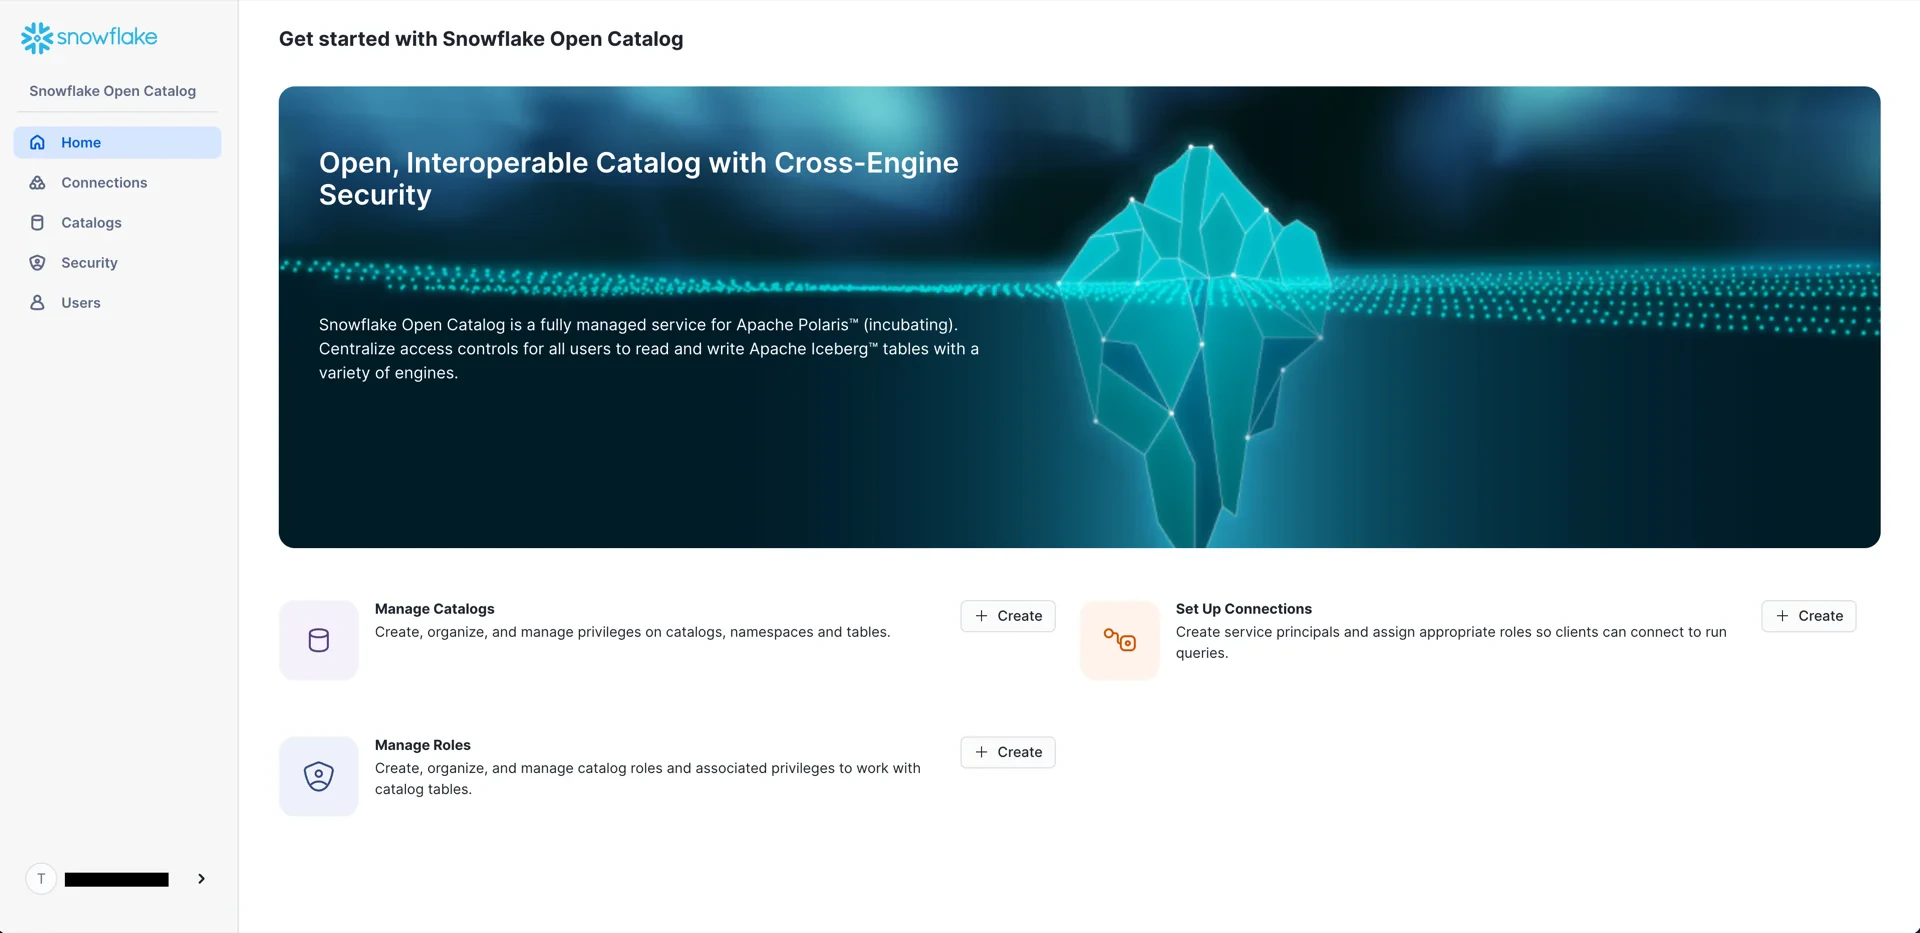
 After creation, click the **Account URL** to sign in to the Open Catalog console.
 ## 2. Create an S3 Bucket
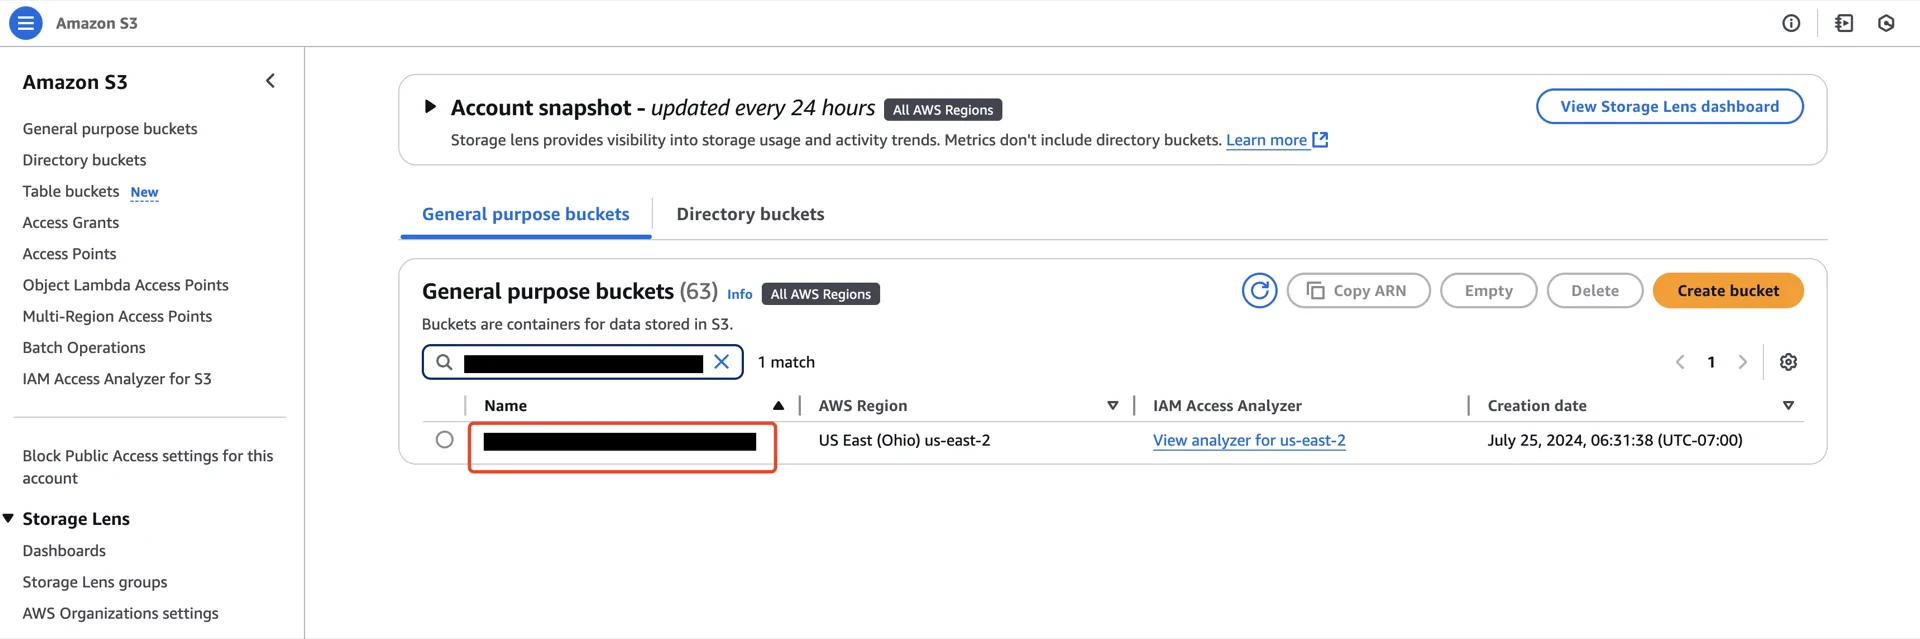
Create an S3 bucket in the same region as the Open Catalog account.
## 2. Create an S3 Bucket
Create an S3 bucket in the same region as the Open Catalog account.
 ## 3. Create an IAM Policy
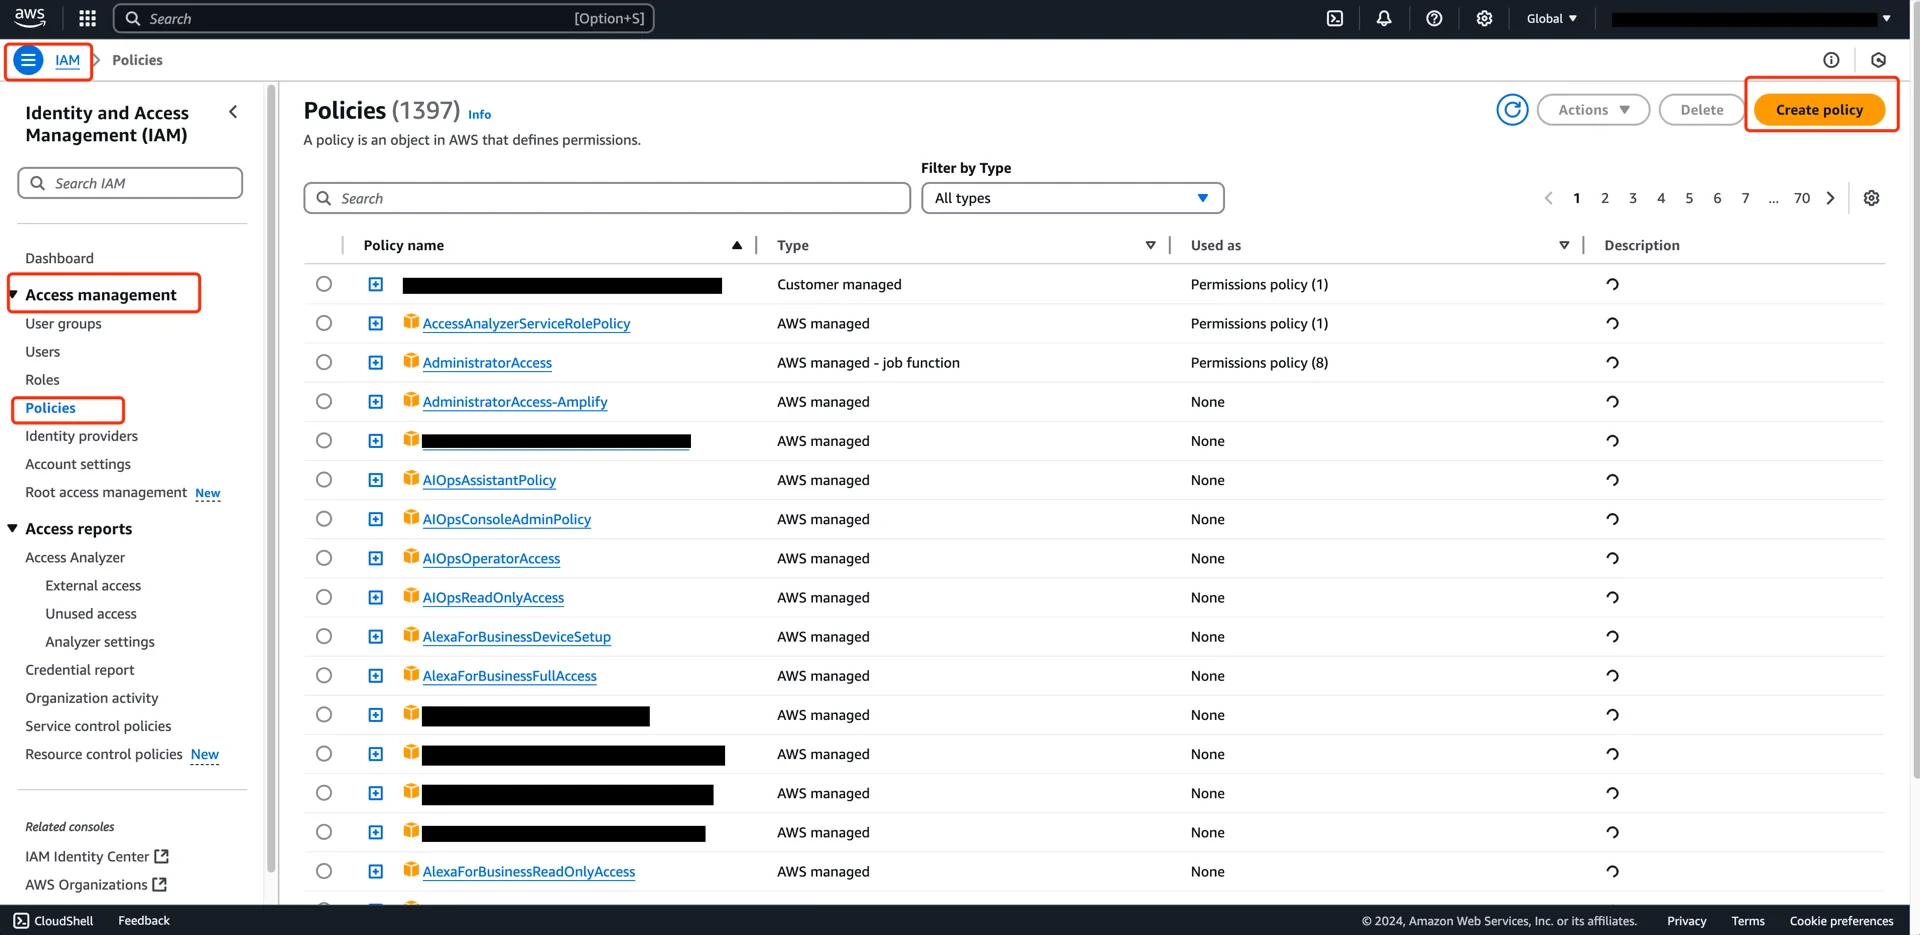
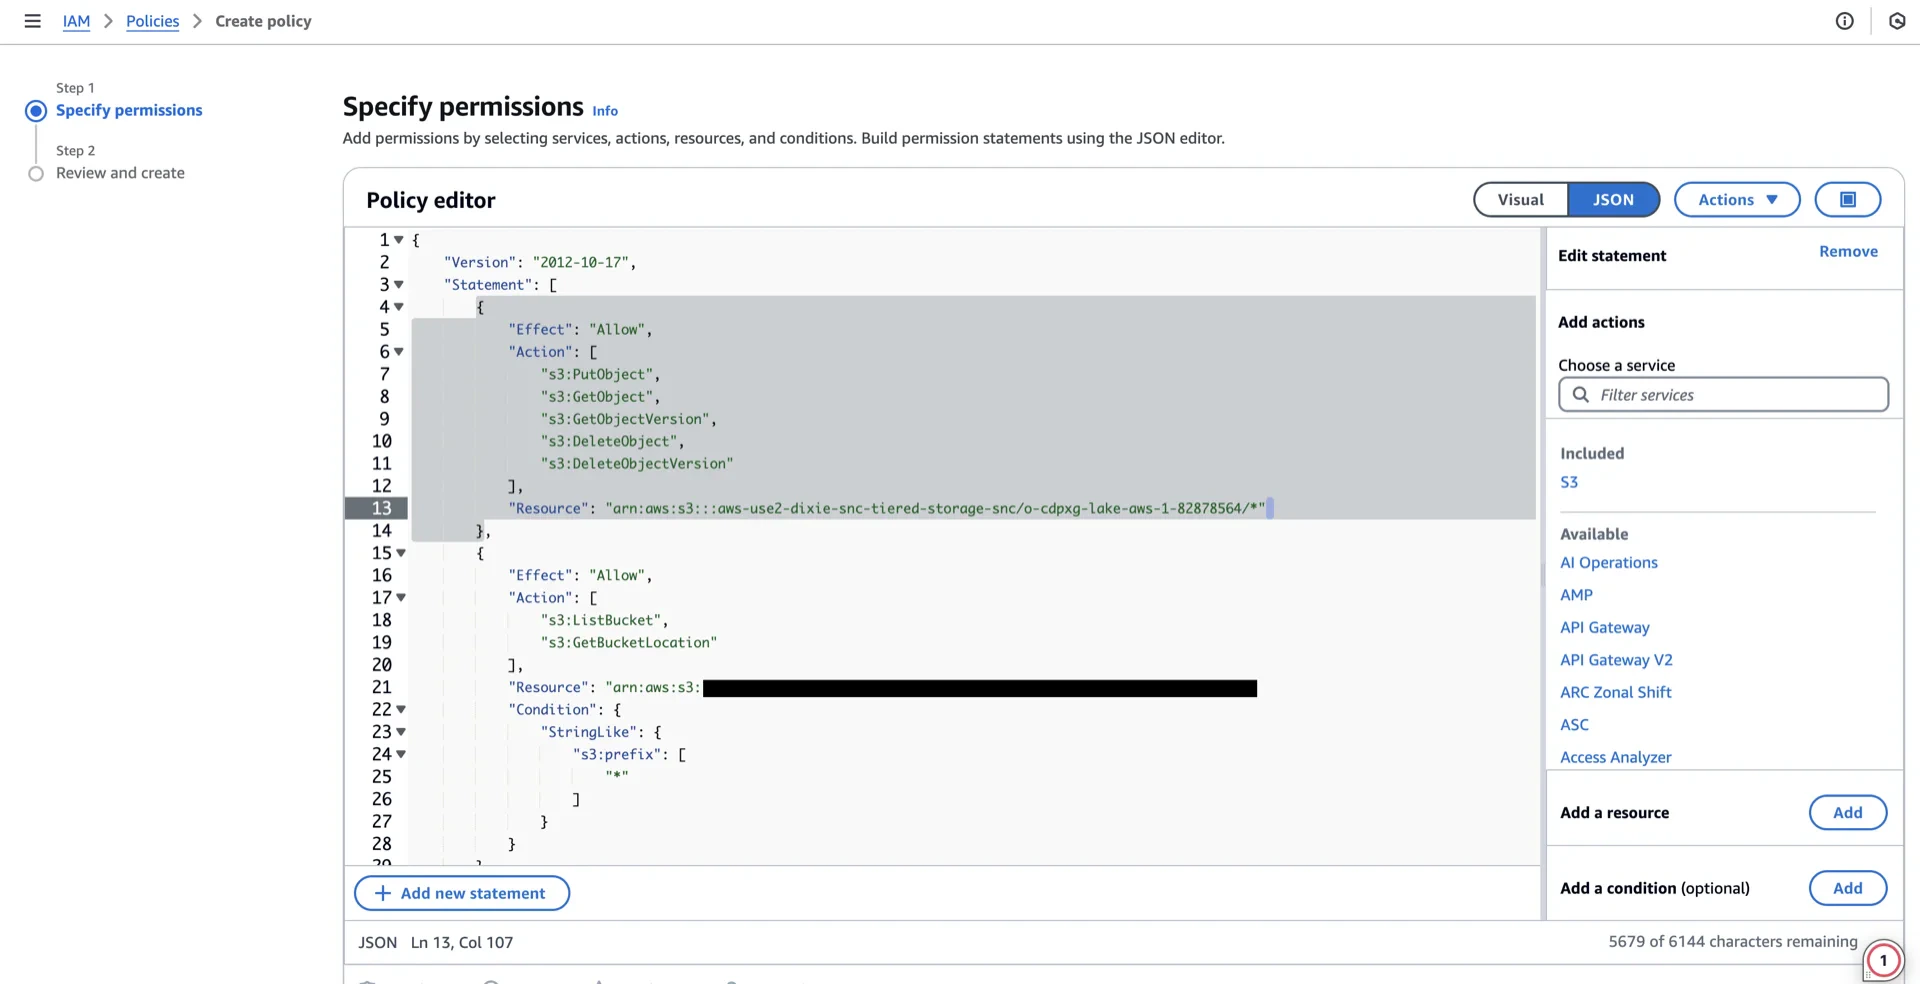
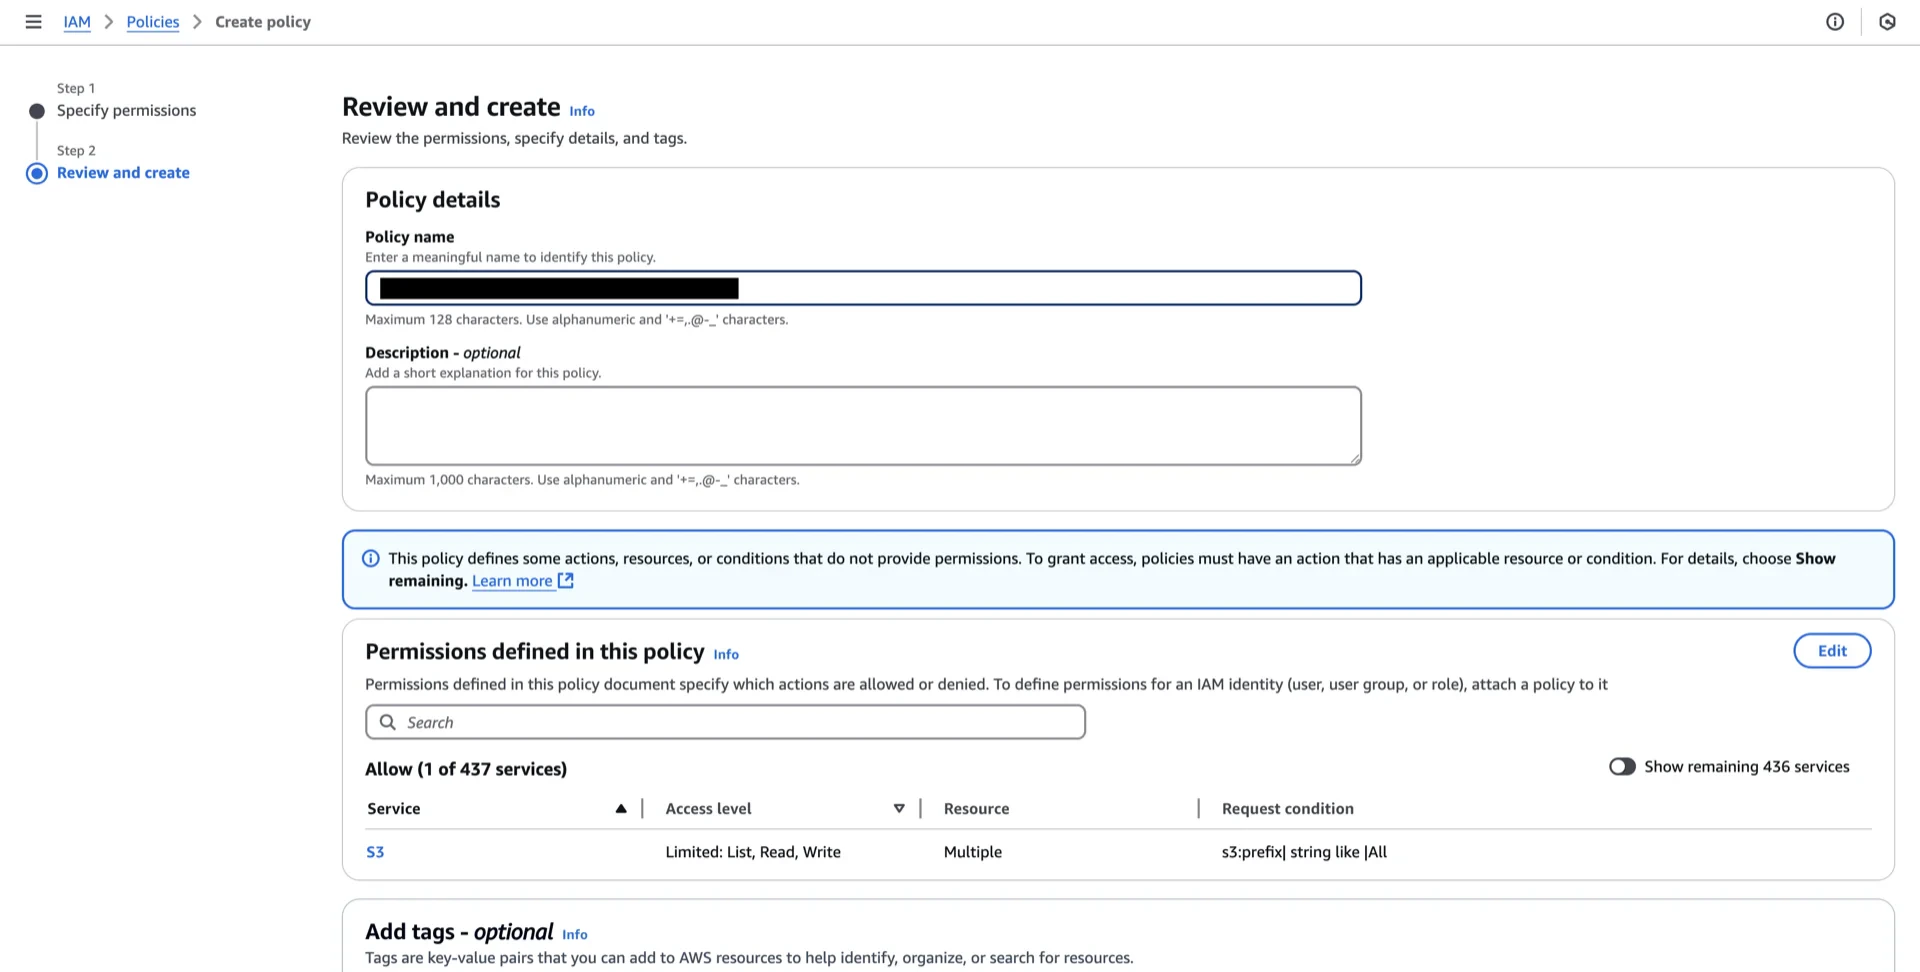
Navigate to **AWS IAM -> Policies -> Create policy**.
## 3. Create an IAM Policy
Navigate to **AWS IAM -> Policies -> Create policy**.
 Paste the following policy, replacing the bucket name and subpath with your values:
```json theme={null}
{
"Version": "2012-10-17",
"Statement": [
{
"Effect": "Allow",
"Action": [
"s3:PutObject",
"s3:GetObject",
"s3:GetObjectVersion",
"s3:DeleteObject",
"s3:DeleteObjectVersion"
],
"Resource": "arn:aws:s3::://*"
},
{
"Effect": "Allow",
"Action": [
"s3:ListBucket",
"s3:GetBucketLocation"
],
"Resource": "arn:aws:s3:::/",
"Condition": {
"StringLike": {
"s3:prefix": ["*"]
}
}
}
]
}
```
Paste the following policy, replacing the bucket name and subpath with your values:
```json theme={null}
{
"Version": "2012-10-17",
"Statement": [
{
"Effect": "Allow",
"Action": [
"s3:PutObject",
"s3:GetObject",
"s3:GetObjectVersion",
"s3:DeleteObject",
"s3:DeleteObjectVersion"
],
"Resource": "arn:aws:s3::://*"
},
{
"Effect": "Allow",
"Action": [
"s3:ListBucket",
"s3:GetBucketLocation"
],
"Resource": "arn:aws:s3:::/",
"Condition": {
"StringLike": {
"s3:prefix": ["*"]
}
}
}
]
}
```
 ## 4. Create an IAM Role
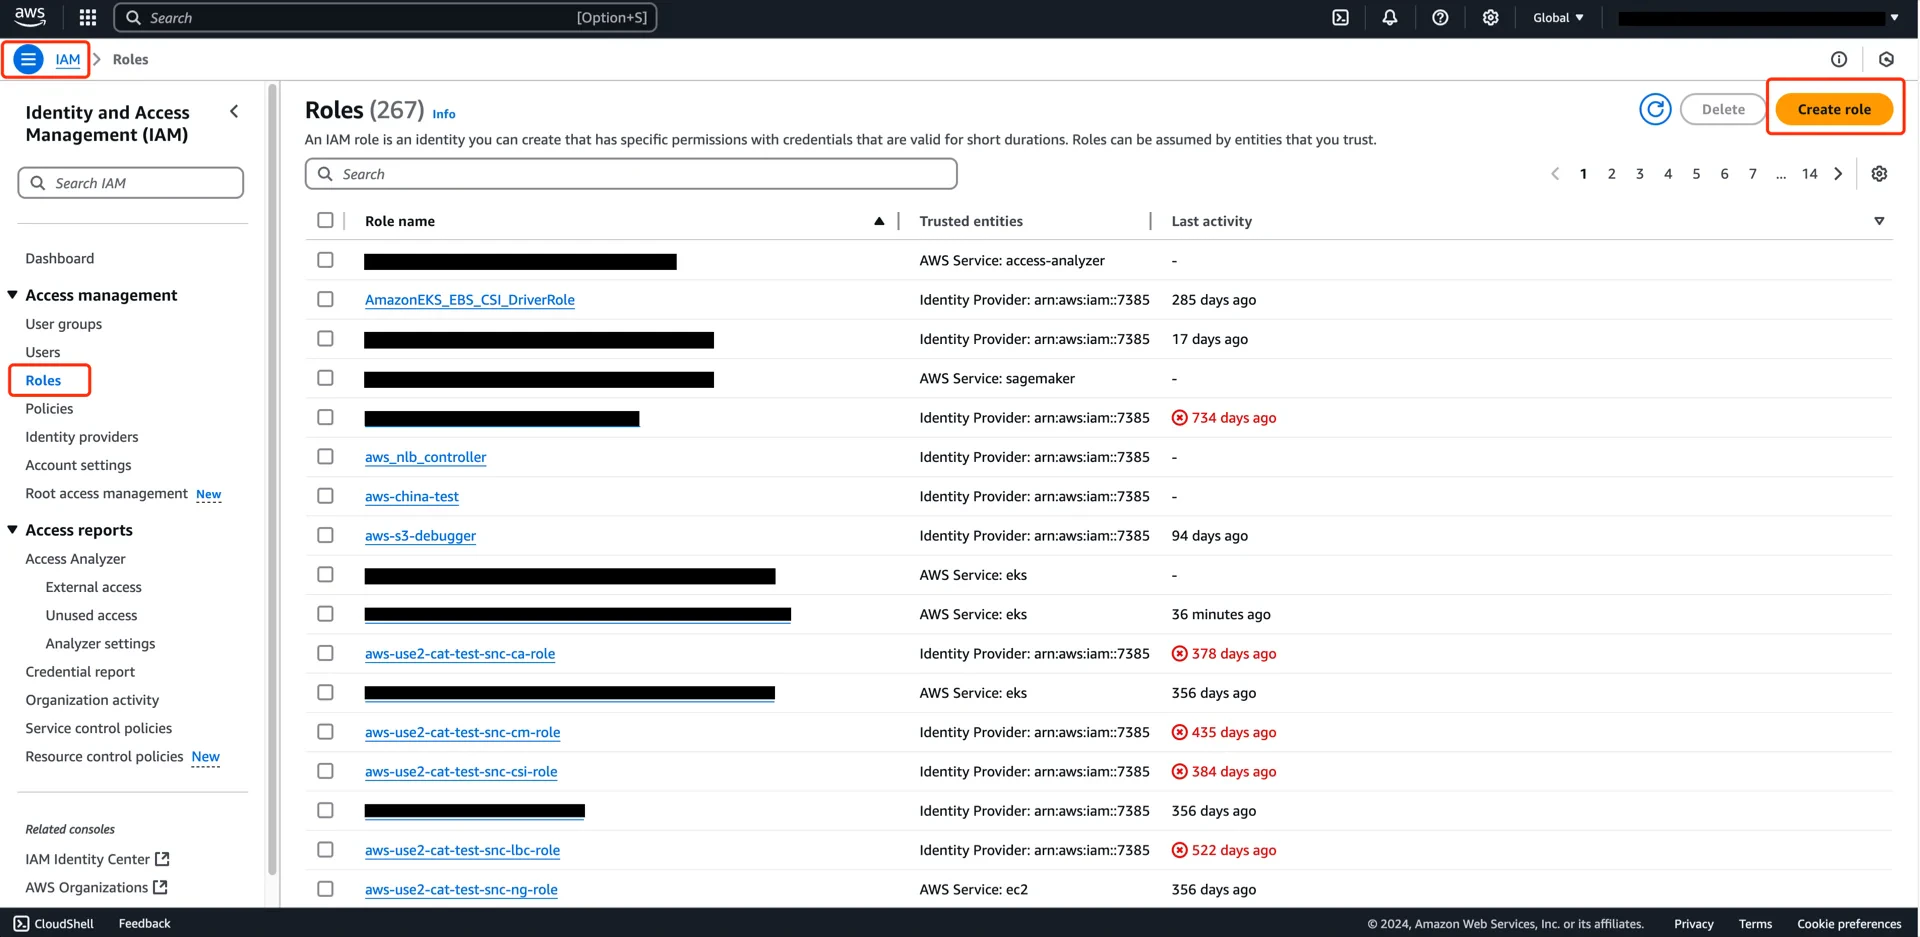
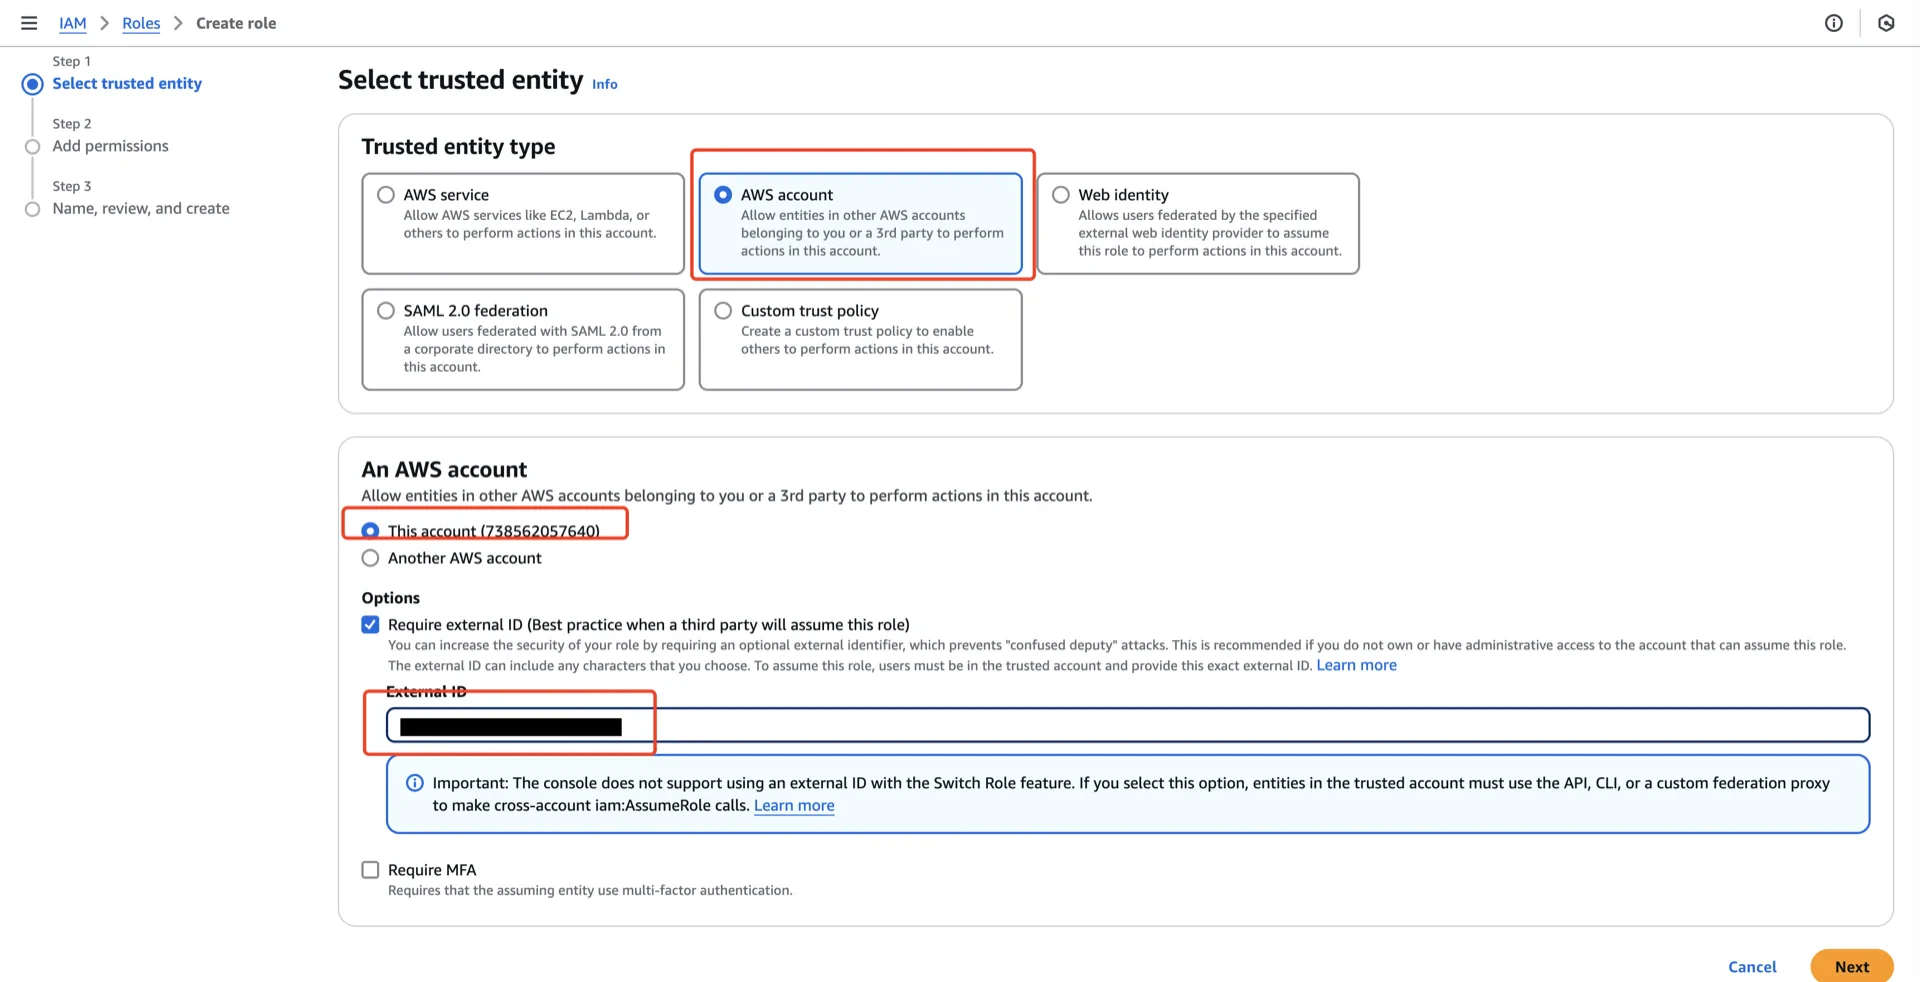
Navigate to **AWS IAM -> Roles -> Create role** and configure:
* **Trusted entity type:** AWS account
* **An AWS account:** This account
* **Enable External ID** with a unique value (you will reference this when creating the Polaris catalog)
## 4. Create an IAM Role
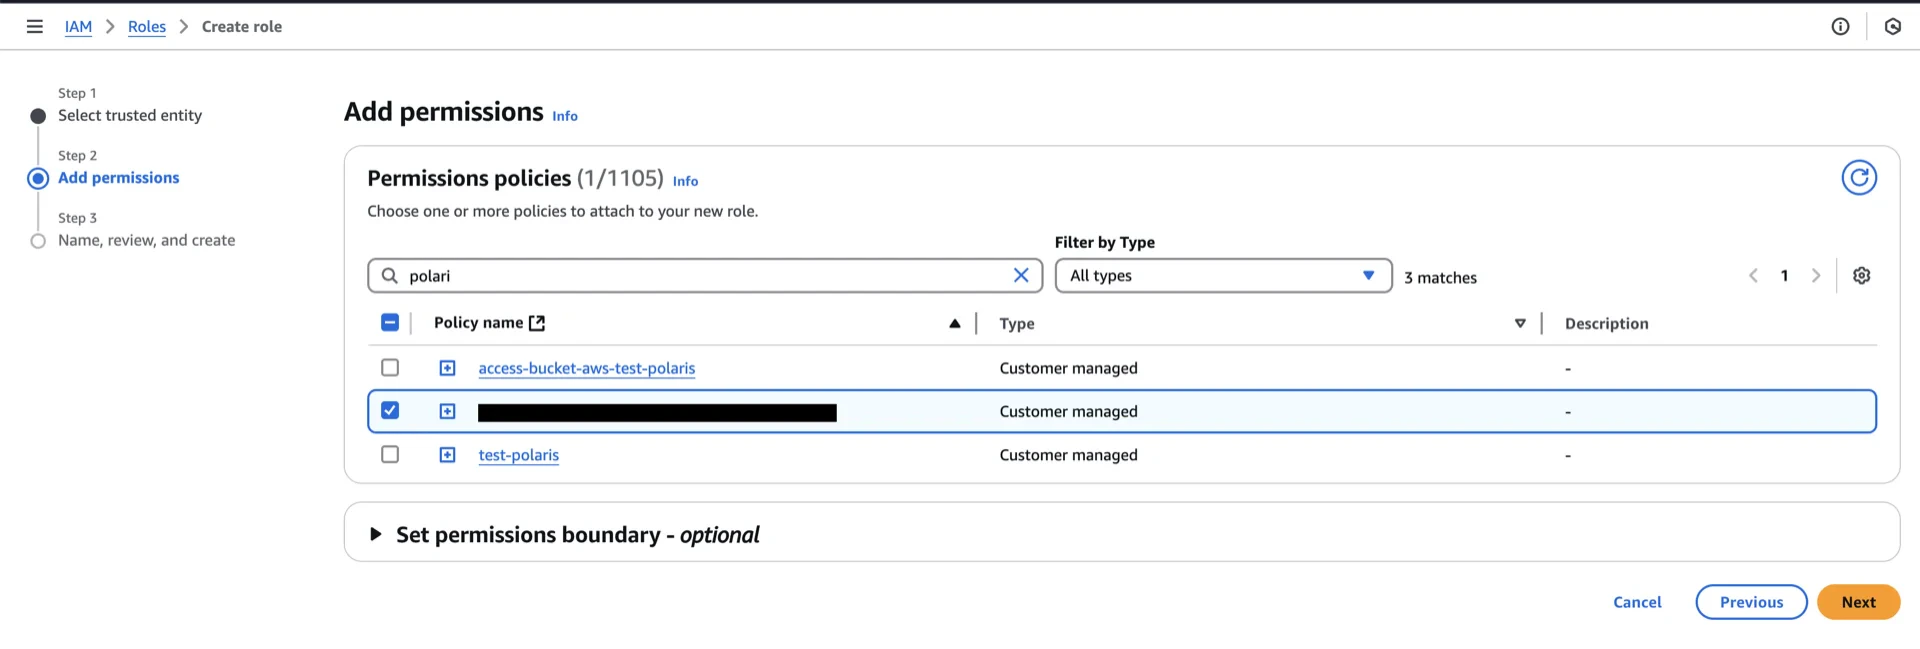
Navigate to **AWS IAM -> Roles -> Create role** and configure:
* **Trusted entity type:** AWS account
* **An AWS account:** This account
* **Enable External ID** with a unique value (you will reference this when creating the Polaris catalog)
 Attach the policy created in step 4.
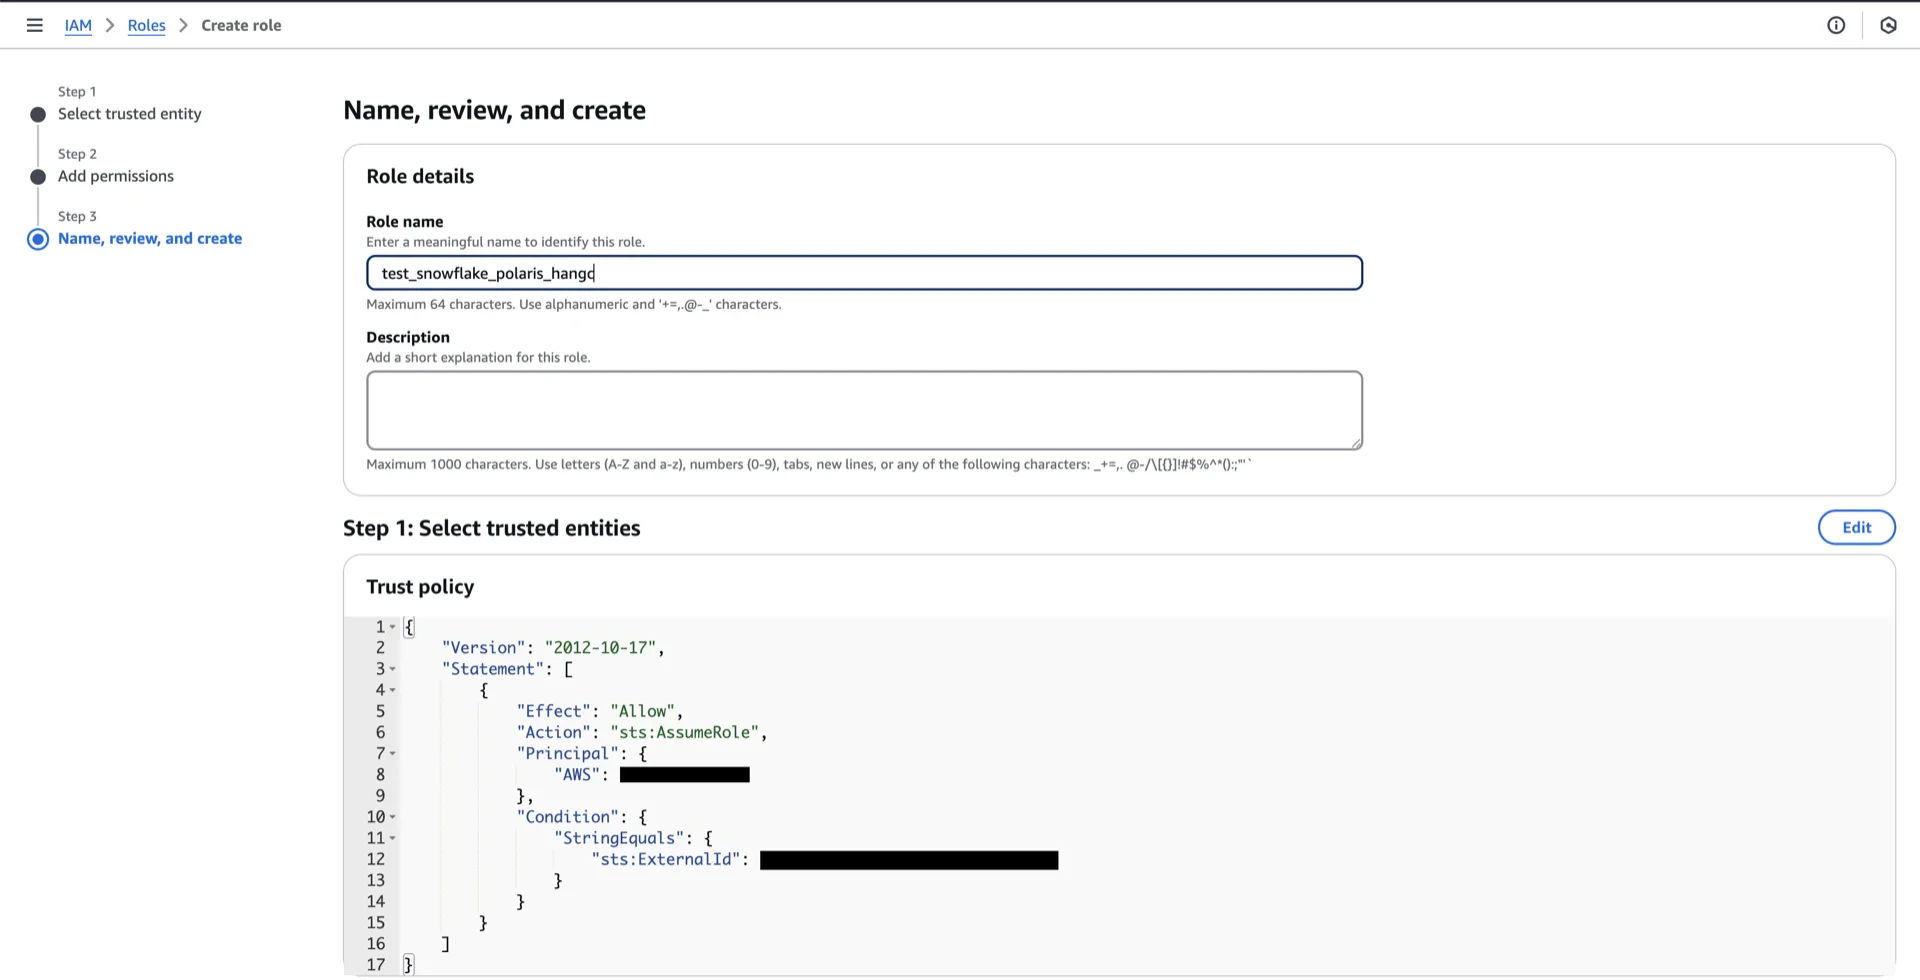
 Provide a role name and create the role.
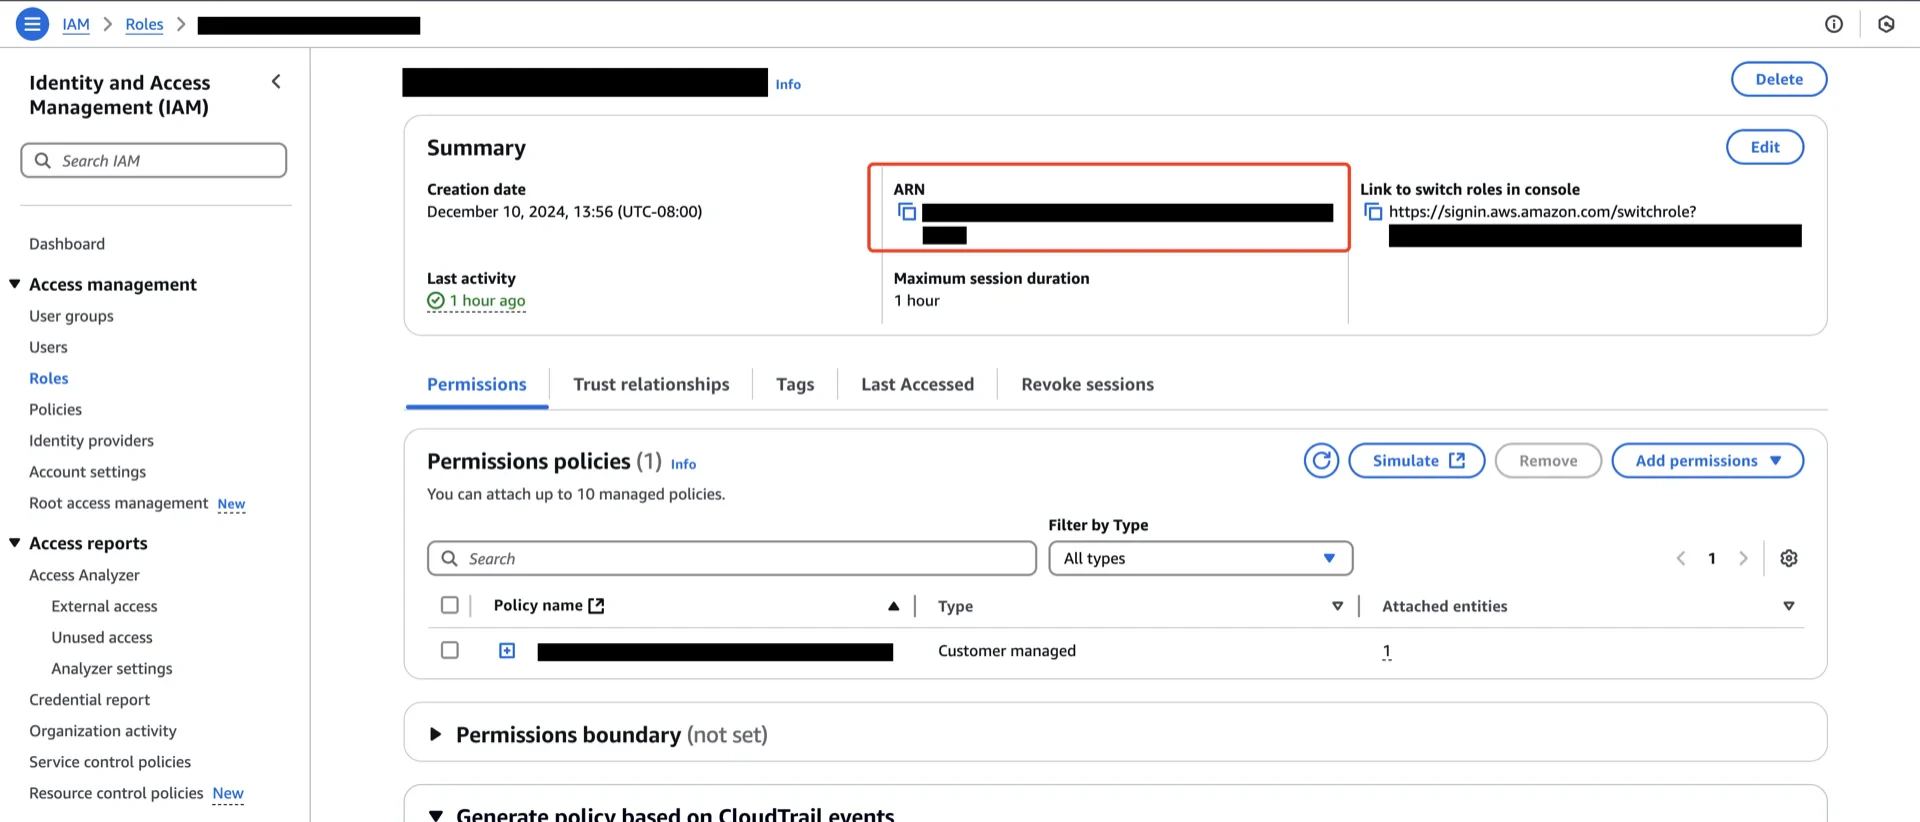
 Record the role ARN (for example, `arn:aws:iam:::role/`).
 ## 5. Create the Polaris Catalog
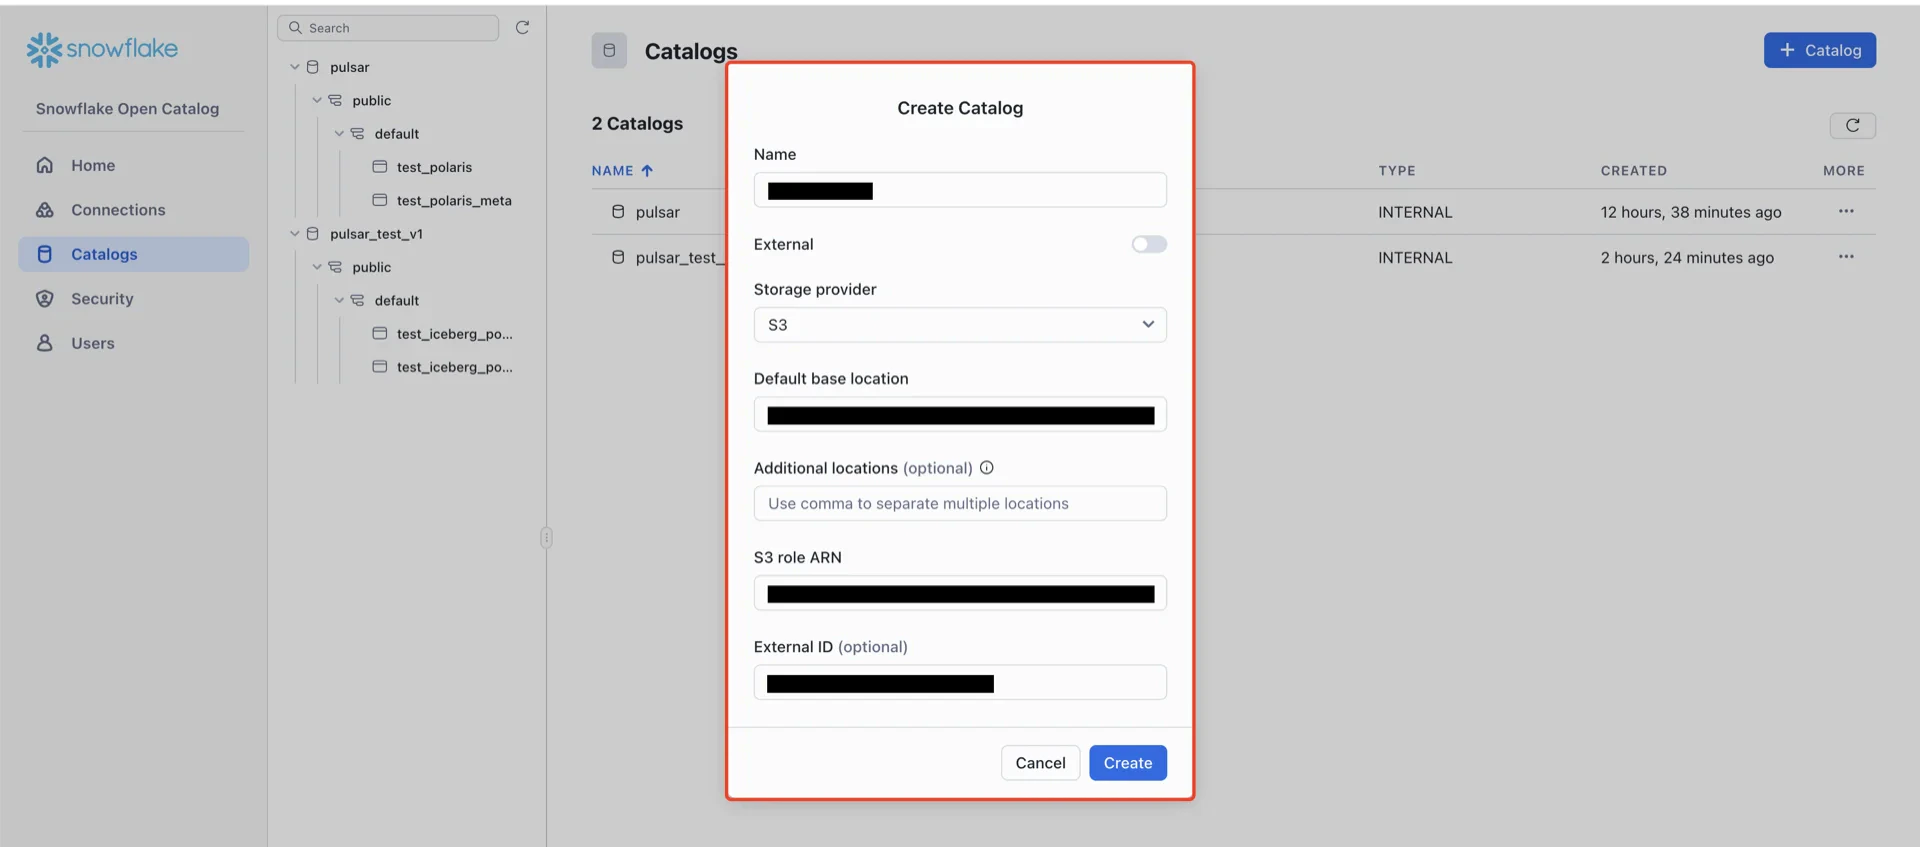
In the Snowflake Open Catalog console, create a new catalog.
## 5. Create the Polaris Catalog
In the Snowflake Open Catalog console, create a new catalog.
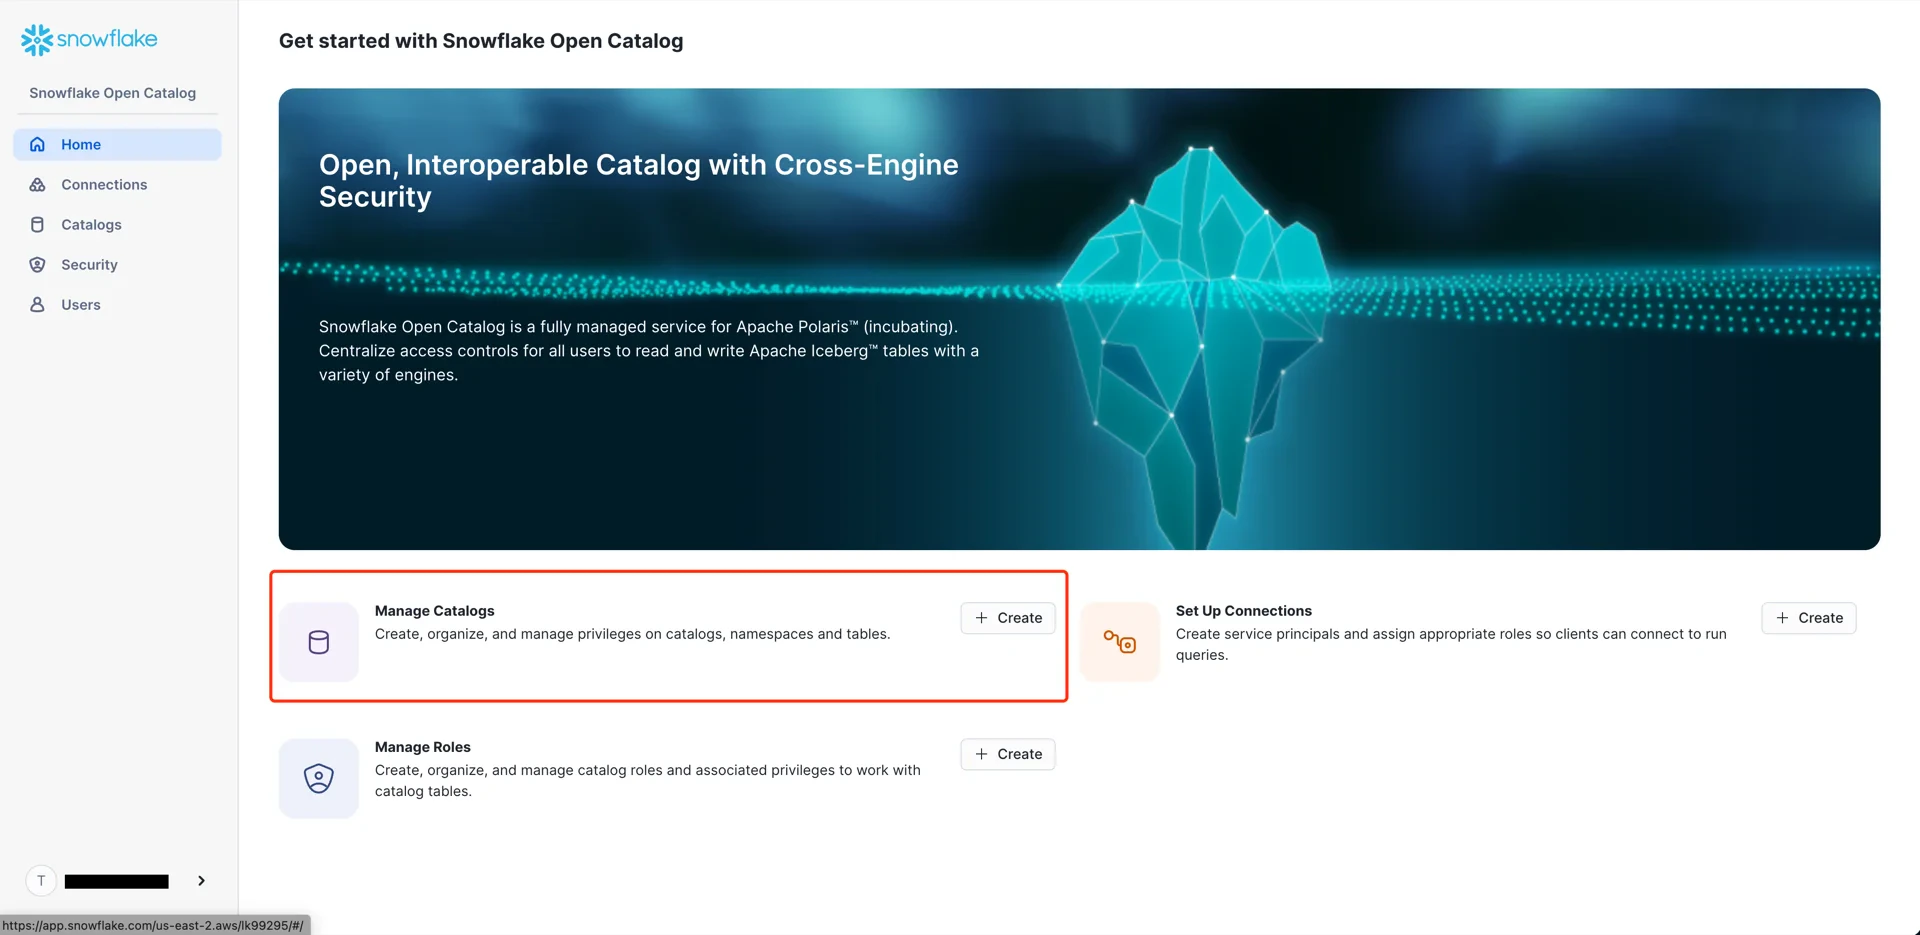 Configure the catalog with:
* **External:** disabled
* **Storage provider:** S3
* **Default base location:** `s3:///` (the path from step 3)
* **S3 role ARN:** the role ARN recorded in step 5
* **External ID:** the External ID configured in step 5
Configure the catalog with:
* **External:** disabled
* **Storage provider:** S3
* **Default base location:** `s3:///` (the path from step 3)
* **S3 role ARN:** the role ARN recorded in step 5
* **External ID:** the External ID configured in step 5
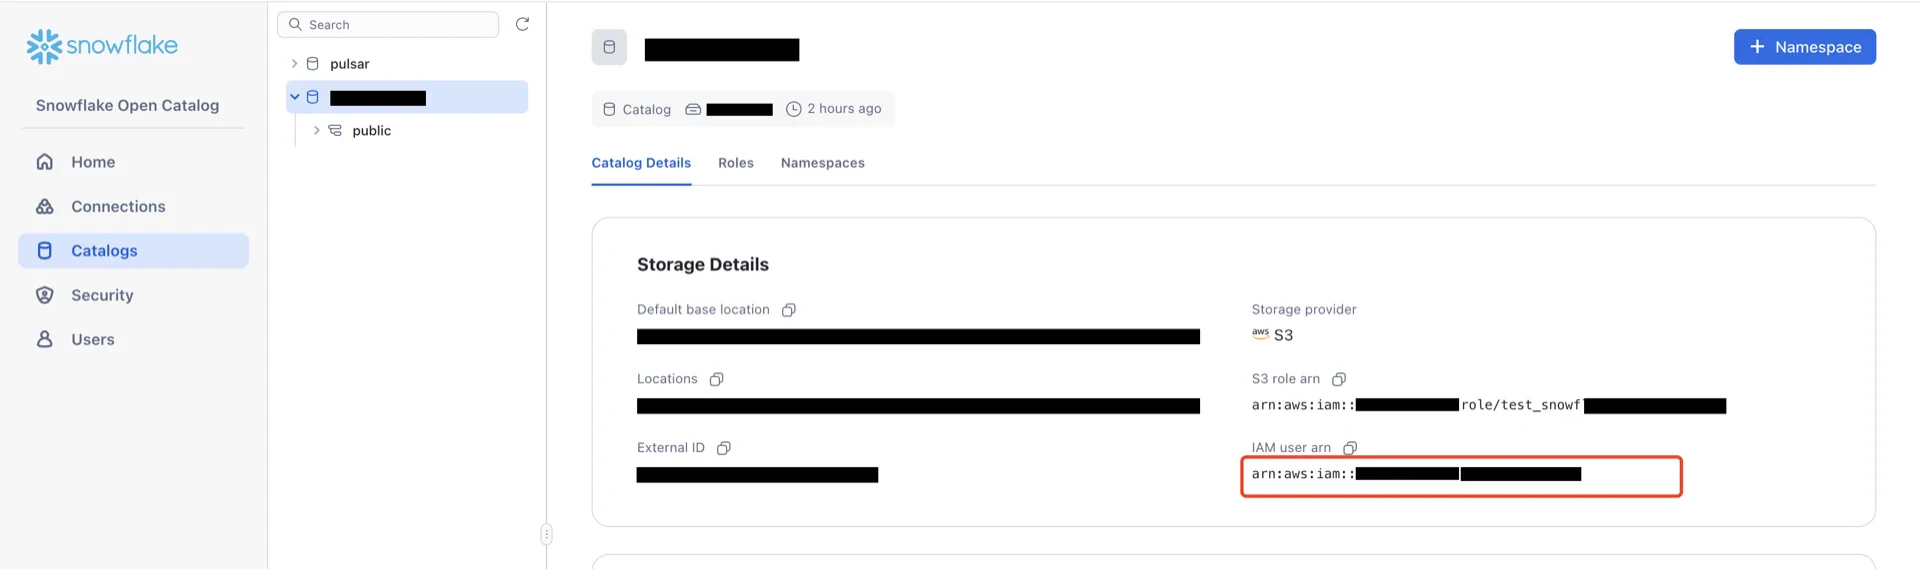
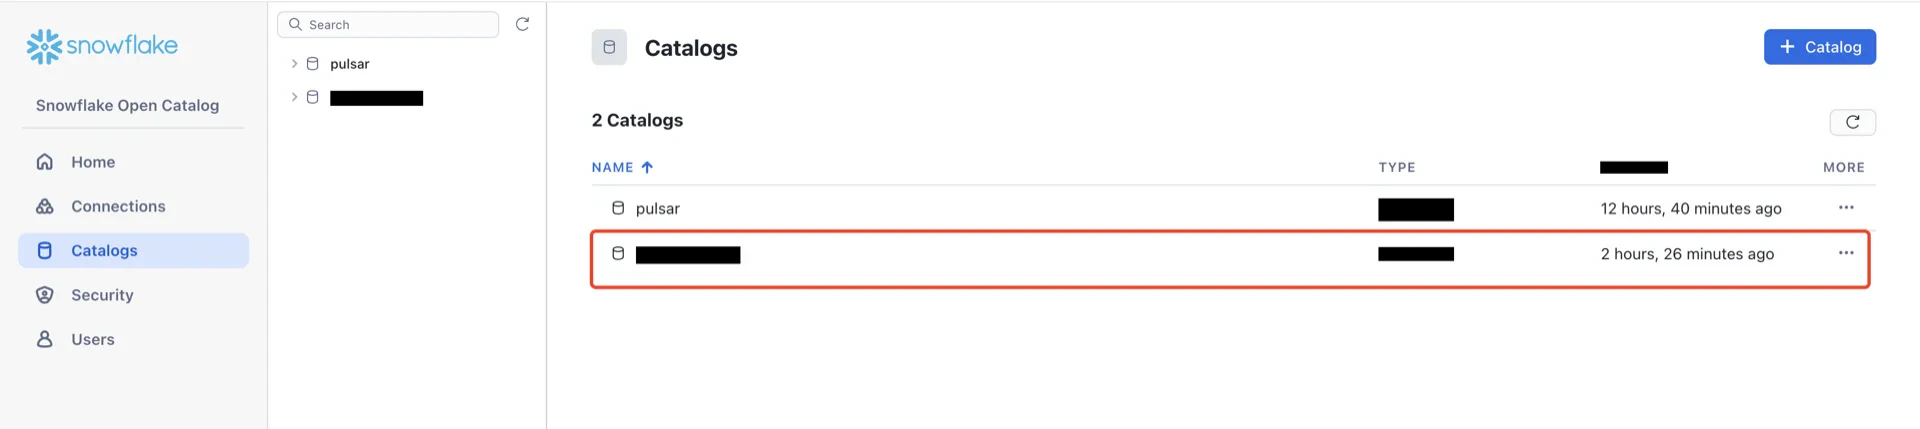 Open the catalog details and record the **IAM user ARN** that Polaris uses to access AWS. You will use this in step 7 to update the trust policy of the IAM role.
 ## 6. Update the IAM Role Trust Policy
Return to the AWS IAM console, open the role created in step 5, and edit the trust relationship.
## 6. Update the IAM Role Trust Policy
Return to the AWS IAM console, open the role created in step 5, and edit the trust relationship.
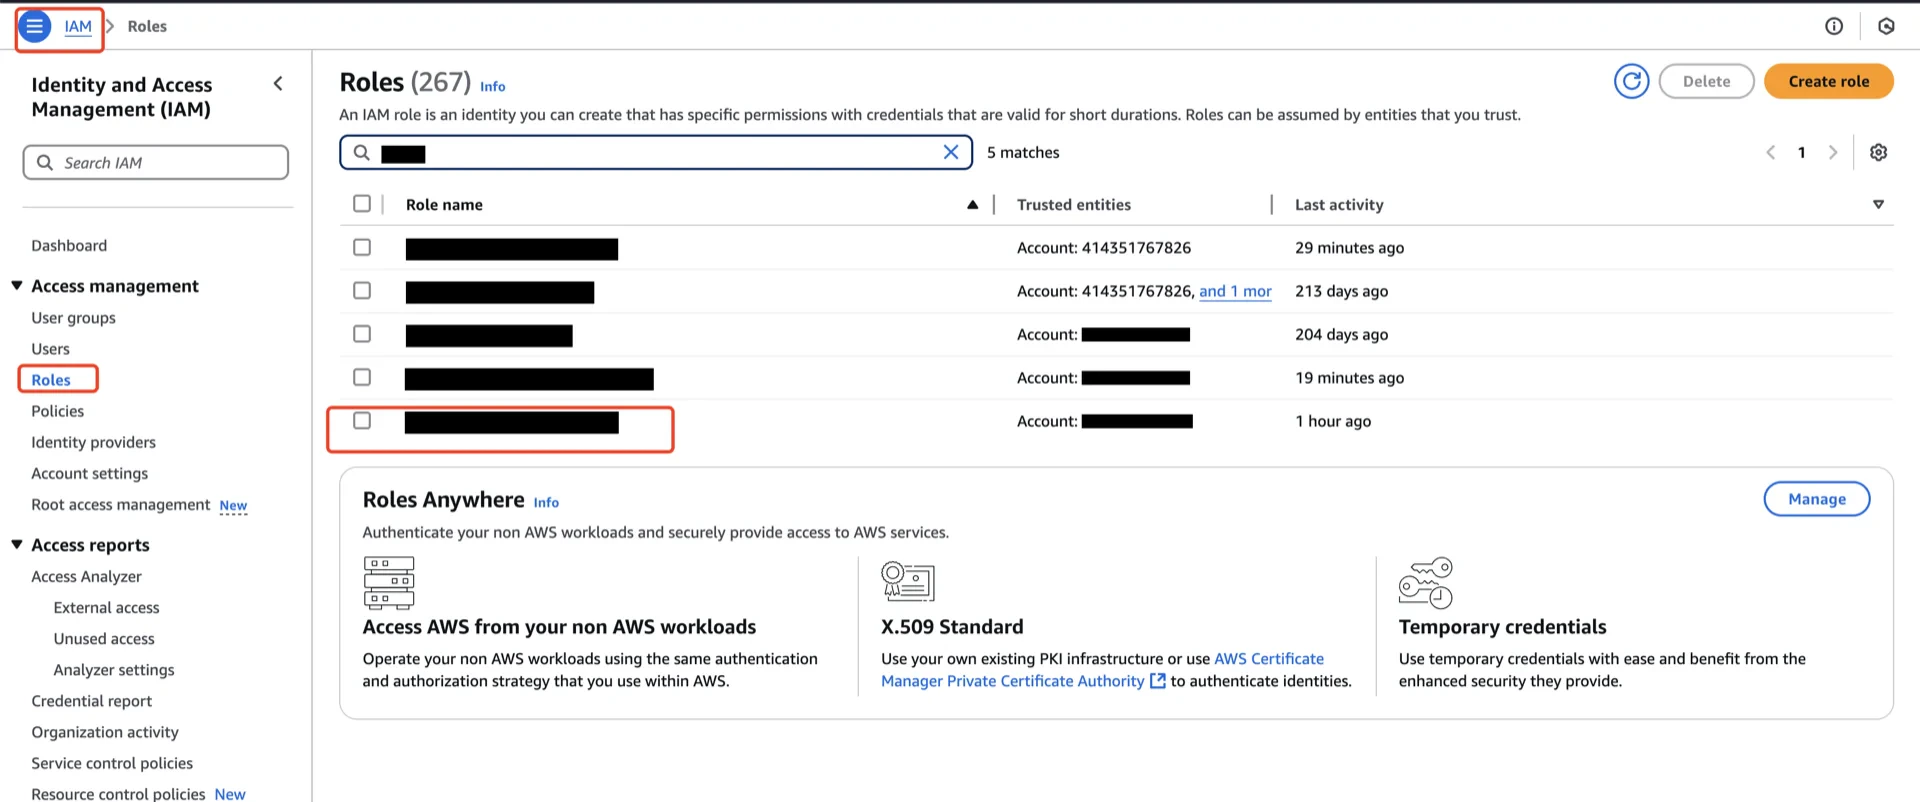
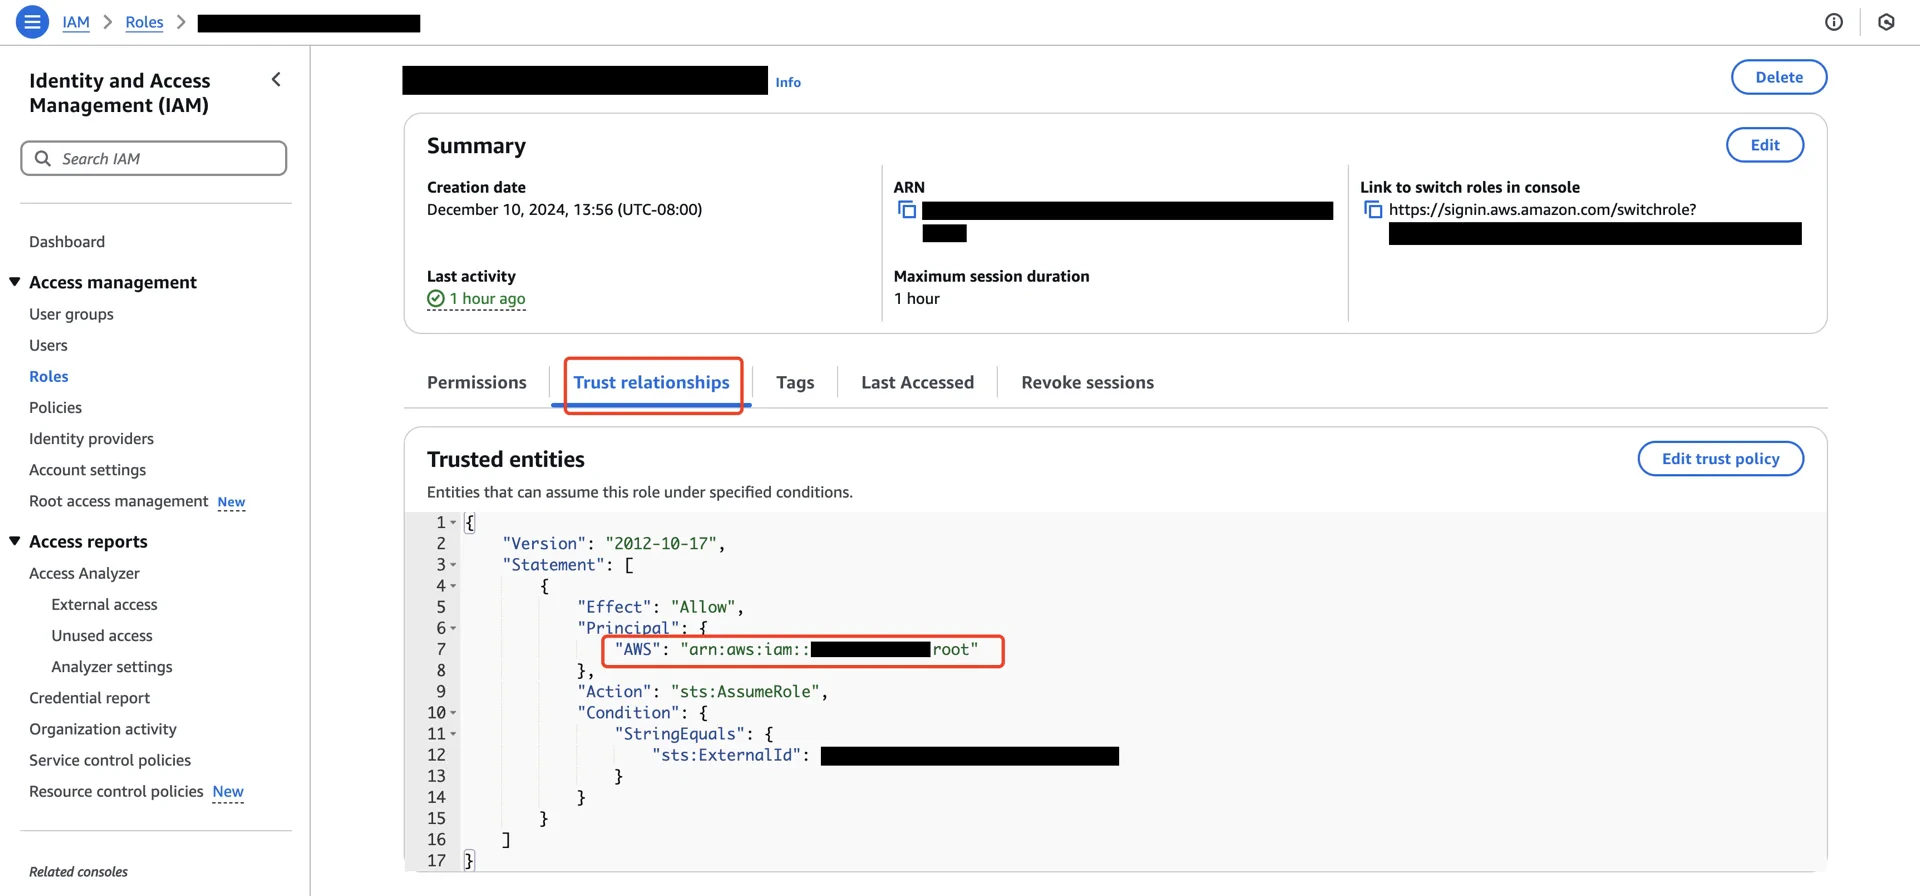 Update `Principal.AWS` to the Polaris IAM user ARN recorded in step 6.
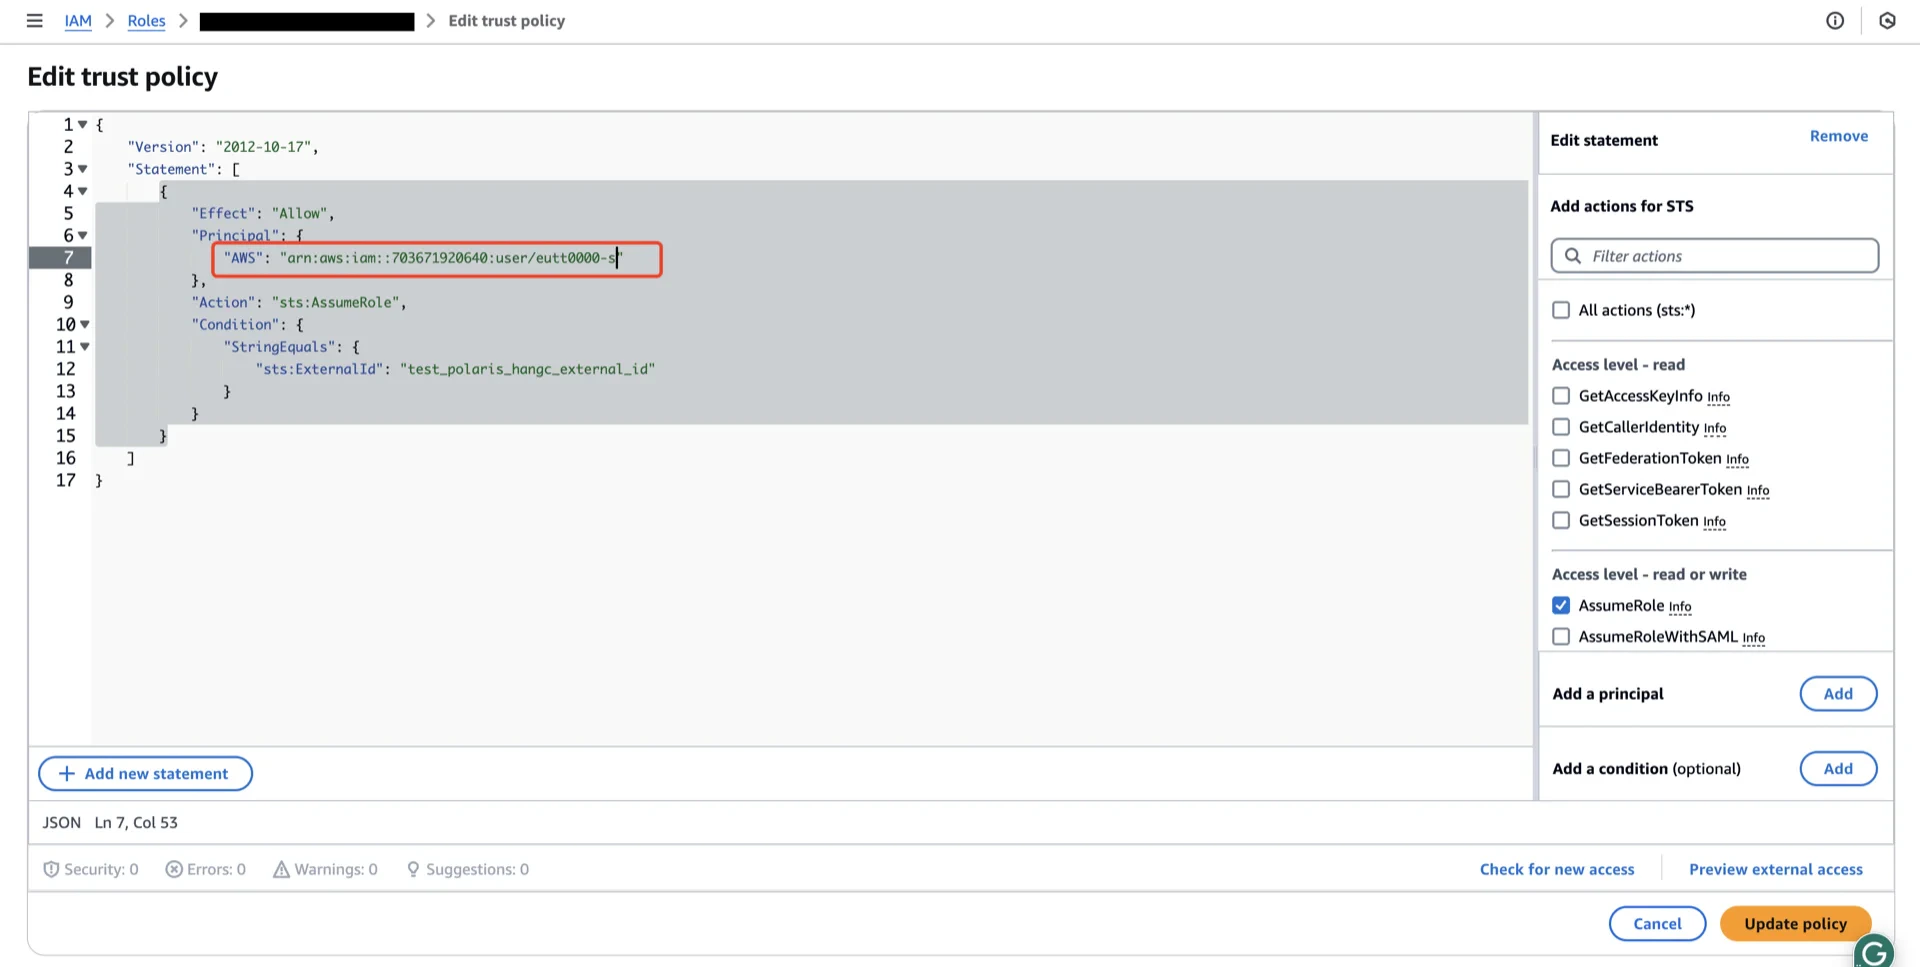 Click **Update policy**.
## 7. Create a Connection (Service Principal)
In the Open Catalog console, create a new connection that StreamNative Ursa will use to authenticate.
Click **Update policy**.
## 7. Create a Connection (Service Principal)
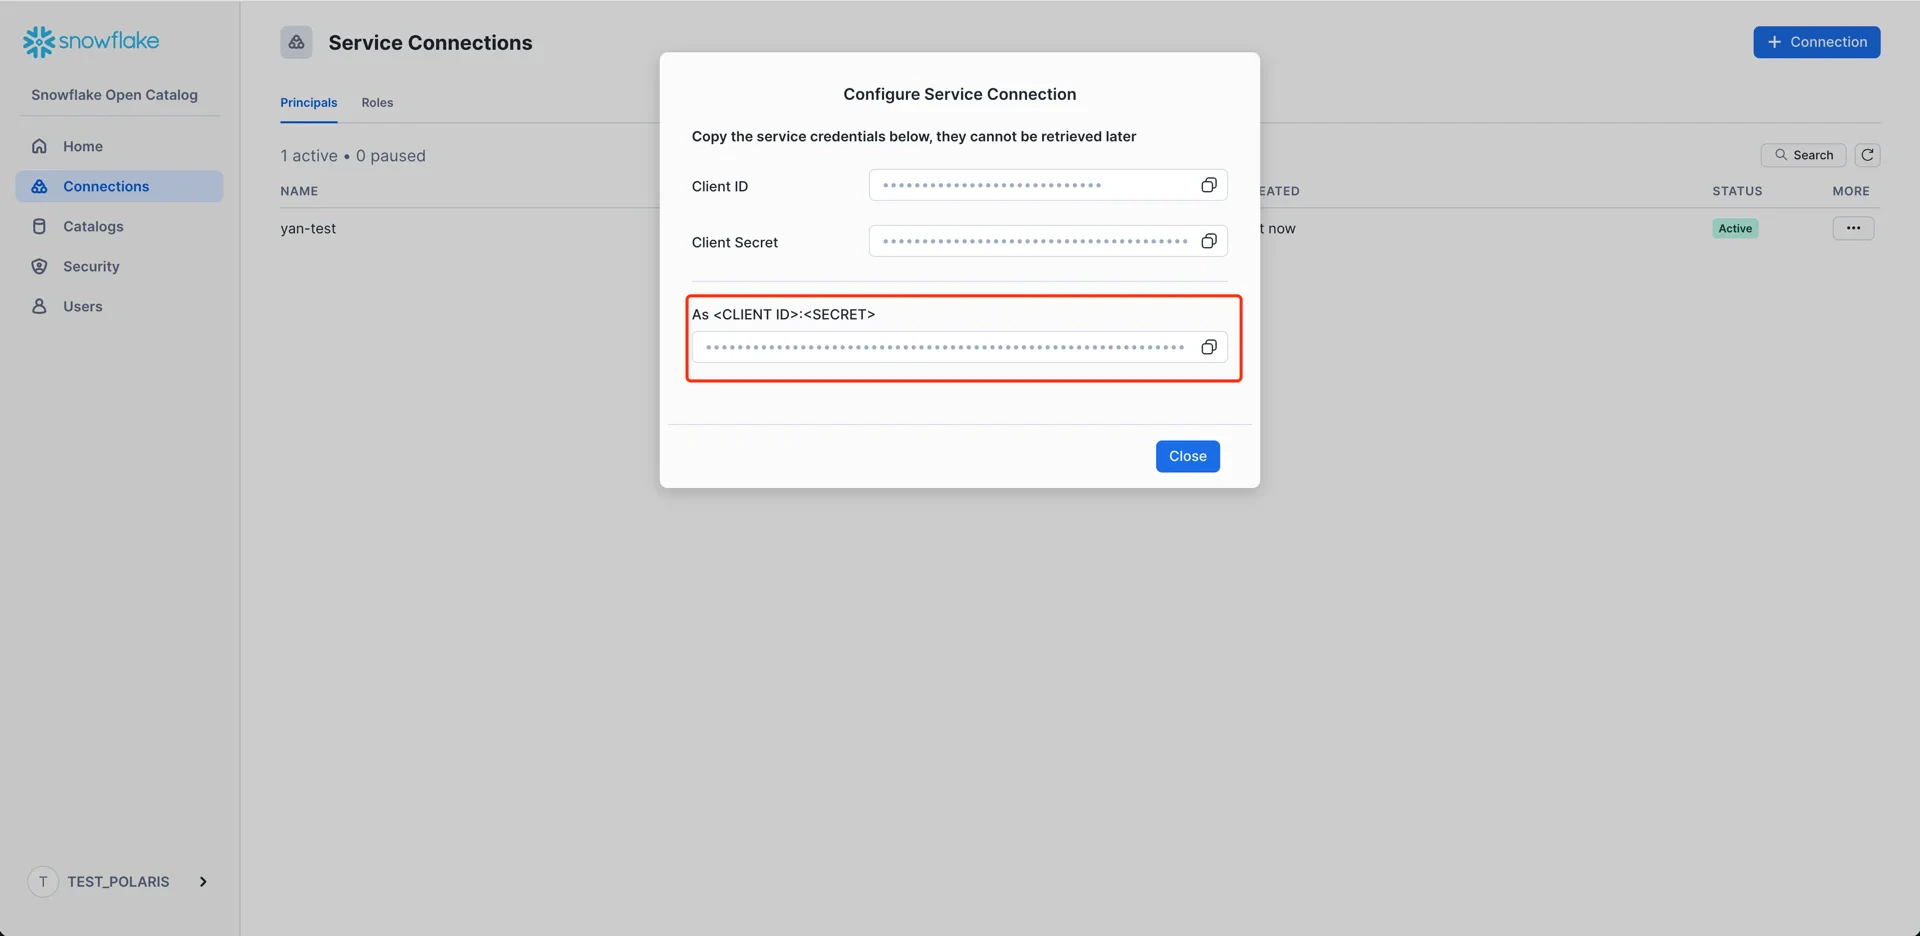
In the Open Catalog console, create a new connection that StreamNative Ursa will use to authenticate.
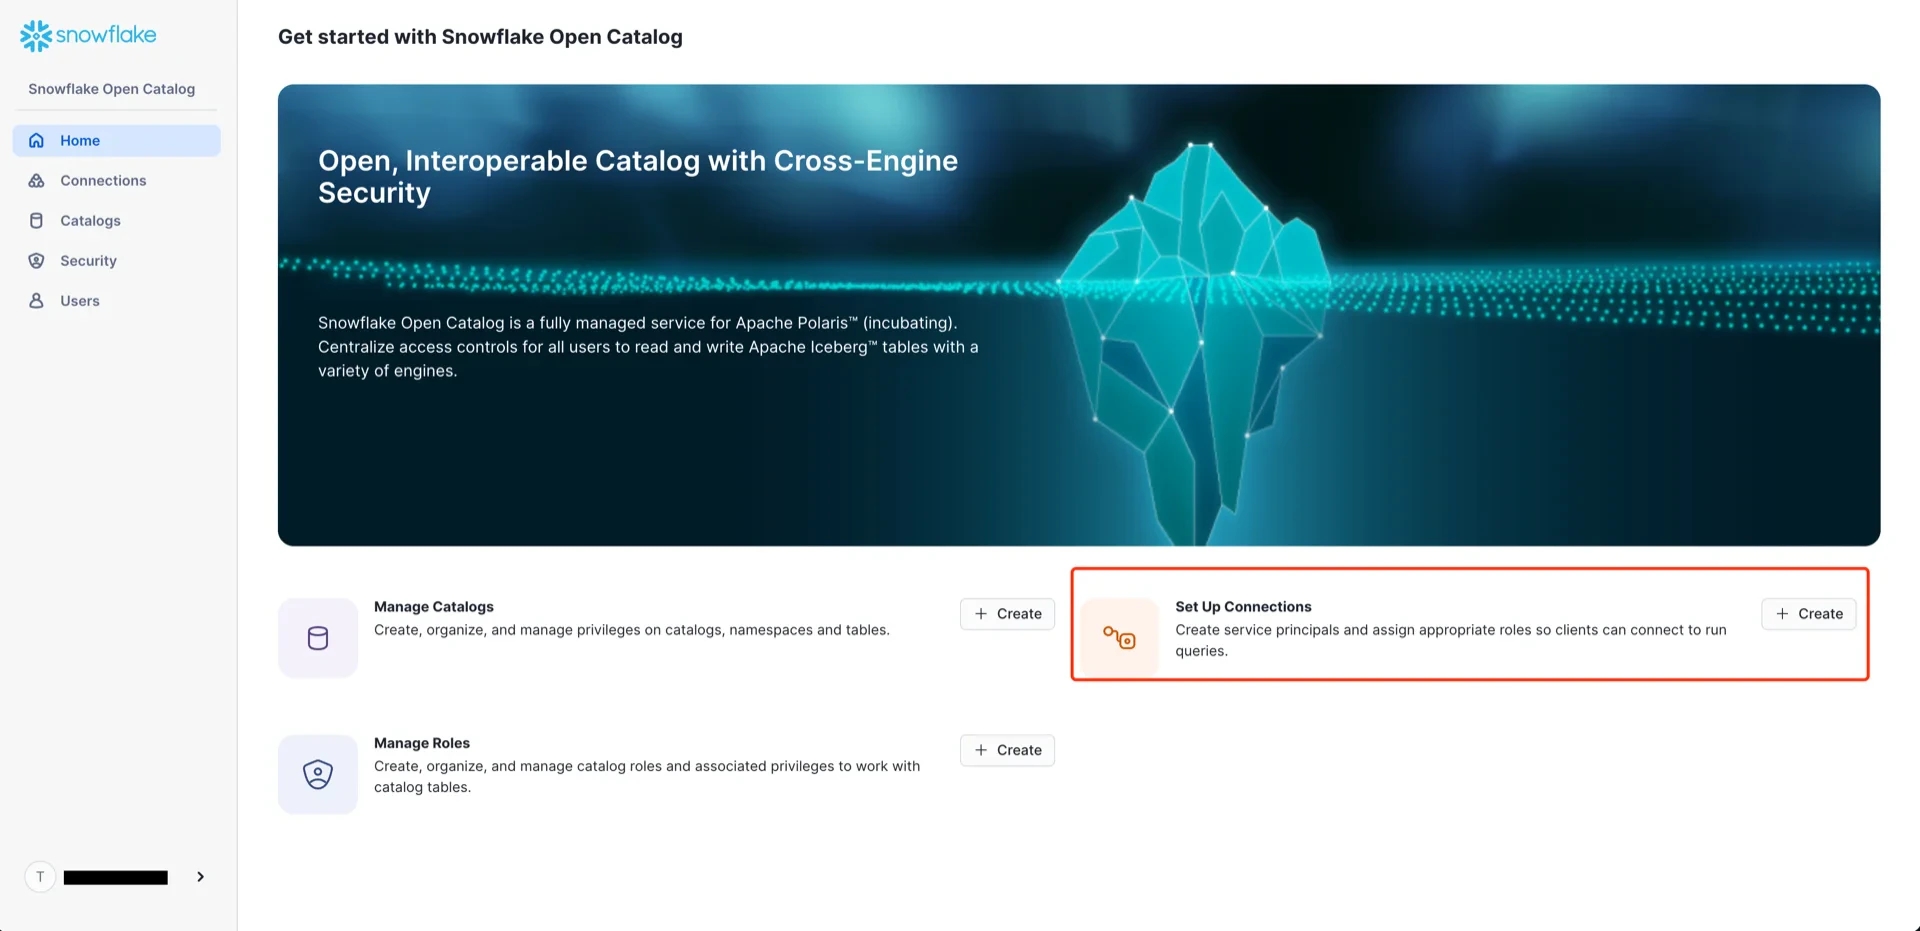 Configure with:
* **Name:** any name
* **Create new principal role:** enabled
* **Principal Role Name:** any name
Configure with:
* **Name:** any name
* **Create new principal role:** enabled
* **Principal Role Name:** any name
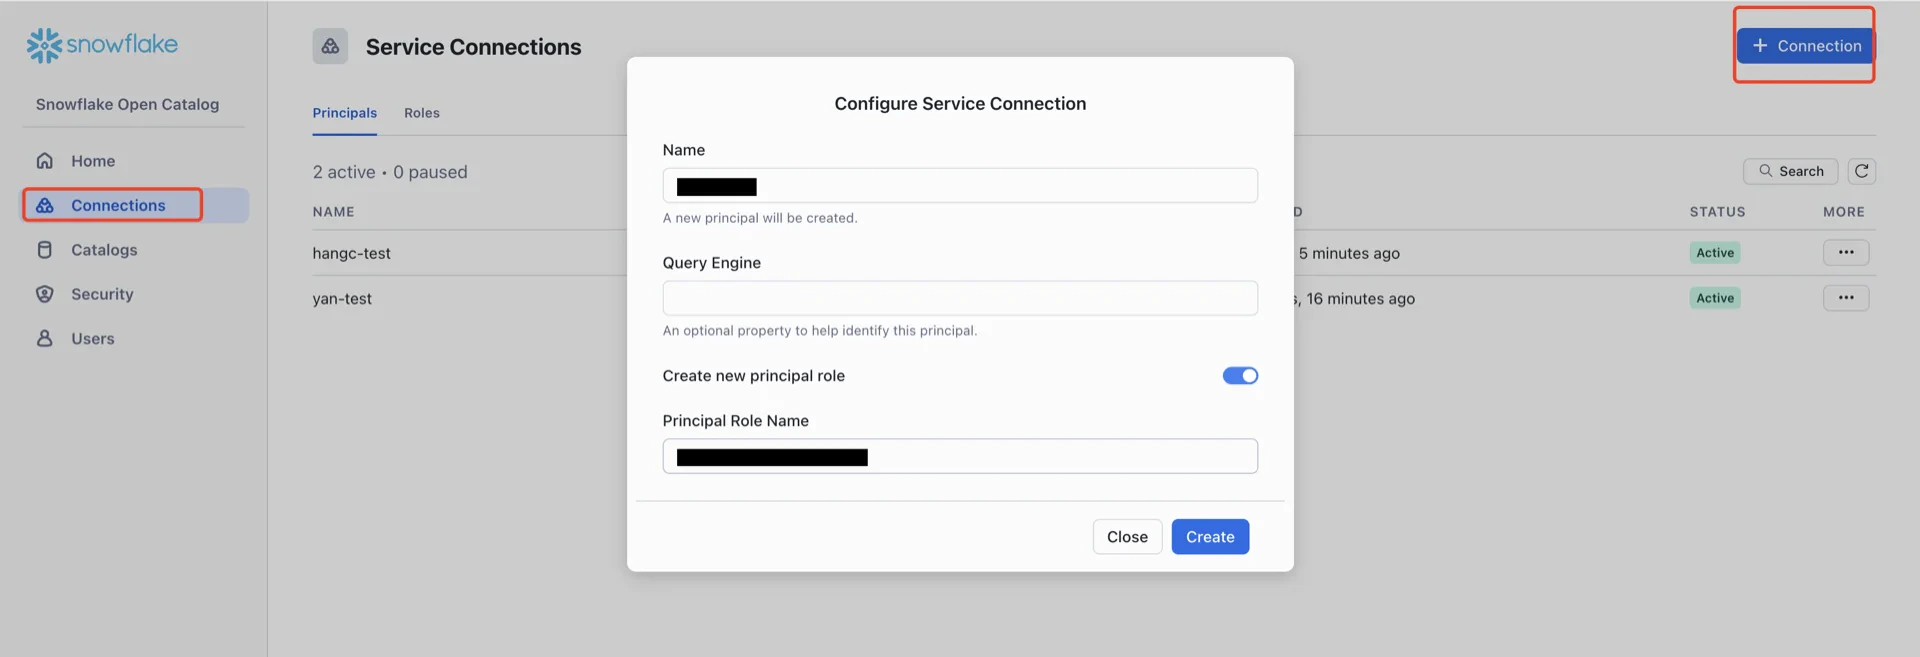 After creation, record the **Client ID** and **Client Secret** -- the secret cannot be retrieved later.
 ## 8. Create a Catalog Role and Grant Privileges
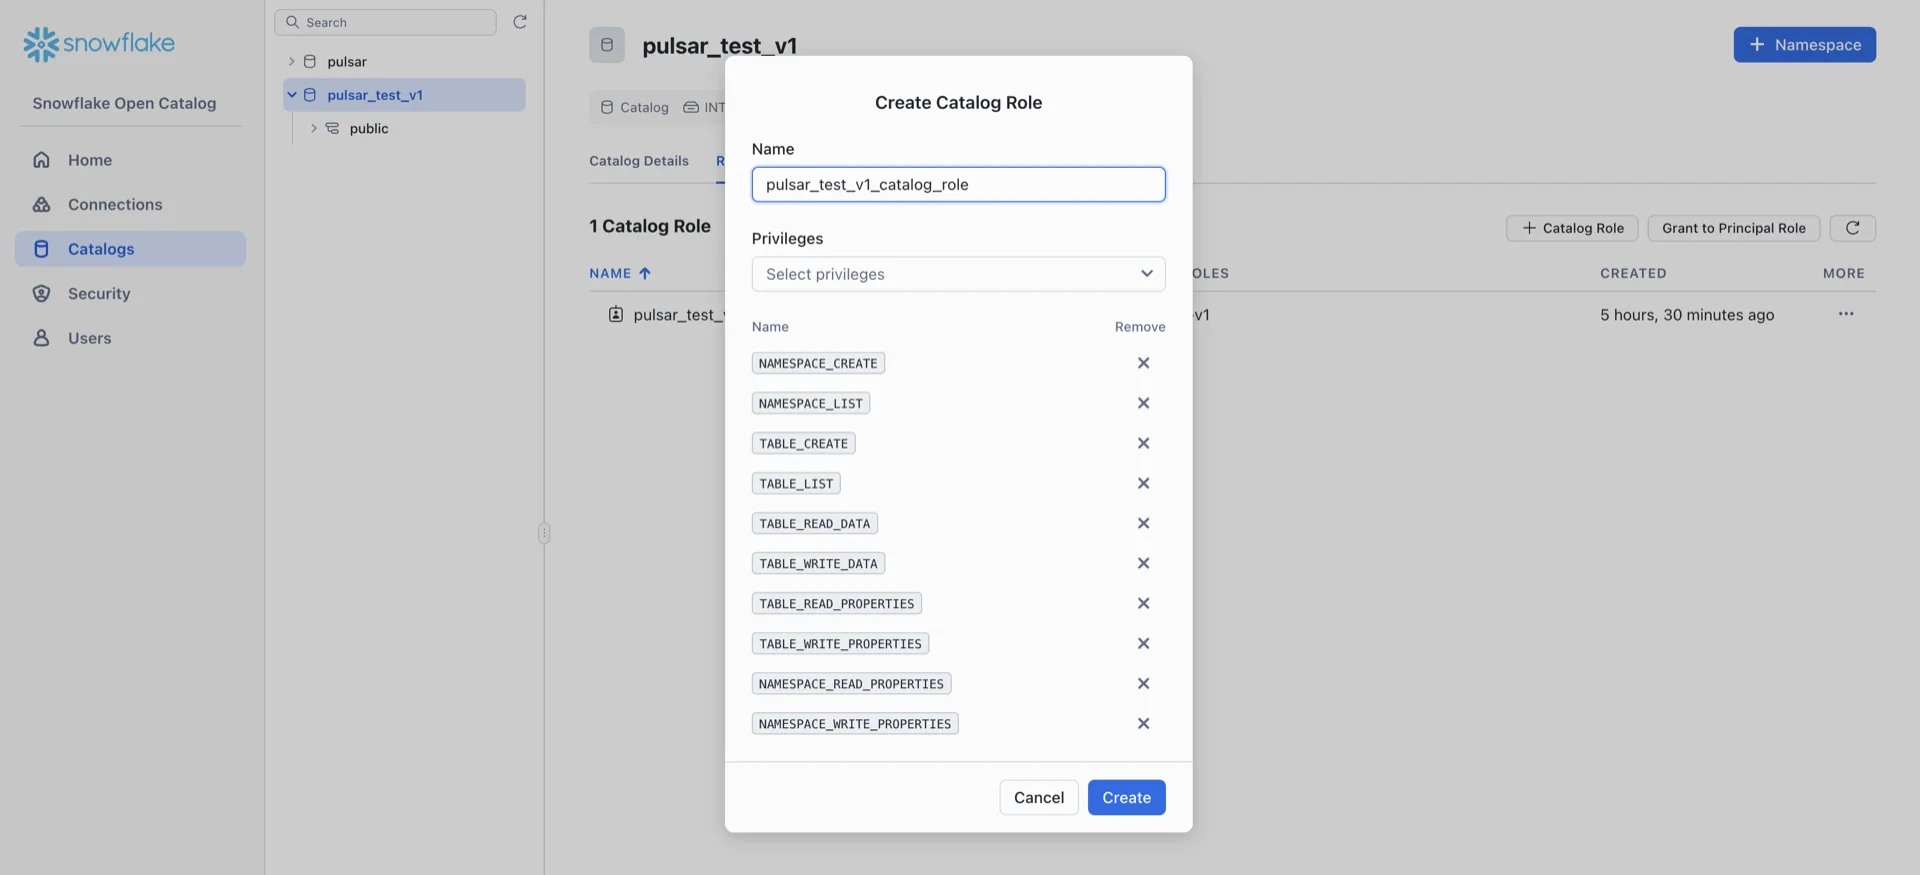
Navigate to **Catalogs -> \[your catalog] -> Roles -> + Catalog Role** and create a role with the following privileges:
* `NAMESPACE_CREATE`
* `NAMESPACE_LIST`
* `NAMESPACE_READ_PROPERTIES`
* `NAMESPACE_WRITE_PROPERTIES`
* `TABLE_LIST`
* `TABLE_CREATE`
* `TABLE_WRITE_DATA`
* `TABLE_READ_DATA`
* `TABLE_READ_PROPERTIES`
* `TABLE_WRITE_PROPERTIES`
## 8. Create a Catalog Role and Grant Privileges
Navigate to **Catalogs -> \[your catalog] -> Roles -> + Catalog Role** and create a role with the following privileges:
* `NAMESPACE_CREATE`
* `NAMESPACE_LIST`
* `NAMESPACE_READ_PROPERTIES`
* `NAMESPACE_WRITE_PROPERTIES`
* `TABLE_LIST`
* `TABLE_CREATE`
* `TABLE_WRITE_DATA`
* `TABLE_READ_DATA`
* `TABLE_READ_PROPERTIES`
* `TABLE_WRITE_PROPERTIES`
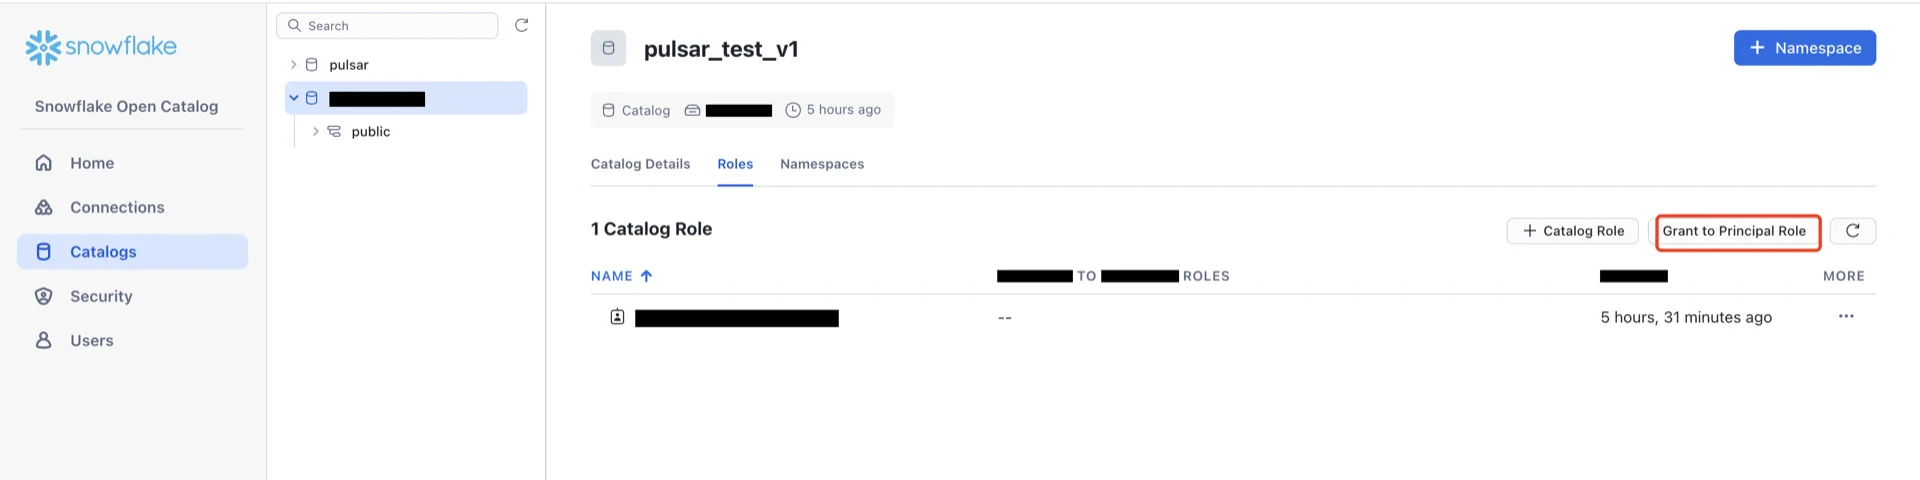
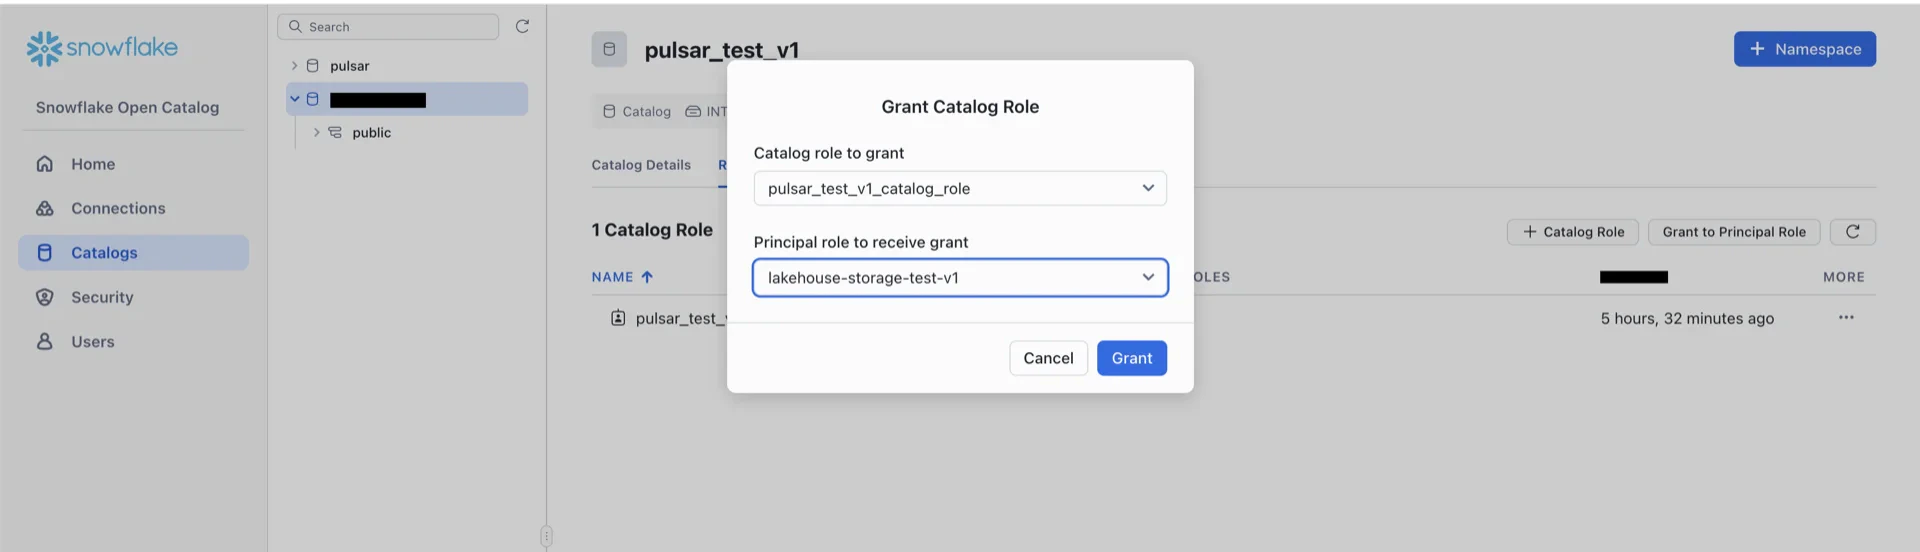
 Click **Grant to Principals Role** and grant the catalog role to the principal role created in step 8.
 For background on the relationship between catalogs, catalog roles, principal roles, and principals, see the [Polaris Quick Start](https://polaris.io/#section/Quick-Start/Defining-a-Catalog).
## Catalog Information Summary
When the steps above are complete, collect the following values for the StreamNative Ursa compaction service:
| Value | Description |
| -------------------- | -------------------------------------------------------------------------------------------------------------------------------------------------------------- |
| `iceberg.uri` | Polaris REST endpoint (e.g., `https://..aws.snowflakecomputing.com/polaris/api/catalog`). The format follows the URL of your Polaris console. |
| `iceberg.warehouse` | The Polaris catalog name created in step 6 |
| `iceberg.credential` | `:` from step 8 |
| `iceberg.scope` | `PRINCIPAL_ROLE:ALL` |
## Table Maintenance
Snowflake Open Catalog (Polaris) and the Hadoop catalog do **not** run table maintenance on your behalf. Streaming writes from the StreamNative Ursa compaction service produce many small Parquet files and accumulate snapshot history over time, which degrades query performance and inflates storage costs. You are responsible for scheduling and running maintenance against every Iceberg table written by Ursa.
Run the maintenance operations below on a regular schedule. They are provided as [Apache Iceberg Spark stored procedures](https://iceberg.apache.org/docs/latest/spark-procedures/) and can be triggered from any Spark cluster (Databricks, AWS EMR, AWS Glue, GCP Dataproc, or self-managed Spark) that has the Iceberg Spark runtime, catalog credentials, and IAM access to the warehouse bucket.
**Maintenance operations**
| Operation | Purpose | Suggested cadence |
| --------------------- | ------------------------------------------------------------------------------------------------------------------------------------- | ----------------------------------------------------------------------------------------- |
| `rewrite_data_files` | Compact small Parquet files into fewer, larger files. Reduces file-listing overhead and improves scan performance. | Hourly to daily, depending on ingestion rate |
| `expire_snapshots` | Drop snapshots older than the retention window so their data and manifest files can be cleaned up. | Daily; retain at least 1–7 days so in-flight readers and time-travel queries keep working |
| `remove_orphan_files` | Delete files in the table location that are no longer referenced by any snapshot (typically left behind by failed or partial writes). | Weekly |
| `rewrite_manifests` | Rewrite manifest files so they align with the current partition layout. Improves query planning time. | Weekly, or after large schema or partition changes |
**Example: run maintenance from Spark**
The following examples assume the catalog has been registered in Spark as ``. Replace ``, ``, and `
For background on the relationship between catalogs, catalog roles, principal roles, and principals, see the [Polaris Quick Start](https://polaris.io/#section/Quick-Start/Defining-a-Catalog).
## Catalog Information Summary
When the steps above are complete, collect the following values for the StreamNative Ursa compaction service:
| Value | Description |
| -------------------- | -------------------------------------------------------------------------------------------------------------------------------------------------------------- |
| `iceberg.uri` | Polaris REST endpoint (e.g., `https://..aws.snowflakecomputing.com/polaris/api/catalog`). The format follows the URL of your Polaris console. |
| `iceberg.warehouse` | The Polaris catalog name created in step 6 |
| `iceberg.credential` | `:` from step 8 |
| `iceberg.scope` | `PRINCIPAL_ROLE:ALL` |
## Table Maintenance
Snowflake Open Catalog (Polaris) and the Hadoop catalog do **not** run table maintenance on your behalf. Streaming writes from the StreamNative Ursa compaction service produce many small Parquet files and accumulate snapshot history over time, which degrades query performance and inflates storage costs. You are responsible for scheduling and running maintenance against every Iceberg table written by Ursa.
Run the maintenance operations below on a regular schedule. They are provided as [Apache Iceberg Spark stored procedures](https://iceberg.apache.org/docs/latest/spark-procedures/) and can be triggered from any Spark cluster (Databricks, AWS EMR, AWS Glue, GCP Dataproc, or self-managed Spark) that has the Iceberg Spark runtime, catalog credentials, and IAM access to the warehouse bucket.
**Maintenance operations**
| Operation | Purpose | Suggested cadence |
| --------------------- | ------------------------------------------------------------------------------------------------------------------------------------- | ----------------------------------------------------------------------------------------- |
| `rewrite_data_files` | Compact small Parquet files into fewer, larger files. Reduces file-listing overhead and improves scan performance. | Hourly to daily, depending on ingestion rate |
| `expire_snapshots` | Drop snapshots older than the retention window so their data and manifest files can be cleaned up. | Daily; retain at least 1–7 days so in-flight readers and time-travel queries keep working |
| `remove_orphan_files` | Delete files in the table location that are no longer referenced by any snapshot (typically left behind by failed or partial writes). | Weekly |
| `rewrite_manifests` | Rewrite manifest files so they align with the current partition layout. Improves query planning time. | Weekly, or after large schema or partition changes |
**Example: run maintenance from Spark**
The following examples assume the catalog has been registered in Spark as ``. Replace ``, ``, and `` with your values.
```sql theme={null}
-- Compact small files. Iceberg targets files smaller than the default 512 MB.
CALL .system.rewrite_data_files(table => '.');
-- Expire snapshots older than 3 days; keep the 5 most recent snapshots.
CALL .system.expire_snapshots(
table => '.',
older_than => TIMESTAMP '2026-05-20 00:00:00',
retain_last => 5
);
-- Remove orphan files older than 7 days.
CALL .system.remove_orphan_files(
table => '.',
older_than => TIMESTAMP '2026-05-20 00:00:00'
);
-- Rewrite manifests to match the current partition layout.
CALL .system.rewrite_manifests(table => '.');
```
**Operational guidance**
* **Credentials.** The principal that runs maintenance must have catalog privileges to read and write the target table (for example, the same `TABLE_READ_DATA`, `TABLE_WRITE_DATA`, `TABLE_READ_PROPERTIES`, and `TABLE_WRITE_PROPERTIES` privileges configured for the Ursa compaction service) and IAM access to the warehouse bucket so it can read and rewrite the underlying data files. With the Hadoop catalog there is no catalog service to authenticate against — only the bucket IAM access is required.
* **Concurrency.** Iceberg uses optimistic concurrency control. If maintenance commits race with the Ursa compaction writer, one of them retries. Schedule heavy operations (`rewrite_data_files`, `rewrite_manifests`) during low-write windows when possible.
* **Retention vs. time travel.** `expire_snapshots` and `remove_orphan_files` permanently delete files. Choose a retention window that exceeds the longest expected read query and your time-travel SLA.
* **Schedule the workload.** Most teams orchestrate these procedures from Databricks Jobs, AWS EMR steps, Airflow, Dagster, or a Kubernetes `CronJob`. Pick a scheduler that fits your existing operational stack.
* **Reference.** See the [Iceberg Spark procedures](https://iceberg.apache.org/docs/latest/spark-procedures/#metadata-management) documentation for the full parameter list, including options for partial rewrites (`where`), file-size targets, and merge-on-read delete file compaction.
For the next steps, see [Register Lakehouse Catalogs](/cloud/lakehouse/catalogs/register-catalog).