> ## Documentation Index
> Fetch the complete documentation index at: https://docs.streamnative.io/llms.txt
> Use this file to discover all available pages before exploring further.
# Horizon Catalog for Iceberg on AWS
This guide describes how to prepare a Snowflake Horizon Catalog for use with StreamNative Ursa as an Iceberg catalog on AWS.
For background, see the Snowflake documentation: [Write to Apache Iceberg tables using an external query engine through Snowflake Horizon Catalog](https://docs.snowflake.com/en/LIMITEDACCESS/iceberg/tables-iceberg-write-using-external-write-engine-snowflake-horizon).
## Prerequisites
* A Snowflake account with Horizon Catalog enabled
* An AWS account with permissions to create S3 buckets and IAM roles
* The `ACCOUNTADMIN` role in Snowflake (required for several SQL operations below)
## 1. Create an External Volume
The Horizon Catalog uses a Snowflake **External Volume** to access object storage. Reference: [Tutorial: Create your first Apache Iceberg table](https://docs.snowflake.com/en/user-guide/tutorials/create-your-first-iceberg-table#create-a-table).
### 1.1 Identify the Snowflake Account Region
Find the region of your Snowflake account so the S3 bucket can be created in the same region.
 ### 1.2 Create an S3 Bucket
Create an S3 bucket in the AWS console, in the same region as your Snowflake account.
### 1.2 Create an S3 Bucket
Create an S3 bucket in the AWS console, in the same region as your Snowflake account.
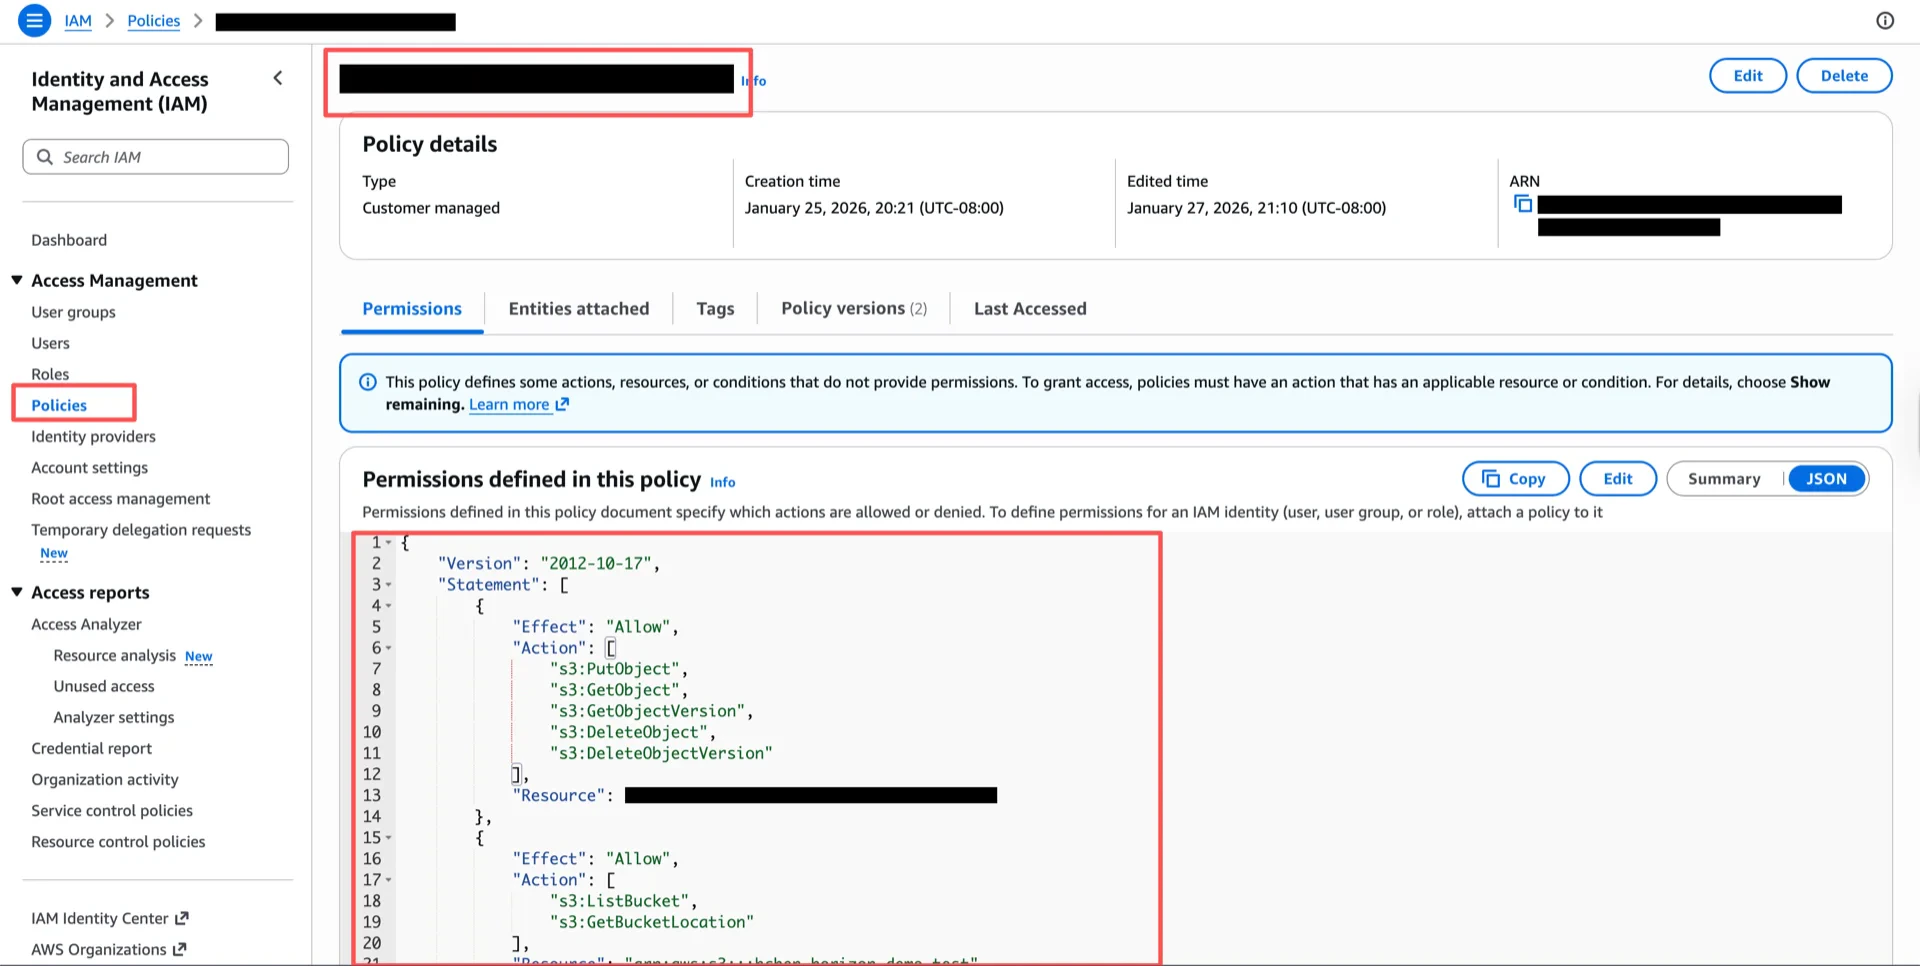
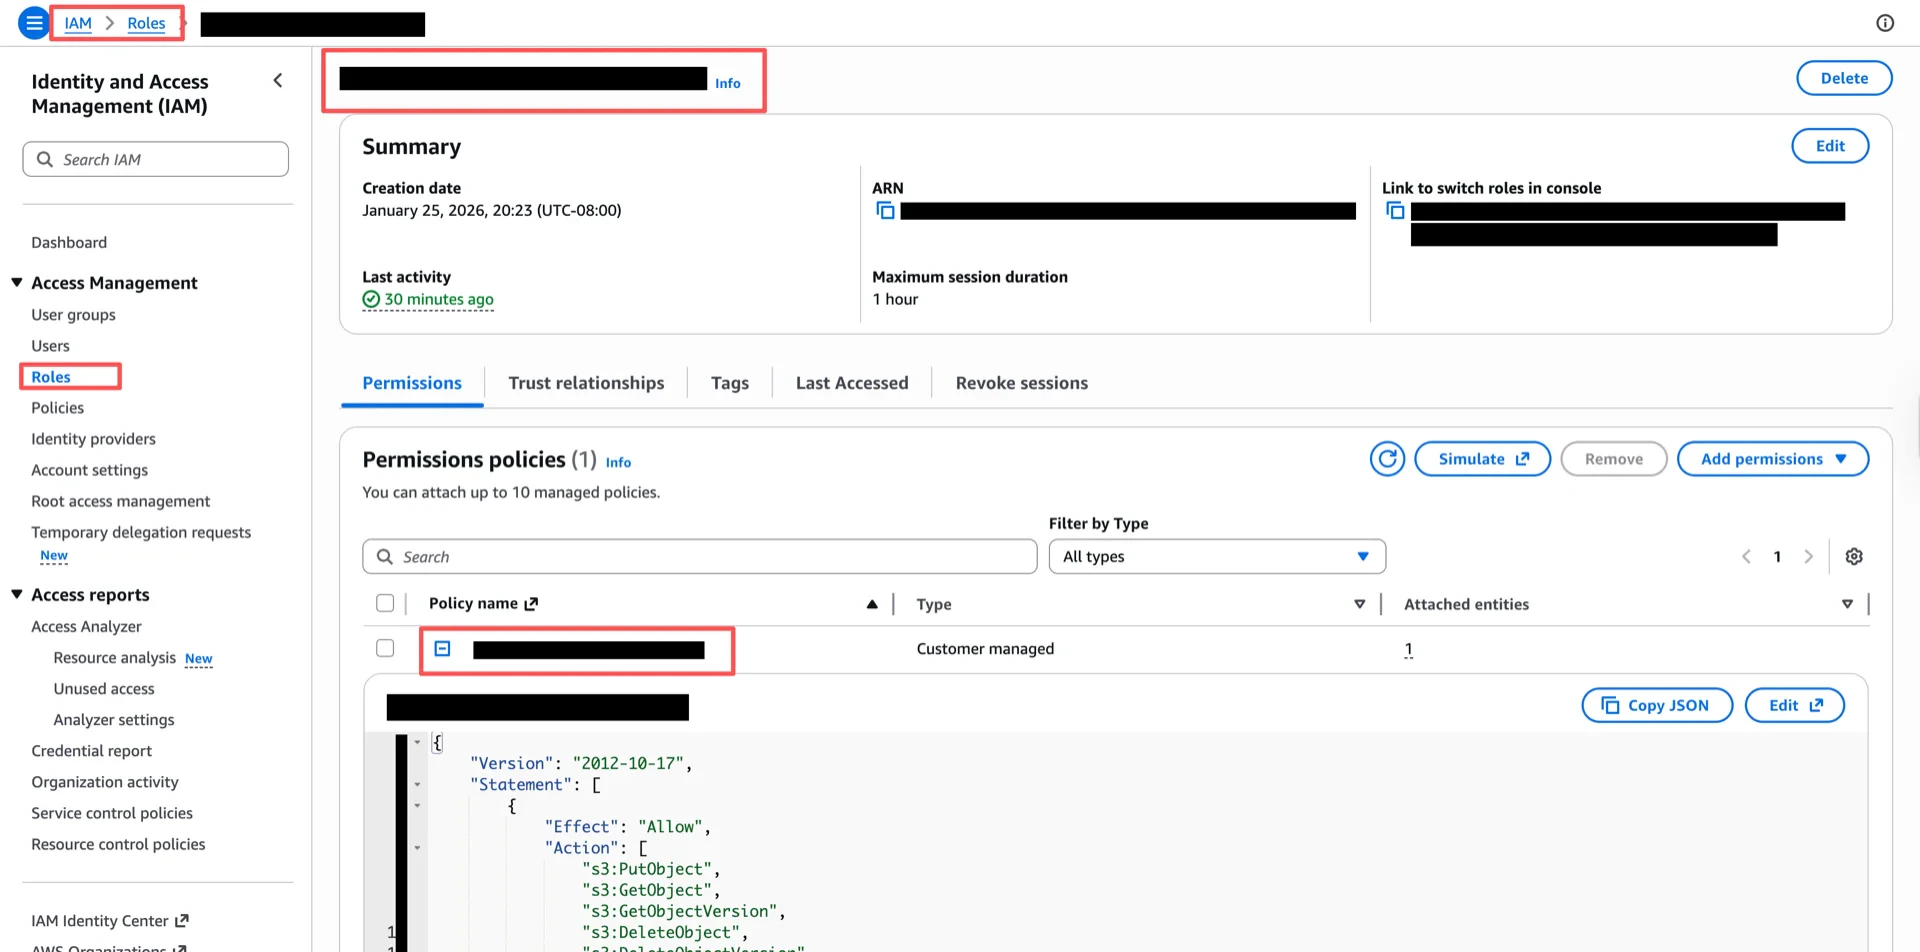
 ### 1.3 Create an IAM Policy
Create an IAM policy granting access to the bucket. Replace `` with the bucket name from step 1.2.
```json theme={null}
{
"Version": "2012-10-17",
"Statement": [
{
"Effect": "Allow",
"Action": [
"s3:PutObject",
"s3:GetObject",
"s3:GetObjectVersion",
"s3:DeleteObject",
"s3:DeleteObjectVersion"
],
"Resource": "arn:aws:s3:::/*"
},
{
"Effect": "Allow",
"Action": [
"s3:ListBucket",
"s3:GetBucketLocation"
],
"Resource": "arn:aws:s3:::",
"Condition": {
"StringLike": {
"s3:prefix": ["*"]
}
}
}
]
}
```
### 1.3 Create an IAM Policy
Create an IAM policy granting access to the bucket. Replace `` with the bucket name from step 1.2.
```json theme={null}
{
"Version": "2012-10-17",
"Statement": [
{
"Effect": "Allow",
"Action": [
"s3:PutObject",
"s3:GetObject",
"s3:GetObjectVersion",
"s3:DeleteObject",
"s3:DeleteObjectVersion"
],
"Resource": "arn:aws:s3:::/*"
},
{
"Effect": "Allow",
"Action": [
"s3:ListBucket",
"s3:GetBucketLocation"
],
"Resource": "arn:aws:s3:::",
"Condition": {
"StringLike": {
"s3:prefix": ["*"]
}
}
}
]
}
```
 ### 1.4 Create an IAM Role
Create an IAM role with an External ID (for example, `iceberg_table_external_id`). The trust policy will be updated in step 1.6.
### 1.4 Create an IAM Role
Create an IAM role with an External ID (for example, `iceberg_table_external_id`). The trust policy will be updated in step 1.6.
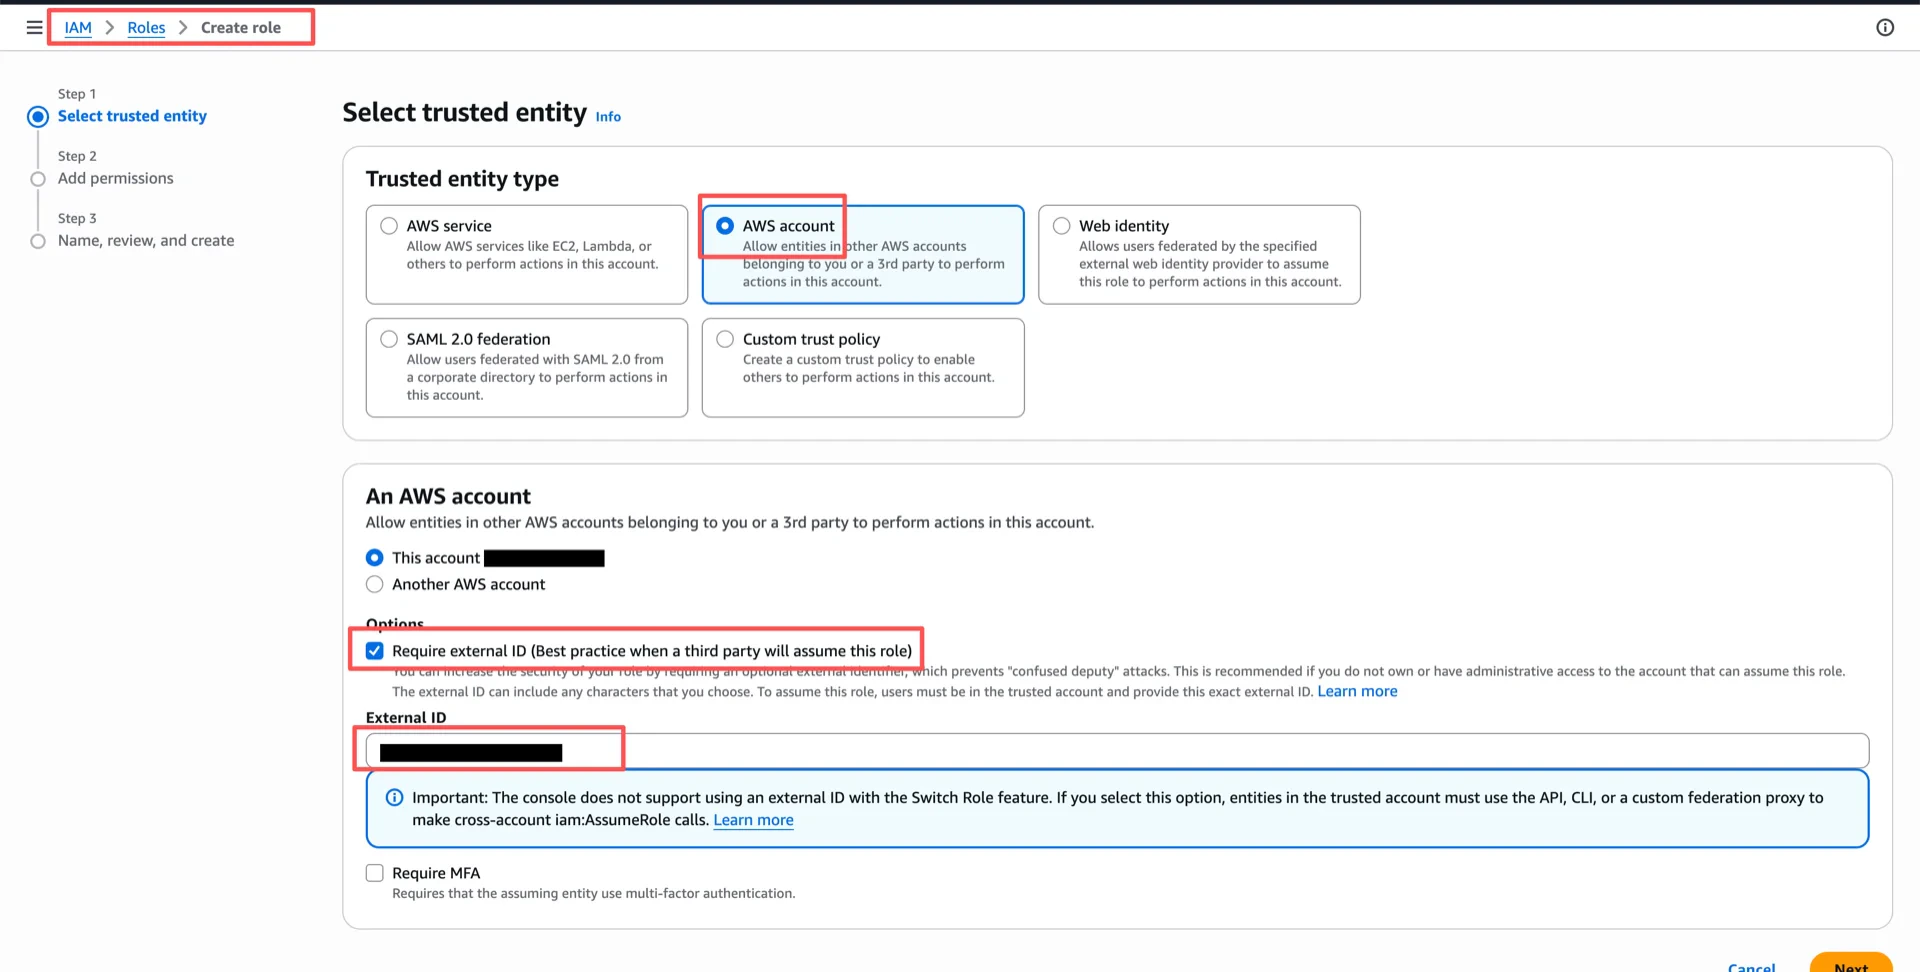 Attach the policy from step 1.3 to the role.
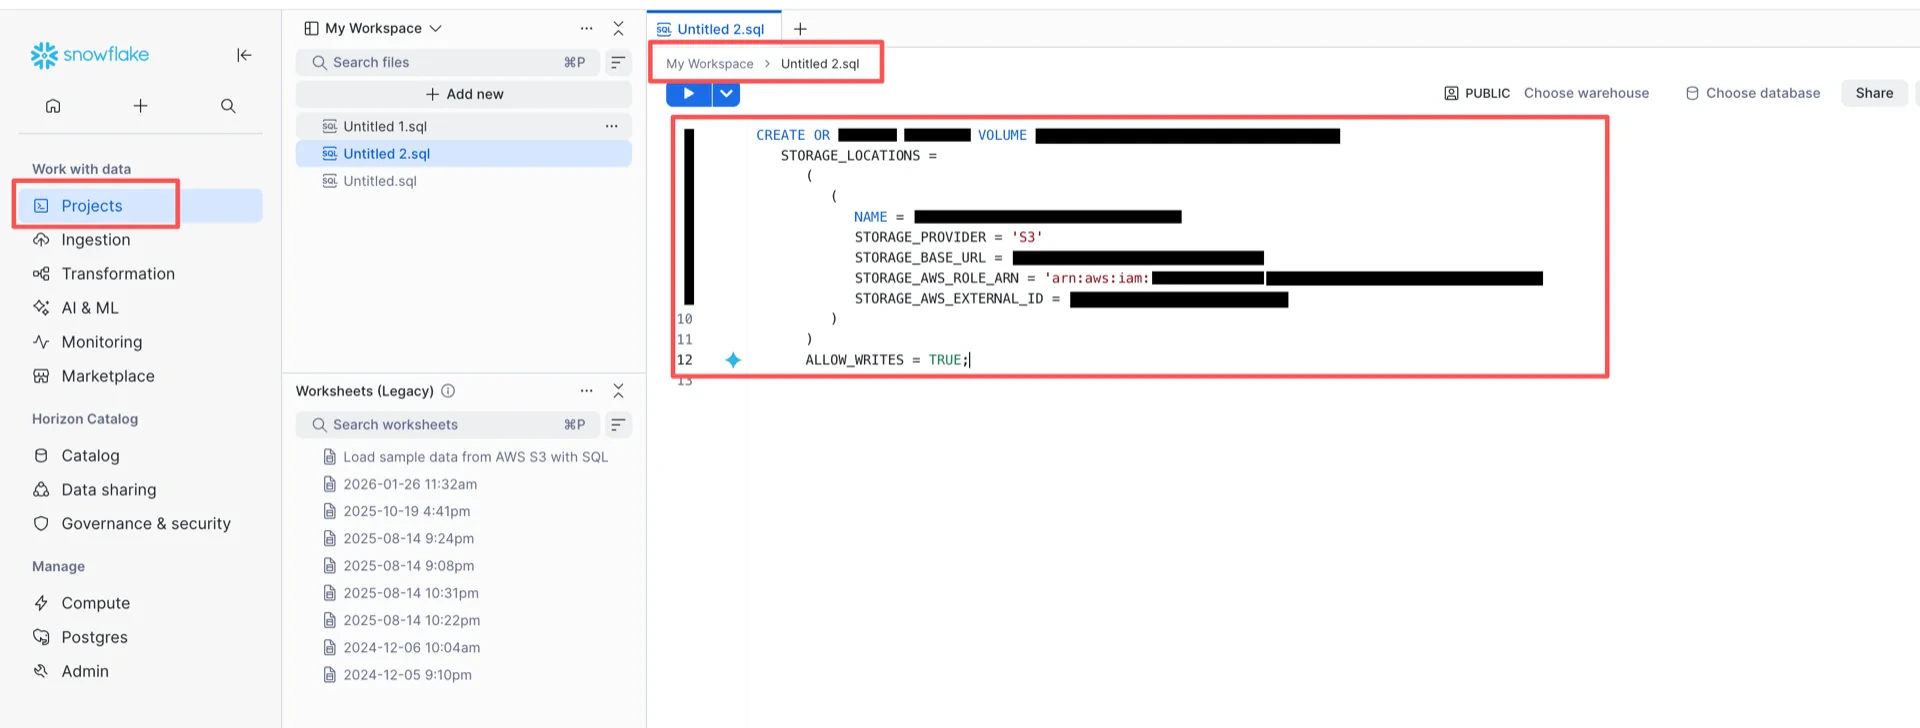
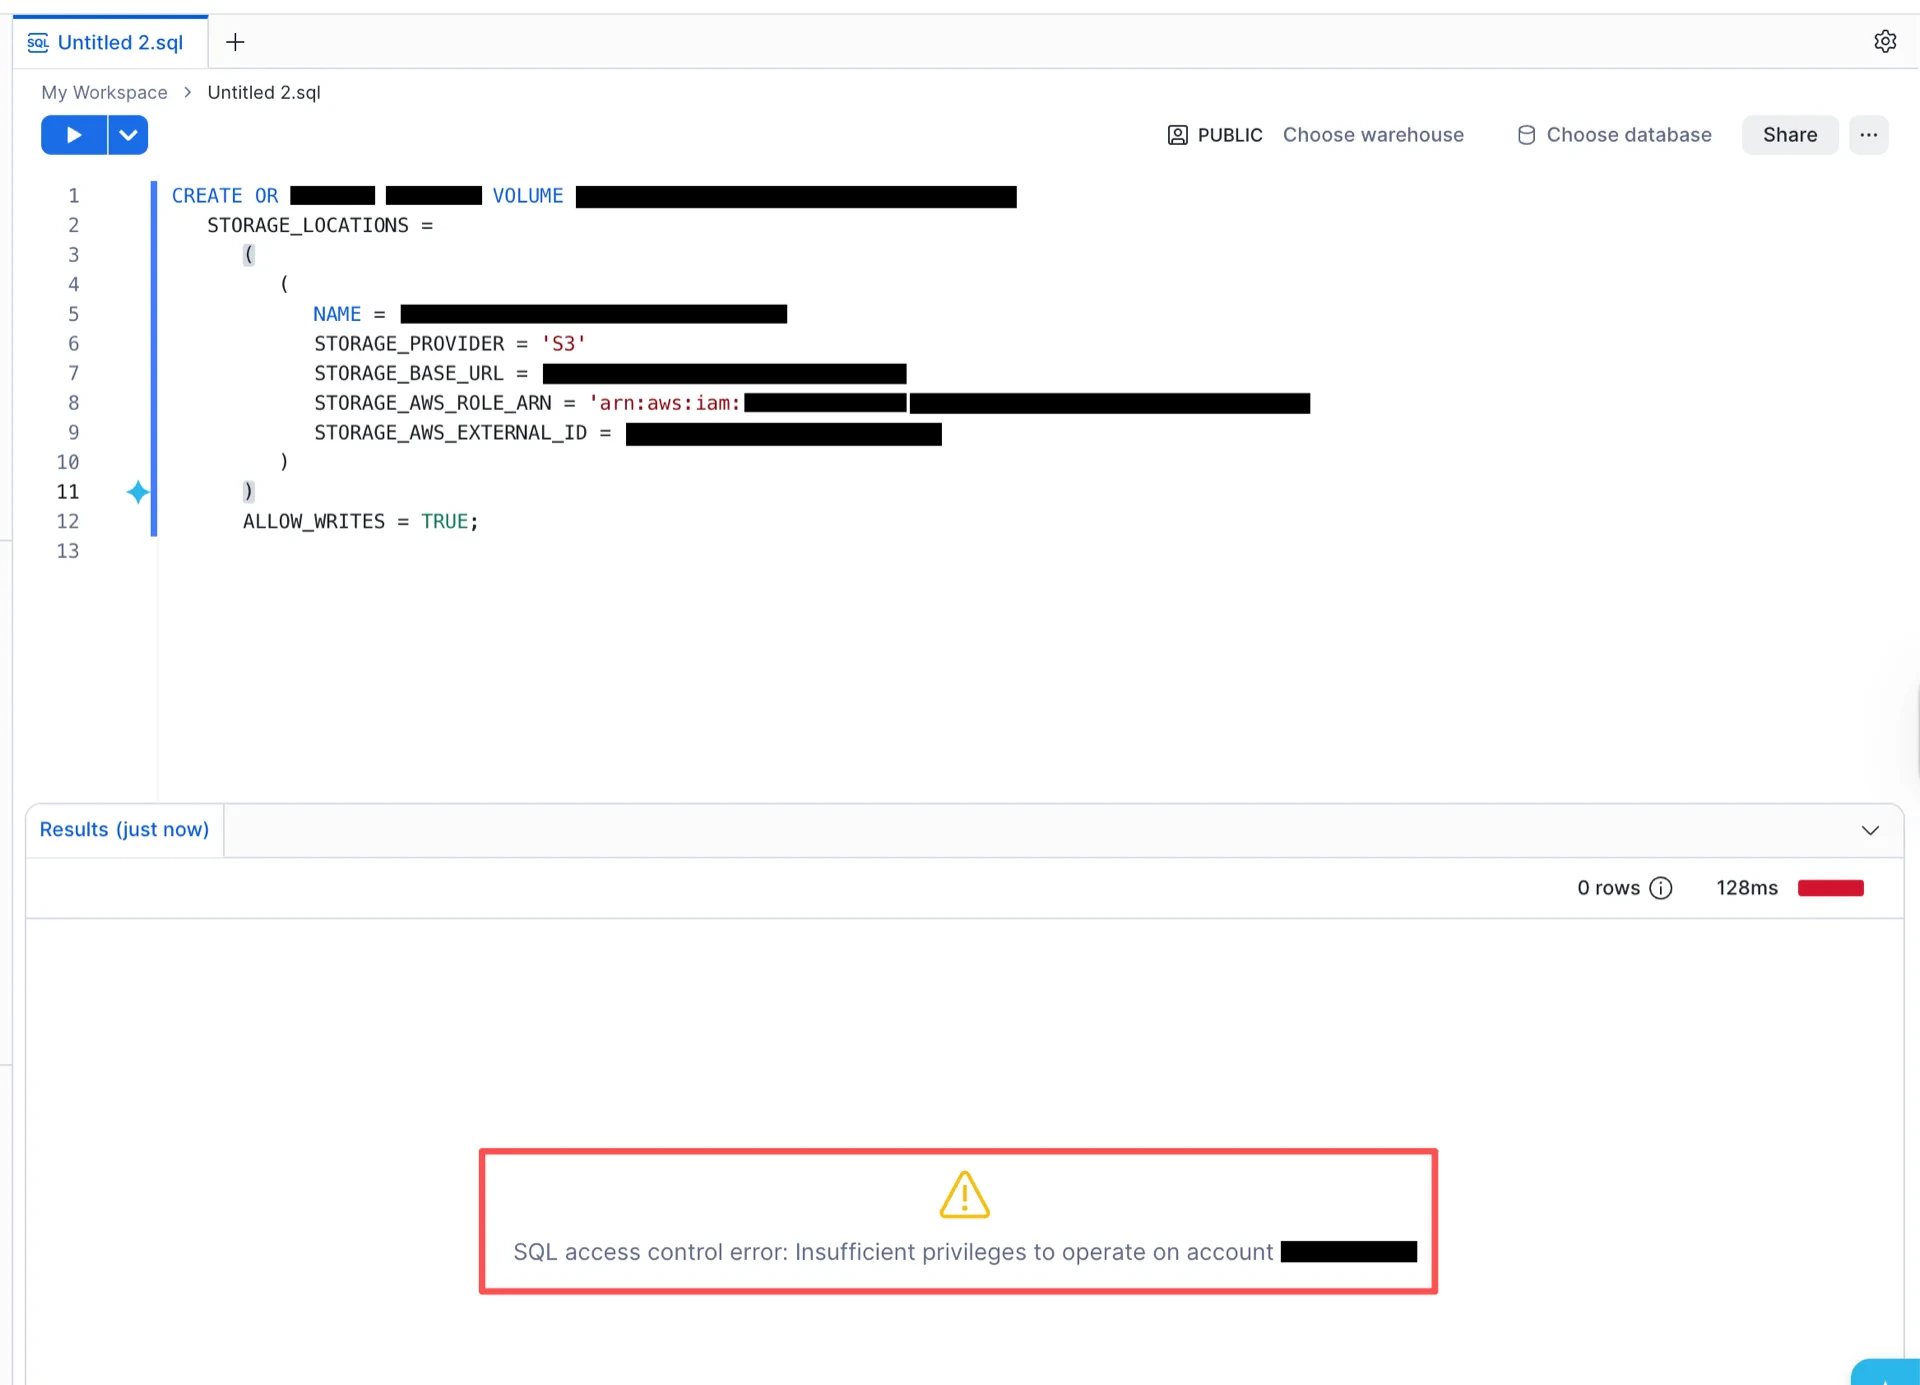
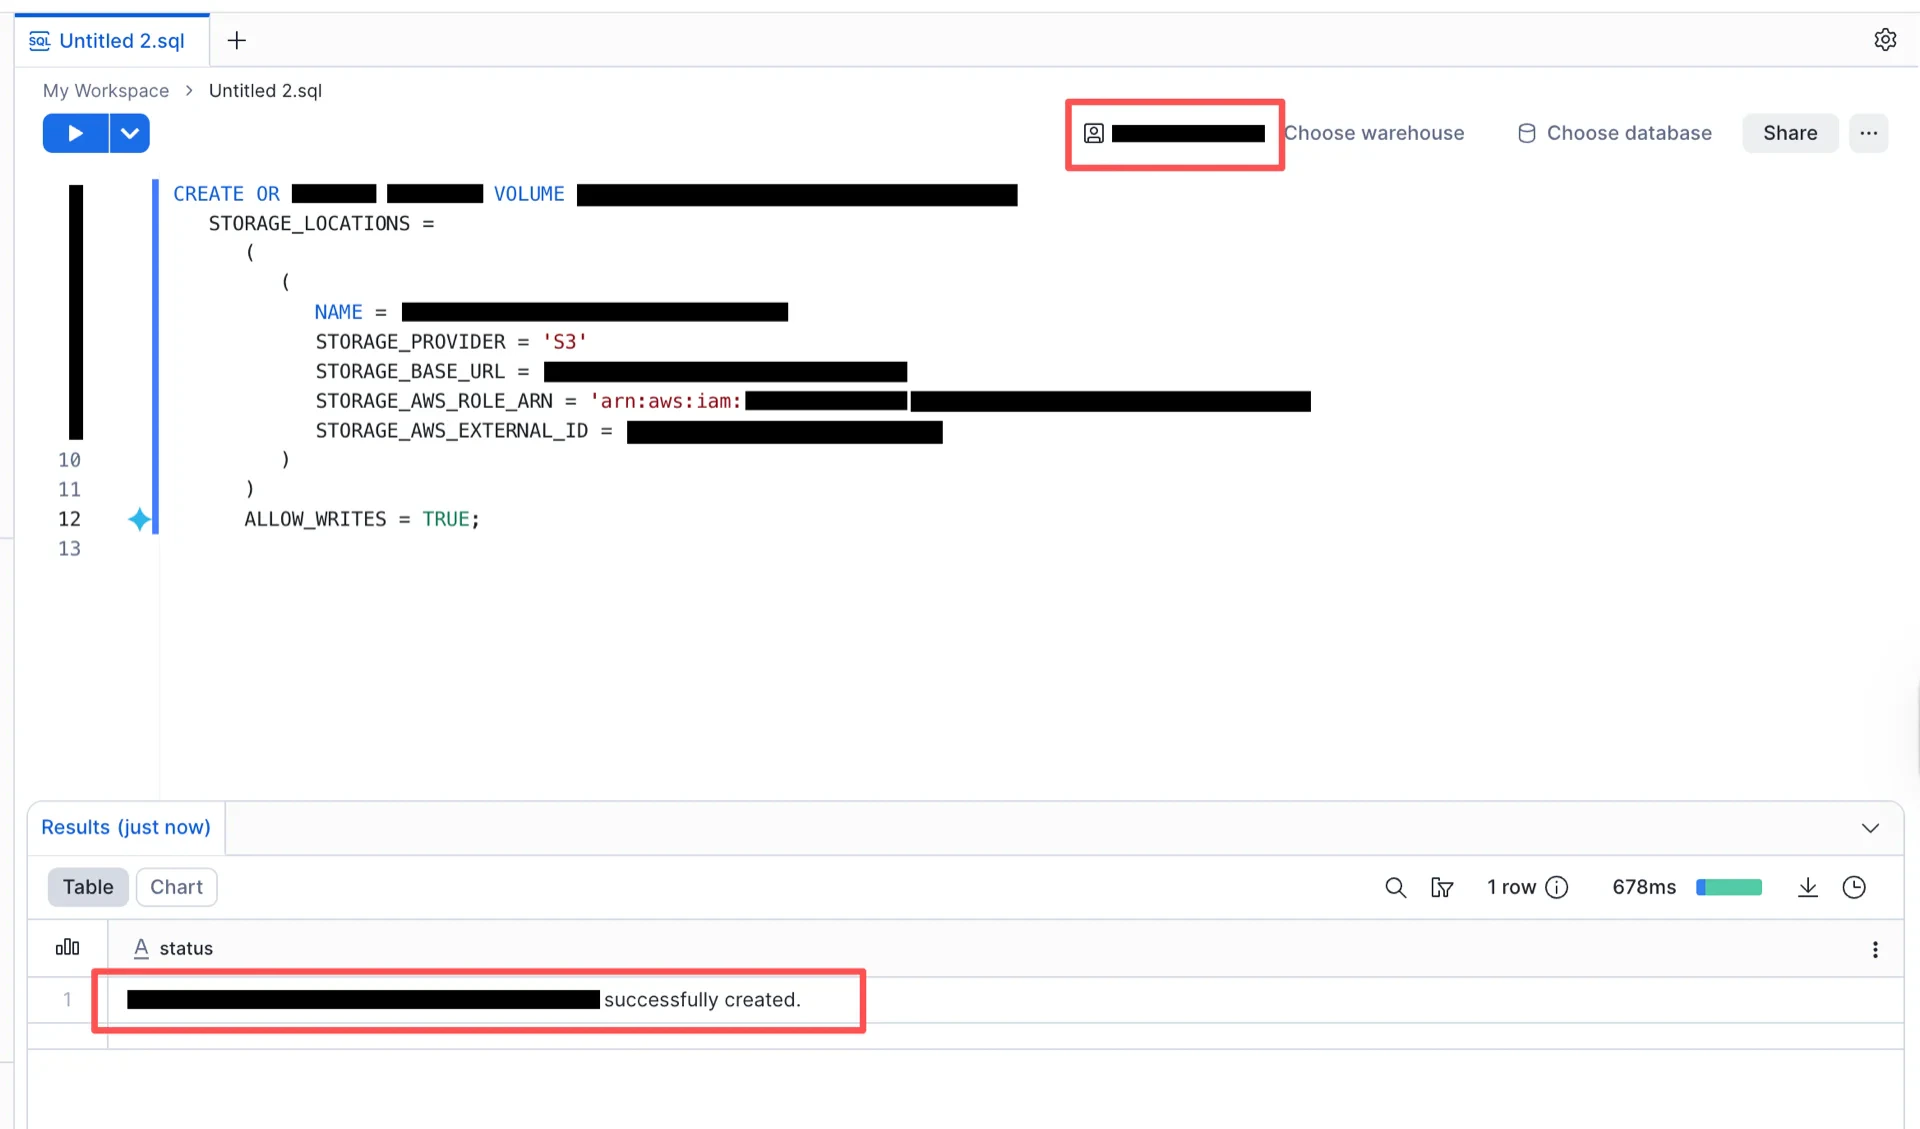
 ### 1.5 Create the External Volume in Snowflake
Switch to the `ACCOUNTADMIN` role and run the following SQL, substituting your values:
```sql theme={null}
CREATE OR REPLACE EXTERNAL VOLUME
STORAGE_LOCATIONS = (
(
NAME = ''
STORAGE_PROVIDER = 'S3'
STORAGE_BASE_URL = 's3:///'
STORAGE_AWS_ROLE_ARN = 'arn:aws:iam:::role/'
STORAGE_AWS_EXTERNAL_ID = ''
)
)
ALLOW_WRITES = TRUE;
```
### 1.5 Create the External Volume in Snowflake
Switch to the `ACCOUNTADMIN` role and run the following SQL, substituting your values:
```sql theme={null}
CREATE OR REPLACE EXTERNAL VOLUME
STORAGE_LOCATIONS = (
(
NAME = ''
STORAGE_PROVIDER = 'S3'
STORAGE_BASE_URL = 's3:///'
STORAGE_AWS_ROLE_ARN = 'arn:aws:iam:::role/'
STORAGE_AWS_EXTERNAL_ID = ''
)
)
ALLOW_WRITES = TRUE;
```
 If the command fails with a permission error, ensure you are using the `ACCOUNTADMIN` role:
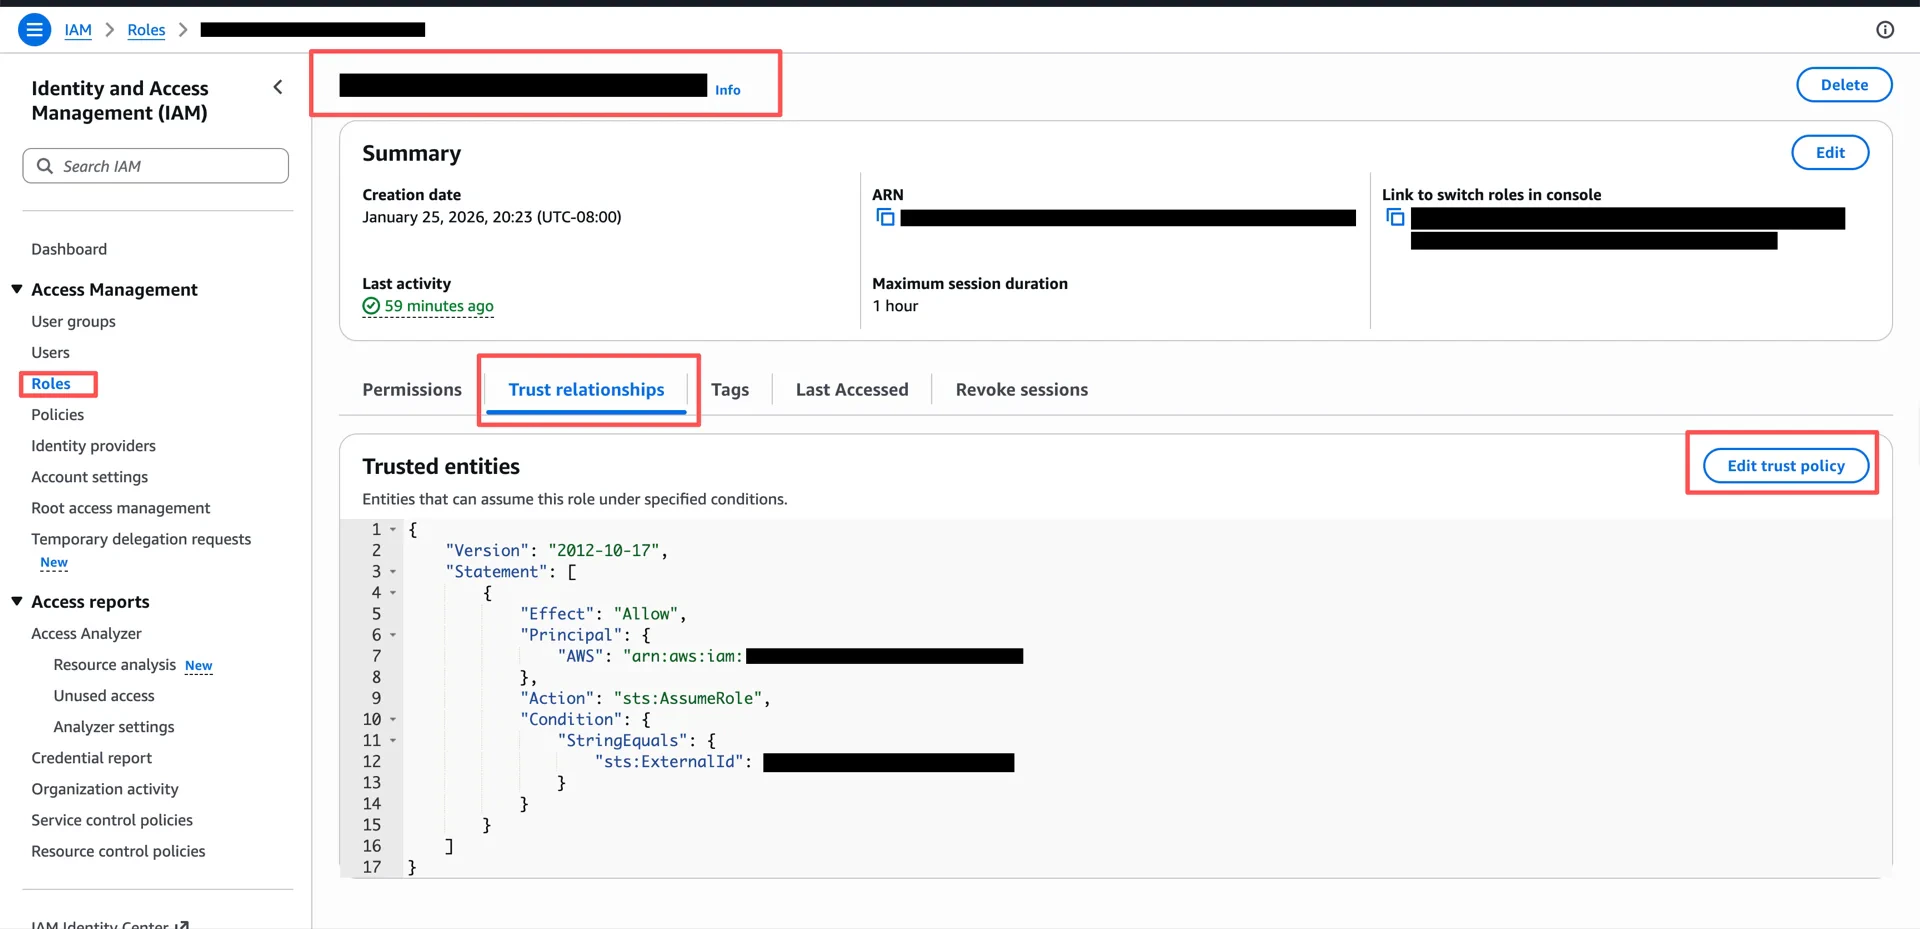
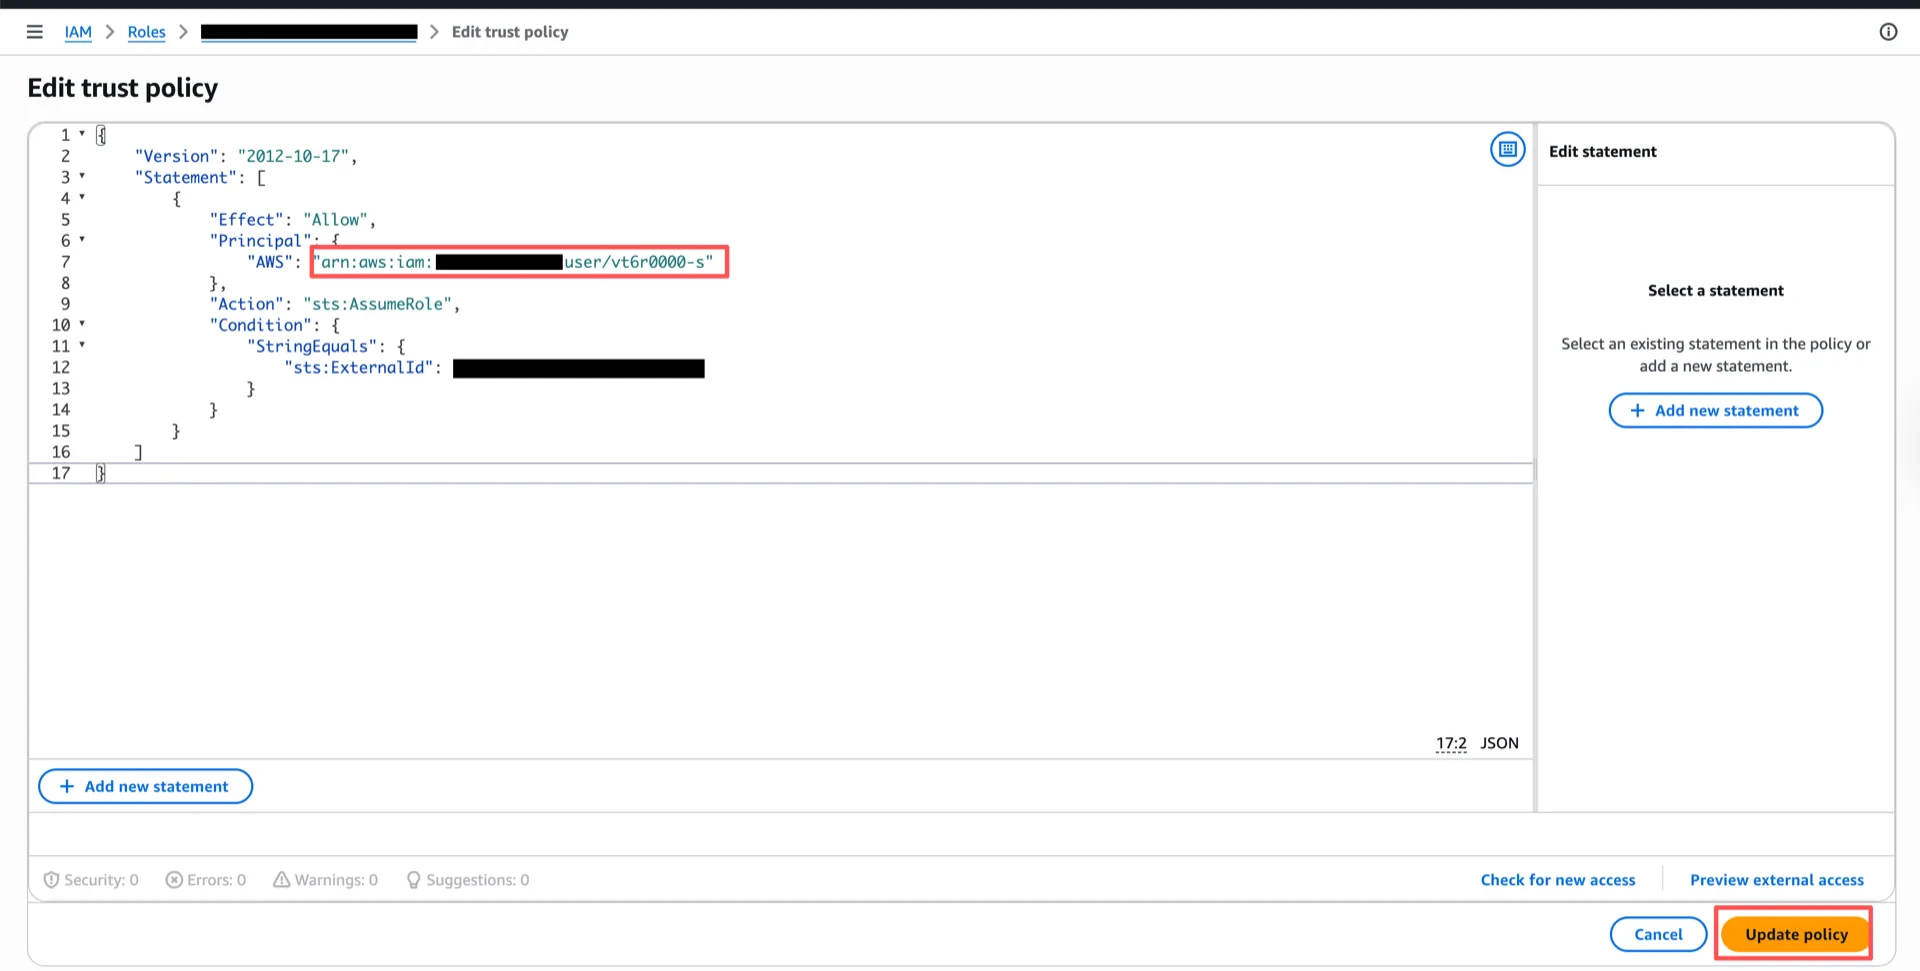
 ### 1.6 Configure the Trust Relationship
After the external volume is created, retrieve the Snowflake-generated IAM user ARN:
```sql theme={null}
DESC EXTERNAL VOLUME ;
```
The `STORAGE_AWS_IAM_USER_ARN` field contains the value (for example, `arn:aws:iam:::user/`).
### 1.6 Configure the Trust Relationship
After the external volume is created, retrieve the Snowflake-generated IAM user ARN:
```sql theme={null}
DESC EXTERNAL VOLUME ;
```
The `STORAGE_AWS_IAM_USER_ARN` field contains the value (for example, `arn:aws:iam:::user/`).
 Return to the AWS IAM console and update the trust policy of the role created in step 1.4 to allow `STORAGE_AWS_IAM_USER_ARN` to assume the role.
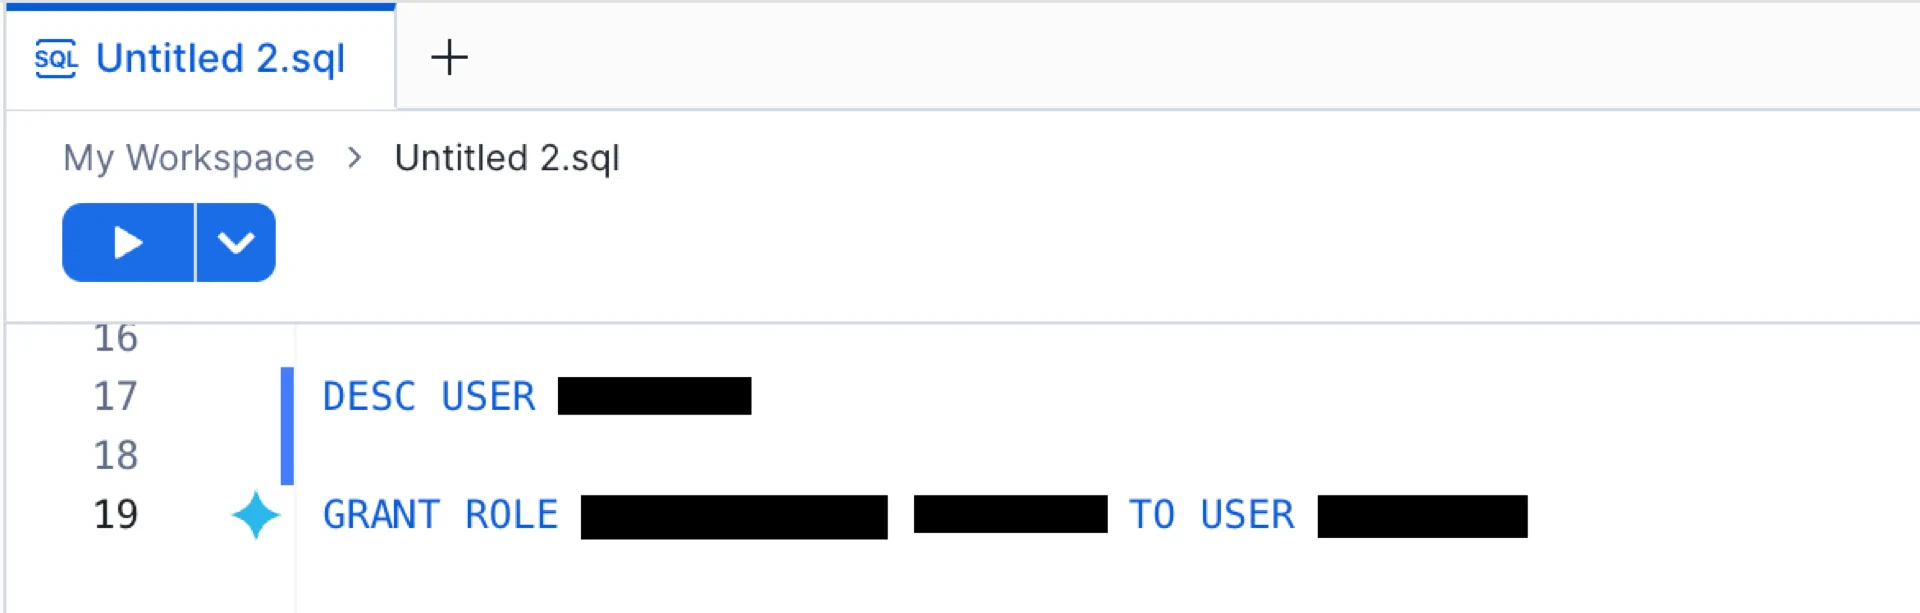
 ## 2. Configure Access Control
> **Note:** If you already have roles configured with access to the Iceberg tables you want to use, you can skip this section.
For details, see [Configuring access control](https://docs.snowflake.com/en/user-guide/security-access-control-configure).
```sql theme={null}
GRANT ROLE ACCOUNTADMIN, SYSADMIN TO USER ;
```
## 2. Configure Access Control
> **Note:** If you already have roles configured with access to the Iceberg tables you want to use, you can skip this section.
For details, see [Configuring access control](https://docs.snowflake.com/en/user-guide/security-access-control-configure).
```sql theme={null}
GRANT ROLE ACCOUNTADMIN, SYSADMIN TO USER ;
```
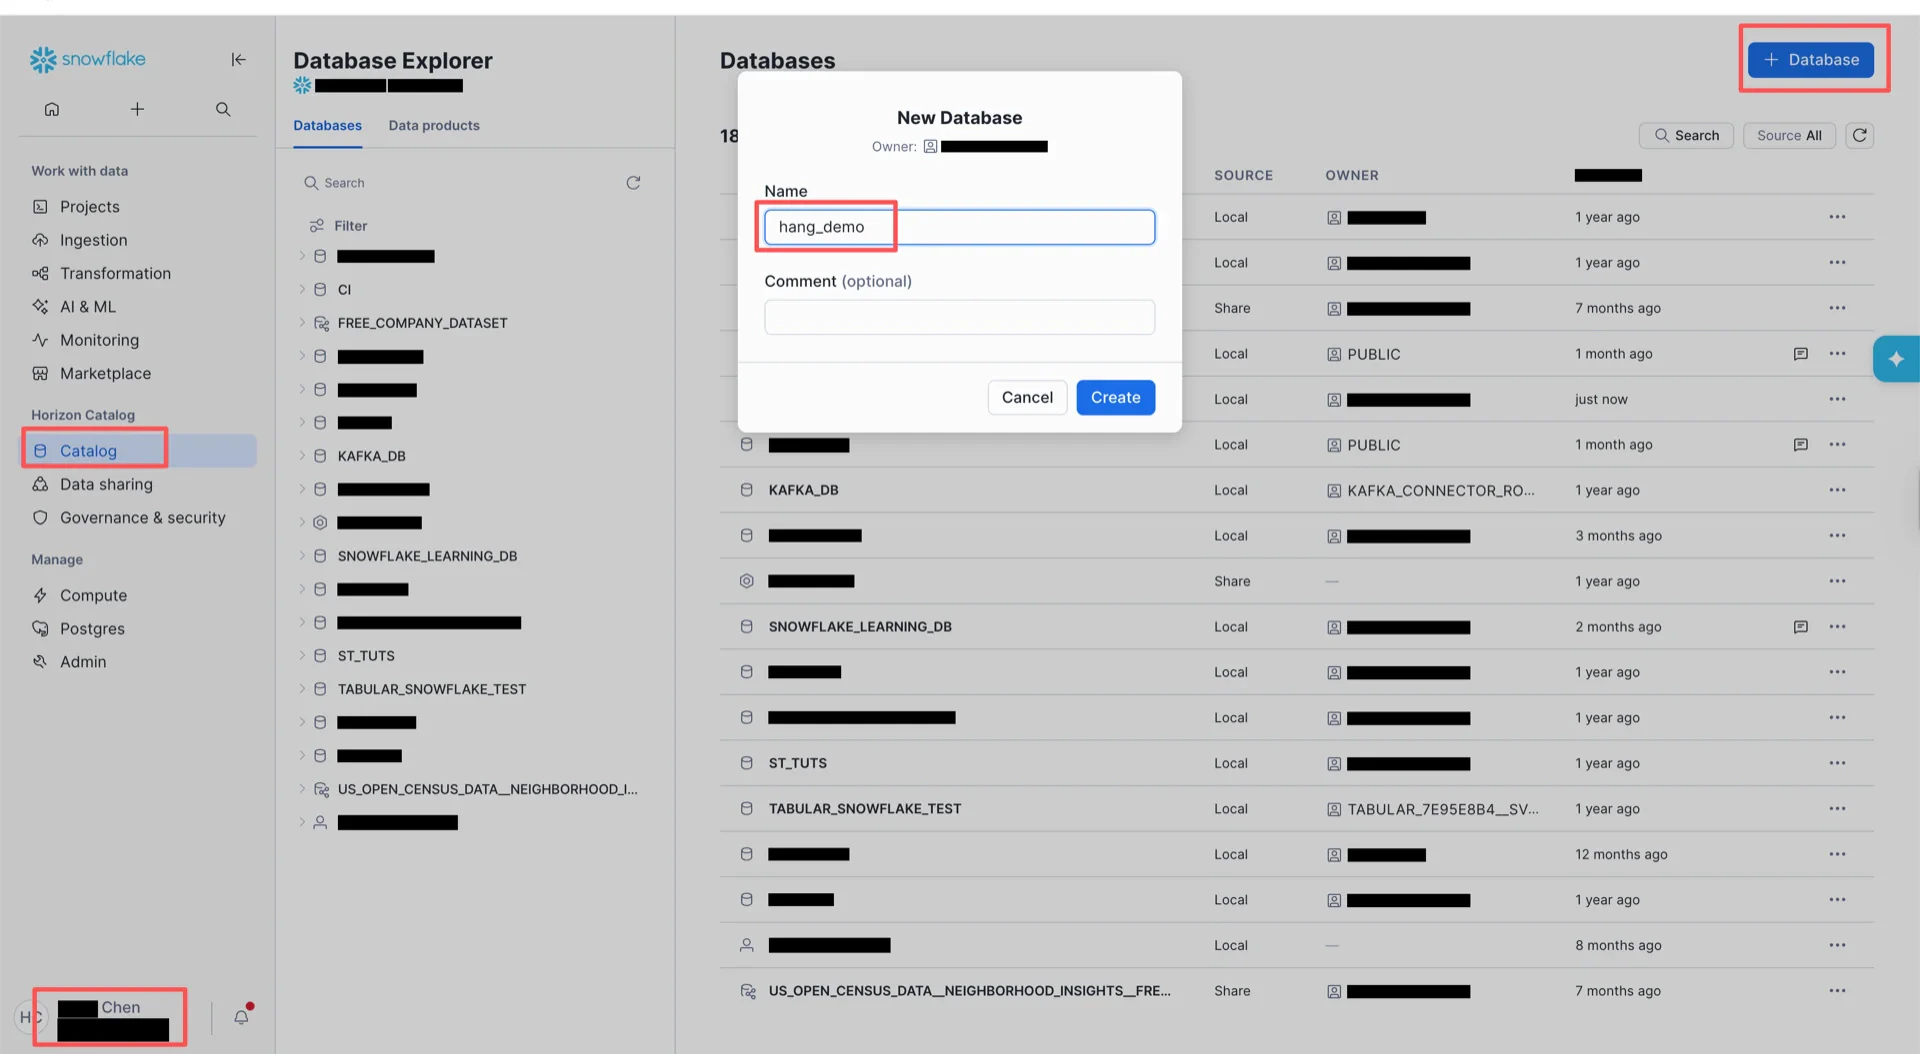
 ## 3. Create the Catalog Database
Switch to `ACCOUNTADMIN` and create the catalog database in the Snowflake UI. Then bind the database to the external volume:
```sql theme={null}
ALTER DATABASE SET CATALOG = 'SNOWFLAKE';
ALTER DATABASE SET EXTERNAL_VOLUME = '';
```
## 3. Create the Catalog Database
Switch to `ACCOUNTADMIN` and create the catalog database in the Snowflake UI. Then bind the database to the external volume:
```sql theme={null}
ALTER DATABASE SET CATALOG = 'SNOWFLAKE';
ALTER DATABASE SET EXTERNAL_VOLUME = '';
```
 ## 4. Obtain an Access Token
Snowflake Horizon supports three authentication methods: External OAuth, Key-pair authentication, and Programmatic Access Token (PAT). This guide uses **PAT**.
### 4.1 Create an Authentication Policy
Switch to `ACCOUNTADMIN` and run:
```sql theme={null}
USE ;
CREATE AUTHENTICATION POLICY
PAT_POLICY=(NETWORK_POLICY_EVALUATION = ENFORCED_NOT_REQUIRED);
ALTER ACCOUNT SET AUTHENTICATION POLICY ;
ALTER AUTHENTICATION POLICY
SET AUTHENTICATION_METHODS = ('OAUTH', 'PASSWORD', 'PROGRAMMATIC_ACCESS_TOKEN');
ALTER AUTHENTICATION POLICY
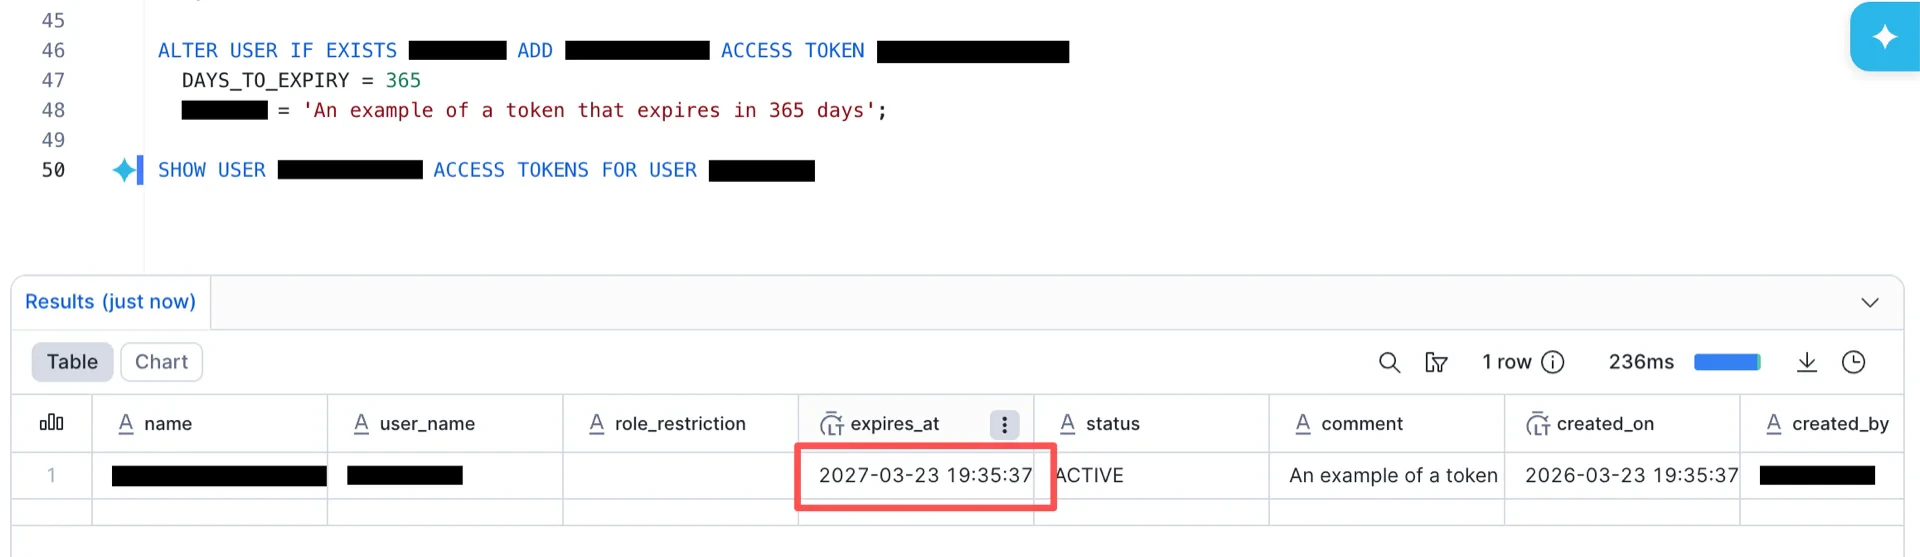
SET PAT_POLICY = (MAX_EXPIRY_IN_DAYS=365, DEFAULT_EXPIRY_IN_DAYS=365);
ALTER USER IF EXISTS ADD PROGRAMMATIC ACCESS TOKEN
DAYS_TO_EXPIRY = 365
COMMENT = 'PAT for StreamNative Ursa';
```
Record the generated PAT.
## 4. Obtain an Access Token
Snowflake Horizon supports three authentication methods: External OAuth, Key-pair authentication, and Programmatic Access Token (PAT). This guide uses **PAT**.
### 4.1 Create an Authentication Policy
Switch to `ACCOUNTADMIN` and run:
```sql theme={null}
USE ;
CREATE AUTHENTICATION POLICY
PAT_POLICY=(NETWORK_POLICY_EVALUATION = ENFORCED_NOT_REQUIRED);
ALTER ACCOUNT SET AUTHENTICATION POLICY ;
ALTER AUTHENTICATION POLICY
SET AUTHENTICATION_METHODS = ('OAUTH', 'PASSWORD', 'PROGRAMMATIC_ACCESS_TOKEN');
ALTER AUTHENTICATION POLICY
SET PAT_POLICY = (MAX_EXPIRY_IN_DAYS=365, DEFAULT_EXPIRY_IN_DAYS=365);
ALTER USER IF EXISTS ADD PROGRAMMATIC ACCESS TOKEN
DAYS_TO_EXPIRY = 365
COMMENT = 'PAT for StreamNative Ursa';
```
Record the generated PAT.
 ### 4.2 Verify the Endpoint
Generate an OAuth access token using the PAT and verify the Horizon REST endpoint:
```bash theme={null}
curl -i --fail -X POST \
"https://.snowflakecomputing.com/polaris/api/catalog/v1/oauth/tokens" \
--header 'Content-Type: application/x-www-form-urlencoded' \
--data-urlencode 'grant_type=client_credentials' \
--data-urlencode 'scope=session:role:' \
--data-urlencode 'client_secret='
curl -i --fail -X GET \
"https://.snowflakecomputing.com/polaris/api/catalog/v1/config?warehouse=" \
-H "Authorization: Bearer " \
-H "Content-Type: application/json"
```
### 4.3 Grant Permissions
```sql theme={null}
GRANT ROLE PUBLIC TO USER ;
GRANT USAGE ON DATABASE TO ROLE PUBLIC;
GRANT USAGE ON EXTERNAL VOLUME TO ROLE PUBLIC;
```
## Catalog Information Summary
When the steps above are complete, collect the following values for the StreamNative Ursa compaction service:
```sql theme={null}
-- Determine the URI prefix
SELECT CURRENT_ORGANIZATION_NAME() || '-' || CURRENT_ACCOUNT_NAME();
```
| Value | Description |
| -------------------- | ----------------------------------------------------------------------------- |
| `iceberg.uri` | `https://-.snowflakecomputing.com/polaris/api/catalog` |
| `iceberg.warehouse` | The catalog database name created in step 3 |
| `iceberg.credential` | The PAT generated in step 4.1 |
| `iceberg.scope` | `session:role:` (e.g., `session:role:PUBLIC`) |
For the next steps, see [Register Lakehouse Catalogs](/cloud/lakehouse/catalogs/register-catalog).
### 4.2 Verify the Endpoint
Generate an OAuth access token using the PAT and verify the Horizon REST endpoint:
```bash theme={null}
curl -i --fail -X POST \
"https://.snowflakecomputing.com/polaris/api/catalog/v1/oauth/tokens" \
--header 'Content-Type: application/x-www-form-urlencoded' \
--data-urlencode 'grant_type=client_credentials' \
--data-urlencode 'scope=session:role:' \
--data-urlencode 'client_secret='
curl -i --fail -X GET \
"https://.snowflakecomputing.com/polaris/api/catalog/v1/config?warehouse=" \
-H "Authorization: Bearer " \
-H "Content-Type: application/json"
```
### 4.3 Grant Permissions
```sql theme={null}
GRANT ROLE PUBLIC TO USER ;
GRANT USAGE ON DATABASE TO ROLE PUBLIC;
GRANT USAGE ON EXTERNAL VOLUME TO ROLE PUBLIC;
```
## Catalog Information Summary
When the steps above are complete, collect the following values for the StreamNative Ursa compaction service:
```sql theme={null}
-- Determine the URI prefix
SELECT CURRENT_ORGANIZATION_NAME() || '-' || CURRENT_ACCOUNT_NAME();
```
| Value | Description |
| -------------------- | ----------------------------------------------------------------------------- |
| `iceberg.uri` | `https://-.snowflakecomputing.com/polaris/api/catalog` |
| `iceberg.warehouse` | The catalog database name created in step 3 |
| `iceberg.credential` | The PAT generated in step 4.1 |
| `iceberg.scope` | `session:role:` (e.g., `session:role:PUBLIC`) |
For the next steps, see [Register Lakehouse Catalogs](/cloud/lakehouse/catalogs/register-catalog).