> ## Documentation Index
> Fetch the complete documentation index at: https://docs.streamnative.io/llms.txt
> Use this file to discover all available pages before exploring further.
# Cluster Setup
We are going to need a StreamNative Cloud cluster for our client application to operate with. This guide can help you create your first StreamNative Cloud cluster.
## Create a StreamNative Cloud cluster
From within the StreamNative Cloud console, creating a new cluster is just a few clicks.
1. In the upper-right corner of the StreamNative Cloud Console, click your Profile and select **Organizations** to list your created organizations.
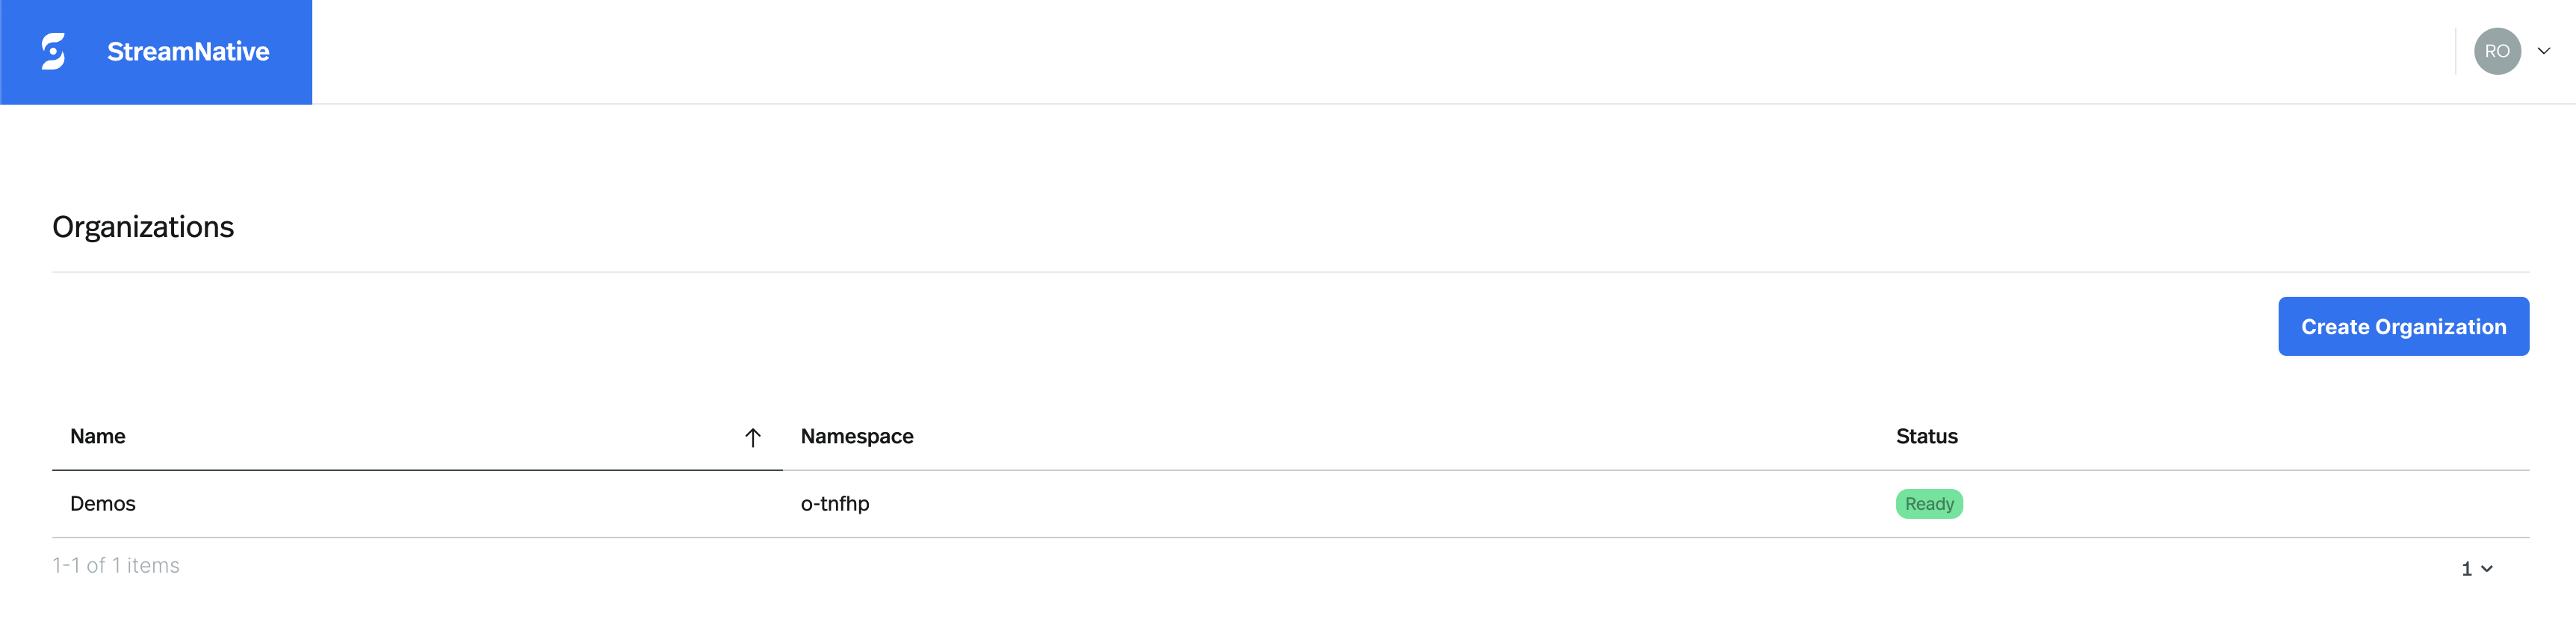
2. Click the name of your first organization. In the figure below, the organization name is `Demos`.
 3. On the **Select an Instance** card of the **Organization Dashboard** page, click the `+` button.
4. On the **Choose the deployment type for your instance**, click **Deploy Serverless** to start the instance creation process.
5. On the **Instance Configuration** page, enter a name for your instance, and select a Cloud Provider. The instance name starts with a lowercase letter, contains any combination of lowercase letters (a-z), numbers (0-9), and hyphens (-), and must be 4-10 characters.
6. Click **Cluster Location** to start the cluster creation process.
7. On the **Cluster Location** page, enter a name for your cluster, select the cluster location, and then click **Finish**. The cluster name starts with a lowercase letter, contains any combination of lowercase letters (a-z), numbers (0-9), and hyphens (-), and must be 4-10 characters.
The cluster page appears, displaying the cluster creation process. Depending on the chosen cloud provider and other settings, it may take a few seconds to several minutes to provision the cluster. Once the cluster has been provisioned, the **Cluster Dashboard** page will be displayed.
Now you can get started configuring apps and data on your new cluster.
## Get the cluster service URLs
Next, you'll need to get your StreamNative Cloud cluster's Service URLs to configure your client applications. These URLs allow your applications to connect to and interact with your cluster.
Your cluster provides different Service URLs depending on which protocol you plan to use:
For Pulsar Protocol:
* **Broker Service URL**: Used to configure Pulsar clients to connect to the brokers for producing and consuming messages
* **HTTP Service URL**: Used for administrative operations via the Pulsar admin API
For Kafka Protocol:
* **Kafka Service URL**: Used as bootstrap servers in Kafka client configurations
* **Schema Registry URL**: Used to configure Kafka serializers and deserializers that work with schemas
You'll need these URLs in the upcoming steps when setting up your producer and consumer clients.
To get the service URL(s) of a StreamNative cluster, follow these steps.
1. Navigate to the **Cluster Dashboard** page by [switching to the cluster workspace](/cloud/get-started/cloud-console#switch-a-cluster).
2. On the **Cluster Dashboard** page, click **Details** tab.
3. You will see the available service URLs in the **Access Points** area.
4. You can click **Copy** at the end of the row of the service URL that you want to use.
## Create a service account and API key
Next, to connect your client application to your cluster to produce and consume messages, you need to create a [Service Account](/cloud/security/authentication/service-accounts/manage-service-accounts) and choose an authentication mechanism: either [API Key](/cloud/security/authentication/service-accounts/use-api-keys/api-keys-overview) or [OAuth](/cloud/security/authentication/service-accounts/use-oauth/oauth-overview).
API Key authentication is quicker to implement since you only need to create an API key in StreamNative Cloud. This guide uses API Key authentication.
Currently, you can't edit a service account. If you need a service account to have Super Admin access, make sure to enable it when creating the service account. By default, service accounts do not have Super Admin enabled.
1. In the upper-right corner of the StreamNative Cloud Console, click your Profile and select **Accounts & Accesses**.
2. On the left navigation pane, click **Service Accounts**.
3. On the **Service Account** page, click **+ New Service Account**.
4. On the **Create Service Account** dialog, enter a name for the service account, and then click **Confirm**.
5. On the **Service Account** page, in the row of the service account you just created, click the **...** icon, and select **Create API Key** in the dropdown menu.
6. On the **New API Key** dialog:
* Enter a name for the API key
* Set the expiration date
* Select the instance you created in Step 2
* Write a description for the API key
* Click **Confirm**
An API key and associated secret apply to the active StreamNative instance. If you add a new instance, you must create a new API key for producers and consumers on the new Pulsar instance. For more information, see [Use API Keys to Authenticate to StreamNative Cloud](/cloud/security/authentication/service-accounts/use-api-keys/api-keys-overview).
7. After the API key is created, you can see the API key shown in the **New API Key** dialog. Click the **Copy and close** button to copy the API key to your clipboard. **Please note that you cannot retrieve the API key later after closing the dialog.**
Note the API key as we will use them when configuring the producer and consumer clients in upcoming steps.
3. On the **Select an Instance** card of the **Organization Dashboard** page, click the `+` button.
4. On the **Choose the deployment type for your instance**, click **Deploy Serverless** to start the instance creation process.
5. On the **Instance Configuration** page, enter a name for your instance, and select a Cloud Provider. The instance name starts with a lowercase letter, contains any combination of lowercase letters (a-z), numbers (0-9), and hyphens (-), and must be 4-10 characters.
6. Click **Cluster Location** to start the cluster creation process.
7. On the **Cluster Location** page, enter a name for your cluster, select the cluster location, and then click **Finish**. The cluster name starts with a lowercase letter, contains any combination of lowercase letters (a-z), numbers (0-9), and hyphens (-), and must be 4-10 characters.
The cluster page appears, displaying the cluster creation process. Depending on the chosen cloud provider and other settings, it may take a few seconds to several minutes to provision the cluster. Once the cluster has been provisioned, the **Cluster Dashboard** page will be displayed.
Now you can get started configuring apps and data on your new cluster.
## Get the cluster service URLs
Next, you'll need to get your StreamNative Cloud cluster's Service URLs to configure your client applications. These URLs allow your applications to connect to and interact with your cluster.
Your cluster provides different Service URLs depending on which protocol you plan to use:
For Pulsar Protocol:
* **Broker Service URL**: Used to configure Pulsar clients to connect to the brokers for producing and consuming messages
* **HTTP Service URL**: Used for administrative operations via the Pulsar admin API
For Kafka Protocol:
* **Kafka Service URL**: Used as bootstrap servers in Kafka client configurations
* **Schema Registry URL**: Used to configure Kafka serializers and deserializers that work with schemas
You'll need these URLs in the upcoming steps when setting up your producer and consumer clients.
To get the service URL(s) of a StreamNative cluster, follow these steps.
1. Navigate to the **Cluster Dashboard** page by [switching to the cluster workspace](/cloud/get-started/cloud-console#switch-a-cluster).
2. On the **Cluster Dashboard** page, click **Details** tab.
3. You will see the available service URLs in the **Access Points** area.
4. You can click **Copy** at the end of the row of the service URL that you want to use.
## Create a service account and API key
Next, to connect your client application to your cluster to produce and consume messages, you need to create a [Service Account](/cloud/security/authentication/service-accounts/manage-service-accounts) and choose an authentication mechanism: either [API Key](/cloud/security/authentication/service-accounts/use-api-keys/api-keys-overview) or [OAuth](/cloud/security/authentication/service-accounts/use-oauth/oauth-overview).
API Key authentication is quicker to implement since you only need to create an API key in StreamNative Cloud. This guide uses API Key authentication.
Currently, you can't edit a service account. If you need a service account to have Super Admin access, make sure to enable it when creating the service account. By default, service accounts do not have Super Admin enabled.
1. In the upper-right corner of the StreamNative Cloud Console, click your Profile and select **Accounts & Accesses**.
2. On the left navigation pane, click **Service Accounts**.
3. On the **Service Account** page, click **+ New Service Account**.
4. On the **Create Service Account** dialog, enter a name for the service account, and then click **Confirm**.
5. On the **Service Account** page, in the row of the service account you just created, click the **...** icon, and select **Create API Key** in the dropdown menu.
6. On the **New API Key** dialog:
* Enter a name for the API key
* Set the expiration date
* Select the instance you created in Step 2
* Write a description for the API key
* Click **Confirm**
An API key and associated secret apply to the active StreamNative instance. If you add a new instance, you must create a new API key for producers and consumers on the new Pulsar instance. For more information, see [Use API Keys to Authenticate to StreamNative Cloud](/cloud/security/authentication/service-accounts/use-api-keys/api-keys-overview).
7. After the API key is created, you can see the API key shown in the **New API Key** dialog. Click the **Copy and close** button to copy the API key to your clipboard. **Please note that you cannot retrieve the API key later after closing the dialog.**
Note the API key as we will use them when configuring the producer and consumer clients in upcoming steps.